Table of Contents
Advertisement
Quick Links
Advertisement
Table of Contents

Related Manuals for Abocom WR5205


Summary of Contents for Abocom WR5205
- Page 1 802.11n Router with USB2.0 Port User’s Manual...
- Page 2 Federal Communication Commission Interference Statement This equipment has been tested and found to comply with the limits for a Class B digital device, pursuant to Part 15 of the FCC Rules. These limits are designed to provide reasonable protection against harmful interference in a residential installation. This equipment generates uses and can radiate radio frequency energy and, if not installed and used in accordance with the instructions, may cause harmful interference to radio communications.
-
Page 3: Table Of Contents
Table of Content CHAPTER 1: INTRODUCTION................1 Features............................1 Physical Details........................... 1 CHAPTER 2: ABOUT OPERATION MODES ............4 Gateway Mode ..........................4 Bridge (WDS) Mode........................4 Repeater (WDS+AP) Mode..................... 5 CHAPTER 3: CONFIGURATION ................6 Hardware Connection....................... 6 Login ............................... 6 Setup Wizard ..........................10 Internet ............................ -
Page 4: Chapter 1: Introduction
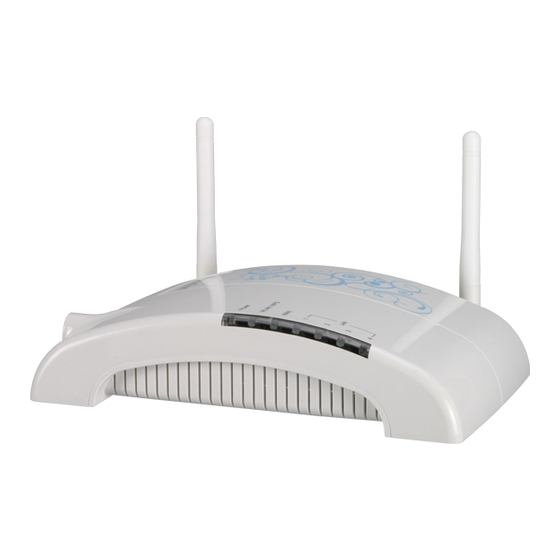
Chapter 1: Introduction The 802.11n Router with USB2.0 Port is a draft 802.11n/b/g compliant Wireless Broadband Router with 4-port Fast Ethernet Switch. 802.11n Router with USB2.0 Port with latest Draft 802.11n technology that delivers up to 150Mbps wireless, provides multi-functional capabilities, particularly the high-performance throughput and high-quality security to propose an integrated, thorough SOHO solution. -
Page 5: Rear Panel
Power off WPS is enabled to make a Blinking connection WLAN function off WLAN Green WLAN link / active Blinking WLAN traffic transmitting WAN link / active Green WAN function off Blinking WAN traffic transmitting LAN function off LAN 1~4 Green LAN link / active Blinking... -
Page 6: Side Panel
Side Panel Insert the USB 3.5G card that provided by your ISP(Internet USB 2.0 Port Service Provider) here. -
Page 7: Chapter 2: About Operation Modes
Chapter 2: About Operation Modes Please go to the Wireless> WDS to set up the WDS function (Lazy, Bridge or Repeater) of the Wireless Router. Gateway Mode The wireless connection will be set up from a point-to-point local LAN into a point-to-multipoint WAN. -
Page 8: Repeater (Wds+Ap) Mode
Wireless Distribution System uses wireless media to communicate with other APs, like the Ethernet does. To do this, you must set these APs in the same channel and wireless MAC address to each other APs that you want to communicate with. Repeater (WDS+AP) Mode If set to Repeater mode, a device connects to each other through an access point or a base station (gateway or router.) This device can also work like a wireless station when it’s connected to a computer... -
Page 9: Chapter 3: Configuration
Chapter 3: Configuration Hardware Connection 1. Connect one end of the Ethernet cable to the LAN port of the Wireless Router, another end to your PC or notebook. 2. There are two ways to connect to Internet (Only one way can be selected): Connect Ethernet cable one end to the WAN port of the Wireless Router, the other end to the ADSL or cable modem. - Page 10 4. After connected successfully, the following screen will show up. Simply enter the username “admin” and password “password” to login.
- Page 11 If you cannot connect... If the Wireless Router does not respond, check the following: • The Wireless Router is properly installed, LAN connection is OK, and it is powered ON. You can test the connection by using the "Ping" command: •...
-
Page 12: Common Connection Types
Common Connection Types The Internet connection type according to the ISP (Internet Service Provider) that you selected. Cable Modems Type Details ISP Data required Usually, none. Your IP Address is allocated However, some ISP's may require you to Dynamic IP Address automatically, when you use a particular Hostname, Domain name, connect to you ISP. -
Page 13: Setup Wizard
Setup Wizard Step 1- WAN Connect Detection This page is used to detect the WAN connection of network. User can select Auto Detect form the pull-down menu and click Start Auto Detect button, the system will detect whether there is WAN connection or not. - Page 14 If the Static IP be selected, user have to set up the IP address, subnet mask and default gateway according to the ISP that provided the related information. IP Address: Enter the WAN IP address provided by your ISP here. Subnet Mask: Enter the subnet mask here.
- Page 15 Step 3- LAN This step can set up local area network of the Wireless Router, such as IP address, subnet mask, DHCP type, DHCP IP addresses range, DHCP subnet mask and DHCP lease time. IP Address Shows the IP address of the Wireless Router (Default IP address is 192.168.1.1.) Subnet Mask The subnet mask of the Wireless Router (Default subnet mask is...
- Page 16 Lease Time The lease time of the distribute IP Addresses. Default settings are 86400 seconds. Step 4- Network Mode This step can set up wireless network mode, network name and channel. Select 11b/g mixed mode, 11b only, 11g only, or 11b/g/n mixed mode Network Mode from the pull-down menu.
- Page 17 Default Key: Select the default key Key1~4. WEP Key 1~4: Enter the key in the selected key field. Only valid when using WEP encryption algorithm. The key must match with the AP’s key. There are several formats to enter the keys. Hexadecimal (WEP 64 bits): 10 Hex characters (0~9, a~f).
-
Page 18: Internet
Internet LAN Interface Setup IP Address Shows the IP address of the Wireless Router (Default IP address is 192.168.1.1) Subnet Mask The subnet mask of the Wireless Router (Default subnet mask is 255.255.255.0.) MAC Address Shows the MAC address of this Wireless Router. DHCP Type Disable: Select to disable this Wireless Router to distribute IP addresses to... - Page 19 connected clients. Server: Select to enable this Wireless Router to distribute IP Addresses (DHCP Server) to connected clients. And the following field will be activated for you to enter the starting IP Address. Start IP Address The starting address of this local IP network address pool. The pool is a piece of continuous IP address segment.
- Page 20 Internet Service Setup WAN Connection Select the WAN Connection Type Static (Fixed IP), DHCP (Auto Config), Type PPPoE(ADSL), or 3G (DIAL). Default setting is DHCP (Auto Config) enabled. DHCP (Auto Config) If the DHCP(Auto Config) be selected, the PC will obtain the IP address automatically.
- Page 21 here. Primary DNS Server: Enter the DNS server IP address(es) that provided by your ISP, or you can specify your own preferred DNS server IP address(es). Secondary DNS Server: Secondary DNS Server is optional. You can enter another DNS server’s IP address as a backup. PPPoE (ADSL) If the PPPoE (ADSL) be selected, user have to set up the user name and password according to the ISP that provided the related information.
-
Page 22: Dhcp Clients
MAC Clone Your ISP may require a particular MAC address in order for you to connect to the Internet. This MAC address is the PC’s MAC address that your ISP had originally connected your Internet connection to. Type in or click Fill my MAC to replace the WAN MAC address with the MAC address of that PC. - Page 23 Destination The network address of the destination LAN segment. When a packet with destination IP address that matches to this field, it will route to the device set in the Route Gateway field. Range Select Host or Net from the pull-down menu. Gateway Enter the Gateway IP address in the field.
- Page 24 VPN Pass-through VPN passthrough configurations including: L2TP, IPSec, and PPTP passthrough. L2TP Passthrough L2TP, Layer Two Tunneling Protocol (L2TP). Use the L2TP with VPN that user can access the personal network via Internet. Select Enabled or Disabled from the pull-down menu. IPSec Passthrough IPSec, Internet Protocol Security.
-
Page 25: Wireless
Wireless Basic... - Page 26 Click Radio ON/OFF button to turn on/off the radio function. Radio On/Off Select 11b/g mixed, 11b only, 11g only, or 11b/g/n mixed mode from Network Mode the pull-down menu. (Default is 11b/g/n mixed mode.) Network Name A SSID is referred to a network name because essentially it is a name (SSID) that identifies a wireless network (case-sensitive).
- Page 27 Advanced Advanced Wireless BG Protection Select the protection mode form the pull-down list, Auto, On and Off. Mode Beacon Interval is the amount of time between beacon transmissions. Before Beacon Interval a station enters power save mode, the station needs the beacon interval to...
- Page 28 know when to wake up to receive the beacon. Range 20-999. (Default Beacon Interval is 100.) Data Beacon Range from 1 to 255. (Default data beacon rate is 1.) Rate (DTIM) Fragmentation mechanism is used for improving the efficiency when high Fragment traffic flows along in the wireless network.
- Page 29 AP which must support the DLS function. Direct Link Setup allows direct STA-to-STA frame transfer within a BSS (Basic Service Set). This is designed for consumer use, where STA-to-STA transfer is more commonly used. Select Disable or Enable this function. (Default setting is Disable.) Click the WMM Configuration button to go further settings.
- Page 30 Security Wireless Security/Encryption Settings Select choice Select SSID to set up the security form the pull-down list. Security Mode There are eleven type of authentication modes including Disable, Open, Shared, WEP Auto, WPA, WPA-PSK, WPA2, WPA2-PSK, WPA-PSK/ WPA2-PSK, WPA1/WPA2 and 802.1X. The security default setting is Disable.
- Page 31 Default Key: Select the default key. WEP Key 1~4: Enter the key in the selected key field. Only valid when using WEP encryption algorithm. The key must match with the AP’s key. There are several formats to enter the keys. Hexadecimal (WEP 64 bits): 10 Hex characters (0~9, a~f).
- Page 32 WPA Algorithms: Select the type of algorithm, TKIP or AES for WPA, and TKIP, AES or TKIP AES for WPA2, WPA1/WPA2. Key Renewal Interval: Enter the renewal security time (seconds) in the column. Default is 3600 seconds. Set 0 to disable re-key. RADIUS Server: RADIUS is an authentication, authorization and accounting client-server protocol.
- Page 33 WPA Algorithms: Select the type of algorithm, TKIP or AES for WP-PSK, and TKIP, AES or TKIP AES for WPA2-PSK, WPA1 PSK WPA2 PSK. Pass Phrase: Enter the pass phrase 8~63 ASCII or 64 HEX characters in the column. Key Renewal Interval: Enter the renewal security time (seconds) in the column.
- Page 34 To use WDS function: 1. The APs must support WDS function. (To set WDS must use the same wireless product (the same model will be better); due to different wireless products might support different WDS settings. Thus, it is suggested that to use the same wireless products that support WDS function.) 2.
- Page 35 Step 2: Enter Wireless MAC address to each other(according to the WDS mode that user selected). Lazy Mode If Lazy mode be selected, it is unnecessary to set up wireless MAC here, just go to set up Wireless MAC address on the other wireless AP then WDS function will be active.
- Page 36 Encrypt Key: Enter the corresponding encryption keys in the field. Select the type of Open, Shared, WEP Auto authentication, for WEP encryption. Hexadecimal (WEP 64 bits): 10 Hex characters (0~9, a~f). Hexadecimal (WEP 128 bits): 26 Hex characters (0~9, a~f). ASCII (WEP 64 bits): 5 ASCII characters (case-sensitive).
- Page 37 Hexadecimal (WEP 128 bits): 26 Hex characters (0~9, a~f). ASCII (WEP 64 bits): 5 ASCII characters (case-sensitive). ASCII (WEP 128 bits): 13 ASCII characters (case-sensitive). Select the type WPA, WPA-PSK, WPA2, WPA2-PSK, WPA-PSK/ WPA2-PSK, WPA/WPA2 authentication, for TKIP or AES encryption. If users select TKIP or AES encryption, please enter the password in the Encryption Key column that must be filled with characters longer than 8 and less than 64 lengths to set up the security.
- Page 38 If users select TKIP or AES encryption, please enter the password in the Encryption Key column that must be filled with characters longer than 8 and less than 64 lengths to set up the security. AP1~AP4 MAC Address: Enter Wireless MAC of each other to make the WDS connection.
- Page 39 WPS Config Select Enable then click Apply to use WPS (Wi-Fi Protected Setup) function, then push physical WPS button on Wireless Router to make a WPS connection. Default setting is Disable. WPS Summary After enabling the WPS function, if there is connection the status will show Configured, otherwise, the status will show Idle.
-
Page 40: Station List
Station List Here shows the station information that connected with the Wireless Router. -
Page 41: Firewall
Firewall DMZ Settings DMZ Settings DMZ Settings If the DMZ Host Function is enabled, it means that you set up DMZ host at a particular computer to be exposed to the Internet so that some applications/software, especially Internet / online game can have two-way connections. - Page 42 System Firewall Settings Remote management Remote management (via Select Deny or Allow form the pull-down list to enable or WAN) disable the remote client to control the Wireless Router via WAN. Default setting is Deny. Ping form WAN Filter Ping form WAN Filter Select Disable or Enable from the pull-down list.
- Page 43 URL Filtering Settings Basic Settings Webs URL Filtering Select Disable or Enable from the pull-down menu. Default setting is Disable. Add a URL filter Enter the IP address or URL to restrict the improper content access. Current Webs URL Filters Here shows the URL information that added in the URL filter list.
-
Page 44: Mac Filtering
MAC Filtering Basic Settings MAC Filtering Select Enable or Disable from the pull-down list. Default setting is Disable. MAC Filter Settings MAC Address Enter the client MAC address that user would like to disconnect. Current MAC rules in system MAC Address Here shows the MAC address that added in the filter list. - Page 45 IP Filtering Basic Settings IP Filtering Select Enable or Disable from the pull-down list. Default setting is Disable. IP Filter Settings Dest IP Address Enter the local server’s IP address. Source IP Address Enter the source IP address. Current IP filtering rules in system Dest IP Address Here shows the Dest and Source IP address that added in the filter list.
-
Page 46: Virtual Server
Virtual Server Virtual Server Settings Virtual Server Settings Select Enable or Disable from the pull-down menu. IP Address Enter the local server’s IP address. For TCP and UDP services enter the beginning of the range of port Port Range numbers used by the service. If the service uses a single port number, enter it in both the start and finish fields. - Page 47 CSRF CSRF Settings CSRF Settings Cross-site request forgery, also known as a one-click attack or session riding and abbreviated as CSRF or XSRF, is a type of malicious exploit of a website whereby unauthorized commands are transmitted from a user that the website trusts. Select Enable or Disable from the pull-down menu.
-
Page 48: Administration
Administration Management... -
Page 49: Upload Firmware
Administrator Settings Account Key in a new login user name in the blank field. Password Maximum input is 36 alphanumeric characters (case-sensitive.) NTP Settings Current Time Click Sync with host button to synchronize the time with the server. Time Zone Select the time zone area that you located from the pull-down list. -
Page 50: Settings Management
Settings Management Export Settings Export Click the Export button to save the current device settings to located computer. Import Settings Import Settings Click the Browse… button, find and open the settings file (the browser will display to correct file path), then click the Import Settings button to use the device settings that previous saved. -
Page 51: System Log
Statistics This page shows all system memory, WAN/LAN, all interfaces statistics. System Log Here shows the system log file information. Click Refresh button to update system log file, or click Clear button to review the log file. - Page 52 Reboot Click the Reboot button to restart the Wireless Router.
-
Page 53: Chapter 4: Pc Configuration
Chapter 4: PC Configuration Overview For each PC, the following may need to be configured: • TCP/IP network settings • Internet Access configuration • Wireless configuration Windows Clients • This section describes how to configure Windows clients for Internet access via the Wireless Router. - Page 54 Select the TCP/IP protocol for your network card. Click on the Properties button. You should then see a screen like the following. Ensure your TCP/IP settings are correct, as described below. Using DHCP • To use DHCP, select the radio button Obtain an IP Address automatically. This is the default Windows setting.
- Page 55 • If the DNS Server fields are empty, select Use the following DNS server addresses, and enters the DNS address or addresses provided by your ISP, then click OK. Checking TCP/IP Settings - Windows XP Select Control Panel - Network Connection. Right click the Local Area Connection and choose Properties.
-
Page 56: For Windows 2000
Using DHCP • To use DHCP, select the radio button Obtain an IP Address automatically. This is the default Windows setting. Using this is recommended. By default, the Wireless Router will act as a DHCP Server. • Restart your PC to ensure it obtains an IP Address from the Wireless Router. Using a fixed IP Address ("Use the following IP Address") If your PC is already configured, check with your network administrator before making the following changes. -
Page 57: Macintosh Clients
Accessing AOL To access AOL (America On Line) through the Wireless Router, the AOL for Windows software must be configured to use TCP/IP network access, rather than a dial-up connection. The configuration process is as follows: Start the AOL for Windows communication software. Ensure that it is Version 2.5, 3.0 or later. This procedure will not work with earlier versions. -
Page 58: Other Unix Systems
• OR, restart your system. Other Unix Systems To access the Internet via the Wireless Router: • Ensure the "Gateway" field for your network card is set to the IP Address of the Wireless Router. • Ensure your DNS (Name Server) settings are correct. Wireless Station Configuration •... -
Page 59: Appendix A: Troubleshooting
Appendix A: Troubleshooting Overview This chapter covers some common problems that may be encountered while using the Wireless Router and some possible solutions to them. If you follow the suggested steps and the Wireless Router still does not function properly, contact your dealer for further advice. General Problems Problem 1: Can't connect to the Wireless Router to configure it. -
Page 60: Wireless Access
• If the Wireless Router is configured correctly, check your Internet connection (DSL/Cable modem etc) to see that it is working correctly. Problem 2: Some applications do not run properly when using the Wireless Router. Solution 2: The Wireless Router processes the data passing through it, so it is not transparent. Use the Content Filter Settings feature to allow the use of Internet applications, which do not function correctly. - Page 61 • RF Shielding Your environment may tend to block transmission between the wireless stations. This will mean high access speed is only possible when close to the Wireless Router.
-
Page 62: Appendix B: About Wireless Lans
Appendix B: About Wireless LANs A group of Wireless Stations and a single Access Point, all using the same ID (SSID), form a Basic Service Set (BSS). Using the same SSID is essential. Devices with different SSIDs are unable to communicate with each other. -
Page 63: Wireless Lan Configuration
WPA/WPA2 WPA/WPA2 (Wi-Fi Protected Access) is more secure than WEP. It uses a “Shared Key” which allows the encryption keys to be regenerated at a specified interval. There are several encryption options: TKIP, AES, TKIP-AES and additional setup for RADIUS is required in this method. The most important features beyond WPA to become standardized through 802.11i/WPA2 are: pre- authentication, which enables secure fast roaming without noticeable signal latency. - Page 64 WPA-PSK WPA2-PSK securities is enabled on the Wireless Router. To make a connection, each station must use the same algorithms and pass phrase as the Wireless Router. RADIUS Server: RADIUS is an authentication, authorization and accounting client-server protocol. The client is a Network Access Server that desires to authenticate its links.
Need help?
Do you have a question about the WR5205 and is the answer not in the manual?
Questions and answers