
Related Manuals for Interlogix RS-3230


Summary of Contents for Interlogix RS-3230
- Page 1 TruVision 81 Series IP Camera Configuration Manual P/N 1073279-EN • REV A • ISS 12MAY17...
- Page 2 Copyright © 2017 United Technologies Corporation. Interlogix is part of UTC Climate, Controls & Security, a unit of United Technologies Corporation. All rights reserved. Trademarks and Trade names used in this document may be trademarks or patents registered trademarks of the manufacturers or vendors of the respective products.
-
Page 3: Table Of Contents
Content Introduction 2 Default settings to access the camera 2 Temporary Wi-Fi connection for camera installation 2 Network access 4 Checking web browser security level 4 Accessing the camera over the internet 5 Overview of the camera web browser 5 Camera configuration 7 Configuration panel overview 7 System time 11... -
Page 4: Introduction
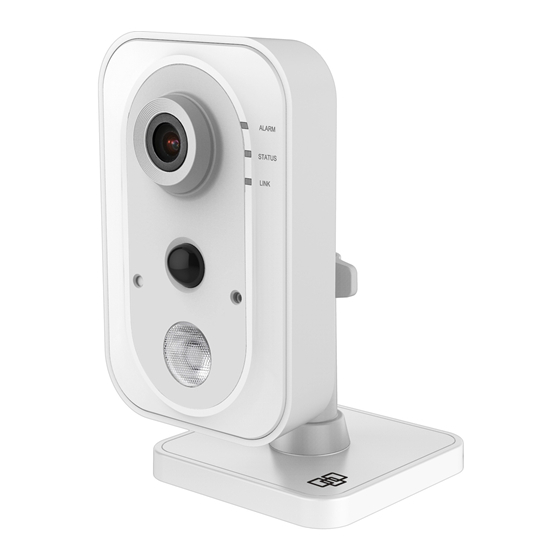
Introduction ® This is the user manual for the following TruVision IP camera models: 1080p IP Wi-Fi Desktop IR camera (2 MP): RS-3230/3231 • TVQ-8101 1080p IP Wi-Fi Bullet IR camera (2 MP): RS-3250/3251 • TVB-8101 Default settings to access the camera... - Page 5 • The temporary Wi-Fi connection becomes available and setup can continue after disconnecting an Ethernet cable from the camera. • Cameras are identifiable on the Wi-Fi network by their unique SSID address, which is comprised of the camera's model number plus serial number. •...
-
Page 6: Network Access
Network access This manual explains how to configure the camera over the network with a web browser. ® TruVision IP cameras can be configured and controlled using Microsoft Internet ® ® ® Explorer (IE) and Apple Safari . The procedures described use the Microsoft Internet Explorer (IE) web browser. -
Page 7: Accessing The Camera Over The Internet
To add the camera’s IP address to Internet Explorer’s list of trusted sites: 1. Open Internet Explorer. 2. Click Tools, and then click Internet Options. 3. Click the Security tab, and then select the Trusted sites icon. 4. Click the Sites button. - Page 8 Name Description Live view tab Click to view live video. Playback tab Click to play back video. Snapshot tab Click to search for snapshots. Configuration tab Click to display the configuration window for setting up the camera. Viewer View live video. Time, date, and camera name are displayed here. Current user Displays current user logged on.
-
Page 9: Camera Configuration
Camera configuration This chapter explains how to configure the cameras using a web browser. After the camera hardware has been installed, configure the camera’s settings using the web browser. Administrator rights are required to configure the cameras over the internet. The camera web browser permits configuration of the camera remotely using a PC. - Page 10 Parameters Description Image Format Choose the image format for a snapshot: JPEG or BMP. Record File Settings Record File Size Specifies the maximum file size. Options include: 256M, 512M, and 1G. Save Record Files to Specifies the directory for recorded files. Save Downloaded Files to Specifies the directory for downloaded files.
- Page 11 System submenus Description User Add or delete users and see which users are currently online. See management “User management” on page 47. Network Use the Network window to set up and monitor Wi-Fi cameras and define basic and advanced network settings. Network submenus Description Wi-Fi...
- Page 12 Image Use the Image window to define the image display settings, OSD settings, overlay text, and privacy mask. See “Image” on page 24 for further information on setup. Event Use the Event window to set up alarms by defining area settings, arming schedules, and linkage methods.
-
Page 13: System Time
Event submenus Description Basic event Defines motion detection, video tampering, alarm input/output, exception, and PIR alarm. See “Motion detection alarms” on page 30, “Tamper-proof alarms” on page 35, “Exception alarms” on page 36, “Alarm inputs and outputs” on page 36, and “PIR alarm” on page 37. Smart event Defines intrusion and line crossing detection. - Page 14 To define the system time and date: 1. From the menu toolbar, click Configuration > System > System Settings > Time Settings. 2. From the Time Zone drop-down list, select the time zone that corresponds to the camera’s location. 3. Select one of the following options for setting the time and date: Synchronize with an NTP server: Select the radio button and type the required information in the...
-
Page 15: System Service
7. Click Save to save changes. System service System service hardware settings enable or disable camera LED functions. These LEDs are selected by default. • Select or deselect Enable IR Light to turn the infrared LED indicator on or off. •... -
Page 16: Network Settings
Network settings Accessing the camera through a network requires the definition of certain network settings. Use the Network menu to define these settings. Wi-Fi Define Wi-Fi and WPS parameters in the Wi-Fi window. Note: Follow the recommended camera installation instructions in the installation guide before defining parameters. - Page 17 Select the PBC Connection radio button and click Connect. The camera and the wireless network router connect automatically. —or— Router PIN mode: Locate the PIN code printed on a sticker or directly on the router. Select the Use router PIN code radio button, type the PIN code in the Router PIN Code...
- Page 18 Menu tabs Description network settings from that server. IPv4 Address: If necessary, type in the IPv4 address of the camera. IPv4 Subnet Mask: If necessary, type in the IPv4 subnet mask. IPv4 Default Gateway: If necessary, type in the IPv4 gateway IP address. IPv6 Mode: Select Manual, DHCP, or Router Advertisement...
- Page 19 To define the TCP/IP parameters: 1. From the menu toolbar, click Configuration > Network > Basic Settings > TCP/IP. 2. Configure the NIC settings, including the Type, IPv4 settings, IPv6 settings, MTU, and Multicast Address. 3. If a DHCP server is available, select the DHCP checkbox.
- Page 20 Server Port: The default server port number is 8000. It can be changed to any port number in the range from 2000 to 65535. 3. Type the IP address and port to upload the alarm information to the remote alarm host.
- Page 21 To define the FTP parameters: 1. From the menu toolbar, click Configuration > Network > Advanced Settings > FTP. 2. Configure the FTP settings, including the Server Address, Port, User Name, Password, Directory Structure, and upload type. Anonymous: Select this check box to enable anonymous access to the FTP server. Directory Structure: Select the Save in the root...
- Page 22 Sender’s Address: The email address of the sender. SMTP Server: The SMTP Server, IP address, or host name. SMTP Port: The SMTP port. The default is 25. Email Encryption: Select None, SSL, or TLS. If the Enable STARTTLS check box is not selected after selecting SSL or TLS, e-mails are sent after encryption via SSL or TLS.
-
Page 23: Video/Audio
2. Deselect Enable and click Save to remove the default certificate. 3. To create a self-signed certificate: Select the Create Self-signed Certificate radio button and then click Create. Enter the country, host name/IP, validity, and the other information requested. —or— To create a certificate request: Select the Signed Certificate is available, Start the installation directly... - Page 24 Parameter descriptions Video Stream Type: Specifies the streaming method used. Options include: Main Stream (Normal), Sub Stream Third stream. Video Type: Specifies the stream type for recording. Select Video Stream to record video stream only. Select Video&Audio to record both video and audio streams. Note: Video&Audio is only available for those camera models that...
- Page 25 Parameter descriptions I Frame Interval: A video compression method. We strongly recommended not changing the default value of 50. Smoothing: Adjust the smoothness of the stream. Audio (Desktop Audio Encoding: G.722.1, G.711ulaw, G.711alaw, MP2L2, G.726, camera only) encoding standards are selectable. Sampling Rate: Set the frequency of samples per second.
-
Page 26: Image
3. Select the stream type from the Stream Type drop-down list to set the ROI encoding. 4. Select Enable under Fixed Region to manually configure the area. Region No.: Select the region. ROI Level: Choose the image quality enhancing level. Region Name: Type the required region name. - Page 27 Parameter Description Scheduled D/N The camera switches between day and night modes according to Settings the configured schedule. The start and end times shown are for day mode. The other time period is for night mode. There are three tabs to configure the day/night settings: Common: The settings are identical for both day and night modes for Exposure Settings (Iris Mode), Day/Night Switch, and Video Adjustment.
- Page 28 Parameter Description 2. Image Adjustment Brightness, Contrast Modify the different elements of picture quality by adjusting the Saturation, Hue, values for each parameter. Sharpness 3. Exposure Settings Iris Mode There are two settings, Auto and Manual. The type of lens determines which setting is used.
- Page 29 Parameter Description LED indicator Select to enable/disable LEDs. See the Installation Guide for a description of LED functions. Enable: The LEDs will be when the camera is in the mode selected (Common, Day, or Night). Disable: The LEDs will be when the camera is in the mode selected (Common, Day, or Night).
- Page 30 Parameter Description Hallway View To invert the 16:9 aspect ratio, enable the rotate function. This function is best used when installing the camera in a scene with a narrow angle of view. During installation, turn the camera to 90 degrees or rotate the 3-axis lens to 90 degrees, and then set the rotate mode as ON.
- Page 31 • Transparent & Not flashing. The image appears through the text. • Transparent & Flashing. The image appears through the text. The text flashes on and off. • Not transparent & Not flashing. The image is behind the text. This is the default setting.
-
Page 32: Basic Event
To add a privacy mask area: 1. From the menu toolbar, click Configuration > Image > Privacy Mask. 2. Select the Enable Privacy Mask check box. 3. Click Draw Area. 4. Click and drag the mouse in the live video window to draw the mask area. 5. - Page 33 Defining a motion detection alarm requires the following tasks: 1. Area settings: Define the on-screen area that can trigger a motion detection alarm and the detection sensitivity level. 2. Arming schedule: Define the schedule during which the system detects motion. 3.
- Page 34 Notify Alarm Recipient Send an exception or alarm signal to the remote management software when an event occurs. Notify Surveillance Center Triggers an audible warning locally (only applies to cameras with an audio output). Send Email Sends an email to a specified address when there is a motion detection alarm.
- Page 35 8. Click the Arming Schedule tab to edit the arming schedule. Click and drag along the time bars or click on a time bar to configure arming schedule times. Note: All scheduled times are based on the 24-hour clock. Ensure that the correct time zone and daylight saving time settings have been configured in Configuration >...
- Page 36 4. In the Image Settings drop-down list, select OFF, Auto-switch Scheduled- switch. Default is OFF. Auto-switch and Scheduled-switch allow permit different settings for day and night as well as different periods. 5. Select a number from the Area drop-down list and click Draw Area.
- Page 37 15. Click Save to save changes. Tamper-proof alarms The camera can be configured to trigger an alarm when the lens is covered and take an alarm response action. To set up tamper-proof alarms: 1. From the menu toolbar, click Configuration >...
- Page 38 Alarm inputs and outputs (Desktop cameras only) To define the external alarm input: 1. From the menu toolbar, click Configuration > Event > Basic Event > Alarm Input. 2. Select the Alarm Input No. and the Alarm Type. The alarm type can be (Normally Open) or (Normally Closed).
- Page 39 Exception alarms The camera can be configured for notification of irregular events. These exception alarms include: • HDD Full: All recording space of NAS or local storage is full. • HDD Error: Errors occurred while files were being written to the storage, no storage is present, or the storage failed to initialize.
-
Page 40: Smart Event
2. Select the Enable check box. 3. Type the alarm name in the Alarm Name box. 4. Drag the mouse on time bar to set the arming schedule and click Save when finished. Note: All scheduled times are based on the 24-hour clock. Ensure that the correct time zone and daylight saving time settings have been configured in Configuration >... - Page 41 To define intrusion detection: 1. From the menu toolbar, click Configuration > Event > Smart Event > Intrusion Detection. 2. Select the Enable check box to enable intrusion detection. 3. Click Draw Area, and then draw a rectangle on the image as the defense region. When drawing the rectangle, connect all lines end-to-end to each other.
- Page 42 7. Click the Arming Schedule tab to edit the arming schedule. Click and drag along the time bars or click on a time bar to configure arming schedule times. Note: All scheduled times are based on the 24-hour clock. Ensure that the correct time zone and daylight saving time settings have been configured in Configuration >...
-
Page 43: Schedule Settings
2. Select the Enable check box to enable the function. 3. Click Draw Area. A crossing plane appears on the image. 4. Click the line and two red squares that appear at each end. Drag one of the red squares to define the arming area. Select the direction as A<->B, ->B, or B->A... - Page 44 To set up a recording schedule: 1. From the menu toolbar, click Configuration > Storage > Schedule Settings > Record Schedule. 2. Select the Enable check box to enable recording. Note: To disable recording, deselect the option. 3. Click Advanced to set the camera record parameters.
- Page 45 Note: All scheduled times are based on the 24-hour clock. Ensure that the correct time zone and daylight saving time settings have been configured in Configuration > System > System Settings. 6. Click to copy the schedule to other days by selecting the corresponding check box next to the day.
- Page 46 4. Click Save to save changes. To set up timed snapshots: 1. From the menu toolbar, click Configuration > Storage Schedule Settings > Snapshot > Snapshot Parameters. 2. Select Enable Timing Snapshot to enable continuous snapshots. 3. Select the file format for the snapshot from the Format drop-down list.
-
Page 47: Storage Management
7. Click Save to save changes. Storage management Use the storage management window to display the capacity, free space available, and the working status of NAS hard drives and the SD card in the camera. These storage devices can also be formatted in the Storage Management window. - Page 48 • To prevent formatting failure, we recommend NAS drives with a capacity between 9 GB and 2 TB. To set up a NAS system: 1. From the menu toolbar, click Configuration > Storage > Storage Management > NAS. 2. Click inside the NAS table to type the IP address and the file path of the network disk in the appropriate HDD No.
-
Page 49: Camera Management
Camera management This chapter describes how to use the camera’s web browser interface to manage users, configure security settings, and perform camera maintenance. User management This section describes how to: Add or delete users Modify permissions Modify passwords Only the administrator can manage users. - Page 50 Viewer: This user has the permission of live view, playback, and log search. Viewers cannot change any configuration settings. Add and delete users The administrator can create up to 31 users. Only the system administrator can create or delete users. To add a user: 1.
- Page 51 Basic Permissions Camera Configuration Remote: Shutdown/Reboot Remote: Notify Alarm Recipient/Trigger Alarm Output Remote: Video Output Control Remote: Serial Port Control 7. Click to save the settings. To delete a user: 1. Select a user from the User List. 2. Click the Delete button.
-
Page 52: Security
Click Refresh to refresh the list. Security RTSP authentication Add Real Time Streaming Protocol (RTSP) functionality to Live View streaming in the Authentication window. To define RTSP authentication: 1. From the menu toolbar, click Configuration > System > Security > Authentication. -
Page 53: Maintenance
To define the IP address filter: 1. From the menu toolbar, click Configuration > Security > IP Address Filter. 2. Select the Enable IP Address Filter check box. 3. Select Forbidden Allowed from the IP Address Filter Type drop-down list. 4. - Page 54 To upgrade the firmware version: 1. Download the latest camera firmware from our web site at www.interlogix.com/video/category/ip-cameras. 2. When the firmware file has downloaded, extract the file to the required destination. TruVision 81 Series IP Camera Configuration Manual...
- Page 55 To upgrade the firmware using TruVision Device Manager: 1. Launch TruVision Device Manager. Note: Install TruVision Device Manager using the included CD or download it from www.interlogix.com/video. 2. In the FW upgrader panel, select a device or hold the Ctrl or Shift key to select multiple devices for simultaneous upgrading.
- Page 56 Searching event logs Configure NAS storage (see “NAS settings” on page 45) or insert a SD card in the camera before using the log functions. The number of event logs that can be stored on NAS or SD card depends on the capacity of the storage devices.
- Page 57 Main log type Minor log types: Description of events included Operation Power On, Local Reboot, Local Abnormal Shutdown, Local Login, Local Logout, Local Configure Parameters, Local Upgrade, Local Start Record, Local Stop Record, Local Export Config File, Local Import Config File, Remote Reboot, Remote Login, Remote Logout, Remote Configure parameters, Remote Upgrade, Remote Start Record, Remote Stop Record, Remote PTZ Control, Remote Initialize HDD, Remote Playback by File, Remote Playback by Time,...
-
Page 58: Camera Operation
Camera operation This chapter describes how to use the camera after it is installed and configured. Logging on and off 1. If necessary, log out of the camera browser window by clicking the Logout button on the menu toolbar. A user name and password are always required when logging 2. -
Page 59: Live View Mode
Live view mode After logging in, click the Live View tab on the menu toolbar to access live view mode. See “Overview of the camera web browser” on page 5 for a description of the interface. Start/stop live view: Stop and start live view by clicking the Start/stop live view button on the bottom of the window. - Page 60 Name Description Playback button Click to open the Playback window. Search calendar Click the day required to search. Search Start search. Set playback time Input the time and click to locate the playback point. Recording type The color code displays the recording type. Recording types are Schedule, Alarm, and Manual.
-
Page 61: Snapshot
To archive a recorded video segment during playback: 1. While playing back a recorded file, click to start clipping. Click it again to stop clipping. A video segment is created. 2. Repeat step 1 to create additional segments. The video segments are saved on the local computer. - Page 62 Index Advanced settings overview of advanced settings parameters, 18 Email parameters Alarm inputs set up, 19 set up, 36 Encryption type Alarm outputs set up, 14 set up, 36 Event settings Alarm types overview of event parameters, 10 motion detection, 30 Events Archive files searching logs, 54...
- Page 63 viewing logs, 54 Recording schedule setup, 42 configuring, 23 Motion detection RTSP authentification, 50 advanced configuration, 33 mark the detection areas, 33 normal configuration, 32 SD card capacity, 45 formatting, 45 NAS settings, 45 Security NAT parameters illegal login lock, 51 set up, 18 IP address filter, 50 Network, 37...
- Page 64 access the camera, 5 interface overview, 5 Video parameters, 21 Web browser security level Video quality, 24 checking, 4 Video/Audio settings Wi-Fi parameters overview of video/audio parameters, 9 set up, 14 WPS parameters set up, 14 Web browser TruVision 81 Series IP Camera Configuration Manual...
Need help?
Do you have a question about the RS-3230 and is the answer not in the manual?
Questions and answers