Table of Contents
Advertisement
Advertisement
Table of Contents

Related Manuals for Kodak PIXPRO AZ652


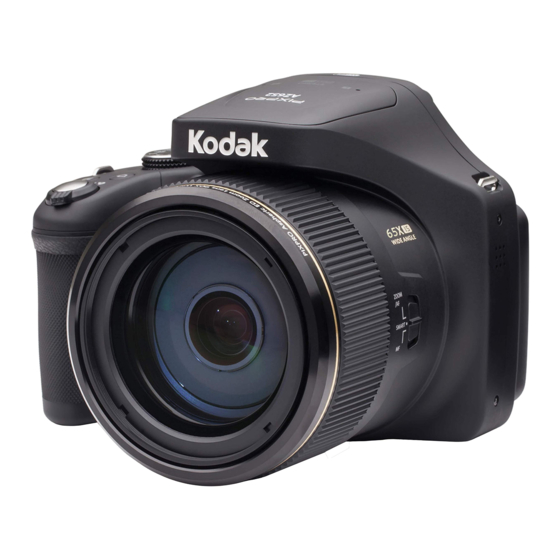
Summary of Contents for Kodak PIXPRO AZ652
- Page 1 KODAK PIXPRO AZ652 DIGITAL CAMERA User Manual...
-
Page 2: Before You Start
BEFORE YOU START Declaration of Conformity Responsible Party: JK Imaging Ltd. Address: JK Imaging Ltd., 17239 So. Main Street, Gardena, CA 90248 USA JK Imaging Europe, 71 Clarendon Road, Watford, WD17 1DS, UK Company Website: kodakpixpro.com INDUSTRY CANADA This device complies with Canadian RSS-210. This device complies with Industry Canada license-exempt RSS standard (s).Operation is subject to the following two conditions: (1) this device may not cause interference, and (2) this device must accept any interference, including interference that may cause... - Page 3 For Customers in Europe This symbol [crossed-out wheel bin WEEE Annex IV] indicates separate collection of electrical waste and electronic equipment in the European countries. Please do not throw the equipment into domestic refuse. Please use the return and collection systems available in your country for proper, safe disposal of this product.
- Page 4 Compatibility (EMC) standard for radio equipment; Part 17: Specific conditions for Broadband Data Transmission Systems Hereby, Sintai Optical (Shenzhen) Co., Ltd, declares that this PIXPRO AZ652 is in compliance with the essential requirements and other relevant provisions of Directive 2014/53/EU.
- Page 5 This equipment has been tested and found to comply with the limits for a Class B digital device, pursuant to Part 15 of the FCC Rules. These limits are designed to provide reasonable protection against harmful interference in a residential installation. This equipment generates, uses and can radiate radio frequency energy and, if not installed and used in accordance with the instructions, may cause harmful interference to radio communications.
-
Page 6: Contents
All trademarks mentioned in this manual are used for identification purposes only and are properties of their respective owners. This manual will instruct you on how to operate the KODAK PIXPRO Digital Camera. JK Imaging has tried its utmost to ensure the correctness of the user manual contents, but reserves the right to modify as necessary. -
Page 7: Safety Notes
SAFETY NOTES Safety notes for this camera Do not drop the camera or allow it to When you take the camera from a hit solid objects. cold place to a warmer environment, condensation may occur. Please wait Do not attempt to disassemble or for a reasonable period of time before repair the camera. - Page 8 Safety notes for battery Please use a battery that is the same Do not heat the battery or throw it into type as the one included. a fire to avoid a possible explosion. Please use the attached charger to Do not store the battery in a hot charge the battery.
- Page 9 Safety notes for memory card We suggest buying only well-known, Do not modify the name of the files name brand memory cards to ensure or folders of the memory card using peak performance. your PC. Modifying the file names may cause the files to not be recognized Format the memory card using the on the camera or a possible error may...
- Page 10 Other Safety Notes Do not disconnect the power or turn the camera off during the update process. Doing so may cause incorrect data to be written and the camera may not power on later. Do not hang the neck strap of the camera around the neck of a child. When using your camera on an airplane, observe the relevant rules specified by the airline.
-
Page 11: Table Of Contents
CONTENTS BEFORE YOU START ....1 MODE OVERVIEW ....27 LCD Display........27 SAFETY NOTES ..... 6 Overview of the Screen Icons in Shooting Mode ......27 CONTENTS ......10 Overview of the Screen Icons in Movie Mode .......29 GETTING READY ....14 Overview of the Screen Icons in Playback Mode ......30 Accessories Included ......14... - Page 12 PLAYBACK ......71 AF Area ..........55 Macro Mode........56 Viewing Photos and Videos ....71 Self-timer Mode ......57 Thumbnail View .......72 Flash Mode ........58 Using Zoom Playback (for still pictures only) ........73 WB (White Balance) Mode ....60 Continuous Shot Group Playback ..74 Continuous Shot Mode ....62 Animation Panorama Play ....75 Exposure Compensation Functions...
- Page 13 Movie Size .........83 Touch-up ......96 Quality ........84 Resize .........97 MF (Manual Focus) Assist ..85 Playback Settings ......97 AF Assist Beam ......86 Protect ........98 Digital Zoom ......86 Delete ........98 Shoot Setting 2........87 DPOF (Digital Print Order Format) ........99 Date Imprint ......88 Trim ..........100 Quick Review......88 Play Slide Show ......100...
- Page 14 Copy to Card ......106 Exit ..........115 File Numbering ......106 Video System ........116 Reset Settings ......107 Supported HDMI Connections ..117 Version ........107 Connecting HDMI-Ready TV ..117 HDMI CEC Control ......118 CONNECTION SETTINGS .. 108 Set Eye-Fi SD Card Connection Mode ..........123 Connecting to a Computer .....108 Setting the USB Mode ....108 APPENDICES ......
-
Page 15: Getting Ready
GETTING READY Accessories Included Your camera box should contain the camera model you purchased along with the following accessories. If anything is missing or appears to be damaged, please contact your retailer.(Based on sales in different countries or regions, the shape of the AC adapter will vary. -
Page 16: Install Lens Cap And Neck Strap
Install Lens Cap and Neck Strap 15 15... -
Page 17: Part Names
Part Names 1. Micro HDMI Port 2. Micro USB Port 3. Zoom Lever 4. Shutter Button 5. Strap Eyelet Exposure Compensation Button Continuous Shot Button 8. Power Button 9. AF Assist Beam/Self-timer Lamp 10. Flash Lamp 11. Lens... - Page 18 12. Microphone 13. Electronic View Finder (EVF) EVF / LCD Switch Button 15. Indicator Lamp 16. Mode Dial Fast Video Recording Button Menu Button Jog Dial ] AF Button/Up Button ] Delete Button/Self-timer Button/Down Button ] Macro Button/Left Button ] Flash Button/Right Button Display Button 21 .
- Page 19 24. Vari-angle LCD 25. Diopter Adjustment Knob 26. Speaker 27. Lens Function Ring Lever 28. Lens Function Ring 29. Battery Cover 30. Tripod Socket...
-
Page 20: Installing Battery And Memory Card
Installing Battery and Memory Card 1. Open the battery cover. 2. Insert the battery into the battery compartment according to the negative and positive directions as illustrated in the picture. Push the battery down until it locks in place. Battery Lock Knob... - Page 21 3. Insert the memory card into the memory 4. Close the battery cover. card slot as shown in the diagram. Write Protection Buckle The memory card (SD/SDHC) is optional and not included in all camera packaging. It needs to be purchased separately. Please use an original memory card which is Class 4 or higher and has a capacity of 4GB to 32GB.
-
Page 22: Charging Battery
Charging Battery Please insert the battery and charge it under shutdown mode. 1. Connect the camera and the power charger using the supplied Micro USB cable. 2. Insert the plug of the power charger into the power outlet to charge the battery. -
Page 23: Vari-Angle Lcd
Vari-angle LCD The LCD is housed in the camera’s body. You may follow the directions shown below to move it as needed: 1. Turn on the LCD along the direction shown by arrow ①. 2. Available to rotate 180° along the direction shown by arrow ②. 3. -
Page 24: Turning Camera On And Off
Turning Camera On and Off Press the power button to turn the camera on. To turn the camera off, press the power button again. Power Button When the power is off, press and hold the button to power on and enter playback mode. -
Page 25: Set Your Language, Date/Time After The First Power-On
Set your Language, Date/Time Set your Language, Date/Time after the first power-on Language 1. When you turn the camera on for Sound Settings Soun the first time, the language selection Power Saver Powe Auto Auto screen appears. Language Lang English nglish 2. -
Page 26: Resetting Your Language
Resetting your Language After you set your language for the first time, follow the instructions below to reset your language. Sound Settings 1. Press the button, press the [ Power Saver Auto ] button to select , and Language English press the button to enter the menu. -
Page 27: Resetting Date/Time
Resetting Date/Time After you set your Date/Time for the first time, follow the instructions below to reset date and time. 1. Press the button, press the [ Sound Settings ] button to select , and Power Saver Auto press the button to enter the menu. -
Page 28: Mode Overview
MODE OVERVIEW LCD Display Overview of the Screen Icons in Shooting Mode 9 10 11 00:00:00 0000 x3.0 EV-0.0 F00.0 0/0000 ISO00000 Eye-Fi ON (with signal) Video Pixels Color Effect Zoom Display(By turning the Focus Mode No Memory Card Zoom Lever) Number of Pictures in Static Quality Beautifier... - Page 29 00:00:00 0000 x3.0 EV-0.0 F00.0 0/0000 ISO00000 Lens Function Ring 24 Focus Frame 29 White Balance Custom Settings Exposure ISO Value 30 AF Area Compensation Value Shutter Speed 26 Shooting Mode 31 Expo Metering Single / Continuous Shot / 22 Histogram 27 Custom Settings HDR / WDR / AE Bracketing 23 Aperture Value...
-
Page 30: Overview Of The Screen Icons In Movie Mode
Overview of the Screen Icons in Movie Mode 00:00:00 00/15 Battery Status Number of Videos Captured Continuous Recording Time Movie Mode... -
Page 31: Overview Of The Screen Icons In Playback Mode
Overview of the Screen Icons in Playback Mode 2016/04/18 2016/04/18 000-0000 0000 Thumbnail3x3 Eye-Fi ON (with signal) Image Area Quality Zoom Magnification Area Capture Date Image Zoom Ratio File Name Index Prompt Shooting Pixel Ratio Touch-up Image Size Battery Status DPOF File Icon Continuous Shot Group Playback File Protection Icon... -
Page 32: How To Take Pictures
How to Take Pictures 1. Hold the camera with both hands as shown in the figure, not blocking the flash and lens by fingers. 2. Aim the camera at the object and then frame with the LCD. 3. Use the zoom lever to select Tele or Wide positions to zoom in or out on your subject. -
Page 33: Using The Mode Dial
Using the Mode Dial This camera provides a convenient mode dial that allows you to manually switch between different modes with ease. The available modes are listed below: Mode Name Icon Description In this mode, the optimal conditions for taking pictures will Auto Mode be set based on the subject and environment. -
Page 34: Face Beautifier
This mode is for manually setting the aperture, shutter speed Manual Mode and ISO value. This mode automatically enhances facial features with skin Face Beautifier softening touches and eye brightening capabilities. Enable image transmission and remote control by connecting Wi-Fi Mode smart device with Wi-Fi. - Page 35 Please refer to the table below if any nonadjustable options in mode: (O: Optional X: Not optional) Options Aperture Shutter Mode (Display) (Display) (Display) (Display) (Display) 1. Turn the mode dial to select the mode you want. 2. Press the button to configure settings.
Need help?
Do you have a question about the PIXPRO AZ652 and is the answer not in the manual?
Questions and answers