Advertisement
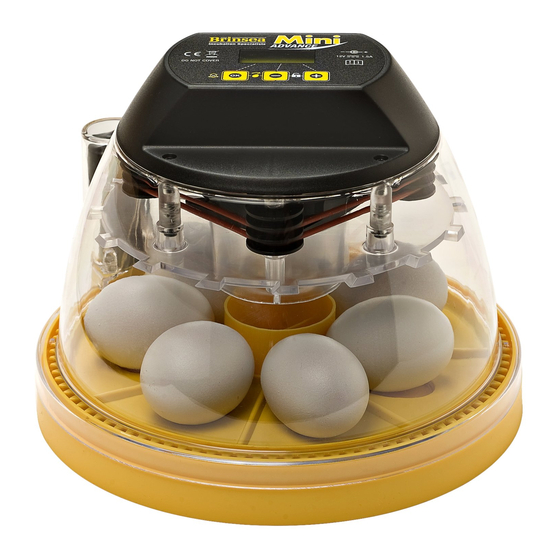
Mini Advance high performance egg incubator
Contents
Section
1
2
3
4
5
6
7
8
9
10
11
12
13
14
15
User instructions
Subject
1
A016 GB Issue 02
Page
2
3
5
5
6
7
7
8
10
11
12
12
13
15
16
Advertisement
Table of Contents

Related Manuals for Brinsea Mini Advance


Summary of Contents for Brinsea Mini Advance
-
Page 1: Table Of Contents
A016 GB Issue 02 Mini Advance high performance egg incubator User instructions Contents Section Subject Page Introduction QUICK REFERENCE Unpacking Location and Installation Digital Control System Storage of eggs Temperature Humidity and Ventilation Egg setting and Day Countdown Egg turning... -
Page 2: Introduction
A016 GB Issue 02 1 Introduction These instructions detail the operation of your new Mini Advance digital incubator. Please read these instructions carefully before setting up your machine to achieve best results and keep these instructions safe for future reference. This document includes recommended procedures for successful hatching but incubation involves the control and manipulation of a large number of factors and in certain circumstances different procedures may be necessary. -
Page 3: Quick Reference
SUPERVISION. FOR CONTINUED PROTECTION AGAINST FIRE AND ELECTRIC SHOCK ONLY USE THE POWER SUPPLY UNIT AS SUPPLIED WITH THE INCUBATOR. Spares are available from Brinsea Products Ltd. 1) Carefully unpack the incubator (section 3) 2) Place the egg disc in the base of the incubator, shiny side up... - Page 4 A016 GB Issue 02 MAIN MENU – QUICK REFERENCE INCUBATION TEMPERATURE. 37.5C TEMP RANGE 20.0 – 40.0°C (68.0 – 104.0°F). DEFAULT 37.5°C (99.5°F). REMAINING DAYS. DAYS THE NUMBER OF DAYS LEFT UNTIL DAY 21 THE EGGS ARE DUE TO HATCH. MUST BE SET FOR EACH NEW BATCH.
-
Page 5: Unpacking
Power Supply Unit Please identify each part and check that they are all present and undamaged. If there are any parts damaged or missing please contact your retailer or Brinsea Products (at the address at the end of the document). -
Page 6: Digital Control System
T*37.5C DAY:21 The Mini Advance control system utilises a highly accurate, individually calibrated sensor for temperature. Be cautious of low cost analogue or digital thermometers when comparing them with the incubator display reading. NORMAL OPERATION – Temperature, number of days remaining until the hatch is due and turn system status are continuously displayed. -
Page 7: Storage Of Eggs
Discard cracked, mis-shaped and heavily soiled eggs (if possible). Only wash soiled eggs using a brand egg wash solution such as Brinsea Incubation Disinfectant Concentrate following the manufacturer’s instructions. It is essential to wash eggs in solution which is significantly warmer than the egg. Bear in mind that all solutions will remove the outer cuticle from the egg as well as the dirt and may leave the egg at greater risk from bacterial contamination in the future. -
Page 8: Humidity And Ventilation
Temperatures above ideal can quickly have a serious detrimental effect on hatch rates and must be avoided. The Mini Advance has a built-in temperature alarm which warns of high or low temperatures. See section 5 for details. - Page 9 A016 GB Issue 02 If measuring humidity levels directly be cautious of readings from low cost analogue or digital hygrometers. Generally accepted incubation RH levels for species groups: During incubation Poultry 40-50% RH Waterfowl 45-55% RH Parrots 35-45% RH Hatching All species 65% RH or more For more specific information on particular species’...
-
Page 10: Egg Setting And Day Countdown
9 Egg Setting and Day Countdown The Mini Advance is designed to accommodate 7 eggs of different sizes up to some duck eggs. An alternative egg disc for up to 12 small eggs such as quail may be purchased as an accessory. Contact your retailer or Brinsea Products. -
Page 11: Egg Turning
A016 GB Issue 02 10 Egg Turning The Mini Advance turning system has three modes of operation: 10.1 ON – The turning system will alternately roll the eggs left and right irrespective of the Day Countdown. A revolving line symbol “/” is shown in the corner of the display. -
Page 12: Hatching
(120°F). DO NOT USE A DISHWASHER TO CLEAN EGG DISCS, INCUBATOR BASE OR LID. Following each hatch in the Mini Advance remove and wash the egg disc and base in Brinsea Incubation Disinfectant Solution. Wipe all other internal surfaces with a soft cloth soaked in the solution. Ensure that the instructions supplied with the fluid are followed. -
Page 13: Servicing And Calibration
If the problem persists contact your distributor or Brinsea Products Service Dept. 13.2 The functional parts of the Mini Advance are modular and parts are available and are readily exchanged by a suitably qualified person equipped with basic tools. Fitting instructions are supplied with replacement parts. - Page 14 A016 GB Issue 02 CALIBRATION MENU PRESS ALL 3 BUTTONS TO UNLOCK THE CALIBRATION MENU SELECT THE OPTION / RETURN TO THE MENU. GO FORWARD ONE SCREEN / INCREASE THE VALUE. GO BACK ONE SCREEN / DECREASE THE VALUE. CALIBRATE THERMOMETER. T 37.3C CAL TEMP TAKE A READING 20mm ABOVE THE...
-
Page 15: Troubleshooting
Poor hatching results are frustrating and can be caused by a large number of factors. The most common are given below. Brinsea Products will not be held responsible for loss of eggs or chicks under any circumstances. However we will try to advise on incubation technique to improve results where necessary. -
Page 16: Specification
(typical average) 12 Watts Power Supply Unit: 100 - 230v, 50Hz, 0.5A max. Registered Community Design Application No 001130082 Brinsea Products Ltd, Station Road, Sandford, N. Somerset, BS25 5RA Tel: 0845 226 0120 Fax: (01934) 820250 e-mail: sales@brinsea.co.uk, website: www.Brinsea.co.uk...
Need help?
Do you have a question about the Mini Advance and is the answer not in the manual?
Questions and answers