
Related Manuals for Market Forge Industries STM-E


Summary of Contents for Market Forge Industries STM-E
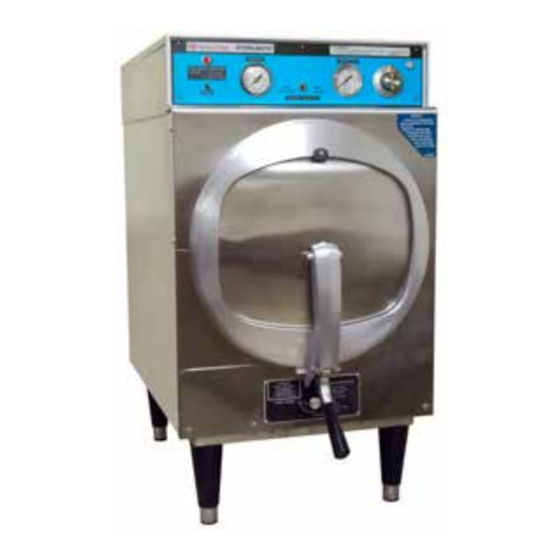
- Page 1 STERILMATIC ANALOG ELECTRIC STERILIZER INSTALLATION - OPERATION - MAINTENANCE MODELS ‰ STM-E ‰ STM-EL ‰ STM-EX ‰ STM-ELX Telephone: (802) 658-6600 Fax: (802) 864-0183 www.marketforge.com PN 14-0411 Rev D (2/16) © 2015 - Market Forge...
- Page 2 Your Service Agency’s Address: Model Serial number Sterilizer installed by Installation checked by...
-
Page 3: Table Of Contents
TABLE OF CONTENTS IMPORTANT WARNING: Improper installa- INSTALLATION tion, adjustment, alternation, Introduction ............. . 2 service or maintenance can cause property damage, in- Service Connections . -
Page 4: Installation
• For use at altitudes up to 6500 ft (2000 m) about using distilled or deionized water for use with our Sterilizer models STM-E and STM-EL. We are always • For use at temperatures from 41°F (5°C) to 104°F asked why these water choices are not allowed for use (40°C). -
Page 5: Service Connections
Drain - 1/2” (13mm) N.P.T. of 3/8” (10mm) OD copper Domestic (see note 1) Models 208V 240V 208V 240V Steam Exhaust Connection - 5/8” (16mm) (see note 2) STM-E Electrical Connection - (*see electrical specifications STM-EL 12.4 table) Power Supply 1 Phase 3 Phase... -
Page 6: Installation Instructions
Install small baffle with Electric supply connection for STM-E & STM-EL no perforation at the rear of the upper tray support chan- Connect to proper electrical supply as indicated on name- nel. -
Page 7: Optional Cold Water Condenser
Optional Cold Water Condenser Item Part No. Description SERVICE CONNECTIONS REQUIRED 95-2119 Steam condensing unit 1/2” IPS Cold Water Connection 95-2219 Thermostat Box Assy. 1” IPS Drain Connection (See Note 3) 95-0086 Exhaust line 115V Elec. Connection 7/8 Ø knockout (cond. unit) 15-7057 Copper tubing 3/8 OD 22.25”... -
Page 8: Pan Supports And Baffles
Pan Supports and Baffles 1. Locate the mounting studs on the inside of the cham- 4. After installing one pan support rack correctly, you ber. There are two rack mounting studs on each side. can install the upper baffle. Position the baffle so that the 45°... - Page 9 Pan Supports and Baffles 5. Position the second pan support rack into the cavity and slide the other mounting tab onto the rack flat bend while the pan support rack is not on the mount- ing studs. Hang the pan support by placing the rear key-way slot onto the rear mounting stud and slide the rack until the slot sits on the mounting stud.
-
Page 10: Optional Stands
Optional Stands STERILMATIC OPEN STAND: STERILMATIC OPEN STAND WITH CONDENSER Market Forge Sterilmatic Stand can be supplemented Market Forge can provide the open stand with an optional with an Optional Stand for utility use where maximum steam condenser system for use where steam exhaustion compactness is desired. -
Page 11: Optional Recording Thermometer
Optional Recording Thermometer INSTALLATION FOR OPTIONAL RECORDING THER- TO REMOVE THE CHART MOMETER 1. Unscrew and remove the chart ‘hub’ knob (attached The optional recording thermometer may be surface or to the chain). panel mounted whichever is preferred. 1. Remove the top cover of the sterilizer. Remove the pipe plug located in the T-fitting that also accommo- dates the safety relief valve and which is connected directly to the sterilizing chamber. -
Page 12: Operation
Operating Instructions 7. To assist in drying racks, release door handle after IMPORTANT pressure has been attained at start of cycle. Pres- sure in chamber will keep door closed. The use of a Make sure the drain valve is closed. Fill bot- wire basket will provide better drying for dressings. -
Page 13: Minimum Sterilization Times
Minimum Sterilization Times TIME (Minutes) ARTICLES • Glassware, empty, inverted. • Instruments, metal in covered or open tray, padded or unpadded. • Needles, unwrapped. • Pipettes, blood diluting, serological, volumetric, etc • Tubing glass (6mm), (10mm) inverted • Flasked solutions 75-250 ml. •... -
Page 14: Maintenance
Cleaning DAILY CLEANING PROCEDURE (AT THE END OF EACH DAY): When sterilizing culture mediums that generate sul- fide gas or chlorine gas, the inside of the chamber must be cleaned and rinsed thoroughly without fail. 1. Remove bottom splash baffle. IMPORTANT STERILIZING CHAMBER MUST BE CLEANED AND DRAINED DAILY USING THE FOLLOW-... -
Page 15: Warranty
Warranty STERILIZER (AUTOCLAVE) WARRANTY MODELS: STM-E, STM-EL, STM-EX* AND STM-ELX* We warrant to the original purchaser that the sterilizers manufactured by Market Forge will be free from defects in material and factory workmanship if properly installed and operated under normal conditions. Within one year from date of original installation, or within 15 months from date of shipment from factory, whichever is sooner, we will repair or replace that part of any such machine that becomes defective at no cost to the customer.
Need help?
Do you have a question about the STM-E and is the answer not in the manual?
Questions and answers