Table of Contents
Advertisement
Quick Links
Advertisement
Table of Contents

Related Manuals for PCD TTX38


Summary of Contents for PCD TTX38
- Page 1 TTX38 User Manual...
-
Page 2: Table Of Contents
YOUR PHONE ..........................5 ..........................6 TANDBY MODE GETTING STARTED ........................6 ................... 6 NSTALLING THE CARD AND THE BATTERY SD C ......................7 NSTALLING A MICRO ......................... 7 HARGING THE BATTERY ....................7 ... - Page 3 ............................14 RAFTS ............................14 UTBOX .......................... 14 ENT MESSAGES ............................. 15 RCHIVE ........................15 ELETE MESSAGES ............................15 MAIL ........................15 OICEMAIL SERVER ......................... 15 ROADCAST ESSAGE ..........................15 EMPLATES ........................
- Page 4 ....................... 24 ESTORE FACTORY SETTINGS .......................... 24 OUND EFFECTS EXTRA ............................24 ..........................24 ALCULATOR ....................... 24 URRENCY ONVERTER ..........................24 TOPWATCH ..........................25 EDOMETER GENERAL INFORMATION ......................26 ..........................26 CCESSORIES PRECAUTIONS ..........................
-
Page 5: Your Phone
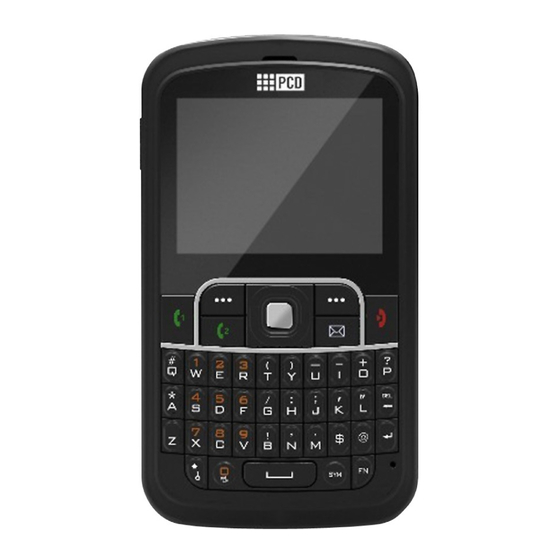
Your Phone Left/Right soft Key Press to perform the function currently displayed in the bottom left/right corner of the screen. Home Key Press to access WAP homepage Camera Key Press to access the camera menu. Navigation Key In the standby mode, quick access four build-in functions. -
Page 6: Standby Mode
Standby mode In the main display, you may see several icons displayed on your status bar. The meaning for each icon is explained below: Vertical bars indicate the signal strength of the GSM network signal. Indicates the battery charge level. Indicates your phone is locked. -
Page 7: Installing A Microsd Card
2. Insert the SIM card (3), install the battery (4) and attach the battery cover as shown (5). (5) Note: make sure that the metallic contacts of the battery are facing the metallic contacts in the battery slot. Installing a microSD Card 1. -
Page 8: Answering Or Rejecting An Incoming Call
In the standby mode, press the Left soft key to enter the main menu, and then select Phonebook. Scroll to the desired contact name or type the name in the search bar, and then press the Dial Key to make the call. To make an international call 1. -
Page 9: Call History
Once the call list exceeds the memory limitation, the oldest one is deleted. For the call logs, you can press the Dial Key in standby mode to have a quick review. Call history Missed Calls To view Missed Calls In Call center menu, choose Call history > Missed calls, and press the Navigation Key to view the records. Dialed Calls To view Dialed Calls In Call center menu, choose Call history >... -
Page 10: Call Settings
All Received: The total GPRS volume you have received. Reset Counters: Press to reset the counters. Call settings Caller ID: Allows you to either send or hide your ID during calling or sending out the message. Your phone is defaulted in Set by network, which means your ID is determined by your service provider. -
Page 11: Bookmarks
Bookmarks You can use this menu to save URL addresses to quick access a website. Recent Pages You can view the recent pages you have visited. Offline Pages You can view the saved offline pages you have visited. Input Address You can key in the URL address. -
Page 12: File Manager
sensitive information just in case your phone is misplaced, lost or stolen. Trusted Certificates This function is to indicate your trusted certificate while browsing and allows you to manage your trust list. File Manager In this menu, you can manage images, audio, music, photos, videos and other contents you have downloaded. Two storages will be displayed: To check files saved in the File Manager 1. -
Page 13: Phonebook
Phonebook Your phonebook list is saved either on the SIM card’s memory or Phone’s memory. You can also choose to save on both. Search In standby mode, press the Left Soft key to enter the main menu, and then select Phonebook. Now you can search names and numbers saved in the Phonebook Key in full name or first character of contact person’s name, the phonebook list will automatically jump to the character you have entered or the matched contact will be displayed. -
Page 14: Messaging
Memory Status: You can check how many entries are stored in SIM card’s and Phone’s memory. Copy contacts: Allows you to copy the contacts among two storages. Move contacts: Allows you to move the contacts among two storages. ... -
Page 15: Archive
Archive The menu has the messages you move from other mail boxes to Archive box. Delete messages You are able to delete all messages in a folder or even all messages at once. Email To create an account First, you must create the data account. In idle mode, press the Left Soft key to access the main menu, and then select Settings >... -
Page 16: Multimedia
rate of transmission. This feature is subscription dependent. If Save sent message is on, the sent successfully messages will be saved in Sent box. Memory status: Allows you check memory status in the Phone or SIM card. Preferred Storage: Allows you to change your preferred storage as SIM or phone. ... -
Page 17: Image Viewer
Image viewer All images from MMS, WAP and camera can be reviewed from here and storage is located in either the phone or memory card. You may choose to view your images in List Style or Matrix Style. To change the storage, please select Options and select Storage. Video Recorder You can record a video clip through the built-in camera. -
Page 18: Audio Player
Main LCD clip: Allows you to select a certain part of the selected image for the full screen display. Manual clip: Allows you to select a certain part of the selected image. Clip help: Allows you to review the instructions on how to clip the image described above. Audio Player Your phone provides you a friendly music player device for entertainment purpose. -
Page 19: Schedule Fm Record
5. Press the Navigation Left or Right Key to start searching. Your phone provides the following selections for your option: Channel list: Allows you to bookmark up to 9 radio stations by entering the channel name and frequency. You can have quick access to 9 radio stations by Numeric Key. You are allowed to play, delete or edit a selected radio station frequency. -
Page 20: Tasks
3. Select Options > View to view the task. You can also select Options > Add event to add a new task. 4. Choose a type of the task. Input the start and end time of your task, and describe the task contents in Subject and Details. -
Page 21: World Clock
World Clock You can view the local date and time via selecting the GMT and city. When the cross points out a certain city, it will show the local date and time. Note: If you want to change the home city, please go to Settings > Phone settings > Time and date > Set home city. STK (SIM Toolkit) In addition to the functions available in the phone, your service provider may offer additional applications such as weather or stock market information via the SIM card. -
Page 22: Themes
Clock type: Allows you to choose analog or Digital clock. Themes You can choose the theme as you prefer. Greeting text This function indicates the message when you power on in main screen display. You may edit any message for your welcome note. - Page 23 connections between electronic devices. The Bluetooth connection can be used to listen to stereo music, send images, video, texts and vCards. To start using Bluetooth technology Your Bluetooth connection needs to be configured prior to operation. Your phone provides the following options: ...
-
Page 24: Data Account
To send data using Bluetooth connectivity 1. Select the object your want to send. 2. Select Options > Send. 3. Choose Via Bluetooth, then your phone will search for the BT device. 4. Select the device you would like to share following by sending action. To receive data using Bluetooth connectivity When you receive data through Bluetooth, a notification message will be popped up to ask if you are willing to accept. -
Page 25: Pedometer
To use stopwatch 1. From the main menu select Extra > Stopwatch. 2. Select Typical stopwatch. You can choose different record methods and view records. Split Timing: When you select this, the timepiece will be saved and continue to count when you press Split. -
Page 26: General Information
GENERAL Information Accessories There are various accessories for your mobile phone. Your pack will include standard battery x 1, headset x 1, and travel adapter x 1. Please note: Use only accessories and charging devices approved by the phone manufacturer otherwise you would risk serious damage to health and property. -
Page 27: Troubleshooting
Use qualified after sales service Only a qualified technician can repair your cellular phone. Accessories and batteries Only use the authorized accessories and batteries and do not connect to incompatible products. Waterproof Your cellular phone is not waterproof. Please keep it away from water. Backup Remember to make a backup or keep a written record of all important information saved in your cellular phone. - Page 28 good, please temporarily shut off your phone. Need to change Insert a new battery. battery. When you cannot Please move to an receive signals, your area where the cellular phone will signal is strong or continue to send to find temporarily turn off a basis.
-
Page 29: Safety Information And Notices
SAFETY INFORMATION AND NOTICES Using the Cellular Phone and Charger Danger: Only use the battery and charger approved by the manufacturer. Using other brands may cause battery leakage, overheating, explosion or even fire. Caution: Keep the phone away from dust, water and damp areas. Dust, water or other liquids may cause overheating, electrical leakage, and/or phone failure. -
Page 30: Using The Charger
or even fire. Battery liquid is severely harmful for your eyes. If battery liquid gets in your eyes, do not rub them. Instead, wash your eyes with water first and then go directly to a doctor for help. Do not use or store your phone in high temperature areas. This may cause battery leakage, overheating, explosion or even fire. -
Page 31: 12 Month Limited Warranty
12 MONTH LIMITED WARRANTY PERSONAL COMMUNICATIONS DEVICES (the Company) warrants to the original retail purchaser of this PCD handheld portable cellular telephone, that should this product or any part thereof during normal consumer usage... - Page 32 Warranty gives you specific legal rights, and you may also have other rights, which vary from state to state or province to province. IN USA: PERSONAL COMMUNICATIONS DEVICES 555 Wireless Blvd. Hauppauge, NY 11788 (800) 229-1235 IN CANADA: PCD COMMUNICATIONS CANADA LTD.
- Page 33 5535 Eglinton Avenue West Suite# 234 Toronto, ON M9C 5K5 (800) 465-9672...
Need help?
Do you have a question about the TTX38 and is the answer not in the manual?
Questions and answers