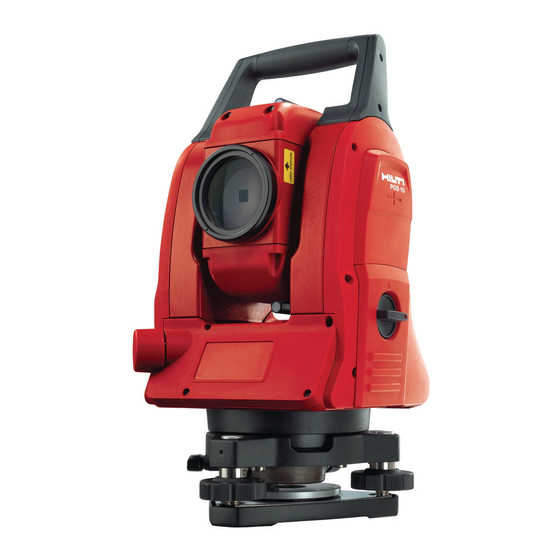
Hilti POS 15 Original Operating Instructions
Hide thumbs
Also See for POS 15:
- Operating instructions manual (103 pages) ,
- Quick start manual (126 pages)
Table of Contents
Advertisement
Quick Links
Advertisement
Table of Contents

Subscribe to Our Youtube Channel
Summary of Contents for Hilti POS 15
- Page 1 POS 15/18 Kurzanleitung Quick-start guide Guía rápida Pikaopas Guide de démarrage rapide Guida rapida Korte handleiding Manual de instruções Краткое руководство Kort instruktion Printed: 26.09.2014 | Doc-Nr: PUB / 5199516 / 000 / 00...
- Page 2 Printed: 26.09.2014 | Doc-Nr: PUB / 5199516 / 000 / 00...
-
Page 4: Table Of Contents
POS 15/18 total station In these operating instructions, the designation “the tool” It is essential that the operating instructions always refers to the POS 15 or POS 18. are read before the tool is operated for the first time. Rear casing section 1... -
Page 5: Description
2.2 Description of the tool the values derived from these positions and for laying The POS 15/18 total station can be used to determine the out points using given coordinates or values relative to a exact position of objects or points. The tool is equipped control line. - Page 6 Compensator Type Dual-axis, liquid Working range ±3’ Accuracy 2" Angle measurement POS 15 accuracy (DIN 18723) 5" POS 18 accuracy (DIN 18723) 3" Angle reading system Diametral Distance measurement Range 340 m (1000 ft) Kodak 90% gray Accuracy ±3 mm + 2 ppm (0.01 ft + 2 ppm) Laser class Class 3R, visible, 630-680 nm, Po <...
-
Page 7: Safety Instructions
The tool and its ancillary equipment may present hazards necessary. Do not tighten any screws on the grip! when used incorrectly by untrained personnel or when To avoid the risk of injury, use only genuine Hilti used not as directed. accessories and additional equipment. - Page 8 (e.g. batteries with cracks, broken parts, Although the tool complies with the strict requirements bent or pushed-in and/or pulled-out contacts). of the applicable directives, Hilti cannot entirely rule out e) Paper clips, coins, keys, nails, screws and other the possibility of the tool small metal objects that could short-circuit the - causing interference to other tools (e.g.
-
Page 9: First Steps
Check the tool for damage before use. If the tool result in the tool being switched off inadvertently is found to be damaged, have it repaired at a Hilti possibly resulting in loss of data. service center. - Page 10 Pivot the tool carefully by hand to the left and right and tilt the telescope up and down to check operation of the friction clutches. Turn the horizontal and vertical drives carefully in both directions. Turn the focussing ring fully to the left. Look through the telescope and turn the eyepiece ring to bring the cross hairs into focus.
- Page 11 Instructions and info for the user Battery and laser pointer status indicator Time and date indicator and entry line Menu hierarchy Data field designations in & Data fields Drawings to assist measuring operations Bar containing up to 5 touch screen buttons 5.5.4 Touch screen –...
- Page 12 Cancel and return to previous screen. Switch to lower case letters. Switch to numerical keys. Confirm and apply the entry. Move the cursor to the left. Move the cursor to the right. Delete the character to the left of the cursor position. If there is no character to the left, the character at the cursor position will be deleted.
-
Page 13: Adjustment
If the tool cannot be switched on, check that the batteries have been inserted correctly. If the batteries have been inserted correctly and the tool still cannot be switched on, have it checked by Hilti Service. 5.7.2 Switching off Press the on / off button. -
Page 14: Care And Maintenance
Most of the materials from which Hilti tools or appliances are manufactured can be recycled. The materials must be correctly separated before they can be recycled. In many countries, Hilti has already made arrangements for taking back old tools or appliances for recycling. -
Page 15: Manufacturer's Warranty
9 Manufacturer’s warranty Please contact your local Hilti representative if you have questions about the warranty conditions. 10 FCC statement (applicable in US) / IC statement (applicable in Canada) CAUTION tion, which can be determined by turning the equipment on and off, the user is encouraged to try to correct the... - Page 16 Hilti Corporation LI-9494 Schaan Tel.: +423 / 234 21 11 Fax:+423 / 234 29 65 www.hilti.com Hilti = registered trademark of Hilti Corp., Schaan Pos. 1 | 20140811 Printed: 26.09.2014 | Doc-Nr: PUB / 5199516 / 000 / 00...


Need help?
Do you have a question about the POS 15 and is the answer not in the manual?
Questions and answers