Sign In
Upload
Download
Table of Contents
Contents
Add to my manuals
Delete from my manuals
Share
URL of this page:
HTML Link:
Bookmark this page
Add
Manual will be automatically added to "My Manuals"
Print this page
×
Bookmark added
×
Added to my manuals
Manuals
Brands
Barco Manuals
Controller
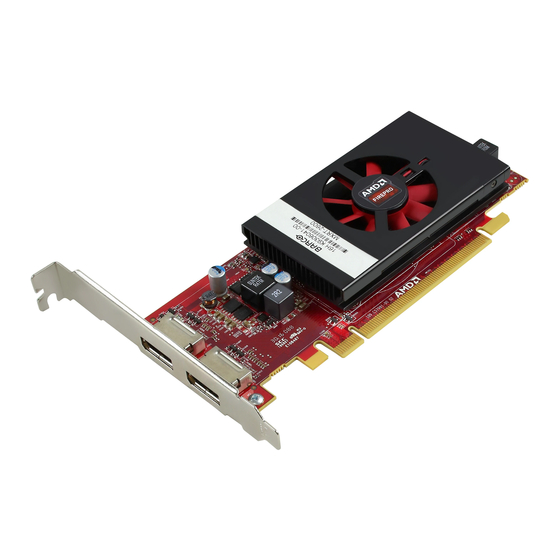
MXRT-1450
User manual
Barco MXRT-1450 User Manual
Display controller
Hide thumbs
Also See for MXRT-1450
:
User manual
(76 pages)
,
User manual
(60 pages)
1
2
Table Of Contents
3
4
5
6
7
8
9
10
11
12
13
14
15
16
17
18
19
20
21
22
23
24
25
26
27
28
29
30
31
32
33
34
35
36
37
38
39
40
41
42
43
44
45
46
47
48
49
50
51
52
53
page
of
53
Go
/
53
Contents
Table of Contents
Bookmarks
Table of Contents
Table of Contents
1 Welcome
About the Product
What's in the Box
2 Display Controller Installation
Which Display Controller
Installing a Barco Display Controller
Installation Procedure
Connecting Your Barco Displays
Dongles
Passive Single-Link Dongle
Active Single-Link Dongle
Active Dual-Link Dongle
Shipping the Barco Display Controller
3 Driver and Software Installation
Introduction
Installation Procedure
Silent Installation
Installation Options
After Installation
Uninstallation
4 Configuring Barco Displays in Windows
Display Resolution
Software Rotation
5 Driver and Software Features
Barco System Settings Control Panel
Description
Operation
Application Appearance Manager
Description
Operation
Configuration
Conference Cloneview
Description
Operation
Configuration
Dimview
Description
Operation
Film Clip
Description
Operation
Configuration
Findcursor
Operation
Configuration
I-Luminate
Description
Reading Environment
Description
Operation
Configuration
Screen Capture
Description
Operation
Configuration
Singleview
Description
Operation
Smartcursor
Description
Operation
Configuration
Softglow
Operation
Configuration
Spotview
Description
Configuration
Touchpad Gestures
Description
Operation
Configuration
Virtualview
Description
Operation
Configuration
6 Important Information
Safety Information
Environmental Information
Regulatory Compliance Information
Explanation of Symbols
Legal Disclaimer
Technical Specifications
Advertisement
Quick Links
1
About the Product
2
Installing a Barco Display Controller
3
Which Display Controller
4
Driver and Software Installation
5
Display Resolution
Download this manual
Display Controller
User Guide
Windows 7, Windows 8.1 and Windows 10
K5905271/11
27/02/2017
Table of
Contents
Previous
Page
Next
Page
1
2
3
4
5
Advertisement
Table of Contents
Need help?
Do you have a question about the MXRT-1450 and is the answer not in the manual?
Ask a question
Questions and answers
Related Manuals for Barco MXRT-1450
PCI Card Barco FirePro 3D Graphics User Manual
Display controller windows xp (76 pages)
Controller Barco MXRT-7600 User Manual
Display controller (60 pages)
Controller Barco MXRT-5400 User Manual
Display controller (53 pages)
Controller Barco MXRT-5450 User Manual
Display controller (53 pages)
Controller Barco VisionTek MXRT-5600 Quick Start Manual
(8 pages)
Controller Barco MXRT-5600 User Manual
Display controller (53 pages)
Controller Barco TransForm A series User Manual
X terminal, video wall controller (198 pages)
Controller Barco Sedomat 600 Specifications
Versatile time/temperature controller (2 pages)
Controller BArco KVD User Manual
Wall control manager (69 pages)
Controller Barco Sedomat 5000 Brochure & Specs
Textile finishing automation - plc integrated (4 pages)
Controller Barco Sedomat 5500 Specifications
Advanced touch screen controller with modular i/o (2 pages)
Controller Barco TransForm A Service Manual
(61 pages)
Controller Barco BarcoMed 2MP2HX Specifications
Display controller for live x-ray image processing (2 pages)
Controller Barco Sedomat 1500 Specifications
Versatile time/temperature controller (2 pages)
Controller Barco Sedomat 1800 Specifications
Cost-effective touch screen controller with internal i/o (2 pages)
Controller Barco EC Series Safety Manual
(102 pages)
This manual is also suitable for:
Mxrt-1451
Mxrt-2600
Mxrt-4500
Mxrt-5400
Mxrt-5450
Mxrt-5550
...
Show all
Mxrt-5500
Mxrt-2400
Mxrt-7400
Mxrt-5600
Mxrt-7500
Mxrt-7600
Mxrt-2500
Table of Contents
Print
Rename the bookmark
Delete bookmark?
Delete from my manuals?
Login
Sign In
OR
Sign in with Facebook
Sign in with Google
Upload manual
Upload from disk
Upload from URL


Need help?
Do you have a question about the MXRT-1450 and is the answer not in the manual?
Questions and answers