
Related Manuals for Barco MXRT-7600


Summary of Contents for Barco MXRT-7600
- Page 1 Display Controller User Guide Windows 7, Windows 8.1 and Windows 10 ENABLING BRIGHT OUTCOMES...
- Page 2 Barco NV Beneluxpark 21, 8500 Kortrijk, Belgium www.barco.com/en/support www.barco.com Registered office: Barco NV President Kennedypark 35, 8500 Kortrijk, Belgium www.barco.com/en/support www.barco.com...
-
Page 3: Table Of Contents
1 Welcome! ..........................................7 About the product....................................8 What's in the box....................................8 2 Display Controller installation .................................9 Which Display Controller ? ................................10 Installing a Barco Display Controller ............................10 Installation procedure ..................................11 Connecting your Barco Displays..............................12 Dongles ........................................13 2.5.1 Passive Single-Link Dongle .............................14 2.5.2... - Page 4 5.4.1 Description..................................32 5.4.2 Operation....................................32 5.4.3 Configuration..................................33 DimView™ ......................................33 5.5.1 Description..................................33 5.5.2 Operation....................................33 5.5.3 Configuration..................................33 Film Clip .........................................33 5.6.1 Description..................................34 5.6.2 Operation....................................34 5.6.3 Configuration..................................34 FindCursor™.......................................34 5.7.1 Description..................................34 5.7.2 Operation....................................35 5.7.3 Configuration..................................35 I-Luminate™ ......................................35 5.8.1 Description..................................35 5.8.2 Operation....................................35 5.8.3 Configuration..................................35 Reading Environment..................................36 5.9.1 Description..................................36 5.9.2...
- Page 5 Environmental information................................46 Regulatory compliance information ............................48 Explanation of symbols..................................49 Legal disclaimer....................................51 Technical specifications.................................51 K5905271 /16 Display Controller...
- Page 6 K5905271 /16 Display Controller...
-
Page 7: Welcome
Welcome! K5905271 /16 Display Controller... -
Page 8: About The Product
Display Controller Thank you for choosing this Barco Display Controller! Barco’s state-of-the-art Display Controllers deliver the performance, quality and stability required for today’s advanced medical imaging applications. The powerful boards ensure ultra-fast and smooth image loading, and graphics processing of images in every resolution. -
Page 9: Display Controller Installation
Display Controller installation K5905271 /16 Display Controller... -
Page 10: Which Display Controller
If you are installing a Barco Display Controller, please follow the installation instructions in this section. Barco displays are compatible with a limited set of non-Barco display controllers. If you are installing a non- Barco display controller, please consult its corresponding documentation. -
Page 11: Installation Procedure
If necessary, unscrew or unfasten and remove any existing display controller(s) from your computer. Locate the appropriate slot and, if necessary, remove the metal back-plate cover(s). Align the Barco Display Controller(s) for your Barco Display System with the slot(s) and press it(them) in firmly until the card(s) is(are) fully seated. -
Page 12: Connecting Your Barco Displays
Display Controller installation Image 2-2: Power connection for the MXRT-7400, MXRT-7500 & MXRT-7600 controllers Screw in or firmly fasten the Display Controller. Replace and secure the computer cover. 2.4 Connecting your Barco Displays For a detailed description of the display installation and signal connection, please refer to the Display User Guide. -
Page 13: Dongles
2.5 Dongles About Barco dongles are designed to allow Barco Display Controllers with a DisplayPort connector to a display with only a DVI input. All current Barco displays support direct DisplayPort connection. If video cable conversion is not required, you may bypass this section. -
Page 14: Passive Single-Link Dongle
The passive Single-Link Dongle converts DisplayPort input signals to single-link DVI output signals. It is compatible with all Barco grayscale displays and up to 2MP color models. For color displays of 3MP and greater resolutions, the Dual-Link Dongle is necessary. - Page 15 Display Controller installation If it is necessary to ship a controller installed in a workstation, the MXRT-7600 requires an extender bracket to protect against shock and vibration. Assemble the extender bracket as shown below. Refer to the workstation user documentation on proper installation to its card guide.
- Page 16 Display Controller installation K5905271 /16 Display Controller...
-
Page 17: Driver And Software Installation
Driver and software installation K5905271 /16 Display Controller... -
Page 18: Introduction
If you have a fresh OS installation, or you have uninstalled an existing driver, the OS may automatically install an inbox driver from the Windows driver store, either an AMD driver or a standard VGA driver, for the Barco Display Controller(s). If this occurs, the OS prompts you to restart your computer, click Yes to allow the automatic driver installation to complete and reboot the system. -
Page 19: Silent Installation
QAWeb (if part of the installation package). Configure silent installation options You can modify the setup. ini file at the Barco root folder to customize certain silent install behavior. The configurable options are listed in the [Custom] section of the setup.ini file. -
Page 20: Installation Options
Driver and software installation 3.4 Installation options Configure installation options You can modify the setup. ini file at the Barco root folder to change the default setting of MXRT driver after either installation or silent installation. Install driver in 24-bit •... -
Page 21: Uninstallation
Image 3-3: Windows 7 Add/Remove Programs Barco System Cleaner The Barco System Cleaner is a tool that will remove all Barco software components from your workstation. This includes the display driver, the accompanying software for supporting Intuitive Workflow features, BMSE, and QAWeb calibration software. - Page 22 Driver and software installation K5905271 /16 Display Controller...
-
Page 23: Configuring Barco Displays In Windows
Configuring Barco displays in Windows K5905271 /16 Display Controller... -
Page 24: Display Resolution
4.1 Display resolution Changing resolutions Click on the Configure Displays button on the Barco System Settings Control Panel or right click on the desktop and select Screen resolution in Windows 7 and 8.1. This will open the Windows Control Panel shown in Image 4-1. -
Page 25: Night Light
Configuring Barco displays in Windows 4.3 Night light Disabling Night light Windows 10 provides a feature to shift the white point of light throughout the day. This is not recommended for diagnostic workstations. It should be disabled by default. if Night light is enabled, follow these steps to disable Right click on the Desktop, and select Display settings in the context menu. - Page 26 Configuring Barco displays in Windows K5905271 /16 Display Controller...
-
Page 27: Driver And Intuitive Workflow Tools
Driver and Intuitive Workflow Tools K5905271 /16 Display Controller... -
Page 28: Barco System Settings Control Panel
Driver and Intuitive Workflow Tools 5.1 Barco System Settings Control Panel 5.1.1 Description Overview The Barco System Settings Control Panel provides a centralized configuration interface for users to personalize their Barco Display System environment. Image 5-1: Barco System Settings Control Panel K5905271 /16... -
Page 29: Operation
Layout of the Barco System Settings Control Panel The Barco System Settings Control Panel consists of 3 sections: the Control Bar at the top, the Navigation pane on the left, and the configuration tiles on the right. The Control Bar shows the current active profile and provides 4 additional buttons. -
Page 30: Application Appearance Manager
5.2.1 Description Overview The high luminance of Barco diagnostic displays may not be necessary when using the displays to view non- diagnostic applications, such as text documents and emails. The Application Appearance Manager (AAM) feature allows the user to set all windows of specific applications to a lower desired luminance, while retaining the full diagnostic luminance for all other applications. -
Page 31: Configuration
This feature is supported on all Barco MXRT display controller systems. 5.3.2 Operation Using 30-bit desktop 30-bit desktop is enabled by default for the standard Barco MXRT driver software package. This is typically compatible will all PACS application software. 5.3.3 Configuration Configuring color depth •... -
Page 32: Conference Cloneview
When the cursor is over to the cloned image, it will change to the Barco cursor. The user can zoom in on the cloned image by rolling the mouse wheel and pan the image with the left mouse button. -
Page 33: Configuration
Driver and Intuitive Workflow Tools 5.4.3 Configuration Configuring Conference CloneView • Add clone configuration: Click this button to define a new clone configuration. • Clone From and Clone To: Click on one or more source displays in the Clone From list and one or more target displays from the Clone To list for the session. -
Page 34: Description
Driver and Intuitive Workflow Tools 5.6.1 Description Overview Film Clip allows the user to view a physical radiological film by using the I-Luminate™ feature of the display as a virtual light box. Image 5-7 Supported display controllers When driven by an MXRT-x400 or later display controller, Film Clip can be enabled on the MDMG-5221 and MDMC-12133 displays. -
Page 35: Operation
Driver and Intuitive Workflow Tools 5.7.2 Operation Using FindCursor To quickly locate the cursor, hold down the hotkey (default: Control +Shift +F). The cursor location will be highlighted by a circle, which appears yellow on color displays and gray on grayscale displays. 5.7.3 Configuration Configuring FindCursor •... -
Page 36: Reading Environment
QAWeb 1.x Agent and the workstation is not connected to the QAWeb 1.x Server, all the controls in this section are available in the Barco System Settings Control Panel. If the workstation is connected to the QAWeb 1.x Server, use the server to set the reading environment. If the display is calibrated by the QAWeb Enterprise Agent, only the white-point chromaticity is calibrated through the Barco System Settings Control Panel. -
Page 37: Screen Capture
Luminance of white: This slider sets the calibration luminance of the display. In some installations with QAWeb, Ambient light condition, SteadyColor calibration, and Luminance of White do not appear in the Barco System Settings Control Panel. These can be configured in QAWeb with an appropriate image quality policy. -
Page 38: Singleview
Click on the hotkey box to enter a new one. 5.12 SmartCursor™ 5.12.1 Description Overview The Barco SmartCursor feature prevents the cursor from becoming stuck on edges of adjacent displays of different sizes. Image 5-13 Supported display controllers SmartCursor is supported by all systems with an MXRT-x400 or later display controller. -
Page 39: Operation
When driven by an MXRT-x400 or later display controller, SoftGlow can be configurated on MDMC-12133, MDCC-6530, and MDCC-4430 displays. 5.13.2 Operation Using SoftGlow The task and wall lights will be set to the SoftGlow settings when the user has logged on to the Barco display system. K5905271 /16 Display Controller... -
Page 40: Configuration
5.14.2 Operation Using SpotView SpotView highlights a region of interest. The region of interest is selected by the use of the Barco Touchpad or by the mouse and a hotkey (default: Control+Shift+X). To control SpotView with the touchpad, hold and move one finger. -
Page 41: Configuration
SpotView Align implements SpotView technology in different shapes to enable alternative uses. The two alternate shapes are a bar and a vee. They are only available through use of the Barco Touchpad, and both allow custom angles specified by the user. -
Page 42: Touchpad Gestures
5.15.1 Description Overview In addition to controlling SpotView, the Barco Touchpad can control the cursor and allows the user to control PACS and other applications with multi-touch gestures and touchpad buttons. The user can program the gestures and buttons to send shortcut keystrokes recognized by the PACS system. -
Page 43: Configuration
These keystroke shortcuts can be used by the active application in Windows. The gesture can send a single keystroke or send the keystroke continuously until the gesture ceases. Some gestures are used by default in Mouse Emulation Mode; those defaults can be overwritten in the Barco System Settings Control Panel. -
Page 44: Operation
Control Panel, select Display, and select Screen Resolution. Or, click on the desktop a select Screen Resolution. The Barco virtual display resolution and location on the Windows desktop can also be changed in the control panel in the same method as normal displays. VirtualView supports a large range of portrait and landscape resolutions. -
Page 45: Important Information
Important information K5905271 /16 Display Controller... -
Page 46: Safety Information
For more information about recycling of this product, please contact your local city office or your municipal waste disposal service. For details, please visit the Barco website at: http://www.barco.com/AboutBarco/weee Turkey RoHS compliance Türkiye Cumhuriyeti: AEEE Yönetmeliğine Uygundur. - Page 47 Mainland, marked with the Environmental Friendly Use Period (EFUP) logo. The number inside the EFUP logo that Barco uses (please refer to the photo) is based on the “General guidelines of environment-friendly use period of electronic information products” of Chinese Mainland.
-
Page 48: Regulatory Compliance Information
The manufacturing country of the product is indicated on the product label (“Made in …”). Importers contact information To find your local importer, contact one of Barco’s regional offices via the contact information provided on our website (www.barco.com). FCC class B This device complies with Part 15 of the FCC Rules. -
Page 49: Explanation Of Symbols
Changes or modifications not expressly approved by the party responsible for compliance could void the user's authority to operate the equipment. FCC responsible: Barco Inc., 3059 Premiere Parkway Suite 400, 30097 Duluth GA, United States, Tel: +1 678 475 8000 6.4 Explanation of symbols... - Page 50 Important information Indicates the DisplayPort connectors on the device Indicates the legal manufacturer Indicates the manufacturing date Indicates the temperature limitations for the device to safely operate within specs Indicates the device serial number Indicates the device part number or catalogue number Warning: dangerous voltage Caution Consult the operating instructions...
-
Page 51: Legal Disclaimer
Barco software products are the property of Barco. They are distributed under copyright by Barco NV or Barco Inc., for use only under the specific terms of a software license agreement between Barco NV or Barco Inc. and the licensee. No other use, duplication, or disclosure of a Barco software product, in any form, is authorized. - Page 52 Important information OpenGL support OpenGL 4.0 OpenCL support OpenCL 1.0 Approvals and compliance FCC Part 15 Class B, CE EN 55022 Limit B, EN 55024, UL-60950-1, BMSI CNS, CISPR- 22/24, IEC609050-1, VCCI, CSA C22.2, EU RoHS directive (2002/95/EC), Certificate of Information & Communication Equipment (Republic of Korea) Operating temperature 0°...
- Page 53 Important information Supported resolutions Up to 6MP color DirectX support Microsoft® DirectX v11.0, Vertex Shader 5.0, Pixel Shader 5.0 OpenGL support OpenGL 4.0 OpenCL support OpenCL 1.0 Approvals and compliance FCC Part 15 Class B, CE EN 55022 Limit B, EN 55024, UL-60950-1, BMSI CNS, CISPR- 22/24, IEC609050-1, VCCI, CSA C22.2, EU RoHS directive (2002/95/EC), Certificate of Information &...
- Page 54 Connectors 1- DVI-I, 2- DisplayPort Connectivity Two DisplayPort to Single-Link DVI-I dongles included DisplayPort to Dual- Link DVI-I dongle available from Barco; Part Number K9305104 Supported resolutions Up to 6MP color and 10MP grayscale DirectX support Microsoft® DirectX v11.0, Vertex Shader 5.0, Pixel Shader 5.0 OpenGL support OpenGL 4.1...
- Page 55 Connectors 1- DVI-I, 2- DisplayPort Connectivity Two DisplayPort to Single-Link DVI-I dongles included DisplayPort to Dual- Link DVI-I dongle available from Barco; Part Number K9305104 Supported resolutions Up to 6MP color and 10MP grayscale DirectX support Microsoft® DirectX v11.0, Vertex Shader 5.0, Pixel Shader 5.0 OpenGL support OpenGL 4.0...
- Page 56 Connectors 1- DVI-I, 2- DisplayPort Connectivity Two DisplayPort to Single-Link DVI-I dongles included DisplayPort to Dual- Link DVI-I dongle available from Barco; Part Number K9305104 Supported resolutions Up to 6MP color and 10MP grayscale DirectX support Microsoft® DirectX v11.1, Vertex Shader 5.0, Pixel Shader 5.0 OpenGL support OpenGL 4.2...
- Page 57 Connectors 1- DVI-I, 2- DisplayPort Connectivity Two DisplayPort to Single-Link DVI-I dongles included DisplayPort to Dual- Link DVI-I dongle available from Barco; Part Number K9305104 Supported resolutions Up to 6MP color and 10MP grayscale DirectX support Microsoft® DirectX v11.0, Vertex Shader 5.0, Pixel Shader 5.0 OpenGL support OpenGL 4.0...
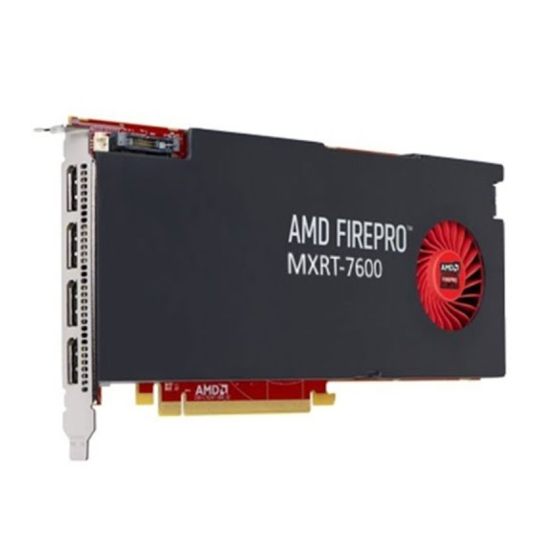
- Page 58 Connectors 4- DisplayPort Connectivity Two DisplayPort to Single-Link DVI-I dongles included DisplayPort to Dual- Link DVI-I dongle available from Barco; Part Number K9305104 Supported resolutions Up to 6MP color and 10MP grayscale DirectX support Microsoft® DirectX v11.1, Vertex Shader 5.0, Pixel Shader 5.0 OpenGL support OpenGL 4.2...
- Page 59 Important information K5905271 /16 Display Controller...
- Page 60 Barco NV President Kennedypark 35 MXRTs 8500 Kortrijk Belgium K5905271 /16 | 2019-08-07 Barco NV | Beneluxpark 21, 8500 Kortrijk, Belgium Registered office: Barco NV | President Kennedypark 35, 8500 Kortrijk, Belgium www.barco.com...
Need help?
Do you have a question about the MXRT-7600 and is the answer not in the manual?
Questions and answers