Table of Contents
Advertisement
Advertisement
Table of Contents

Related Manuals for Sailor C4900


Summary of Contents for Sailor C4900
- Page 1 SAILOR C4900/C4901 Installation Manual...
- Page 2 Products with an annually updated training are ready to provide service 24 The SAILOR COMPACT 2000 GMDSS is based on the well proven hours a day, 365 days a year. range of Sailor products specifically developed to meet the GMDSS...
-
Page 3: Table Of Contents
C4900/01 Installation Contents Installation ................................2 Mounting Possibilities ............................2 Power Supply ............................... 2 Handset Connection - A1 VHF-DSC/Basic VHF ....................3 2.3.1 Connection of Transceiver / Indoor Handset ....................... 3 2.3.2 Connection of Transceiver / WP SPARC-Bus Connection Box / Weatherproof Handset ................. 4 2.3.3 Connection of Transceiver / Indoor and Weatherproof Handset ................. -
Page 4: Installation
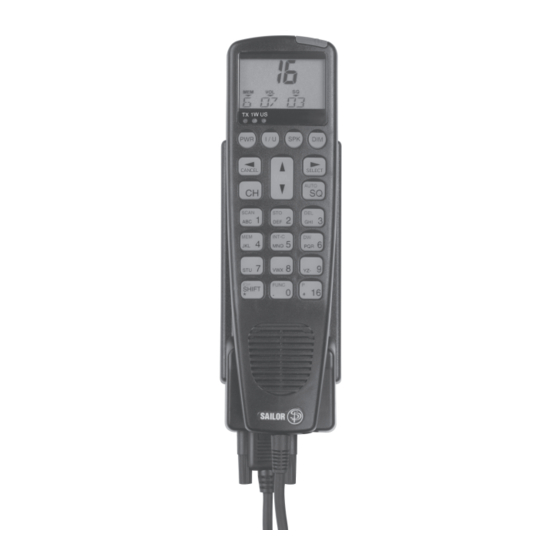
Installation C4900/01 2 Installation Mounting Possibilities Handset Drilling Plan 2 x ø4.5 ø12 for cable entry CALL ALARM 68.5 66.5 13.5 min. 300 4-0-35556 Space for handset access 4-0-36247 Weight: Handset 0.5 kg Power Supply The handset unit is supplied from the SPARC-bus interface with +12V-DC. -
Page 5: Handset Connection - A1 Vhf-Dsc/Basic Vhf
C4900/01 Installation Handset Connection - A1 VHF-DSC/Basic VHF Remote control units can be connected in two ways: 1. Directly between the transceiver and the control unit hooks. 2. By means of a SPARC-bus connection box H4991 or WP SPARC-bus connection box. -
Page 6: Connection Of Transceiver / Wp Sparc-Bus Connection Box / Weatherproof Handset
Installation C4900/01 2.3.2 Connection of Transceiver / WP SPARC-Bus Connection Box / Weatherproof Handset Indoor Outdoor CALL ALARM Transceiver WP SPARC-Bus Connection box 737216 10m cable supplied by the factory When connecting the sub-D plug, it is possible to avoid making a big hole in the bulkhead of the... -
Page 7: Connection Of Transceiver / Indoor And Weatherproof Handset
C4900/01 Installation 2.3.3 Connection of Transceiver / Indoor and Weatherproof Handset If the existing handset hook is the one shown in the drawing below, your weatherproof handset is to be connected as follows. Indoor Outdoor TX 1W US CALL ALARM... -
Page 8: Handset Connection - Vhf-Dsc
Installation C4900/01 Handset Connection - VHF-DSC Remote control units can be connected in two ways: 1. Directly between the transceiver and the control unit hooks. 2. By means of a SPARC-bus connection box H4991 or WP SPARC-bus connection box. Both control units with or without DSC can be connected. -
Page 9: Connection Of Transceiver / Connectionbox H4991 / Indoor And Weatherproof Handset
C4900/01 Installation 2.4.2 Connection of Transceiver / Connectionbox H4991 / Indoor and Weatherproof Handset Indoor Outdoor TX 1W CALL ALARM CALL ALARM TX 1W US CALL ALARM Transceiver 12V DC H4991 SPARC-BUS OPTION HANDSET PRINTER 56.111 L=1.2m 10m cable supplied... -
Page 10: Loudspeaker Connection
Installation C4900/01 Loudspeaker Connection When one or more control units are connected to the VHF system, two of them can be set up to use the transceiver’s two loudspeaker outputs to drive external speakers. To link a loudspeaker to a control unit, enter the function menu and select external speaker: Path: Func\general\sound\loudspeak\norm\alarm\extspk, and set external speaker to be 1 or 2 as desired. -
Page 11: Sparc-Bus Cable
C4900/01 Installation 2.6.1 SPARC-Bus Cable The table below describes the max. length of the SPARC-bus cable for the power supply for one handset unit. The length of the cable depends on the number of supply wires and the wire thickness. The table shows the cable lengths for systems with a supply voltage of +12V. -
Page 12: Installation Of Handset
Installation C4900/01 Installation of Handset VHF system turned off, connect hook and handset to the system according to the above description. When transceiver, SPARC-bus cable and handset hook unit are assembled, connect the handset to the hook by the 15-pole D-sub connector and place the handset on hook. - Page 13 C4900/01 Installation Press SELECT FUNC to change SPARC-bus location number LOC NO 1 Press Use keys FUNC enter/change name of handset. NAME * Press to step one character to the right or select the entered name. After setup enter VHF mode by pushing:...
-
Page 14: System Function Test
Installation C4900/01 ATTENTION: When more control units are connected to the VHF system, they all have to be assigned different location numbers for the system to function correctly. The control unit placed at a ship’s main place of control should be assigned location number 1. - Page 15 C4900/01 Installation Other control units in Handset loc_1: VHF display. sequence: Hook off. 0 08 01 Other control units: OCC display. 1 “NAME” All control units: All control units: VHF display (system idle). Hook on. 0 08 01 Handset (loc_2): Handset loc_2: VHF display.
- Page 16 Installation C4900/01 Handset (loc_1): Handset loc_2: VHF display. Hook on. 0 08 01 Other control units: OCC display. 2 “NAME” Handset (loc_3): Handset loc_2: VHF display. Hook off. 0 08 01 Other control units: OCC display. 2 “NAME” Handset (loc_3): Handset loc_2: VHF display.
-
Page 17: Test Procedure Intercom: (Handset Tx Af Circuits And Handset Audio Amplifier Circuits)
C4900/01 Installation 2.8.2 Test Procedure Intercom: (Handset TX AF Circuits and Handset Audio Amplifier Circuits) If only one control unit is connected, this test is not to be carried out. If more control units are connected, do the following: Test stimuli... - Page 18 Installation C4900/01 Handset (loc_1): Handset (loc_1): INT-C dial display Press PTT and talk. and dialling tone in the handset. CALLING Handset (loc_2): Voice output in speaker and dialling tone in the handset. CALLING Other control units: VHF display. 0 08 01 Handset (loc_2): Handset (loc_1): INT-C display.
-
Page 19: Test Procedure Tx Transmitter: (Handset Tx Af Circuits And Vhf Transmitter)
C4900/01 Installation Handset (loc_2): All control units: VHF display (sys idle). Hook on (all on hook) 0 08 01 2.8.3 Test Procedure TX Transmitter: (Handset TX AF Circuits and VHF Transmitter) When this test is carried out, the transmitter power level has to be 25W indicated by no light in the 1W indicator lamp. - Page 20 Installation C4900/01 Handset (loc_1): Handset (loc_1): VHF display. Press PTT. TX indicator lamp is lit. 8 08 01 Other control units: OCC display. 1 “NAME” Handset (loc_1): Handset (loc_1): VHF display Release PTT. TX indicator lamp turns off. 0 08 01 Other control units: OCC display.
-
Page 21: Test Procedure Vhf Signal Reception: (Vhf Receiver And Handset Rx Af Circuits)
C4900/01 Installation 2.8.4 Test Procedure VHF Signal Reception: (VHF Receiver and Handset RX AF Circuits) For each control unit, do the following: Test stimuli Expected result All handsets placed on hook. All control units: (VHF display) Receiver opens, static noise in all control Set squelch threshold unit speakers. -
Page 22: Test Procedure Tx/Rx Dsc Call
Installation C4900/01 2.8.5 Test Procedure TX/RX DSC Call To test the system’s DSC functionality, enter the function menu and perform two test calls: (INTernal test) and (EXTernal test). Internal test call: (The call is looped back internally, no activation of transmitter or receiver) This test controls the DSC modem in the transceiver RX and TX internally.
Need help?
Do you have a question about the C4900 and is the answer not in the manual?
Questions and answers