Table of Contents
Advertisement
Advertisement
Table of Contents

Related Manuals for VTL TP2.5


Summary of Contents for VTL TP2.5
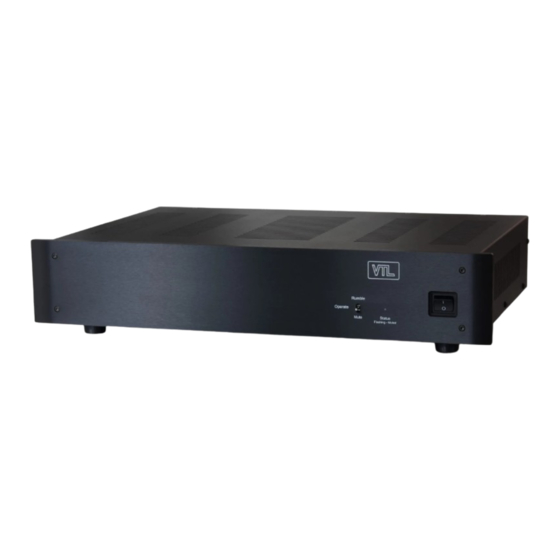
- Page 1 TP2.5 Phono Preamplifier Owner’ s Manual...
- Page 2 VTL. Version History: Version 2.0 September 21, 2012 Part Number: OM-0495 Copyright © 2012 by VTL Amplifiers Inc. All rights reserved. 4774 Murrieta Street, Suite 10 Chino, CA 91710, USA Phone 909.627.5944 • Fax 909.627.6988 email: mail@vtl.com • http://www.vtl.com/...
-
Page 4: Table Of Contents
............13 ARE AND AINTENANCE OF YOUR PREAMPLIFIER ........................13 REAK ERIOD Changing Tubes ........................13 Changing the Main Fuse......................15 Cleaning..........................16 Troubleshooting ........................16 CHAPTER 5 ..........................18 ........................18 PECIFICATIONS CHAPTER 6 ..........................19 ..........................19 ARRANTY APPENDIX ..........................21 Warranty Registration......................21 Service Notes........................21 TP2.5 Preamplifier Owner’s Manual... -
Page 6: Chapter 1
The VTL team is proud that you have selected our TP2.5 phono preamplifier as a new member of your home audio system. This preamplifier is designed to give you the... -
Page 7: Water And Moisture
In all cases this preamplifier should only be installed in a location that is stable, as warranty does not cover damage due to the unit falling. TP2.5 Preamplifier Owner’s Manual... -
Page 8: Servicing
Servicing Do not attempt to service the TP-2.5 beyond the procedures described in this manual. For all other service and questions, please contact your authorized VTL dealer or the factory. Operational Warnings It is critical for proper sonic performance of this component that it be properly configured for the mode of operation while playing. -
Page 9: Chapter 2
There should be no rattles inside the preamplifier. Look through the vent slots and check to see that the tubes appear properly seated firmly in their sockets. Contact your VTL dealer immediately if physical damage is detected. -
Page 10: The Preamplifier's Back Panel
Make sure that the Connect the turntable to the TP2.5 preamplifier. preamplifier and the turntable is powered off. Connect the output cable from the turntable to either the MM or MC Input connectors of the TP2.5 preamplifier, TP2.5 Preamplifier Owner’s Manual... - Page 11 Make sure that the left and right output channels from the TP2.5 are connected to the left and right input channels of your line stage preamplifier. If you are using the VTL TP2.5 preamplifier, you can connect the outputs from the TP2.5 to the Phono/Aux inputs of the TP2.5.
-
Page 12: Powering The System Off
6. Put on your favorite record and get ready for some good music. 7. Change the TP2.5 to its operating mode if it is in mute and adjust the volume on your line stage or integrated amplifier to the appropriate playing level. -
Page 13: Chapter 3
TP2.5 Internal Jumpers for MC/MM Selection Remove the top cover of the TP2.5: Your must turn off the TP2.5 preamplifier and remove the power cord. Use a #2 Phillips screw driver and remove the 6 screws on the top and 3 screws on each side of the preamplifier. - Page 14 Locate the jumpers L MC SEL (J101) and R MC SEL (J201:) These are two small black jumpers located on the TP2.5 PC board on the left hand side of the board marked JP101 and JP201. To set the preamplifier for MM cartridges, lift the black pin jumper and connect the jumper a single pin of the header.
- Page 15 Locate the jumpers L MC SEL (J101) and R MC SEL (J201:) There are two small black jumpers located on the TP2.5 PC board on the left hand side of the board marked JP101 and JP201. To set the preamplifier for MC cartridges, connect the jumpers across both pins of the headers.
- Page 16 7. Enhanced and standard RIAA Locate the Enhanced RIAA jumpers on the PC board in the locations R ENH RIAA and L ENH RIAA. Place the jumper across both pins of this header to select standard RIAA. TP2.5 Preamplifier Owner’s Manual...
- Page 17 9. Default Settings Prior to shipping the TP2.5 Preamplifier, the following default settings are configured in the preamplifier at the VTL factory unless your dealer has asked specific settings to match with your cartridge. MC Selected MC Gain – 62 dB MC Load –...
-
Page 18: Chapter 4
We recommend a complete replacement of all tubes in your preamplifier at that time, which will restore it to a “like new” sound quality. Your VTL dealer or VTL factory service department will be happy to assist you with the re-tubing process. - Page 19 NOT be covered under the warranty. Be sure to understand these constraints before going any further. If at this stage you feel that you would rather not attempt this procedure yourself you can take the unit to your VTL Authorized Dealer to have the work done.
-
Page 20: Changing The Main Fuse
To change the fuse, make sure the unit is powered off. Disconnect the AC power cord from the unit. Move the preamplifier so that you can work with the panel in the back. Locate the mains fuse holder and use a flat blade screw driver to TP2.5 Preamplifier Owner’s Manual... -
Page 21: Cleaning
AC ground in your system for optimum noise reduction and safest operation. If however there are too many paths to ground then a ground loop hum can result, and you should either contact your dealer or the VTL factory to try to resolve this problem. - Page 22 One or more of the tubes in the preamplifier may be the source of the problem. Follow the procedures listed in this manual to remove the tubes and change them for new ones. TP2.5 Preamplifier Owner’s Manual...
-
Page 23: Chapter 5
Primary Mains Fuse Rating 1A Slo Blo Ceramic (120Volt AC) .41 A Slo Blo Ceramic (240 Volt AC) Dimensions 19” wide x 15” deep x 4” high 48.25 x 35.5 x 9.5 cm Weight 25 lbs (11.34 Kg) packed TP2.5 Preamplifier Owner’s Manual... -
Page 24: Chapter 6
This must be shipped to VTL Amplifiers Inc via insured freight at the customer's own expense. Charges for unauthorized service and transportation costs... - Page 25 USA may not be registered for warranty with the factory in the USA, but may only be registered with the VTL distributor in the country of purchase. In the case of returns from outside the USA, the owner of the product returned is...
-
Page 26: Appendix
A P P E N D I X Warranty Registration Warranty registration for VTL products is valid in the USA only. International VTL customers should consult their local VTL dealer regarding product registration and warranty procedures. To obtain valid US warranty service, please fill out the enclosed VTL Warranty...
Need help?
Do you have a question about the TP2.5 and is the answer not in the manual?
Questions and answers