Table of Contents
Advertisement
Quick Links
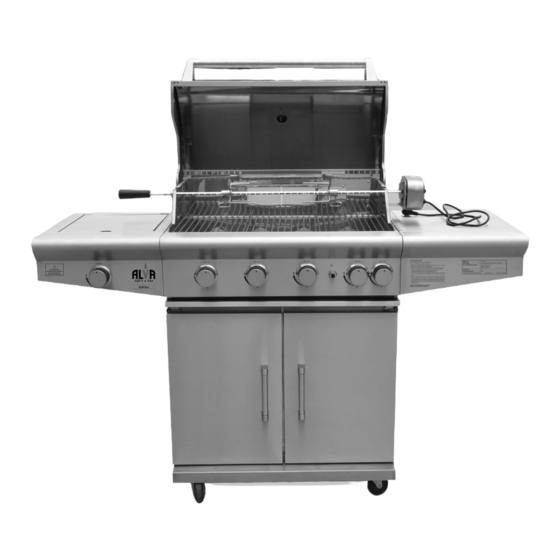
SPHINX GAS BBQ
•
THIS IS A LOW PRESSURE APPLIANCE TO BE USED
ONLY WITH A 2.8kPa SANS 1237 APPROVED REGULATOR
(REGULATOR FITTED AND SUPPLIED)
•
FOR YOUR OWN SAFETY, PLEASE READ THIS MANUAL
CAREFULLY AND ALWAYS OPERATE THIS PRODUCT
ACCORDING TO THE INSTRUCTIONS
•
IT IS ILLEGAL AND DANGEROUS TO CHANGE OR MODIFY
ANY PART OF THIS APPLIANCE
Manufactured for
and Distributed by:
4 BURNER BBQ WITH SIDE AND REAR BURNER
WITH FULL 430 GRADE (18/0) STAINLESS STEEL CONSTRUCTION
ALVA Marketing (Pty) Ltd
|
P.O. Box 30014, Tokai, 7966
TOLL FREE NUMBER: 086 100 ALVA (2582)
APPROVED FOR USE IN
SOUTH AFRICA
|
+27 21 442 1540
|
info@stingray.co.za
|
www.alva.co.za
Advertisement
Table of Contents

Subscribe to Our Youtube Channel
Related Manuals for Alva SPHINX


Summary of Contents for Alva SPHINX
- Page 1 • FOR YOUR OWN SAFETY, PLEASE READ THIS MANUAL CAREFULLY AND ALWAYS OPERATE THIS PRODUCT ACCORDING TO THE INSTRUCTIONS APPROVED FOR USE IN • IT IS ILLEGAL AND DANGEROUS TO CHANGE OR MODIFY SOUTH AFRICA ANY PART OF THIS APPLIANCE Manufactured for ALVA Marketing (Pty) Ltd P.O. Box 30014, Tokai, 7966 +27 21 442 1540 info@stingray.co.za www.alva.co.za TOLL FREE NUMBER: 086 100 ALVA (2582) and Distributed by:...
- Page 3 IMPORTANT SAFETY INFORMATION • The operator is responsible for the safety of all third parties while the appliance is in use. As with all gas • The manufacturer’s warranty will be voided by incorrect use of appliances, misuse this product. of this appliance or • If you have any queries regarding these instructions, contact failure to fully follow your local dealer for clarification before you use your Gas these instructions may • The unit must be correctly installed before use. cause fire, injury or death. • DO NOT use indoors. The Gas is designed for OUTDOOR USE ONLY. •...
-
Page 4: Table Of Contents
Important information CONNECTING THE GAS HOSE TO THE BBQ FIXING THE REGULATOR TO THE CYLINDER ASSEMBLY OF SIDE TABLES FIXING THE REGULATOR TO THE CYLINDER LIGHTING YOUR GAS BBQ MANUAL IGNITION Cautions and LEFT SIDE BURNER IGNITION warnings. REAR BURNER IGNITION REAR BURNER MANUAL IGNITION ROASTING HOOD COOKING ! VERY IMPORTANT! FLARE UP CONTROL FLASHBACK (FLAME IN BURNER TUBE) END OF COOKING OPERATION Danger GAS CYLINDER FITTING THE GAS CYLINDER TO THE APPLIANCE REGULATOR AND HOSE STORAGE LEAK TEST Contact an approved CLEANING AND CARE ALVA technician. WARNING FREQUENTLY ASKED QUESTIONS SPECIFICATIONS AFTER SALES SERVICE SOME GREAT RECIPE IDEAS DESSERT ANYONE? Do It Yourself Tasty Tips... -
Page 5: Warranty
DO NOT move the Gas BBQ while in operation. GENERAL INFORMATION The Gas BBQ and cylinder must be Before using this Gas BBQ, please read through this manual and placed on a level make sure you understand everything. If you are not sure, call surface. 086 100 ALVA (2582) or visit www.alva.co.za for help. This Gas BBQ is a safe and efficient appliance when used according to these instructions. Reading and understanding this manual should give you a good indication of what to expect from your Gas BBQ. If this product is not what you want or need, please help Alva and the environ- ment by not damaging or destroying any part of the packaging. Always keep your proof of purchase. Keep these instructions for future use. If you lose this copy, you can obtain a new copy from your dealer or online at www.alva.co.za. -
Page 6: Use And Characteristics
USE AND CHARACTERISTICS This BBQ is safe and easy to use. The specified gas for this BBQ is LPG. Please ensure you only use your BBQ with a 2.8kPa approved regulator. Regulator and hose supplied. Food can be barbequed on the cooking grid either with or without the hood being closed. When the hood has been closed for 5 minutes, the hood must be opened for at least 1 minute to release heat. The grease tray is fitted below the burners. Please clean the grease tray regularly. (See page 14) Adequate ventilation is vital for combustion and efficiency performance of the BBQ. This will ensure the safety of the user and other people in the vicinity of the BBQ being used. Never use the BBQ in any enclosed covered area. INSTALLATION SELECTING A LOCATION This BBQ is for outdoor use only and should be placed in a Failure to follow these well-ventilated area. This appliance consumes oxygen and it is instructions may result dangerous for the health and safety of the occupants to use this in serious bodily injury appliance in areas not properly ventilated. Take care to ensure and/or property that it is not placed near or under any combustible surface. damage. The sides of the BBQ should not be closer than 1m to any combustible surface. Keep this BBQ away from flammable Never use Natural Gas in a unit designed for... -
Page 7: Connecting The Gas Hose To The Bbq
Always inspect the hose for cuts, cracks, or excessive wear before use. If the hose is damaged, it must be replaced with a hose suitable for use with LPG and which meets the national standards for the country of use (South Africa: SANS 1156-2 or BS3212). The length of the hose shall not exceed 1,5m. CONNECTING THE GAS HOSE TO THE BBQ Connect the gas hose to the gas manifold inlet on the BBQ. Do not overtighten. Do not use any sealing tape or liquid on the connection. FIXING THE REGULATOR TO THE CYLINDER Ensure that all the BBQ control knobs are in the OFF position. Connect the regulator to the gas cylinder according to your regulator and cylinder dealer’s instructions. Always check that the bullnose seal on the regulator is in place and in good condition before connecting the regulator to the cylinder. Perform this check every time a cylinder is connected or changed. Always make sure that the thread is fully engaged and properly tightened. Please note that the thread on the regulator is a LEFT HAND thread and must be turned in an ANTI-CLOCKWISE direction to tighten it when facing the cylinder valve. ASSEMBLY OF SIDE TABLES The hood, body, storage cabinet, main burners, back burner, side burners are all pre-assembled and do not need to be adjusted. The left and right side panels are separated from the body for shipping. The gas control panel for the side burners and main burners are separate, and require assembly. Please use washers and bolts to connect the left and right panels to the body of the barbecue... -
Page 8: Fixing The Regulator To The Cylinder
Use gas pipe C and A & B to connect the main burners and side burner. Line up the holes in the side table assembly with the holes of burner assembly. Place 5 screws (M6x12) in holes of the side table and fully tighten. Connect the side burner’s hose assembly to the main valve assembly. Once you have installed the BBQ, you must check for gas leaks before using the BBQ (for detailed steps on testing, please refer to “leak testing” below). Once you have connected all the parts according to the above instructions, please check if there are any parts that have not been used. If so please repeat the above instructions – there are no spare parts supplied. Before using, please remove the foam and plastic packing material. Please also clean your BBQ. FIXING THE REGULATOR TO THE CYLINDER Ensure that all the BBQ control knobs are in the OFF position. Connect the regulator to the gas cylinder according to your regulator and cylinder dealer’s instructions. Always check that the bullnose seal on the regulator is in place and in good condition before connecting the regulator to the cylinder. Perform this check every time a cylinder is connected or changed. Always make sure that the thread is fully engaged and properly tightened. Please note that the thread on the regulator is a LEFT HAND thread and must be turned in an ANTI-CLOCKWISE direction to tighten it when facing the cylinder valve. Bullnose seal... -
Page 9: Lighting Your Gas Bbq
LIGHTING YOUR GAS BBQ Before proceeding make certain that you The lid must be open when lighting the burners. understand the IMPORTANT Depress any/or required knobs and turn anti-clockwise. You will INFORMATION hear an audible "click", which will ignite the powerful pilot flame. section of this manual Keep the knob depressed until the burner is alight. Release and turn the control knob anti-clockwise for the desired setting. Follow the same procedure as above to ignite the other burners. If for some reason the burner(s) does not ignite, refer to If any burner fails to the Manual Ignition instructions that follow. ignite, turn the control knob off (clockwise) After use, first turn off the gas control valve at the cylinder and and also turn the then turn ALL control knobs to the OFF position. The lid must be cylinder valve off. -
Page 10: Rear Burner Ignition
6. When the burner has lit, the burner rate can be adjusted by turning the knob anticlockwise to any position between the full and low rate positions. 7. To turn the burner ‘OFF’. If the side burner is no longer required, or if you have finished cooking, please turn the cylinder valve and regulator switch to the ‘OFF’ position and then turn all the control knobs on the appliance clockwise to the ‘OFF’ position. REAR BURNER IGNITION 1. Before using the back burner, please assemble the rotisserie and motor and remove the warming rack. The warming rack must always be removed when lighting the back burner. 2. Turn knob ‘A’ to maximum then depress and hold for 10 seconds. Then push ignition button 'B' to ignite the pilot flame. Once the pilot flame is alight, keep knob depressed for another 10 seconds to allow the flame safe valve to open and light the rear ceramic panel. Turn to desired setting. The rear burner is not to be used at the same time as the bbq burners. An “AAA” battery is required for the electronic ignition of the back burner system. After use, first turn OFF the gas control valve at the cylinder and then turn ALL control knobs to the OFF position. -
Page 11: Rear Burner Manual Ignition
REAR BURNER MANUAL IGNITION 1. Open the gas control valve at the cylinder 2. Remove grids. The burners will be visible. FIRST strike a match and hold approximately 40 mm away from the RIGHT HAND burner, then push and turn the rightmost control knob anti-clockwise to the HIGH position. 3. If the burner fails to ignite after 5 seconds, turn to the OFF position and wait 2 minutes. Then begin again from Step 2. If the burner still fails to light after several attempts, call your local dealer for service. 4. After use, first turn OFF the gas control valve at the cylinder and then turn ALL control knobs to the OFF position. ROASTING HOOD COOKING! VERY IMPORTANT! Gas BBQ's equipped with a roasting hood give the option of cooking with the hood closed to form an ‘oven’ for roasting food, such as joints of meat, whole chickens, etc. When the hood is closed, a large amount of heat is trapped inside the Gas BBQ. Thus, it is important to make sure that the burner is turned to the low position to prevent burning of the food and damaging the Gas BBQ. Avoid lifting the hood unnecessarily as heat will be lost every time the hood is opened. FLARE UP CONTROL Flare-ups occur when meat is barbecuing on the grill and the juices fall on the hot vaporiser/flame tamer plate and vaporise. The smoke from some flare-up helps to give the meat its BBQ flavour, but excessive flare-up will result in the meat being burned and becoming bitter. To control excessive flare-up, it is advisable to trim excessive fat from meat and poultry before grilling; to control it further, the burners can be turned to the low setting. -
Page 12: Flashback (Flame In Burner Tube)
If problem persists do not try to rectify the problem yourself as this could result in serious injury and/or property damage. Store the appliance in a clean and dry environment. Do not store your gas cylinder indoors. Store in a well ventilated area away from direct sunlight or an electrical source. Light the burners in the same method, in order from left right. The burner will cross-ignite from the burner to it’s left. Adjust to the required heat setting. END OF COOKING OPERATION After each cooking session, turn the BBQ burners to the HIGH position and burn for 5 minutes. This procedure will burn off cooking residue, thus making cleaning easier. The hood must be open during this procedure. Turning off your BBQ. When you have finished using your BBQ, turn off the gas at the cylinder valve, and then ensure that all the control valves are turned to the OFF position in sequence starting from the left hand and moving to the right hand side of the unit. Wait until the BBQ is sufficiently cool before closing it’s hood or lid. GAS CYLINDER A 9kg ALVA gas cylinder with a 5/8 inch BSP left hand thread is recommended. This will match the supplied regulator. Cylinders must be stored in an upright position, in a well ventilated and damp free area and out of reach of children. The cylinder must never be stored where temperatures can reach or exceed 50’C. Do not store the cylinder near open flames, pilot lights or any other sources of ignition. DO NOT SMOKE WHILE HANDLING THE CYLINDER. -
Page 13: Fitting The Gas Cylinder To The Appliance
FITTING THE GAS CYLINDER TO THE APPLIANCE This appliance is only suitable for use with LPG. This appliance is fitted with a 2.8kPa low pressure regulator. BEFORE USE PLEASE CHECK FOR LEAKS Never check for leaks with a naked flame, always use a soapy water solution. 1. Ensure the gas cylinder is turned off, 2. Open the cabinet doors. 3. Load the cylinder into the cabinet 4. Connect the regulator to the cylinder 5. Check all the connections for gas leakage (see Leak Test on following page) REGULATOR AND HOSE Use only regulators and hose approved for LPG in accordance to the South African National Standards. The use of the wrong regulator or hose is unsafe; always check that you have the correct items before operating the barbecue. The length of the hose must be 1.5 meters (maximum). Worn or damaged hose must be replaced. Ensure that the hose is not ob- structed, kinked, or in contact with any part of the barbecue other than at its connection. The hose should not be twisted or kinked when attached to the gas cylinder. No part of the hose should touch any part of the appliance. STORAGE FIXINGS Annual checking and tightening of metal fixings is recommended. -
Page 14: Leak Test
• Tighten the connection and retry the leak test. • If you are unsure or if you cannot tighten the connection, place the cylinder outside in a How to do cool, well-ventilated area and a leak test contact Alva on 086 100 ALVA (2582). Connections to be leak tested • A leak between the regulator Regulator into cylinder Hose to regulator and cylinder can lead to a high Hose to appliance pressure fire, which is very dangerous and can result in http://www. -
Page 15: Cleaning And Care
CLEANING AND CARE As with all appliances, proper care and maintenance will keep All cleaning and them in top operating condition and prolong their life. Your new maintenance should gas BBQ is no exception. By following these cleaning procedures be carried out when on a regular basis, your BBQ will remain clean and in good the BBQ is cool and working order with the minimum of effort. with the gas supply turned OFF at the gas cylinder. BEWARE OF SPIDERS AND WASPS. BURNER TUBES SHOULD BE INSPECTED AND CLEANED PERIODICALLY! Never attempt to Spiders and small insects occasionally spin webs or make nests operate your barbecue without the burner in the burner tubes during warehousing and transit. These webs tube being correctly... - Page 16 3. Inspect the burner assembly for any opening caused by cor- rosion. 4. If any openings due to corrosion are found, replace the burner. 5. Replace the burner and spring as described in the assembly instructions. 6. Check the burner for proper location/seating after replacement. 7. Ensure that the valve orifices are inside the burner tube. CLEANING THE GRIDS After cooking, turn the burner control to “OFF” and let the BBQ cool before attempting to clean your grill plates. Before first use - as well as periodically - we suggest that you wash the grids in a mild soap and warm water solution. You can use a wash cloth, a vegetable brush, or non-metallic scouring pad to clean your grids. CLEANING THE FLAME TAMER Washing the flame tamers after every use is not necessary but we suggest that you frequently wash the flame tamer in a soap and warm water solution. Use a non-metallic brush/scourer to remove stubborn burnt-on cooking residue. Dry the flame tamer thoroughly before you reinstall it in the cooking body. CLEANING THE DRIP TRAY The drip tray should be emptied and wiped down periodically and washed in a mild detergent and warm water solution. A level layer of clean dry sand should be placed in the bottom of the sand tray to absorb the grease. Lining the tray with aluminium foil before use will aid in cleaning.
- Page 17 ANNUAL CLEANING OF BBQ HOUSING Burning-off the grill after cooking will keep it ready for instant use, however, once a year you should give the entire BBQ a thorough cleaning to keep it in top operating condition. 1. Turn the burner controls to the “OFF” position. 2. Turn the cylinder valve off fully. 3. Detach the regulator assembly from cylinder valve by turn- ing the quick coupling nut. 4. Remove and clean (as explained above) the grids, flame tamer and burners. 5. Cover the gas valve orifices with aluminium foil. 6. Brush the inside and bottom of the BBQ with a cleaning brush, and wash down with a mild soap and warm water solution. Rinse thoroughly and let dry. 7. Remove aluminium foil from orifices and check orifices for obstruction. 8. Check spark electrode, adjusting it as instructed. Electrode tip pointing toward the tip of gas collector and approximately 5 mm from the tip of collector box. 9. Replace burners. Adjust spark electrode collector box. 10. Replace flame tamer, grids and warming rack. 11. Re-connect to gas supply. VISUALLY CHECKING BURNER FLAMES Occasionally observe burner flame for correct operation. See diagram below. STAINLESS STEEL CARE In order to preserve the stainless steel on your BBQ, we suggest applying a thin film of baby oil to the...
-
Page 18: Warning
WARNING • The appliance is designed for outdoor use only. • WARNING! Accessible parts may be very hot. Keep young children away. • Read the instructions before using the appliance. For use outdoors only • Do not move the appliance while in use. and in well ventilated • Turn off the appliance at the cylinder valve after use. areas • The Gas BBQ must not have any overhead obstructions e.g. trees, shrubs and lean to roofs. WARNING: Accessible • The Gas BBQ must be used with a clearance of 1m. parts may be very hot, • The Gas BBQ must not be used near flammable materi- keep young children als (petroleum based products, thinners or any other solid away object that carries a flammable warning label). -
Page 19: Specifications
SPECIFICATIONS Model G545 Description 4 Burner gas BBQ with side and back burner Gas Consumption at max 1165gr/hr (main burner) 182gr/hr (side burner) 219gr/hr (rear burner) Type of Gas Operating pressure 2.8kPa FOR USE OUTDOORS ONLY AND IN WELL VENTILATED AREAS. TO BE USED WITH A 2.8kPa SANS 1237 APPROVED REGULATOR WITH A MINIMUM DELIVERY CAPACITY OF 1kg/h WITH A SANS 1156-2 OR B53212-2 APPROVED HOSE. REGULATOR AND HOSE SUPPLIED. WARNING: ACCESSIBLE PARTS MAY BE VERY HOT. KEEP YOUNG CHILDREN AWAY. READ THE INSTRUCTION LITERATURE BEFORE USING THE APPLIANCE. DO NOT MOVE THE APPLIANCE WHILE IN USE. AFTER SALES SERVICE MANUFACTURED AND DISTRIBUTED BY Alva Marketing (Pty) Ltd P.O. Box 30014 Tokai, 7966 Tel: 021 442 1540 E-mail: info@stingray.co.za www.alva.co.za @StingrayGroupSA www.facebook.com/AlvaGas TOLL FREE NUMBER 086 100 ALVA (2582) -
Page 20: Some Great Recipe Ideas
SOME GREAT RECIPE IDEAS NEVER FAIL BBQ SAUCE 2Tbsp Butter or Margarine 1 Clove Garlic (Finely Chopped) ¼ cup Finely Chopped onion 1 cup Tomato Juice ½ tsp Ground Ginger ¼ cup Lemon Juice 1 tsp Prepared mustard 1 Tbsp Worcestershire sauce ¼... - Page 21 BARBEQUED HONEY STEAK Beef sirloin steak Garlic Cloves, crushed 2 Tbsp Red pepper, crushed Large onion, chopped 1 tsp Black pepper 1 cup Honey Method: Combine all ingredients well and marinate the steak for 7-8 hours. Remove the steak from the marinade and grill over a very high heat until cooked as desired. Bring the left over marinade to the boil and pour over the grilled steak. GRILLED VEGGIES ¾ cup Olive oil 1 tsp Fresh Oregano, chopped ¼...
- Page 22 GRILLED BOEREWORS/SAUSAGE Boerewors (as much as desired) Prepare the Olive oil boerewors/sausage with the BBQ hood open. Method: Brush the boerewors/sausage and grill lightly with Olive oil. Preheat the grill. Turn the heat down to low and place the boerewors/sausage on the grill. Grill on one side for ±5 minutes, before turning over and leaving for another ±5 minutes.Cooking times will vary depending on the thickness of the boerewors/sausage. GRILLED RUMP STEAK Rump Steaks (Each ±20mm thick) Olive oil Seasoning of choice Method: Brush the rump steaks with olive oil. Leave the steaks out of the refrigerator for 3-4 hours, to reach room temperature.
- Page 23 PRAWNS A LA ALVA King or Tiger prawns, unpeeled Garlic Cloves, crushed 100ml Olive oil 1 Tbsp Fresh Sage, chopped 100ml Basil oil Salt 20 drops Tobasco Sauce Method: Combine all the ingredients, except the prawns, to create a marinade. Marinade the unpeeled prawns for several hours in advance. Grill the marinated prawns till they turn pink and their tails curl. RIB EYE STEAKS WITH GRILLED VEGETABLES AND OLIVE...
-
Page 24: Dessert Anyone
DESSERT ANYONE? CINNAMON APPLES Medium tart apples, cored 4 tsp Cinnamon 4 tsp Brown sugar For a little something Vanilla ice-cream or custard (optional) extra, add chopped nuts and raisins as well as the sugar and cinnamon mix to the foil parcel before grilling. - Page 25 MEXICAN SMORES ½ cup Creamy Peanut butter Try using a mix of ½ cup Semi-sweet chocolate chips semi-sweet chocolate Flour tortillas (20cm) chips and broken chilli cup Miniature marshmallows chocolate for a little Vanilla ice-cream more spice. Method: Spread 2 tablespoons of peanut butter on each tortilla. Sprinkle a ¼ marshmallows and 2 tablespoons chocolate chips on half of each tortilla. Roll each tortilla up, beginning with the topping side. Wrap each rolled tortilla in heavy duty foil and seal tightly.
Need help?
Do you have a question about the SPHINX and is the answer not in the manual?
Questions and answers