
Related Manuals for Celsius Viper


Summary of Contents for Celsius Viper
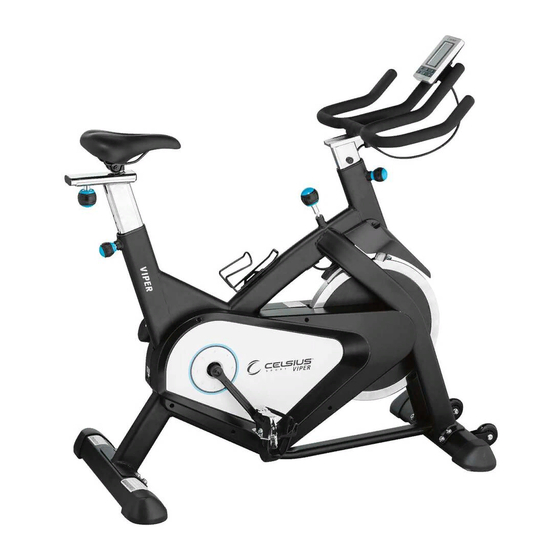
- Page 1 CELSIUS VIPER INDOOR CYCLE IMPORTANT: Read all instructions carefully before using this product. Retain this product owner's manual for future reference.
-
Page 2: Table Of Contents
CONTENTS page 3-4 SAFETY PRECAUTIONS page 5 ASSEMBLY PACK page 6 EXPLODED DRAWING page 7 COMPLETE BIKE ASSEMBLY page 8-11 PARTS LIST page 12-15 ASSEMBLY INSTRUCTION page 16 LCD POWER GENERATING page 17-20 MONITOR INSTRUCTION page 21 FIRST TIME USER INSTRUCTION page 22 ADJUSTMENT OF THE BIKE page 23... -
Page 3: Safety Precautions
SAFETY PRECAUTIONS IMPORTANT SAFETY INSTRUCTIONS READ ALL INSTRUCTIONS BEFORE USING THIS EXERCISE EQUIPMENT. 1. Close supervision is necessary at all times whenever the equipment is used. A serious injury could result from the moving components of the exercise system. 2. Keep your hands away from all moving parts and keep your feet on the pedals while exercising. - Page 4 GUIDE LINES FOR SAFE OPERATION WARNING THESE GUIDELINES ARE DIRECTED TO YOU, AS THE OWNER OF THIS EXERCISE EQUIPMENT. YOU SHOULD INSIST THAT ALL USERS FOLLOW THE SAME GUIDELINES. YOU SHOULD MAKE THIS MANUAL AVAILABLE TO ALL USERS. 1. Obtain a complete physical examination from your medical doctor and enlist a health/fitness professional’s aid in developing an exercise program suitable for your current health status.
-
Page 5: Assembly Pack
ASSEMBLY PACK CHB-CES200... -
Page 6: Exploded Drawing
EXPLODED DRAWING... -
Page 7: Complete Bike Assembly
COMPLETE BIKE ASSEMBLY... -
Page 8: Parts List
PARTS LIST PART NO. DESCRIPTION Computer 1PCS Screw 4PCS Handlebar post 1PCS Sleeve 1PCS Screw 1PCS Handlebar 1PCS Cable 1PCS End cap 1PCS End cap 1PCS screw 1PCS Hardware kit 1SET Flat washer 8PCS Allen Bolt 8PCS Allen Key 1PCS Screwdriver 1PCS Box Spanner... - Page 9 PART NO. DESCRIPTION E-11 2PCS E-12 Star washer 2PCS E-13 Belt 1PCS E-14 Screw 3PCS Main frame accessory Set 1SET 2PCS Left crank 1PCS Left chain cover 1PCS Screw 6PCS Screw 4PCS Left front chain cover 1PCS Right front chain cover 1PCS 1PCS Bearing...
- Page 10 PART NO. DESCRIPTION G-19 Servo motor set 1PCS G-20 1PCS Adjustable shaft of servo motor Rear stabilizer set 1SET Rear stabilizer 1PCS Left cap of rear stabilizer 1PCS Right cap of rear stabilizer 1PCS Adjustable feet of stabilizer 2PCS Magnetic set 1SET Screw 2PCS...
- Page 11 PART NO. DESCRIPTION Idler wheel 1PCS Idler axle 1PCS Flat washer 1PCS Spring washer 1PCS Screw 1PCS Adaptor 1PCS...
- Page 12 ASSEMBLY AND SET UP STEP 1 1. Attach the front stabilizer (D-5) to the main frame (G) using four flat washers (C-1) and Allen bolts (C-2). 2. Attach the rear stabilizer (H-1) to the main frame (G) using four flat washers (C-1) and Allen bolts (C-2) After assembly, the bike can be adjusted to slightly uneven ground by adjusting the height of the foot caps at the rear stabilizer .
- Page 13 Remarks: When you have chosen a desired position, tighten the Seat Post Knob STEP 3 3.1 : Release the screw from the end cap(B-6) and take off the sleeve from the handlebar post but do not take the sleeve off the lower cable. 3.2 : Insert the handlebar post (B ) into the main frame (G), then choose the desired position and tighten the adjusting knob.
- Page 15 PROGRAMMING FUNCTIONS PROGRAMMING MODE All program selections will be flashing. Selections are MANUAL, PROGRAM, USER, H.R.C Turning the UP and DOWN until the program you want is flashing, press MODE. MANUAL MODE. Press START in main menu may start workout in manual mode. 1.
- Page 16 F1 -SUPER FIT F2 – VERY FIT F3 – FIT F4 – FAIR F5 – UNFIT F6 – VERY UNFIT Press the RECOVERY key to return to the main display. DISPLAY FUNCTIONS BAR GRAPH. This display is made up of 128 segments, 16 horizontal column segments and 8 vertical row segments.
- Page 17 5. Pedaling 60RPM for 30 minutes every day, after 15 days, the battery will be fully charged. 6. Adaptor is not only for charging the battery, but also it will supply the power to computer when pedaling. 7. The adaptor still can be used when exercise to provide the power to the computer. 8.
- Page 18 ADJUSTMENT OF SEAT POSITION Seat Height Adjustment 1. Standing next to the bike, adjust the seat until it is about hip height. 2. Rotate the crank arms until the pedals are in the vertical position: 12 and 6 o’clock. 3. Place your foot in the toe cage of the pedal closest to the floor and mount the bike. Ensure that the ball of your foot is over the center of the pedal.
- Page 19 ADJUSTING THE BIKE FOR A PROPER FIT Take some time to learn how to properly adjust the bike to your body; it will make your workouts more pleasant and a safer experience too. Riding the bike when it is incorrectly adjusted can result in discomfort and increase your risk of in jury.
-
Page 20: Maintenance
Maintenance MOVING YOUR BIKE Stand in front the bike, grasp the handlebars and tip the bike toward you until the transport wheels are touching the floor. Roll the bike to the desired location and then gently lower the rear of the bike back to the floor. LEVELING YOUR BIKE If you place your bike on an uneven surface, you may adjust how the bike sits by adjusting one or all of the four levelers located on the bottom of each corner of the bike. -
Page 21: Warranty Information
WARRANTY INFORMATION This product is guaranteed to be free from quality and manufacturing defects for a period of one (1) year. If your product becomes defective during this period, Rebel Sport Limited will offer you either a replacement, credit or refund where a product is faulty; wrongly described; different from the sample shown to you or does not do what it is supposed to do.
Need help?
Do you have a question about the Viper and is the answer not in the manual?
Questions and answers