
Related Manuals for Pari VELOX


Summary of Contents for Pari VELOX
- Page 1 ® VELOX ® VELOX Junior ©2016 PARI GmbH Spezialisten für effektive Inhalation, 055D1001-B 01/16...
- Page 2 Gebrauchsanweisung ......... Instructions for use ........Electromagnetic compatibility....
-
Page 3: Table Of Contents
– 3 – Gebrauchsanweisung Stand der Information: 2015-09. Alle Rechte vorbehalten. Technische und optische Änderungen sowie Druckfehler vorbehalten. Abbildungen ähnlich. WICHTIGE HINWEISE..............Allgemein..................Informationen zur Gebrauchsanweisung........Gestaltung von Sicherheitshinweisen .......... Umgang mit dem Gerät ..............Therapie von Babys, Kindern und hilfsbedürftigen Personen ..Hygiene .................. - Page 4 – 4 – Klassifikation nach DIN EN 60601-1 ..........Angaben zur elektromagnetischen Verträglichkeit ....... Empfohlene Schutzabstände ............Umgebungsbedingungen für den Betrieb........SONSTIGES................. Transport und Lagerung ............... Entsorgung ................... Garantiebedingungen ..............Kontakt ..................Zeichenerklärung................
-
Page 5: Wichtige Hinweise
Produkt zu vermeiden. 1.4 Umgang mit dem Gerät Der VELOX ist ein elektrisches Gerät, das mit Kleinspannung betrieben wird. Er ist so konzipiert, dass keine stromführenden Teile zugänglich sind. Bei nicht geeigneten Umgebungsbedingungen bzw. einer Beschädigung der Steuerungseinheit oder des Netzteils kann dieser Schutz jedoch nicht mehr vorhanden sein. -
Page 6: Therapie Von Babys, Kindern Und Hilfsbedürftigen Personen
– Halten Sie das Netzteil von Haustieren (z.B. Nagetieren) fern. Diese könnten die Isolierung des Kabels beschädigen. – Der VELOX darf nicht in Betrieb genommen bzw. es muss sofort das Netzteil aus der Steckdose gezogen werden, wenn die Steuerungseinheit oder das Netzteil be- schädigt ist oder der Verdacht auf einen Defekt besteht. -
Page 7: Produktbeschreibung
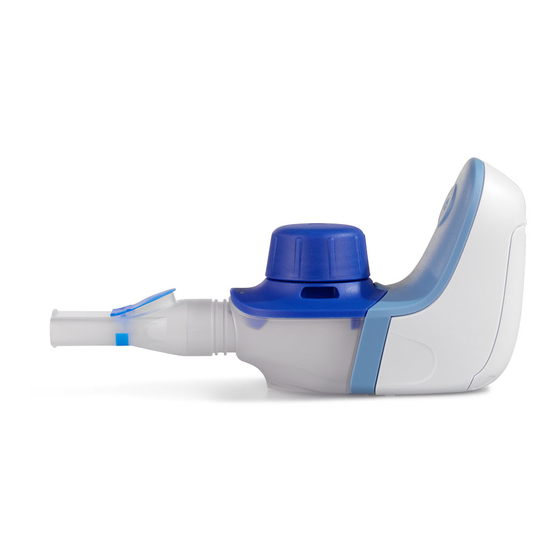
– 7 – PRODUKTBESCHREIBUNG 2.1 Lieferumfang Prüfen Sie, ob alle Teile Ihres PARI Produkts im Lieferumfang enthalten sind. Sollte etwas fehlen, verständigen Sie umgehend den Händler, von dem Sie das PARI Pro- dukt erhalten haben. (1) Steuerungseinheit (2) Vernebler , bestehend aus (2a) Medikamentendeckel (farbig) (2b) Medikamentenbehälter mit Aerosolerzeuger... -
Page 8: Zweckbestimmung
Nur für die Inhalationstherapie zugelassene Medikamente dürfen verwendet werden. Beachten Sie eventuelle Einschränkungen in der Gebrauchsinformation des jeweili- gen Medikaments. Der VELOX ist nicht für eine Anwendung mit Antibiotika zur Therapie von bakte- riellen Infektionen der Atemwege (z. B. bei Pseudomonas aeruginosa) vorgese- hen. -
Page 9: Lebensdauer
– 9 – 2.8 Lebensdauer Komponente Erwartete Lebensdauer Steuerungseinheit 3 Jahre Vernebler 1 Jahr Maske 2 Jahre VELOXcare 3 Jahre Der Vernebler ist für 365 Anwendungen und 52 Desinfektionen ausgelegt. Wenn die Behandlung einer Krankheit eine intensivere Nutzung und/oder häufigere Desinfektionen erforderlich macht, verkürzt sich die Lebensdauer. Die einzelnen Komponenten sind spätestens bei Erreichen der oben angegebenen, erwarteten Lebensdauer auszutauschen. -
Page 10: Inhalation
– 10 – INHALATION 3.1 Inhalation vorbereiten Die Steuerungseinheit kann mit dem mitgelieferten Netzteil oder mit Batterien (bzw. Akkus) betrieben werden. Es wird empfohlen, Batterien vor der Montage des Verneb- lers einzusetzen. Das Netzteil hingegen sollte erst unmittelbar vor der Inhalation an- geschlossen werden. - Page 11 – 11 – • Schließen Sie den Batteriefachdeckel. Der Deckel ist sicher verschlossen, wenn er eingerastet ist. Montage Verbinden Sie den Medikamentenbehälter mit der Verneblerkammer: • Prüfen Sie die korrekte Position der beiden Ventilflügel an der Unterseite des Medika- mentenbehälters und korrigieren Sie diese ggf.
- Page 12 – 12 – • Setzen Sie den Medikamentenbehälter bündig auf die Verneblerkammer und schließen Sie die Laschen. Verbinden Sie den Vernebler mit der Steuerungseinheit: • Stecken Sie den Vernebler in die Steue- rungseinheit. • Schließen Sie die Lasche an der Unterseite des Geräts.
-
Page 13: Inhalation Durchführen
Bei Betrieb mit dem Netzteil: • Stecken Sie den USB-Stecker des Netzteils in den USB-Anschluss an der Steuerungs- einheit. • Verbinden Sie das Netzteil mit einer geeig- neten Steckdose. Der VELOX ist betriebsbereit. ► • Setzen Sie sich entspannt und aufrecht hin. - Page 14 Zähne und umschließen Sie es mit den Lip- pen. • Atmen Sie möglichst langsam und tief durch das Mundstück ein und entspannt wieder aus. Achten Sie während der Inhalation darauf, den VELOX nicht zu stark zu kippen, damit keine Flüssigkeit über das Mundstück in den Mund gelangt.
- Page 15 Für eine wirksame Therapie mit der SMARTMASK Baby muss die Maske beide Mundwinkel und die Nase vollständig umschließen. Ist die Maske zu klein, können Sie das Mundstück verwenden oder im Fachhandel eine geeignete PARI Kindermaske er- halten. • Halten Sie den VELOX waagerecht.
- Page 16 Der Medikamentenrest sollte direkt nach Beendigung der Inhalation entsorgt werden, damit er nicht verschüttet wird. Inhalation unterbrechen Schalten Sie den VELOX grundsätzlich aus, wenn Sie die Inhalation kurz unterbre- chen wollen. Vernebelt das Gerät, ohne dass inhaliert wird, geht Medikament an die Umgebungs- luft verloren und es sammelt sich vermehrt Medikament in der Verneblerkammer.
-
Page 17: Gerätesignale
– 17 – 3.3 Gerätesignale Der VELOX gibt mithilfe einer LED in der Ein/Aus-Taste sowie über ein akustisches Signal Auskunft über verschiedene Betriebszustände: Einschalten des Geräts: LED leuchtet grün auf. 1 Piepton. Während des Betriebs: LED leuchtet grün. Niedriger Batteriestand: LED blinkt grün. -
Page 18: Reinigung Und Desinfektion
– 18 – REINIGUNG UND DESINFEKTION 4.1 Vorbereitung Zerlegen Sie das Inhalationsgerät in seine Einzelteile: • Ziehen Sie das Mundstück bzw. die Maske vom Vernebler ab. • Ziehen Sie das blaue Ausatemventil am Mundstück vorsichtig aus dem Schlitz her- aus. Das Ventil muss danach immer noch am Mundstück hängen. -
Page 19: Steuerungseinheit
– 19 – • Schrauben Sie den Deckel vom Medika- mentenbehälter. 4.2 Steuerungseinheit • Wischen Sie die Außenflächen der Steuerungseinheit bei Bedarf mit einem saube- ren, feuchten Tuch ab. HINWEIS Eingedrungene Flüssigkeiten können einen Gerätedefekt verursachen. Sprühen Sie deshalb keine Flüssigkeit auf die Steuerungseinheit oder auf das Netzteil. 4.3 Vernebler HINWEIS Um eine Beschädigung des Aerosolerzeugers zu vermeiden, legen Sie den... - Page 20 – 20 – • Öffnen Sie die seitlichen Laschen am VELOXcare. • Klappen Sie das VELOXcare auf. • Setzen Sie den Medikamentenbehälter mit seiner Öffnung nach unten in das Unterteil des VELOXcare. Info: Die blauen Ventilflügel müssen sich oben befinden. •...
- Page 21 – 21 – • Stecken Sie das VELOXcare an die Steue- rungseinheit. • Schließen Sie die Lasche an der Unterseite des Geräts. • Füllen Sie 2,5 ml isotone Salzlösung oder destilliertes Wasser in das VELOXcare. max. 2,5 ml Bei Betrieb mit dem Netzteil: •...
- Page 22 – 22 – • Drücken Sie die Ein/Aus-Taste an der Steuerungseinheit, um die Spülung zu star- ten. Es ertönt ein kurzer Signalton. ► Die LED der Taste leuchtet grün. ► Die Spülung wird durchgeführt. ► • Sobald die gesamte Spülflüssigkeit durch- gelaufen ist, schalten Sie das Gerät aus, in- dem Sie erneut die Ein/Aus-Taste drücken.
- Page 23 – 23 – In kochendem Wasser • Legen Sie alle Einzelteile mind. 5 Minuten in kochendes Wasser. Verwenden Sie einen sauberen Kochtopf und destilliertes Wasser. Kunststoff schmilzt bei Berührung mit dem heißen Topfboden. Achten Sie des- halb auf ausreichenden Wasserstand im Topf. Damit vermeiden Sie eine Be- schädigung der Einzelteile.
-
Page 24: Trocknung Und Aufbewahrung
– 24 – • Spülen Sie alle Teile gründlich unter fließendem Wasser ab (Rückstände des Des- infektionsmittels können allergische Reaktionen oder Schleimhautirritationen verur- sachen). • Beschleunigen Sie das Abtropfen des Wassers durch Ausschütteln aller Teile. • Entsorgen Sie die verwendete Lösung (die verdünnte Lösung kann über den Aus- guss entsorgt werden). -
Page 25: Fehlersuche
– 25 – FEHLERSUCHE Fehler Mögliche Ursache Vorgehen Der VELOX lässt sich Die Batterien sind leer. Setzen Sie neue Batterien ein nicht einschalten. oder schließen Sie das Netzteil an. Das Netzteil ist nicht richtig in Überprüfen Sie den korrekten eine Steckdose eingesteckt... -
Page 26: Technische Daten
139 mm × 66 mm × 61 mm Gewicht (inkl. Mundstück) 40 g 6.3 Aerosoldaten Aerosoldaten gemäß DIN EN 13544-1 sind auf Anfrage bei der PARI GmbH erhält- lich. 6.4 Klassifikation nach DIN EN 60601-1 Art des Schutzes gegen elektrischen Schlag (Netzteil) -
Page 27: Angaben Zur Elektromagnetischen Verträglichkeit
Betrieb in der benutzten Anordnung sicherzustellen. Technische Daten zur elektromagnetischen Verträglichkeit (EMV-Hinweise) in tabella- rischer Form liegen dem Gerät bei. Sie sind außerdem auf Anfrage bei der PARI GmbH oder im Internet unter www.pari.com auf der jeweiligen Produktseite unter „Technische Daten“ zu erhalten. 6.6 Empfohlene Schutzabstände Empfohlene Schutzabstände zwischen tragbaren und mobilen Hochfrequenz(HF)-... -
Page 28: Sonstiges
Garantiezeit, dass Ihr Gerät bei bestimmungsgemäßem Gebrauch keine herstel- lungsbedingten Material- oder Verarbeitungsmängel aufweist. Der Garantieanspruch unterliegt einer Verjährung von 12 Monaten. Die von PARI gegebene Garantie gilt zu- sätzlich zur Gewährleistungsverpflichtung Ihres Verkäufers. Ihre gesetzlichen Rechte bei Mängeln gegenüber Ihrem Verkäufer werden durch die Garantie oder den Eintritt des Garantiefalls nicht eingeschränkt. -
Page 29: Kontakt
– die Seriennummer am Gerät geändert, entfernt oder sonst unleserlich gemacht wurde – von durch PARI nicht autorisierten Personen Reparaturen, Anpassungen oder Ver- änderungen am Gerät vorgenommen wurden Im Übrigen erstreckt sich die Garantie nicht auf Verschleißteile, also Geräteteile, die normaler Abnutzung ausgesetzt sind. -
Page 30: Zeichenerklärung
– 30 – 7.5 Zeichenerklärung Auf dem Gerät bzw. auf der Verpackung befinden sich folgende Zeichen: Gebrauchsanweisung beachten. Bestellnummer Seriennummer des Geräts Gleichstrom Wechselstrom Schutzgrad des Anwendungsteils: Typ BF Das Gerät ist geschützt gegen ein Eindringen von Fremdkörpern oder Wasser. Minimale und maximale Umgebungstemperatur Minimale und maximale Luftfeuchtigkeit Minimaler und maximaler Luftdruck... - Page 31 – 31 – Instructions for use Information as of: 2015-09. All rights reserved. Technical and design changes and printing errors reserved. Principle shown in illustrations. IMPORTANT INFORMATION............General..................Information about the instructions for use ........Structure of safety instructions ............. Using the device ................
- Page 32 – 32 – Aerosol data ................. Classification according to DIN EN 60601-1 ........ Information about electromagnetic compatibility ......Recommended safety distances ..........Ambient conditions for operation ..........MISCELLANEOUS ..............Transportation and storage ............Disposal..................Terms and conditions of warranty ..........Contact ..................Explanation of symbols ..............
-
Page 33: Important Information
1.4 Using the device The VELOX is an electrical device that is operated at extra-low voltage. It has been designed so that no live parts are accessible. However, if ambient conditions are un- favourable or if the controller or power adapter is damaged, this protection may no longer be assured. -
Page 34: Treatment Of Babies, Children And Anyone Who Requires Assistance
– 34 – 1.5 Treatment of babies, children and anyone who requires assistance Babies, children and anyone who requires assistance must be supervised constantly by an adult during inhalation therapy. This is the only way to ensure safe and effective treatment. -
Page 35: Product Description
– 35 – PRODUCT DESCRIPTION 2.1 Components Check that all components of your PARI product are contained in your package. If anything is missing, please notify the dealer from whom you purchased the PARI product immediately. (1) Controller (2) Nebuliser... -
Page 36: Intended Purpose
Only medication that has been approved for inhalation treatment must be used. Take note of any restrictions in the instructions for use of the medication in question. The VELOX is not designed for use with antibiotics that are intended to treat bacterial infections of the respiratory tract (e.g., Pseudomonas aeruginosa). -
Page 37: Operating Life
– 37 – 2.8 Operating life Component Expected life cycle Controller 3 years Nebuliser 1 year Mask 2 years VELOXcare 3 years The nebuliser is designed for 365 applications and 52 disinfections. If the treatment of a disease necessitates more intensive use and/or more frequent disinfections, the life cycle of the device is shortened. -
Page 38: Inhalation
– 38 – INHALATION 3.1 Preparing for inhalation The controller can be operated with the accompanying power adapter or with batteries (or rechargeable batteries). It is recommended to insert the batteries before assem- bling the nebuliser. On the other hand, the power adapter should not be connected until just before starting the inhalation session. - Page 39 – 39 – • Close the battery compartment cover. The cover is closed correctly when it clicks into place. Assembly Attach the medication reservoir to the aerosol chamber: • Check that the two valve vanes on the un- derside of the medication reservoir are in the correct position.
- Page 40 – 40 – • Place the medication reservoir flush with the aerosol chamber and close the locking tabs. Connect the nebuliser to the controller: • Insert the nebuliser in the controller. • Close the tab on the underside of the device.
-
Page 41: Performing The Inhalation
• Insert the USB connector of the power ad- apter in the USB port on the controller. • Connect the power adapter to a suitable power socket. The VELOX is ready to use. ► • Sit in an upright position and relax. - Page 42 • Breathe in as slowly and deeply as possible through the mouthpiece, and out again calmly. Make sure that the VELOX is not tilted too far while inhaling, otherwise the fluid will run through the mouthpiece and get into your mouth.
- Page 43 To ensure effective treatment with the SMARTMASK Baby, the mask must completely cover both corners of the mouth and the nose. If the mask is too small, you can use the mouthpiece or buy a suitable PARI child mask from your specialist dealer. • Hold the VELOX horizontally.
- Page 44 The residue should be disposed of as soon as the inhalation session is finished, to prevent it from being spilled. Interrupting the inhalation session Always switch the VELOX off whenever you want to interrupt the inhalation session briefly. If the device continues to nebulise medication that is not being inhaled, unused med- ication escapes into the atmosphere and the quantity left in the aerosol chamber in- creases.
-
Page 45: Device Signals
– 45 – 3.3 Device signals The VELOX communicates information about its various operating states via an LED in the On/Off button and an acoustic signal: Switching on the device: LED lights up green. 1 beep. During operation: LED is lit green and steady. -
Page 46: Cleaning And Disinfection
– 46 – CLEANING AND DISINFECTION 4.1 Preparation Dismantle the inhalation device into its individual parts: • Pull the mouthpiece or mask off the nebuliser. • Carefully pull the blue expiratory valve out of the slot in the mouthpiece. The valve must still be attached to the mouthpiece. -
Page 47: Controller
– 47 – • Unscrew the cap on the medication reser- voir. 4.2 Controller • Wipe the outer surfaces of the controller with a clean, damp cloth as necessary. NOTICE Liquids that get into the device can cause a fault in the device. Therefore, never spray any liquids onto the controller or the power adapter. - Page 48 – 48 – • Release the tabs on the side of the VELOXcare. • Open the VELOXcare. • Place the medication reservoir in the bot- tom part of the VELOXcare with the reser- voir opening facing downwards. Info: The blue valve vanes must be upper- most.
- Page 49 – 49 – • Connect the VELOXcare to the controller. • Close the tab on the underside of the device. • Fill the VELOXcare with 2.5 ml isotonic sa- line solution or distilled water. max. 2.5 ml Operation with the power adapter: •...
- Page 50 – 50 – • Press the On/Off button on the controller to begin rinsing. The device emits a short acoustic signal. ► The LED on the button lights up green. ► The rinsing function is executed. ► • As soon as all of the rinsing fluid has run through, switch the device off by pressing the On/Off button again.
- Page 51 – 51 – In boiling water • Place all the individual parts in boiling water for at least 5 minutes. Use a clean pot and distilled water. Plastic will melt if it comes into contact with the hot base of the pot. Therefore, make sure there is plenty of water in the pot.
-
Page 52: Drying And Storage
– 52 – • Rinse off all parts thoroughly in running water (residues of the disinfectant can cause allergic reactions or irritations of the mucous membrane). • You can remove excess water more quickly by shaking all parts. • Dispose of the used solution (the diluted solution can be got rid of down the drain). Visual inspection Inspect all product components after each cleaning and disinfection. -
Page 53: Troubleshooting
In the event of faults that are not listed in this chapter, or if the suggested procedure does not correct the fault, contact the PARI GmbH Service Center. -
Page 54: Technical Data
139 mm × 66 mm × 61 mm Weight (incl. mouthpiece) 40 g 6.3 Aerosol data Aerosol data according to DIN EN 13544-1 is available on request from PARI GmbH. 6.4 Classification according to DIN EN 60601-1 Type of electric shock protection (power adapter) Protection class II... -
Page 55: Information About Electromagnetic Compatibility
Technical data on electromagnetic compatibility (EMC instructions) in table format are included with the device. These can also be ordered from PARI GmbH or downloaded from the internet at www.pari.com under "Technical Data" on the respective product page. -
Page 56: Miscellaneous
What does the warranty cover? If, exceptionally, a defect is discovered, PARI will at its discretion repair or replace the device, or refund the purchase price of the product. If it is replaced, the replacement device may either be the same model or a model that is at least comparably equipped. -
Page 57: Contact
– the serial number on the device has been changed, removed, or otherwise rendered illegible – repairs, adaptations or modifications have been made to the device by persons not authorised by PARI Moreover, the warranty does not cover wearing parts, that is to say device parts that are exposed to normal wear. - Page 58 – 58 – Minimum and maximum air pressure The medical device was distributed commercially after 13 August 2005. This product must not be disposed of with normal domestic waste. The symbol of the refuse bin with a cross through it indicates that it must be disposed of separately.
- Page 59 – 59 – ELECTROMAGNETIC COMPATIBILITY – Guidance and manufacturer's declaration DIN EN 60601-1-2:2007 (IEC 60601-1-2:2007) Electromagnetic compatibility Medical electrical devices are subject to special precautionary measures in particular regarding EMC with the installation and operation. Portable and mobile HF-communication devices e.g. mobile phone can affect medical electrical devices.
- Page 60 – 60 – Electromagnetic immunity IEC 60601 test Compliance Electromagnetic environment – Immunity test level level Guidance Electrostatic ±6 kV contact ±6 kV contact Floors should be wood, concrete discharge (ESD) or ceramic tile. If floors are ±8 kV air ±8 kV air covered with synthetic material, IEC 61000-4-2 the relative humidity should be at least 30%.
- Page 61 – 61 – IEC 60601 test Compliance Electromagnetic environment – Immunity test level level Guidance Radiated RF 3 V/m 3 V/m Recommended separation 80 MHz to distance: IEC 61000-4-3 2,5 GHz d = 3,5/3 * SQRT (P) d = 3,5/3 * SQRT (P) 80 MHz to 800 MHz d = 7/3 * SQRT (P) 800 MHz to 2,5 GHz where "P"...
- Page 62 – 62 – Recommended separation distances For portable and mobile RF communication equipment and the EUT. The EUT is intended for use in the electromagnetic environment in which radiated RF disturbances are controlled. The customer or user of the EUT can help prevent electromagnetic interference by maintaining a minimum distance between portable and mobile RF communication equipment (transmitters) and the EUT as recommended below, according to the maximum output power of the communications...
- Page 63 PARI VELOX / VELOXcare CERTIFICATE OF GUARANTEE We grant a 2 year guarantee on the control unit of the VELOX and a 6 month guarantee on the VELOXcare, commencing on the date of purchase. PARI GmbH Technical Service Dept. Holzhofstr. 10b 82362 Weilheim, Germany...
- Page 64 Purchase date Stamp and signature of the dealer ©2016 PARI GmbH Spezialisten für effektive Inhalation, 055D1001-B 01/16 PARI GmbH Moosstrasse 3 • 82319 Starnberg • Germany Tel.: +49 (0) 81 51-2 79 0 • Fax: +49 (0) 81 51-2 79 101...
Need help?
Do you have a question about the VELOX and is the answer not in the manual?
Questions and answers