Table of Contents
Advertisement
Quick Links
Advertisement
Table of Contents
Troubleshooting

Related Manuals for Sinclair MS-E48AIN


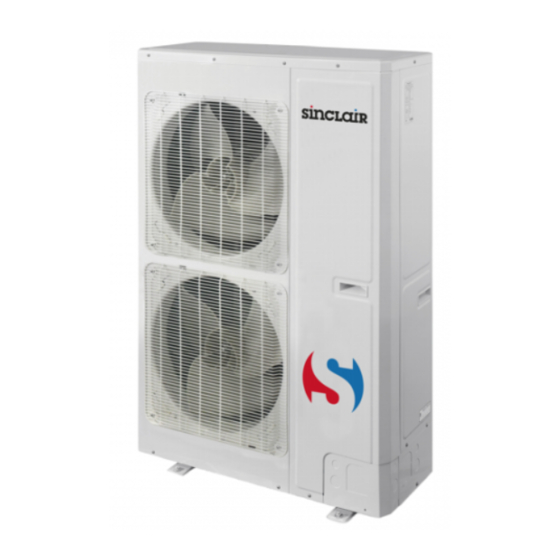
Summary of Contents for Sinclair MS-E48AIN
- Page 1 SERVICE MANUAL HIGH POWER MULTI SYSTEM Outdoor unit MS-E48AIN, MS-E56AIN...
- Page 2 “Original instructions” IMPORTANT NOTE: Read this manual ca r efully befo r e installing or operating your new air conditioning unit. Make sure to save this manual for future reference.
-
Page 3: Table Of Contents
Contents PRODUCT ........................1 MODELS LIST ........................1 Outdoor Unit .......................... 1 1.2 DB Module ..........................1 PRODUCT DATA ........................2 Product Data of Outdoor Unit ....................2 2.2 Product Data of DB Module ....................4 ... - Page 4 DB MODULE INSTALLATION ..................3 6 Precaution for Installation ....................36 Names of Main Parts ......................36 Selection of Installation Location ..................3 6 Outline Dimension and Servicing Space of DB3-16AF ............3 7 ...
- Page 5 Malfunction display: High/Low pressure sensor error ............7 0 POWER DISTRIBUTION ....................7 0 Diagram of Power Distribution .................... 7 0 Wiring diagram ........................71 THE RESISTANCES OF COMMON TEMPERATURE SENSORS ......... 7 2 ...
-
Page 6: Product
1 MODELS LIST 1.1 Outdoor Unit Capacity Capacity Power supply Refriger Model Product code Cooling Heating Appearance Ph, V, Hz (kW) (kW) MS-E48AIN CN860W0250 14.0 16.0 R410A 3,380~415,50 MS-E56AIN CN860W0260 16.0 18.0 1.2 DB Module Number of connectable Power supply indoor units... -
Page 7: Product Data
2 PRODUCT DATA 2.1 Product Data of Outdoor Unit Heat pump MS-E48AIN MS-E56AIN Model Cooling capacity 14.0 16.0 Heating capacity 16.0 18.0 Cooling 4.60 Nominal input Heating 4.25 EER/COP 2.7/3.2 2.65/3.5 Minimum NO. of connectable indoor units Maximum NO. of connectable indoor units Minimum No. - Page 8 Notes: a. The rated cooling capacity data is measured under the following work condition: Indoor Temperature is 27℃ DB, 19℃WB. Outdoor Temperature is 35℃DB. The rated heating capacity data is measured under the following work condition: Indoor Temperature is 20℃DB. Outdoor Temperature is 7℃DB, 6℃WB. b.
-
Page 9: Product Data Of Db Module
2.2 Product Data of DB Module DB3-16AF Model DB5-16AF Maximum numbers of connectable indoor units Power Supply V-Ph-Hz 220~240-1-50 Φ15.9 Φ15.9 Gas pipe(inner diameter) Connection port to Φ9.52 Φ9.52 Liquid pipe(inner diameter) outdoor unit Connection Method Flare Flare Φ9.52 Φ9.52 Gas pipe(inner diameter) Connection port to Φ6.35... -
Page 10: Piping Diagram
4 PIPING DIAGRAM Schematic Diagram of High Power Multi System The units start to work once the power is switched on. During the cooling operation, the low temperature, low pressure refrigerant gas from the heat exchanger of each indoor unit gets together and then is taken into the compressor to be compressed into high temperature, high pressure gas, which will soon go to the heat exchanger of the outdoor unit to exchange heat with the outdoor air and then is turned into refrigerant liquid. -
Page 11: Control
CONTROL 1 OPERATION FLOWCHART... -
Page 12: Cooling/Dry Operation
1.1 Cooling/Dry Operation Cooling Operation Is there Guide Louver? Guide Louvers Swing Fan Motor:Operation Is the process of preventing restart operation? (3 minutes) Temperature Adjustment Fan Motor: Stop Electronic Expansion Valve: Stop Electronic Expansion Valve:Capacity Conctrol Stop (Go to the previous page) -
Page 13: Heating Operation
1.2 Heating Operation... -
Page 14: Main Logic
2 MAIN LOGIC 2.1 Control Function of Outdoor Unit 2.1.1 Cooling Mode Cooling conditions and process: If the compressor is in stop status and start the unit for cooling operation, when one of the indoor units reaches the cooling operation condition, the unit starts cooling operation; in this case, the electronic expansion valve, the outdoor fan and the compressor start operation. -
Page 15: Protection Function
The status of 4-way valve: energized; Outdoor fan control in heating mode The outdoor fan starts before 5s of the starting of compressor and then it will run in high speed for 40s; The fan shall run at every speed for at least 80s; When the compressor stops, the outdoor fan stops after 1min. Defrosting function When the defrosting condition is met, the frequency of the compressor starts to decrease and wait for defrosting;... -
Page 16: Other Function
2.2.4 Communication malfunction Detection of the quantity of installed indoor units and DB modules: After 3min of energizing, if the outdoor unit does not receive the communication data of certain indoor unit, the outdoor unit will judge that indoor unit is not installed and will treat it as it is not installed. -
Page 17: Control Function Of Indoor Unit
2.4 Control Function of Indoor Unit 2.4.1 Running Mode 1. COOL 2.DRY 3.HEAT 4.AUTO 5 FAN 2.4.2 Basic Functions of the System COOL Mode Under this mode, the fan and swing function goes as the set conditions, and the set temperature range is 16℃ ~30℃. - Page 18 speed. d) Under the HEAT Mode: (Ambient temperature herein is the temperature without temperature compensation) ◆ When the ambient temperature is or lower than the set temperature, the indoor unit runs at the high speed. ◆ When the ambient temperature is higher than the set temperature but lower than the set temperature plus 2℃, the indoor unit fan runs at the medium speed.
- Page 19 c) When the indoor unit works without the wired controller, if the timer is not set for the last remote control instruction, the system will memorize this last instruction and works following it; if the timer is set, it will be canceled as the power failure occurs and will have to be reset.
-
Page 20: Remote Controller
3 REMOTE CONTROLLER 3.1 Wired Remote Controller 3.1.1 Wired Controller XK19 It is designed for the cassette type, duct type and floor ceiling type indoor units. ◆ Outside View of the Wired Controller ◆ LCD of the Wired Controller ... - Page 21 Master wired controller (this function is yet unavailable for this unit). It blinks under on state of the unit without operation of any button. Energy-saving function.(this function is yet unavailable for this unit) Ambient/preset temperature value. Electric auxiliary heating function.(this function is yet unavailable for this unit) Blow function.
- Page 22 Upon startup of the unit without malfunction or under off state of the unit, press them at ▲+▼ 2 +6 the same time for 5s to enter the lock state, in which case, any other buttons won’t respond the press. Repress them for 5s to quit this state. 3.1.3 Operation Instructions On/Off Press On/Off to turn on the unit and turn it off by another press.
- Page 23 Notes: a. During the above setting, if Function is pressed down or there is not any operation within 5s, sleep curve setting will be canceled. b. 26℃ is the default Sleep curve temperature before delivery. The wired controller will automatically memorize the Sleep curve after the setting.
- Page 24 memory states between memory on and memory off. When this function is activated, Memory will be displayed. If this function is not set, the unit will be under the “Off” state after power failure and then power recovery. Memory recovery: If this function has been set for the wired controller, the wired controller after power failure will resume its original running state upon power recovery.
- Page 25 ON/OFF Press this button to turn on the unit. Press this button again to turn off the unit. - Press this button to decrease set temperature. Holding it down above 2 seconds rapidly decreases set temperature. In AUTO mode, set temperature is not adjustable. +...
- Page 26 Press this button to set up &down swing angle, which circularly changes as below: This remote controller is universal. If any command is sent out, the unit will carry out the command as indicates the guide louver swings as: I FEEL: Press this button to turn on I FEEL function.
- Page 27 display will resume to original setting temperature. Sleep3- the sleep curve setting under SLEEP mode by DIY could be inquired: ◆ The user could accord to sleep curve setting method to inquire the presetting sleep curve, enter into user individuation sleep setting status, but do not change the temperature, press "Turbo" button directly for confirmation.
-
Page 28: Central Controller Scc-16
Press this button to activate / deactivate the Turbo function which enables the unit to reach the preset temperature in the shortest time. In COOL mode, the unit will blow strong cooling air at super high fan speed. In HEAT mode, the unit will blow strong heating air at super high fan speed. 15) LIGHT: Press LIGHT button to turn on the display's light and press this button again to turn off the display's light. -
Page 29: Communication Network
b. Centralized control: it is intended to control the running parameters of all indoor units at the same time. c. Shielding under single or centralized control: it is intended to shield the running parameter of the indoor unit. d. Weekly timer under single or centralized control: it is intended to set when to start/stop the unit through long-distance control. -
Page 30: Lcd
4.3 LCD Name Description Fan speed It displays the fan speed of the indoor unit, high, medium, low and auto. Running mode It displays the running mode of the indoor unit, auto, cool, dry, fan and heat. It displays the current time (hour and minute) in 24-hour time system and also System clock the week day. - Page 31 4.4.2 Introduction to the Function of Buttons Name Function Description Mode It is used for the switchover among different modes. It is used to set the fan speed, high, medium, low or auto. On/Off It is used to set the on/off status of the indoor unit. 1.
-
Page 32: Installation
INSTALLATION 1 PRECAUTIONS FOR INSTALLATION 1.1 Precautions for Installation Before installation, please ensure the installing site, power ratings, possible operating range (pipe distance, height difference between indoor and outdoor unit, power voltage) and installing space are correct and suitable. To ensure correct installation, please make sure to read the Safety Considerations thoroughly before starting the installation works. - Page 33 Do not use or store flammable, explosive, poisonous or other dangerous substances beside the air conditioner. The compressor will vibrate sharply if the voltage is too low and damage the refrigerating system. Electrical component are easy to damage if the voltage is too high. The voltage should be stable; there shouldn’t be big fluctuation Please take notice of the installation foundation of the unit after long use, if it is damaged, it may lead to the fall of the unit and cause the injury.
-
Page 34: Key Points Of Installation
1.2 Key Points of Installation Installation Procedures Description and Acceptance Criteria ◆ The materials specified on the engineering drawing shall be purchased as specified (e.g. copper tube, thermal insulation tube, PVC pipe, power cables, air switch, etc). ◆ The materials not specified on the engineering drawing shall Material Selection and Equipment Inspection be purchased according to the actual quantity of works (e.g. - Page 35 acceptable if pressure drop is within 0.02MPa. (With the ℃ temperature change by 1 , the pressure will change by approx. 0.01MPa) ◆ The thermal insulation tube must meet the specifications. Thermal insulation ◆ Seal between the thermal insulation pipes to avoid air entry. ◆...
-
Page 36: Flow Chart Of Installation
2 FLOW CHART OF INSTALLATION Design kicking-off Material selection Inspection of site installation position Installation of indoor unit Installation of outdoor unit Installation of BU module Installation of Connection of Connection of Connection of Connection of Connection of remote transmission transmission power cables power cables... -
Page 37: Outdoor Unit Installation
3 OUTDOOR UNIT INSTALLATION 3.1 Precautions for R410A It is very strict that the refrigerant pipes should be clean and dry. The R410A is a mixed refrigerant, when add the refrigerant to the unit, it must keep the refrigerant in its liquid state. -
Page 38: Parts And Components Of Unit
3.5 Parts and Components of Unit For the super free match series system, one outdoor unit is able to drive up to three DB modules and nine indoor units which include cassette type, duct type, wall-mounted type, floor ceiling type and console type. The outdoor unit will run as long as any one indoor unit receives the running command, and all indoor units stop once the outdoor unit is turned off. -
Page 39: Outline Dimension Of The Outdoor Unit
The place should be well-ventilated, so the machine can absorb and discharge sufficient air. Outdoor unit shall be installed close to the indoor unit, hence to minimize the length and bends of cooling pipe. Avoid place the outdoor unit under the windows or between the constructions, hence to prevent normal operating noise from entering the room. -
Page 40: Installation Of The Outdoor Unit
3.9 Installation of the Outdoor Unit Check the installation location and ensure it is strength and level, so that the unit will not cause any operating vibration or noise after installation. In accordance with the foundation drawing in the following figure, please drill 4 holes in the installation location. -
Page 41: Db Module Installation
4 DB MODULE INSTALLATION 4.1 Precaution for Installation The installation of the air conditioner must be in accordance with the national and local laws and regulations. The quality of the installation will affect the capability of air conditioner directly. The installation should be left to the appointed service center. -
Page 42: Outline Dimension And Servicing Space Of Db3-16Af
A place which is full of machine oil; A region with saline-sodic soil near the sea; A place where the sulphide fog exists, such as the sulphur spring; A place where the high frequency facilities exist, such as radio equipment, electric welder and medical equipment;... -
Page 43: Installation Instruction
Sorts Indoor unit side (mm) Outdoor unit side (mm) Φ6.35 Φ9.52 Liquid pipe Φ9.52 Φ15.9 Gas pipe Installation and service space ① ② ③ Name Servicing space Ceiling Electrical box side 4.6 Installation Instruction Check the installation location and ensure it is strength and level. Otherwise, there should be enough space to... - Page 44 install drainage pipe, so that the condensed water can be discharged. Reference to the size of hanger metal and drill 4 holes in the installation location. Hang the hanger bolts. Fix the modules securely with the hanger bolts. You can get the M10 or M8 hanger bolts, nuts and washers from the market.
-
Page 45: Refrigeration Piping Work
5.1 Allowable Length and Drop Height of Connecting Pipe The sorts The pipes Length(m) Total length between outdoor unit and DB ≤55 L1+L2+L3+L4+L5 modules Total length ≤80 MS-E48AIN Maximum 1A+1B+1C+2A+2B+2C+ between indoor allowable 3A+3B ≤90 MS-E56AIN unit and DB length ≤15... -
Page 46: Design Requirements For Oil Trap
MS-01B (Liquid pipe) MS-01B (Gas pipe) Y-type branch pipe is equipped with auxiliary tubes to adjust the diameter of different pipes. If the dimension of the pipe selected is different from the dimension of branch pipe joint, Cut copper tube in the middle with tube cutter and clear up burrs. - Page 47 Outdoor unit higher than indoor unit...
-
Page 48: Connection Of Outdoor Unit Refrigerant Pipe
Connection of Outdoor Unit Refrigerant Pipe ① ② ③ ④ Name Coping plate Rear side plate Front side plate Gas side stop valve ⑤ ⑥ ⑦ Name Liquid side stop valve Right connection board Front connection board Name Front connection Bottom connection Side connection Rear connection... -
Page 49: Precaution For Connection
Install the piping adapter ① Refer to the piping connection size of the outdoor unit and indoor units, the appropriate piping adapter should be adopted. ② Align the flared end of copper tube with the center of pipe joint. Tighten the nuts with hands. Sealing the unconnected port If the port of DB module indoor side does not connected to one indoor unit, the port must be sealed to prevent refrigerant leaks. - Page 50 ② The bending diameter of the pipeline must be greater than 200mm. The connection pipe cannot often be bent or straightened. Otherwise it will harden and crack. ③ If the thermal insulation of the refrigerant pipe is not removed, please do not bend the pipe. Otherwise, it maybe leads the pipe to crack.
-
Page 51: Leak Test
5.8 Leak Test Please make sure that the stop valves of the outdoor unit are closed during the operation. The leak test should be made by pressurizing nitrogen gas. Turn on the Hi-knob and Lo-knob. The leak test should be done simultaneously at both the gas and liquid stop valves. -
Page 52: Refrigerant Charging
5.10 Refrigerant Charging The refrigerant has been charged into the outdoor unit before shipped from the manufacturer, while additional refrigerant still need be charged into the refrigerant pipe during the field installation. 5.10.1 Calculation of the Additional Refrigerant Charging 1) Get the refrigerant charge of the outdoor unit from the nameplate. Note: The refrigerant charge of the outdoor unit does not include the charged additionally in the indoor unit, DB module and the refrigerant pipe. - Page 53 The total length of the liquid pipes: 20+10+10+5+5+5+5+5+5=70(m). Thus, the total length is over than 30m, so the air conditioner needs to add refrigerant. Additional refrigerant charge Σ Σ the Liquid Pipe Length of Φ6.35×0.022kg/m + the Liquid Pipe Length of Φ9.52×0.054kg/m-1.47(kg) =(5+5+5+5+5+5)(m)×0.022kg/m+(20+10+10)(m)×0.054kg/m-1.47(kg) =1.35(kg) 4) Additional refrigerant charge record...
- Page 54 c) Turn off the R410A tank and the Hi-knob immediately, when adding refrigerant is enough. Cautio ! Make sure the liquid and gas side stop valves are opened completely after the installation. Make sure the length of liquid pipe is exactly. Additional refrigerant charge must be measured exactly.
-
Page 55: Electrical Wiring Work
6 Electrical Wiring Work 6.1 Wiring Connection Precept 1 Precept 2... -
Page 56: Requirements Of Power Circuit And Cable
6.2 Requirements of Power Circuit and Cable Frequency 50Hz Outdoor unit 3Ph, 380~415V Phase and voltage DB module 1Ph, 220V MS-E48AIN Recommended cable of outdoor unit 5×2.5 mm (Pieces × Sectional area) MS-E56AIN Recommended cable of DB module 3×0.75 mm (Pieces × Sectional area) Transmission line (Pieces ×... -
Page 57: Precaution Of Laying Wires
device of the building by the professional. The electric installation should be carried out by the professional as instructed by the local laws, regulations and also this manual. The air switch coupled with the leakage current protection switch must be equipped in the circuits, which is of enough capacity and of both magnetic and thermal tripping functions in case of the short circuit and overload. - Page 58 The power wire and transmission line must be more than one meter away from televisions or radios which can emit electromagnetic waves to prevent image interference or noise. Otherwise, the unit maybe cannot work. Confirm the each cable connected to the terminal screw is exactly and securely after finishing the electric work.
- Page 59 and transmission line from damaging by the hole, the rubber ring cannot fall from that, otherwise, it may cause electrical shock or fire etc. Connect the power cable of the DB module to the L, N terminals with the sign of Power and as well as the ground screw.
-
Page 60: Instructions For Dip Switch
6.8 Instructions for DIP Switch 2 digits DIP is adopted to assign the address when using multi-DB modules and the address cannot be repeated in the same unit. One outdoor unit can connect to no more than 3 DB modules. “ON”... -
Page 61: Installation Of Drainage Pipeline
7 INSTALLATION OF DRAINAGE PIPELINE 7.1 Material Quality Requirements for Condensate Pipe Generally, the condensate pipe shall be water supply U-PVC pipe, adhered by using special glue. The other materials available include: PP-R pipe, PP-C pipe and hot-dipped galvanized steel pipe. It is not allowed to use aluminum plastic composite pipe. - Page 62 if the drainage is smooth; on another hand, check the piping system for any leakage. Steel sheath shall be provided to the pipe crossing the wall or slab. The pipe joint shall not be positioned within the sheath. The steel sheath shall be flush with the wall surface or slab base, but 20mm higher than the slab base.
- Page 63 matter how forcible it pushes, but there is no flowing water, thus resulting in abnormal water level. This will cause flooding of the ceiling. 15) If the air flow of indoor unit is high, this might cause negative pressure and result in return suction of outdoor air.
- Page 64 NO2: Connection of drain elbow NO3: Connection of horizontal pipe Drainage pipe is requisite for air conditioner unit. During cooling, the moisture in the air will condense on the surface of evaporator. Such condensing water must be drained out of the unit. Meanwhile, the drainage pipe has an important role to determine if the air conditioner can plays its full functions.
-
Page 65: Installation Of Protective Layer On Connection Pipe
8 Installation of Protective Layer on Connection Pipe The refrigerant pipes should be insulated by the heat insulation material and plastic tape in order to prevent water condensation and leakage. Do not use the foam on the branch pipe as the material for heat insulation. ℃... -
Page 66: Maintenance
Do not repair the air conditioner personally but instead contact the professionally skilled personnel at the SINCLAIR appointed service center, as the incorrect repair would cause electric shock or fire hazard etc. 1.1 Check before Contacting Maintenance Serviceman Please check the following items before contacting the maintenance serviceman. -
Page 67: Problem Handling
1.2 Problem Handling The conditions listed below are not classified into errors. Conditions Causes When restart the unit soon after it The overload protection switch of the unit let the is stopped startup delayed for three minutes The unit does not run As soon as power supply is on The unit will stand by for approximate one minute The unit blows out mist... - Page 68 Compressor discharge temperature Flash 23 times protection Lack of refrigerant or jam protection Flash 31 times Normal operation Flash 1 time Frequency limitation for AC current Flash 2 times Oil returning Flash 3 times Defrosting Flash 4 times Frequency limitation for IPM temperature Flash 5 times Frequency limitation for PFC temperature Flash 6 times...
-
Page 69: Flow Chart Of Troubleshooting
Water full error of indoor unit Refrigerant recovery mode DB module Indicating LED flashing times Indoor unit Errors Outdoor unit error code Yellow LED Green LED Red LED error code DB 1 is connected Flash 1 time DB 2 is connected Flash 2 times DB 3 is connected Flash 3 times... -
Page 70: Malfunction Display: High Pressure Protection
Malfunction display: High Pressure Protection... -
Page 71: Malfunction Display: Low Pressure Protection
Malfunction display: Low Pressure Protection Low pressure protection Replace the outdoor unit mainboard Check the Check the pressure with a manometer: low pressure sensor: is Replace the low pressure sensor is it really low? it normal? Check Charge refrigerant according to the amount specified in the refrigerant in the system: is it nameplate and calculated additional amount sufficient? -
Page 72: Malfunction Display: Discharge Temperature Protection
2.3 Malfunction display: Discharge temperature protection Discharge temperature protection Measure Measure the resistance value of discharge Replace the oudoor discharge temperature: does it have temperature sensor: is it unit mainboard reached 125℃? correct(50KΩ)? Replace relevant discharge temperature sensor Are the Replace relevant electronic electronic expansion valves expansion valve... -
Page 73: Malfunction Display: Communication Error
2.5 Malfunction display: Communication error Communication error Check the Check the orientation of plug cable of indoor unit: is it and socet properly connected? Check the Check the orientation of plug transmission line between outdoor unit and BU module: is it properly and socet connected? Measure... -
Page 74: Malfunction Display: Indoor Unit Water Full Protection
2.6 Malfunction display: Indoor unit water full protection Water full protection Maintain the liquid level switch Check the Replace the mainboard of the Voltage of liquid level Is the water overflow? indoor unit switch : is it ok? Check the Check the Maintain the cables of water water drainage pump:... -
Page 75: Malfunction Display: High/Low Pressure Sensor Error
2.8 Malfunction display: High/Low pressure sensor error Pressure sensor error The plug on pressure sensor is correctly Check the orientation of connected to the socket on plug and socket mainboard, is it? Measure the DC voltage value between black Replace the pressure line and green line of the sensor: is it sensor OK?(0.5~4.5V) -
Page 76: Wiring Diagram
3.2 Wiring diagram Note: This drawing is just for reference; please always refer to the electric wiring stuck to the unit for actual wiring. 3.2.1 Outdoor unit MS-E56AIN, MS-E48AIN... -
Page 77: The Resistances Of Common Temperature Sensors
4 THE RESISTANCES OF COMMON TEMPERATURE SENSORS 4.1 15 KΩ Temp. Resistance Voltage Voltage Temp. Resistance Voltage Voltage (℃) (℃) (kΩ) (15K/5V) (15K/3.3V) (kΩ) (15K/5V) (15K/3.3V) 144.000 0.472 0.311 18.750 2.222 1.467 138.100 0.490 0.323 17.930 2.278 1.503 128.600 0.522 0.345 17.140 2.334... - Page 78 Temp. Resistance Voltage Voltage Temp. Resistance Voltage Voltage (℃) (℃) (kΩ) (15K/5V) (15K/3.3V) (kΩ) (15K/5V) (15K/3.3V) 3.579 4.037 2.664 2.998 4.167 2.750 3.454 4.064 2.682 2.898 4.190 2.766 3.333 4.091 2.700 2.797 4.214 2.781 3.217 4.117 2.717 2.702 4.237 2.796 3.105 4.143 2.734...
- Page 79 Temp. Resistance Voltage Voltage Temp. Resistance Voltage Voltage (℃) (℃) (kΩ) (15K/5V) (15K/3.3V) (kΩ) (15K/5V) (15K/3.3V) 13.59 2.977 1.965 5.942 3.855 2.544 13.04 3.027 1.998 5.726 3.887 2.565 12.51 3.076 2.030 5.519 3.919 2.586 3.125 2.063 5.32 3.949 2.607 11.52 3.173 2.094 5.13...
- Page 80 Temp. Resistance Voltage Voltage Temp. Resistance Voltage Voltage (℃) (℃) (kΩ) (15K/5V) (15K/3.3V) (kΩ) (15K/5V) (15K/3.3V) 145.42 0.322 0.212 21.425 1.591 1.050 138.26 0.337 0.223 20.601 1.634 1.078 131.5 0.353 0.233 19.814 1.677 1.107 126.17 0.367 0.242 19.061 1.721 1.136 119.08 0.387 0.256...
- Page 81 Temp. Resistance Voltage Voltage Temp. Resistance Voltage Voltage (℃) (℃) (kΩ) (15K/5V) (15K/3.3V) (kΩ) (15K/5V) (15K/3.3V) 4.7541 3.389 2.237 2.4983 4.001 2.640 4.6091 3.423 2.259 2.4308 4.022 2.655 4.4693 3.456 2.281 2.3654 4.044 2.669 4.3345 3.488 2.302 2.3021 4.064 2.682 4.2044 3.520 2.323...
-
Page 82: Disassembly And Assembly Procedure Of Main Parts
5 DISASSEMBLY AND ASSEMBLY PROCEDURE OF MAIN PARTS 5.1 Outdoor Unit 5.1.1 Disassembly and Assembly of the plates Remarks: Prior to the assembly of the plates, make sure the power supply is cut off. Steps Illustrations Operation Instructions Unscrew the fixed screws of the 1.Disconnect the coping plate;... - Page 83 Unscrew the fixed screws of 4.Disconnect the left left side plate and rear side side plate and rear side plate; plate Remove left side plate and rear side plate. 5.1.2 Assembly and Disassembly of the Compressor Remarks: Prior to the assembly of the compressor, make sure there is no refrigerant in the pipeline and the power supply is cut off.
- Page 84 3.Loose the fixed Unscrew the fixed screws of the screw of the compressor compressor base base Remove and replace the compressor. 4.Remove the Note: never let the flame compressor away contact any other from the seating component during the replacement.
- Page 85 Solder the connecting 6.Solder the pipe to make them pipeline with the connected suction and Note: never let the discharge ports of flame contact any other the compressor component. Tighten the fixing screw of the power cord. 7.Reconnect the Connect the power power cords cord.
- Page 86 5.1.3 Disassembly and Assembly of 4-way valve Remarks: Prior to the assembly of the compressor, make sure there is no refrigerant in the pipeline and the power supply is cut off. Steps Illustrations Operation Instructions a) Unscrew the fixed screws of the magnet 1.Remove the magnet coil;...
-
Page 87: Parts Guide
PARTS GUIDE HIGH POWER MULTI SYSTEM MS-E48AIN, MS-E56AIN DB2-19SB, DB3-19SB, DB5-16AF... - Page 88 Exploded view of unit MS-E48AIN...
- Page 89 Description Part Code Actualization Price Code MODEL: MS-E48AIN Rear Grill 01574100004 Condenser Assy 01124100105 Over-cooling Pipe Sub-assy 04534100044 Coping Sub-Assy 01264100019 Electric Box Cover none Electric Box Assy 100002000252 Electronic Expansion Valve 43042800005 Clapboard Sub-Assy 017021000029 RetainingPlate(Motor Support) 012066000047 Motor Support Sub-Assy...
- Page 90 Description Part Code Actualization Price Code MODEL: MS-E48AIN Sensing Device 322101002 Electronic Expansion Valve 07334412 Electromagnetic Valve 43000054 Electric Expand Valve Fitting 4304413205 Radiator 49010252 Retaining Support(Radiator) 200115000004 Inductance Sub-Assy none Reactor 43130192 Main Board 300027000010 Main Board 300027000013 Retaining Support(Driving Board)
- Page 91 Exploded view of unit MS-E56AIN...
- Page 92 Description Part Code Actualization Price Code MODEL: MS-E56AIN Rear Grill 01574100004 Condenser Assy 01124100105 Over-cooling Pipe Sub-assy 04534100044 Coping Sub-Assy 01264100019 Electric Box Cover none Electric Box Assy 100002000245 Electronic Expansion Valve 43042800005 Clapboard Sub-Assy 017021000029 RetainingPlate(Motor Support) 012066000047 Motor Support Sub-Assy 017012000095 Discharge Tube Sub-assy 04534100021...
- Page 93 Description Part Code Actualization Price Code MODEL: MS-E56AIN Sensing Device 322101002 Electronic Expansion Valve 07334412 Electromagnetic Valve 43000054 Electric Expand Valve Fitting 4304413205 Radiator 49010252 Retaining Support(Radiator) 200115000004 Inductance Sub-Assy none Reactor 43130192 Main Board 300027000010 Main Board 300027000011 Retaining Support(Driving Board) 200115000005 Testing Board 20017700007...
- Page 98 Exploded view of distribution box DB5-16AF...
- Page 99 Description Part Code Actualization Price Code MODEL: DB5-16AF Coping 01264100017P Electric Component Mounting Plate assy 01324100023 Sponge 12204100052 Tube Clip 021400051 Tube Clip 021400052 Sponge NONE Base Frame Sub-Assy 0128410001801P Cable-Cross Loop 76510026 Wire Clamp 71010003 Insulation GasketF 70410524 Cable Cross Loop 76510021 Retaining Plate (Water Level Switch) 01844100017P...
-
Page 100: Technical Support
SINCLAIR CORPORATION Ltd. 1-4 Argyll St. London W1F 7LD Great Britain www.sinclair-world.com This product was manufactured in China (Made in China). REPRESENTATIVE SINCLAIR EUROPE spol. s r.o. Purkynova 45 612 00 Brno Czech Republic TECHNICAL SUPPORT NEPA spol. s r.o. Purkynova 45...
Need help?
Do you have a question about the MS-E48AIN and is the answer not in the manual?
Questions and answers