
Related Manuals for Sinclair MS-H09AICN PT


Summary of Contents for Sinclair MS-H09AICN PT
- Page 1 SERVICE MANUAL NEW MULTI SYSTEM SERIES INDOOR UNITS MS-H07AICN PT, MS-H09AICN PT MS-H12AICN PT, MS-H18AICN PT...
-
Page 2: Table Of Contents
Service Manual Table of Contents Part : Technical Information ...............1 1. Summary ........................1 ......................2 3. Outline Dimension Diagram ................4 4. Refrigerant System Diagram ..............5 5. Electrical Part ......................6 5.1 Wiring Diagram.........................6 5.2 PCB Printed Diagram .......................8 6. Function and Control ..................9 6.1 Remote Controller Introduction ..................9 6.2 Brief Description of Modes and Functions..............13... - Page 3 Service Manual Appendix: ..........................46 Appendix 1: Reference Sheet of Celsius and Fahrenheit ............46 ................46 Appendix 3: Pipe Expanding Method ..................47 Appendix 4: List of Resistance for Temperature Sensor ............. 48 Table of Contents...
-
Page 4: Part : Technical Information
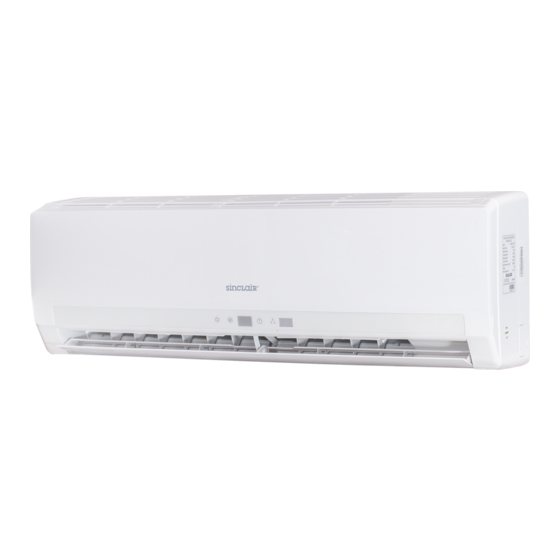
Service Manual Part : Technical Information 1. Summary Indoor Unit MS-H07AICN PT MS-H09AICN PT MS-H12AICN PT MS-H18AICN PT Remote Controller H O U R ONOFF YAA1FB Technical Information... - Page 5 Service Manual Model MS-H07AICN PT MS-H09AICN PT Product Code CB161N07700_L31222 CB161N07800_L31222 Rated Voltage 220-240 220-240 Rated Frequency Phases Power Supply Mode Outdoor Outdoor Cooling Capacity 2100 2600 Heating Capacity 2600 3000 Air Flow Volume (SH/H/M/L) 580/500/400/300 600/500/400/300 Dehumidifying Volume Fan Type...
- Page 6 Service Manual Model MS-H12AICN PT MS-H18AICN PT Product Code CB161N07900_L31222 CB161N07600_L31222 Rated Voltage 220-240 220-240 Rated Frequency Phases Power Supply Mode Outdoor Outdoor Cooling Capacity 3500 5275 Heating Capacity 4000 5800 Air Flow Volume (SH/H/M/L) 600/500/400/300 850/780/650/550 Dehumidifying Volume Fan Type Fan Diameter-height Fan Motor Speed (SH/H/M/L) Cool 1290/1070/900/690...
-
Page 7: Outline Dimension Diagram
Service Manual 3. Outline Dimension Diagram Indoor Unit MS-H07AICN PT MS-H09AICN PT MS-H12AICN PT Φ55 Φ55 MS-H18AICN PT Φ55 Φ55 Unit:mm Models MS-H07AICN PT MS-H09AICN PT MS-H12AICN PT MS-H18AICN PT Technical Information... -
Page 8: Refrigerant System Diagram
Heat Suction Accumlator exchanger Compressor (evaporator) Heat exchanger Liquid pipe (condenser) side Valve Strainer Capillary Electron Strainer expansion valve COOLING HEATING Liquid pipe:1/4" (6mm) Gas pipe:3/8" (9.52mm) MS-H07AICN PT MS-H09AICN PT MS-H12AICN PT Gas pipe:1/2" (12mm) MS-H18AICN PT Technical Information... -
Page 9: Electrical Part
Service Manual 5. Electrical Part 5.1 Wiring Diagram Symbol Symbol Color Symbol Symbol Color Symbol Name White Green Jumper cap Yellow Brown COMP Compressor Blue Grounding wire YEGN Yellow/Green Black Violet Orange Note: Jumper cap is used to determine fan speed and the swing angle of horizontal lover for this model. MS-H07AICN PT Technical Information... - Page 10 Service Manual MS-H09AICN PT MS-H12AICN PT MS-H18AICN PT TUBE TEMP. ROOM TEMP. SENSOR SENSOR FAN MOTOR TERMINAL TUBE ROOM BLOCK N(1) COM-OUT PRINTED CIRCUIT BOARD JUMP L(AC-L) YEGN (SWING) DISP1 DISP2 SWING-UD HEALTH-N HEALTH-L YEGN EVAPORATOR COLD PLASMA GENERATOR RECEIVER AND...
-
Page 11: Pcb Printed Diagram
Service Manual 5.2 PCB Printed Diagram Indoor Unit Top view Name Port of live wire Protective tube Live wire of health function Port of neutral wire Port of indoor fan Communication port Jumper cap Auto button Feedback of indoor fan Port of motor for vertical swing Buzzer Port of display... -
Page 12: Function And Control
Service Manual 6. Function and Control 6.1 Remote Controller Introduction ON/OFF button - button + button MODE button H O U R ONOFF FAN button SWING button I FEEL button button SLEEP button TEMP button TIMER-ON button CLOCK button TIMER-OFF button TURBO button LIGHT... - Page 13 Service Manual no display Technical Information...
- Page 14 Service Manual Technical Information...
- Page 15 Service Manual battery reinstall remove Cover of battery box Technical Information...
-
Page 16: Brief Description Of Modes And Functions
Service Manual 6.2 Brief Description of Modes and Functions MS-H07AICN PT MS-H09AICN PT MS-H12AICN PT 1. Temperature Parameters Indoor preset temperature (T preset Indoor ambient temperature (T amb. 2. Basic Functions Once energized, in no case should the compressor be restarted within less than 3 minutes. In the situation that memory function is lag;... - Page 17 Service Manual If T , the unit enters heating mode, in which case the four-way valve, the compressor and the outdoor fan will operate amb. preset +2°C simultaneously, and the indoor fan will run at preset speed in the condition of preset cold air prevention. If T , the compressor will stop, the outdoor fan will stop with a time lag of 30s, and the indoor fan will stop after 60-second blow amb.
- Page 18 Service Manual 1) Cooling overload a. If T tube b. If T tube c. If T tube d. If T tube 2) Heating overload a. If T tube b. If T tube c. If T tube d. If T tube Exhaust temperature protection of compressor Communication fault Module protection...
- Page 19 Service Manual 2. In heating mode: 2.1 When the initial set temperature is 16°C, the unit will keep on running at this temperature; 2.2 When the initial set temperature is 17~20°C, the temperature will decrease 1°C by every hour after sleep function is set; the temperature will not change after decreasing 1°C;...
- Page 20 Service Manual closed at 0 Location, and the swinging is effectual only on condition that setting the swinging order and the inner fan is running. The indoor fan O(0 ) heating angle cooling angle O(0 ) (10) Basic Display Operation pattern and mode pattern display All the display patterns will display for a time when the power on, the operation indication pattern will display in red under standby status.
- Page 21 Service Manual (14)Electric heating band control of outdoor unit Compressor electric heating band control: a) Start condition: the compressor is in off status and the T outdoor ambient temperature b) Stop condition: the band is off when either of the below condition is met: 1.The compressor is in on status;...
- Page 22 Service Manual MS-H18AICN PT 1.Basic function of system (1)Cooling mode 1.Under this mode, fan motor, swing will work under setting status, the temp. range is 16-30ºC(61-86 Fahrenheit scale) 2.Outdoor unit malfunction or unit stop running, indoor unit will keep original running status, malfunction displayed. 3.When0 (Tset-Tamb.), if indoor fan motor is high speed, that the fanmotorist running in middle speed, the middle speed or low speed will be maintained;(this condition should be executed when compressor ressor statr up);...
- Page 23 Service Manual When the unit is powered on, all patterns will be displayed and the standby operation indicator will become red. When the unit is turned on through a remote controller, the operation indicator is light. At the same time, operating mode patterns (mode indicators include cooling, button is switched off, all display will be turned off.
- Page 24 Service Manual (4) Sleep function In this mode, the unit will automatically select appropriate sleep curve to operate according to different set temperature. 1. If sleep function is set in cooling, the system will increase set temperature automatically for operation in a certain degree. 2.
- Page 25 Service Manual 3. Protecting Treatments of Thermo-bulb: When the thermobulb is detected to be short-circuited continuously for 5 seconds: It is regarded that the temperature detected by the thermo-bulb is over-high (or unlimited), then the whole machine will exert corresponding safety stops according to the over-high temperature sensed by the thermo-bulb, and display corresponding temperature safety stops and faults of the thermo-bulb simultaneously.
-
Page 26: Part : Installation And Maintenance
Service Manual Part : Installation and Maintenance 7. Notes for Installation and Maintenance Safety Precautions: 10. If the power cord or connection wire is not long enough, please get the specialized power cord or connection wire Important! from the manufacture or distributor. Prohibit prolong the wire by yourself. - Page 27 Service Manual Main Tools for Installation and Maintenance 1. Level meter, measuring tape 2. Screw driver 3. Impact drill, drill head, electric drill 4. Electroprobe 5. Universal meter 6. Torque wrench, open-end wrench, inner hexagon spanner 7. Electronic leakage detector 8.
-
Page 28: Installation
Service Manual 8. Installation 8.1 Installation Dimension Diagram Space to the wall At least 15cm At least 15cm Space to the wall Drainage pipe Installation and Maintenance... -
Page 29: Installation Procedures
Service Manual Installation procedures Start installation Preparation before installation Read the requirements select installation Prepare tools for electric connection location Select indoor unit Select outdoor unit installation location installation location Install the support of outdoor unit Install wall-mounting frame, drill wall holes (select it according to the actual situation) Connect pipes of indoor Fix outdoor unit... -
Page 30: Installation Parts-Checking
Service Manual 8.2 Installation Parts-checking 8.4 Electric Connection Requirement 1. Safety Precaution Name Name (1) Must follow the electric safety regulations when installing Indoor unit Sealing gum the unit. Outdoor unit Wrapping tape (2) According to the local safety regulations, use qualified Support of outdoor Connection pipe power supply circuit and air switch. - Page 31 Service Manual (3) Fix the wall-mounting frame on the wall with tapping screws 5. Connect the Pipe of Indoor Unit (1) Aim the pipe joint at the corresponding bellmouth.(As show pulling the frame. If the plastic expansion particle is loose, in Fig.5) (2) Pretightening the union nut with hand.
- Page 32 Service Manual 7. Connect Wire of Indoor Unit 8. Bind up Pipe (1) Open the panel, remove the screw on the wiring cover and (1) Bind up the connection pipe, power cord and drain hose then take down the cover.(As show in Fig.11) with the band.(As show in Fig.14) (2) Reserve a certain length of drain hose and power cord Screw...
-
Page 33: Check After Installation And Test Operation
Service Manual 8.6 Check after Installation and Test Operation 1. Check after Installation Check according to the following requirement after finishing installation. Items to be checked Possible malfunction Has the unit been The unit may drop, shake or emit noise. Have you done the (heating) capacity. -
Page 34: Maintenance
Service Manual 9. Maintenance 9.1 Error Code List Display Method of Outdoor Display Method of Indoor Unit Unit Indicator has 3 kinds of Indicator Display (during display status and during Malfunction blinking, ON 0.5s and OFF Dual-8 A/C status Possible Causes blinking, ON 0.5s and OFF Name 0.5s) -
Page 35: Procedure Of Troubleshooting
Service Manual 9.2 Procedure of Troubleshooting Indoot Unit 1. Malfunction of Temperature Sensor F1, F2 Main detection points: Malfunction diagnosis process: Start Is the wiring terminal between the temperature sensor and the controller Insert the temperature sensor tightly Is malfunction eliminated Is there short circuit due to trip- over of the parts... - Page 36 Service Manual 2. Malfunction of Blocked Protection of IDU Fan Motor H6 Main detection points: Malfunction diagnosis process: Start While power is off stir the blade with a tool to see whether the blade rotates smoothly Tighten the screw; reassemble the blade, motor and shaft bearing rubber base sub-assy to make sure there is no foreign object between them Is malfunction...
- Page 37 Service Manual 3. Malfunction of Protection of Jumper Cap C5 Main detection points: Malfunction diagnosis process: Start Appearance of the jumper cap Assemble the jumper cap with the same model Is malfunction eliminated Is the jumper cap inserted correctly Insert the jumper cap tightly Is malfunction eliminated...
-
Page 38: Troubleshooting For Normal Malfunction
Service Manual 9.3 Troubleshooting for Normal Malfunction 1. Air Conditioner Can't be Started Up Possible Causes Discriminating Method (Air conditioner Status) Troubleshooting No power supply, or poor wait for power recovery. If not, check power connection for power plug and the buzzer can't give out sound supply circuit and make sure the power plug is connected well. - Page 39 Service Manual 4. Air Conditioner is Leaking Possible causes Discriminating method (air conditioner status) Troubleshooting Eliminate the foreign objects inside the drain Drain pipe is blocked Water leaking from indoor unit pipe Drain pipe is broken Water leaking from drain pipe Replace drain pipe Water leaking from the pipe connection place of Wrapping is not tight...
-
Page 40: Exploded View And Parts List
Service Manual 10. Exploded View and Parts List 10.1 Indoor Unit MS-H07AICN PT MS-H09AICN PT MS-H12AICN PT H O U R ONOFF Installation and Maintenance... - Page 41 Service Manual Part Code Description MS-H07AICN PT MS-H09AICN PT MS-H12AICN PT Product Code CB161N07700_L31222 CB161N07800_L31222 CB161N07900_L31222 Front Panel Sub-Assy 20012557_L31222 20012557_L31222 20012557_L31222 Display Board 30565012 30565012 30565012 Filter Sub-Assy 1112220403 1112220403 1112220403 Electric Box Cover2 20122075 20122075 20122075 Screw Cover...
- Page 42 Service Manual MS-H18AICN PT H O U R ONOFF Installation and Maintenance...
- Page 43 Service Manual Part Code Description MS-H18AICN PT Product Code CB161N07600_L31222 Front Panel Assy 20012280_L31222 Display Board 30565039 Filter Sub-Assy 1112208901 Screw Cover 24252016 Front Case Sub-Assy 20022172 Guide Louver 10512115 Air Louver 1 10512116 Air Louver 2 10512117 Helicoid tongue 26112238 Left Axile Bush 10512037...
-
Page 44: Removal Procedure
Service Manual 11. Removal Procedure Warning: Be sure to wait for a minimum of 20 minutes after turning off all power supplies and discharge the refrigerant completely before removal. Removal Procedure of Indoor Unit Steps Procedure Open the panel. Panel Loosen the clasp shown in the fig and then pull the left filter and right filer outwards to remove them. - Page 45 Service Manual Steps Procedure 3. Remove panel Panel Open the front panel; separate the panel Front panel rotation shaft from the groove fixing the front panel and then removes the front panel. Note: Panel rotation The display of some models is fixed on display on the panel before removing the panel.
- Page 46 Service Manual Steps Procedure 6. Remove vertical louver Loosen the connection clasps between vertical louver and bottom case to remove vertical louver. Bottom case Vertical louver Clasps 7. Remove electric box assy Loosen the connection clasps between shield cover of electric box sub-assy and electric box, and then remove the shield cover of electric box sub-assy.
- Page 47 Service Manual Steps Procedure Note: The display of some models is fixed on the panel; unscrew the screws fixing the display on the panel before removing the Display Screws panel. Screw and then remove the electric box assy. 8. Remove evaporator assy Connection pipe clamp Screws At the back of the unit, remove the...
- Page 48 Service Manual Steps Procedure 9. Remove stepping motor Step motor Screws then remove the step motor. Remove the screws fixing motor clamp and then remove the motor clamp. Motor clamp Remove the screw at the connection place of cross flow blade and motor; lift Motor the motor and cross flow blade upwards to remove them.
-
Page 49: Appendix
Service Manual Appendix: Appendix 1: Reference Sheet of Celsius and Fahrenheit Conversion formula for Fahrenheit degree and Celsius degree: Tf=Tcx1.8+32 Set temperature Fahrenheit Fahrenheit Fahrenheit display Fahrenheit display Fahrenheit display Fahrenheit Celsius( Celsius( Celsius( temperature temperature temperature 60.8 69/70 69.8 78/79 78.8 62/63... -
Page 50: Appendix 3: Pipe Expanding Method
Service Manual Appendix 3: Pipe Expanding Method Pipe Note: Pipe cutter Improper pipe expanding is the main cause of refrigerant leakage.Please expand the pipe according to the following steps: Leaning Uneven Burr A:Cut the pip B:Remove the burrs Pipe Shaper Downwards C:Put on suitable insulating pipe Union pipe... -
Page 51: Appendix 4: List Of Resistance For Temperature Sensor
Service Manual Appendix 4: List of Resistance for Temperature Sensor Resistance Table of Ambient Temperature Sensor for Indoor and Outdoor(15K) Temp( Temp( Temp( Temp( 138.1 18.75 3.848 1.071 128.6 17.93 3.711 1.039 121.6 17.14 3.579 1.009 16.39 3.454 0.98 108.7 15.68 3.333 0.952... - Page 52 Service Manual Resistance Table of Tube Temperature Sensors for Indoor and Outdoor (20K) Temp( Temp( Temp( Temp( 181.4 25.01 5.13 1.427 171.4 23.9 4.948 1.386 162.1 22.85 4.773 1.346 153.3 21.85 4.605 1.307 20.9 4.443 1.269 137.2 4.289 1.233 129.9 19.14 4.14 1.198...
- Page 53 Service Manual Resistance Table of Discharge Temperature Sensor for Outdoor(50K) Temp( Temp( Temp( Temp( 853.5 18.34 4.75 799.8 93.42 17.65 4.61 89.07 16.99 4.47 703.8 84.95 16.36 4.33 660.8 81.05 15.75 4.20 620.8 77.35 15.17 4.08 580.6 73.83 14.62 3.96 548.9 70.5 14.09...
Need help?
Do you have a question about the MS-H09AICN PT and is the answer not in the manual?
Questions and answers