Table of Contents
Advertisement
Owner's Manual
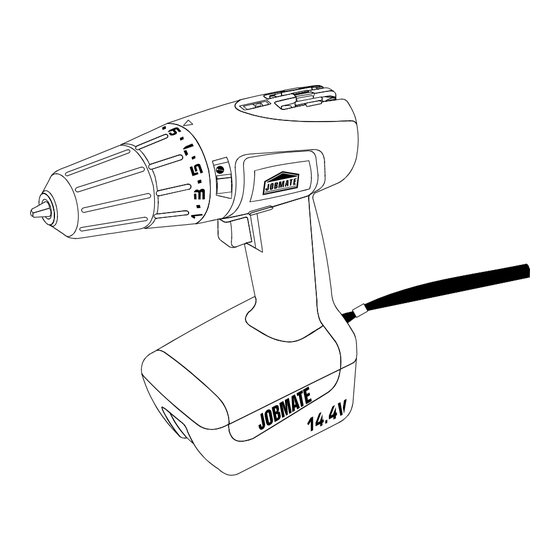
14.4 V Cordless Drill
054-1200-0
Need Assistance?
Call us on our toll free customer support line: 1-866-JOBMATE
Technical questions
Replacement parts
Parts missing from package
CAUTION:
Before using this
cordless drill or any of
its accessories, read
this manual and follow
all Safety Rules and
Operating Instructions.
Imported by Trileaf Distribution Trifeuil Toronto, Canada M4S 2B8
Rev 1.10
08/09/2009
General Safety Rules
Specific Safety Rules
and Symbols
Functional Description
Assembly
Operation
Maintenance
Accessories
Advertisement
Table of Contents

Related Manuals for jobmate 054-1200-0


Summary of Contents for jobmate 054-1200-0
- Page 1 Owner’s Manual 14.4 V Cordless Drill 054-1200-0 Need Assistance? Call us on our toll free customer support line: 1-866-JOBMATE Technical questions Replacement parts Parts missing from package General Safety Rules CAUTION: Specific Safety Rules Before using this...
-
Page 2: Table Of Contents
This product is not guaranteed against wear or breakage due to misuse and/or abuse. This product is not guaranteed if used for industrial or commercial purposes. TOLL FREE HELPLINE: 1-866-JOBMATE... -
Page 3: Product Specifications
SPECIFICATIONS DRILL Chuck speeds …………….. 0–400/0–1150 RPM (no load) Battery ……………………... 14.4 V Clutch positions …………... 17 including drill mode Keyless chuck …………….. ” Weight ……………………... 4 lb. 2 oz. (1.9 kg) BATTERY & CHARGER Battery Voltage …………… 14.4 V Charger ……………………. - Page 4 POWER TOOL SAFETY Do not expose power tools to rain or wet GENERAL SAFETY RULES conditions. Water entering the power tool will increase the risk of electric shock. WARNING: Read and understand all instructions. Failure to follow all Do not abuse the cord. Never use the instructions listed below may result in cord to carry the tools or pull the plug from electric shock, fire and/or serious personal...
-
Page 5: Specific Safety Rules
POWER TOOL SAFETY Do not overreach. Keep proper footing Check for misalignment or binding of and balance at all times. Proper footing moving parts, breakage of parts and any other condition that may affect the tool’s and balance enables better control of the operation. -
Page 6: Battery & Charger Safety
SPECIFIC SAFETY RULES Make sure the spindle has come to a WARNING: Glasses or goggles complete stop before touching the chuck or not in compliance with ANSI Z87.1 could attempting to change the drill bit. cause serious injury when they break. Always make sure the chuck is tight and Do not wear gloves, neckties or loose the drill bit firmly tightened in the chuck... - Page 7 BATTERY & CHARGER SAFETY Do not incinerate the battery. It can Do not abuse the cord. To reduce the risk explode in a fire. of damage to the electric cord or plug, never carry the charger by the cord or yank Do not use an extension cord.
-
Page 8: Symbols
SYMBOLS WARNING: Some of the following symbols may be used on your tool. Please study them and learn their meaning. Proper interpretation of these symbols will allow you to operate the tool better and safer. alternating or direct current volts amperes class II construction hertz... -
Page 9: Know Your Cordless Drill
KNOW YOUR CORDLESS DRILL On-board Spirit level screwdriver bit storage 3/8” Keyless Clutch chuck Forward / reverse switch Two speed gearbox Trigger switch Carry strap 14.4 V Battery pack Battery charger Charger stand... -
Page 10: Accessories
ACCESSORIES & CARTON CONTENTS AVAILABLE ACCESSORIES DRILL COMPONENTS WARNING: Use only accessories DESCRIPTION recommended for this cordless drill. Drill Follow instructions that accompany Double ended accessories. Use of improper screwdriver bits accessories may cause injury to the #1 & #2 operator or damage to the cordless drill. - Page 11 CARTON CONTENTS...
-
Page 12: Assembly & Operation
ASSEMBLY & OPERATION CHARGING THE BATTERY PACK NOTE: Do NOT leave the charger plugged in for longer Place the battery (1) in a dry location than 4 hours. The battery will near a 120 V 60 Hz electrical outlet be fully charged within 4 (see Fig. - Page 13 ASSEMBLY & OPERATION 9–11 For driving screws into soft & 5–8 For driving medium sized screws into soft materials 9–12 For driving screws into soft & medium-density materials 13–14 For driving screws into hardwood 15–16 For driving large screws ...
- Page 14 ASSEMBLY & OPERATION TWO-SPEED GEARBOX Set the speed control switch (1) to the desired speed (Fig. 6). Slide the speed control switch DOWN for low-speed operation. Slide the speed control switch UP for high-speed operation. Fig. 7 NOTES: a) Use low-speed setting for drilling large INSTALLING DRILL BITS holes and for driving screws.
- Page 15 ASSEMBLY & OPERATION INSTALLING DRILL BITS – cont’d WARNING Finish tightening the chuck jaws. Firmly Have you read “POWER TOOL grasp the chuck body with your hand SAFETY”, “SPECIFIC SAFETY and rotate it in a clockwise direction. RULES”, “BATTERY & CHARGER The automatic spindle lock will prevent SAFETY”...
- Page 16 ASSEMBLY & OPERATION DRILLING While holding the drill firmly, place the point of the drill bit at the point to be When drilling into smooth, hard surfaces drilled. Depress the switch trigger to such as metal, use a centre punch to mark start the drill.
- Page 17 ASSEMBLY & OPERATION DRIVING SCREWS – cont’d – cont’d CHUCK REMOVAL Select the correct screwdriver bit for the screw being driven. Fasten the screwdriver bit into the chuck, making sure the flats of the bit are gripped by the chuck jaws. Set the torque clutch to the appropriate setting based on the chart shown on Page 13.
-
Page 18: Maintenance
ASSEMBLY & OPERATION MAINTENANCE GENERAL WARNING: When servicing, use only identical JobMate™ replacement parts. Use of any other part may create a hazard or cause product damage. DO NOT use solvents when cleaning plastic parts. Most plastics are susceptible to damage from various types of Fig. - Page 19 MAINTENANCE BATTERY MAINTENANCE BATTERY PACK REMOVAL AND PREPARATION FOR RECYCLING For power, long operational life and light weight your tool is powered by a Nickel- To preserve our natural resources, please cadmium battery pack. recycle or dispose of batteries properly. Nickel-cadmium batteries are powerful, This product contains nickel-cadmium rugged and will provide hundreds of...
- Page 20 MAINTENANCE HOW TO EXERCISE A NICKEL- CADMIUM BATTERY Every two months or after 30 charge/discharge cycles, whichever comes first, fully discharge your battery. To fully discharge the battery, place it in the tool that it came with and work with the tool until it nearly stops and no longer produces useful action.
-
Page 21: Parts & Service
PARTS DIAGRAM – MODEL 054-1200-0 Cordless Drill... - Page 22 PARTS LIST – MODEL 054-1200-0 Cordless Drill When servicing, use only JobMate™ replacement parts. Use of any WARNING: other parts may create a HAZARD or cause damage to your power tool. Any attempt to repair or replace electrical parts on this power tool may create a hazard unless repair is performed by a qualified technician.
- Page 23 PARTS LIST – MODEL 054-1200-0 Key # Part # Part Name Quantity 316829 Governor box 242562 Lever 315913 Timing point ring Self tapping screw 500006 ST2.9x12 201307 Removable gear ring 144008 Planetary bracket 200015 Planetary gear 144016 Planetary bracket 200016...
Need help?
Do you have a question about the 054-1200-0 and is the answer not in the manual?
Questions and answers