Table of Contents
Advertisement
Owner's Manual
18 V Cordless Drill
(Part of 3 in 1 Combo 99-2847-0)
54-2891-8
CAUTION:
Before using this
cordless drill or any of
its accessories, read
this manual and follow
all its Safety Rules and
Operating Instructions.
Imported by Trileaf Distribution Trifeuil Toronto, Canada M4S 2B8
Rev 1
06/03/06
General Safety Rules
Specific Safety Rules
and Symbols
Functional Description
Assembly
Operation
Maintenance
Accessories
Advertisement
Table of Contents

Related Manuals for jobmate 54-2891-8


Summary of Contents for jobmate 54-2891-8
- Page 1 Owner’s Manual 18 V Cordless Drill (Part of 3 in 1 Combo 99-2847-0) 54-2891-8 General Safety Rules CAUTION: Specific Safety Rules Before using this and Symbols cordless drill or any of Functional Description its accessories, read ...
-
Page 2: Table Of Contents
20–22 WARRANTY 1-year Warranty This JobMate product carries a one (1) year warranty against defects in workmanship and materials. Trileaf Distribution agrees to replace the defective product free of charge with the same model or one of equal value or specification, within the stated warranty period, when returned by the original purchaser with proof of purchase. -
Page 3: Product Specifications
SPECIFICATIONS DRILL Chuck speeds …………….. 0–650 RPM (no load) Battery ……………………... 18 V Clutch positions …………... 17 including drill mode Keyless chuck …………….. ” Weight ……………………... 7 lb. 14 oz. (3.6 kg) BATTERY & CHARGER Battery Voltage …………… 18 V Charger ……………………. - Page 4 POWER TOOL SAFETY GENERAL SAFETY RULES Do not abuse the cord. Never use the cord to carry the tools or pull the plug from WARNING: Read and understand an outlet. Keep cord away from heat, oil, all instructions. Failure to follow all sharp edges or moving parts.
-
Page 5: Specific Safety Rules
POWER TOOL SAFETY Use safety equipment. Always wear eye Use only accessories that are protection. Dust mask, non-skid safety recommended by the manufacturer for shoes, hard hat or hearing protection must your model. Accessories that may be be used under applicable conditions. suitable for one tool may become hazardous when used on another tool. -
Page 6: Battery & Charger Safety
SPECIFIC SAFETY RULES BATTERY & CHARGER SAFETY Do not drill material too small to be securely held. Do not store or carry battery in a manner Always keep hands out of the path of the in which metal objects could contact the drill bit. - Page 7 BATTERY & CHARGER SAFETY Use the charger only in a standard 110– NOTE: See Pages 18 & 19 for 120 V 60 Hz electrical outlet. detailed information on exercising the Charge the battery only with the charger battery for peak performance and for supplied with the drill.
-
Page 8: Symbols
SYMBOLS WARNING: Some of the following symbols may be used on your tool. Please study them and learn their meaning. Proper interpretation of these symbols will allow you to operate the tool better and safer. three-phase alternating volts current with neutral amperes direct current hertz... -
Page 9: Know Your Cordless Drill
KNOW YOUR CORDLESS DRILL On-board screwdriver bit storage 3/8” Keyless chuck Clutch Forward / reverse switch Trigger switch 18 V Battery pack Charger stand Battery charger... -
Page 10: Accessories
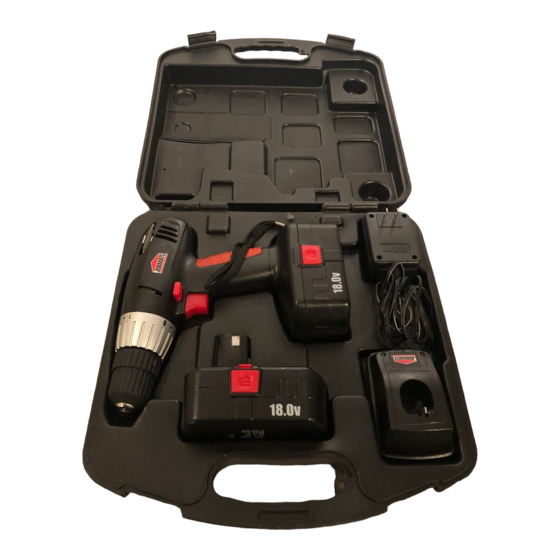
ACCESSORIES & TOTE CONTENTS CARTON CONTENTS – cont’d AVAILABLE ACCESSORIES DRILL COMPONENTS WARNING: Use only accessories DESCRIPTION recommended for this cordless drill. Drill Follow instructions that accompany Double ended accessories. Use of improper screwdriver bits accessories may cause injury to the #1 &... - Page 11 TOTE CONTENTS...
-
Page 12: Assembly & Operation
ASSEMBLY & OPERATION CHARGING THE 18 V BATTERY PACK Place the charging stand near a 110–120 V 60 Hz electrical outlet. Insert small charger plug (1) into charger stand (2) and plug the battery charger (3) into the 110–120 V 60 Hz Fig. - Page 13 ASSEMBLY & OPERATION ON-BOARD SCREWDRIVER BIT STORAGE Convenient on-board screwdriver bit storage (1) is provided at the rear of the drill housing (Fig. 3). Fig. 4 FORWARD/REVERSE SWITCH The forward/reverse switch (1) is conveniently mounted above the trigger switch (2) (Fig.5). To make the drill rotate clockwise (for drilling) push the forward / Fig.
- Page 14 ASSEMBLY & OPERATION INSTALLING DRILL BITS VARIABLE SPEED TRIGGER SWITCH WARNING: Never hold the chuck This drill is equipped with a variable speed body with one hand and use the drill ON/OFF trigger switch. power to rotate the drill body to loosen or tighten bits.
- Page 15 ASSEMBLY & OPERATION INSTALLING DRILL BITS – cont’d WARNING WARNING: Do not insert drill bit Have you read “POWER TOOL into chuck and tighten as shown in SAFETY”, “DRILL SAFETY”, Fig. 8. Drill bit MUST be properly “BATTERY & CHARGER SAFETY” inserted with all three chuck jaws and “SYMBOLS”...
- Page 16 ASSEMBLY & OPERATION DRILLING – cont’d When drilling metals, use a light oil on the drill bit to keep it from overheating. The oil Check drill bit to make sure it is firmly will prolong the life of the drill bit and locked into the drill chuck and the improve the drill cutting action.
- Page 17 ASSEMBLY & OPERATION CHUCK REMOVAL – cont’d Insert hex key into chuck and tighten jaws of chuck securely (Fig. 12). Tap Remove the battery pack from the drill. the hex key sharply with a mallet in a COUNTER-CLOCKWISE direction. Insert a 5/16” or larger hex key (1) into This will loosen the chuck on the the chuck (2) and tighten the chuck spindle.
-
Page 18: Maintenance
PREPARATION FOR RECYCLING WARNING: When servicing, use To preserve our natural resources, please only identical JobMate™ replacement recycle or dispose of batteries properly. parts. Use of any other part may create a hazard or cause product damage. This product contains nickel-cadmium batteries. - Page 19 MAINTENANCE BATTERY MAINTENANCE HOW TO EXERCISE A NICKEL- CADMIUM BATTERY For power, long operational life and light weight your tool is powered by a Nickel- Every two months or after 30 cadmium battery pack. charge/discharge cycles, whichever comes first, fully discharge your Nickel-cadmium batteries are powerful, battery.
-
Page 20: Parts & Service
PARTS DIAGRAM – MODEL 54-2891-8 Cordless Drill... - Page 21 PARTS LIST – MODEL 54-2891-8 Cordless Drill When servicing, use only JobMate™ replacement parts. Use of any WARNING: other parts may create a HAZARD or cause damage to your power tool. Any attempt to repair or replace electrical parts on this power tool may create a hazard unless repair is performed by a qualified technician.
- Page 22 PARTS LIST – MODEL 54-2891-8 Key # Part # Part Name Quantity 500801 Self-tapping screw 316502 Motor mounting flange 500005 Self-tapping screw 130025 Motor 306062 Left enclosure 612000 PH2–6mm driver bit 311512 Direction setting button 163608 Switch assembly 323503 Bit holder 616000 R1–R2 driver bit...
Need help?
Do you have a question about the 54-2891-8 and is the answer not in the manual?
Questions and answers