
Related Manuals for MAXTEK 74275

Summary of Contents for MAXTEK 74275
- Page 1 1080P Dashboard Camera MODEL NUMBER: 74275 USER GUIDE After Sales Support UK/N.IRELAND HELPLINE N 01270 508538 REP.IRELAND HELPLINE N 1800 995 036 WEBSITE: www.quesh.co.uk EMAIL: enquiries@quesh.co.uk...
-
Page 2: Table Of Contents
Contents Welcome Section General Information & Safety Instructions Contents & Features General Layout HUD Layout Assembling • Mounting The Camera Charging • USB Charging • In-Car Adaptor Setup • Turning The Camera On Modes • Available Modes • Video Mode • Still Mode • Playback Mode 10-14. Video Options • Video Options Menu • Resolution • Loop Recording • WDR (Wide Dynamic Range) • Exposure • Motion Detection • Record Audio • Date Stamp • G Sensor • LDWS (Lane Departure Warning System) • FCWS (Forward Collision Warning System) 14-18. - Page 3 Contents 14-18. Still Options (Cont.) • White Balance • Colour • ISO • WDR (Wide Dynamic Range) • Exposure • Anti-Shake • Quick Preview • Date Stamp Playback Options • Playback setting options • Delete • Protect • Slide Show 20-23. Setup Options • Setup Options Menu • Date / Time • Car NO • Auto Power • Beep Sound • Language • TV Mode • Frequency • Lamp Setting • Backlight • Format • Default Settings • Version HDMI • Using The HDMI • Playback 25-26. Micro SD Card • Micro SD Card Requirements • Using a Micro SD Card • Accessing the Micro SD Card AV Out Legal Requirements...
-
Page 4: Welcome Section
Welcome Section Congratulations! You have made an excellent choice with the purchase of this quality MAXTEK product. ® By doing so you now have the assurance and peace of mind which comes from purchasing a product that has been manufactured to the highest standards of performance and safety, supported by the high quality standards of Quesh Ltd. We want you to be completely satisfied with your purchase, so this MAXTEK product is backed by a comprehensive manufacturer’s ® 3 year warranty and outstanding after sales service through our dedicated helpline. We hope you enjoy using this product for many years to come. If you require technical support or in the unlikely event that your purchase is faulty, please telephone our helpline for immediate assistance. Faulty product claims made within the 3 year warranty period will be repaired or replaced free of charge provided that you have a satisfactory proof of purchase (keep your receipt safe). This does not affect your statutory rights. However be aware that the warranty will become null and void if the product is found to have been deliberately damaged, misused and/or disassembled. After Sales Support UK/N.IRELAND HELPLINE N 01270 508538 REP.IRELAND HELPLINE N... -
Page 5: General Information & Safety Instructions
General Information & Safety Instructions Battery Care To get the best out of the battery, fully charge and use till flat for the first 5-6 times. Then use till flat and fully charge at least once a month. Prolonged storage without charge may cause damage to the battery and result in poor to no charge. It is recommended you fully charge the battery every 6 months for long term storage to keep the battery in good condition. This camera is powered by an internal 300mAh lithium battery. Do not dispose of batteries in your household waste. Please contact your local authority for details on safe disposal. Do not expose this Power Bank to damp or moist conditions. • Never throw batteries into a fire or expose to excessive heat sources. • If batteries are swallowed, please seek immediate medical attention. • Always ensure correct +/- battery polarity when installing batteries. • Do not recharge non-rechargeable batteries. Equipment, which is marked with the WEEE logo (as shown on the left), should not be thrown away with your household waste. Contact your local authority waste disposal department, as they will be able to provide details of the recycling options available in your area. Electrical and electronic equipment (WEEE) contains materials, parts and substances, which can be dangerous to the environment and harmful to human health if the waste of electrical and electronic equipment (WEEE) is not disposed of correctly. Equipment, which is marked with the WEEE logo (as shown on the left), should not be thrown away with your household waste. -
Page 6: Contents & Features
Contents & Features Contents 1 x Full HD dashboard camera 1 x Camera mount 1 x Mini USB charge cable 1 x In-car mini USB adaptor (5V/1A) 1 x 32GB Micro SD card Features • Full HD recording • 2.7” TFT display (960x240pxl) • 30FPS • PAL/NTSC • Wide angle lens • Motion sensor • G-Sensor • Continuous loop recording • Micro SD port • Mini HDMI out port • AV out port • 12V In-car adaptor • Multi- positional camera mount • Up to x2 digital zoom • Wide Dynamic Range (WDR) • Lane Departure Warning System (LDWS) • Front Collision Warning System (FCWS) Please Note: The camera is designed to be powered by the in-car adaptor. The internal battery is a short term back up of up to 30 minutes. -
Page 7: General Layout
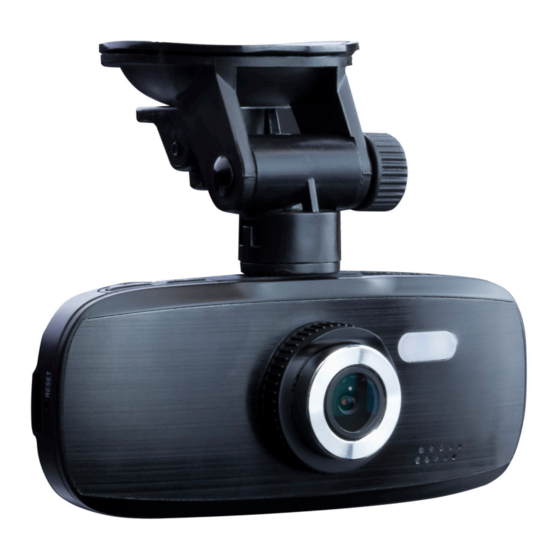
General Layout LED Indicator Screen Record/ Select Navigation Up Microphone Navigation Down Mode AV Out GPS Port On/Off Menu Reset Micro SD Slot USB ‘B’ Port Mount Slot Micro HDMI Port LED Light Fixed Lens Speaker After Sales Support UK/N.IRELAND HELPLINE N 01270 508538 REP.IRELAND HELPLINE N 1800 995 036 WEBSITE: www.quesh.co.uk... -
Page 8: Hud Layout
HUD Layout (Heads Up Display) Video Mode Mode Recording Wide Dynamic Range Recording Time Loop Resolution Motion Detection Exposure Value G Sensor Storage Light Assisted Power Type/Level Audio Date Current Time Stills Mode Wide Dynamic Range Shots Available Mode Size Exposure Value Resolution Auto White Balance Storage Light Assisted Power Type/Level... -
Page 9: Assembling
Assembling Mounting The Camera Attach the camera mount to the camera using either of the fittings on the top of the camera body. Damp the sucker cup with water and place it on the window screen. Press the leaver down to secure it in place. To release lift the leaver up and remove the mount from the window screen. Release Position Place the mount into the slot and slide across to lock into position. Lock Position (Please see legal requirements on page 27 before fitting) Tilt the camera into your preferred position and tighten the locking screw so it is finger tight. Turn the camera to pan it into the correct position. The ratchet style mount will hold the chosen horizontal position in place. Please Note: Some window screen have a coating that may not allow the suction cup to stick. After Sales Support UK/N.IRELAND HELPLINE N 01270 508538 REP.IRELAND HELPLINE N 1800 995 036... -
Page 10: Charging
Charging USB Charging When the camera is connected to a PC/Laptop USB port, the camera will automatically turn itself on and show the 3 options: Mass Storage, PC Camera and Power Charging. • Mass Storage: This will allow the cameras micro SD card to be accessible by the connected PC/Laptop as well as charging the camera slowly. Charging can take up to 2 hours. • PC Camera: This option will turn the camera into a web camera. Select the camera as the input source within a video program. This mode will also charge the camera slowly. Charging can take up to 4 hours. • Power Charging: This option will put the camera into charging mode but will leave the camera on. For faster charging it is recommended you turn the camera off by holding the button until the ‘Goodbye’ screen is shown. Charging can take up to 2 hours. In-Car Adaptor Charging can take up to 2 hours and can be done while in use. After Sales Support UK/N.IRELAND HELPLINE N 01270 508538 REP.IRELAND HELPLINE N 1800 995 036 WEBSITE: www.quesh.co.uk EMAIL: enquiries@quesh.co.uk... -
Page 11: Setup
Setup Turning the Camera On After the camera has been fully charged and mounted correctly, Connect the In-car adaptor to the accessory/cigarette port and the other end to the camera. Press and hold the button on the side marked until the ‘Welcome’ screen appears on the display. Please Note: The camera is designed to be powered by the in-car adaptor. The internal battery is a short term back up of up to 30 minutes. The camera will load up and show the HUD overlay and the live view. -
Page 12: Modes
Modes Available Modes This camera has 3 modes of use, Video, Camera and Playback. To change between the available modes press the ‘MENU’ when the camera is not recording. Video Mode Press the ‘REC’ button to start recording continuously. A red dot will appear on the HUD next to the camera icon to confirm it is recording. When the camera is recording you can press to lock the file and you can press to mute the sound. Please see the Video Options on page 10 for further settings. Still Mode Press the ‘REC’ button to take a photo. The screen will go blank for a few seconds while the image is processed. Please see the Camera Options on page 14 for further settings. Playback Mode Use the and buttons to navigate through the available videos and photos and press ‘REC’ to view the file. When a file has been... -
Page 13: Video Options
Video Options Video Options Menu Press the ‘Menu’ button once to access the available video options. Use the and buttons to navigate through the options and press the ‘REC’ button to select an option. Resolution This option will allow you to select the recording resolution. Options: 1080FHD 1920 x 1080 720P 1280 x 720 VGA 640 x 480 Please Note: A 3 minute 1080FHD video file will use approximately 290Mb. Recording at 720P or VGA will reduce the file size required to the record a video. After Sales Support UK/N.IRELAND HELPLINE N 01270 508538 REP.IRELAND HELPLINE N 1800 995 036... -
Page 14: Loop Recording
Video Options Loop Recording This option will allow the camera to record over the oldest file of a full card in a continuos loop. You can select the length of sections to record from the following: Options: Off > 1 Minute > 3 Minute > 5 Minute If you select off it will record one continuos file until the card is full, then you will need to delete it. A message will say card full on the screen when this happens. -
Page 15: Motion Detection
Video Options Motion Detection This option will allow the camera to automatically start and stop recording based on any movement it senses in front of it. You can select the following: Options: Off > On A circle arrow around a video camera with an ‘F’ icon on the HUD will indicate this is active. Record Audio This option will allow the camera to record audio. This option will increase the file size of the recorded image. You can choose from the following options: Options: Off > On A microphone icon will appear on the HUD when active. Date Stamp With this option you can choose whether or not the camera will record the date and time information as part of the video file. -
Page 16: G Sensor
Video Options G Sensor This option will allow the camera to automatically lock files on the memory card to stop them being deleted. You can select the following sensitivity: Options: Off > High > Medium > Low The higher the sensitivity the softer the impact is needed to lock the file. A circle arrow around a video camera with an ‘G’ icon on the HUD will indicate this is active. Please Note: Formatting the micro SD card will delete a locked file. LDWS (Lane Departure Warning System) This option will allow the camera to detect and track the lines in the road. An audio alert will sound if it detects the vehicle approaching road markings. You can select the following sensitivity: LDWS On/Off Options: Off > On (turns feature on) LDWS Setting Options: Cancel >... -
Page 17: Fcws (Forward Collision Warning System)
Video Options FCWS (Forward Collision Warning System) This option will allow the camera to detect an object coming directly towards the vehicle. You can select the following sensitivity: Options: Off > On This feature will put a double car icon on the HUD. Still Options Still Options Menu Press the ‘Menu’ button once to access the available still options. Use the and buttons to navigate through the options and use the ‘REC’ button to select an option. After Sales Support UK/N.IRELAND HELPLINE N 01270 508538 REP.IRELAND HELPLINE N 1800 995 036 WEBSITE: www.quesh.co.uk EMAIL: enquiries@quesh.co.uk... -
Page 18: Capture Mode
Still Options Capture Mode This option will allow the camera to take an image after a short time delay. You can select the following options: Options: Off > 2 Seconds > 5 Seconds > 10 Seconds A stopwatch icon with a number will appear on the HUD. Resolution This option will change the size of the image taken in still mode. You can select the following sizes: Options: 12M 4032 x 3024 10M 3648 x 2736 3264 x 2448 2664 x 1984 2024 x 1536 1280 x 720 VGA 640 x 480 The selected format will be indicated on the HUD. Sequence This option will allow the camera take 3 images in quick succession. -
Page 19: White Balance
Still Options Quality This option will allow you to change the DPI quality of the image. It is used for any images you may want to print. You can select the following options: Options: Fine > Normal > Economy Sharpness This option will change the digital sharpness of the taken image. You can select the following options: Options: Soft > Normal > Strong White Balance This option will allow you to choose the colour correction options. You can select the following options: Options: Auto > Daylight > Cloudy > Tungsten > Florescent An icon will appear on the HUD that reflect the option selected. (AWB, Sun, Cloud, Lightbulb, Strip Light) Colour This option will allow you to choose the colour output of the camera. You can select the following options: Options: Colour >... - Page 20 Still Options This option will allow you to change how sensitive the camera is to light. You can select the following options: Options: Auto > 100 > 200 > 400 Please Note: The higher the number the more sensitive the camera is to light. The chosen ISO icon will be displayed on the HUD WDR (Wide Dynamic Range) This option will allow the camera to automatically adjust the overall exposure to balance the image in bright or dark conditions. You can choose from the following options: Options: Off > On A WDR icon will appear on the HUD when active. Exposure You can manually adjust the exposure adjustment for bright or dark conditions with this option.
- Page 21 Still Options Anti Shake This option will allow the camera to compensate for a certain amount of camera shake to take a clear image. You can select the following options: Options: Off > On A hand icon will be displayed on the HUD Quick Review This option will allow the taken image to be displayed for a short amount of time on the screen before reverting back to the main camera mode. You can choose from the following options: Options: Off > 2 Seconds > 5 Seconds Date Stamp With this option you can choose whether to include the date and time information as part of the image.
- Page 22 Playback Options Playback Options Menu Press the ‘Menu’ button to access the available setup options. Use the and buttons to navigate through the options and use the ‘REC’ button to select an option. Delete With this option you can choose whether to delete the currently viewed file or delete all files on the card (except the locked ones). You can select from the following options: Delete Current Options: Cancel > Ok Delete All Options: Cancel > Ok Protect With this option you can choose whether to (un)lock the currently viewed file or (un)lock all files on the card.
- Page 23 Setup Options Setup Options Menu Press the ‘Menu’ button twice in any mode to access the available setup options. Use the and buttons to navigate through the options and use the ‘REC’ button to select an option. Date/Time This option will allow you to set the time, date and format. After Sales Support UK/N.IRELAND HELPLINE N 01270 508538 REP.IRELAND HELPLINE N 1800 995 036 WEBSITE: www.quesh.co.uk EMAIL: enquiries@quesh.co.uk...
- Page 24 Setup Options Press the and buttons to change the values and the ‘REC’ button to move to the next value to change. It will cycle through the date, time and format. Car NO With this option you can enter the vehicle registration and display it on the video or image files. You can select from the following options: Car NO Options: Off > On Number Options: Select character spaces _ _ _ _ _ _ Options: Enter Registration Number using the arrow keys and ‘REC’ to move to the next value. Auto Power With this option you can tell the camera to turn itself off after a predetermined time if it is not recording.
- Page 25 Setup Options TV Mode This option control the HDMI output format for a TV. You can select from the following options: Options: NTSC (US) > PAL (UK) Frequency This option cameras visual frequency. You can select from the following options: Options: 50Hz > 60Hz Lamp Setting This option will allow you to turn on and off the LED light. You can select from the following options: Options: Off > On Please Note: You can also turn on and off the LED light in any main mode by a quick press on the button.
- Page 26 Setup Options Format This option will format the micro SD card that is inserted into the camera. You can select from the following options: SD Card Options: Cancel > Yes Please Note: To repair or format in-depth please use a PC/Laptop to perform the formatting of the card. Default Settings This option will reset all the camera’s settings to default. You can select from the following options: Options: Cancel > Yes Please Note: For a complete reset use the reset button on the side of the camera.
- Page 27 HDMI Using The HDMI You will need a mini HDMI to HDMI cable (not supplied) to use this feature. Once you have connected the HDMI cable between a TV and the camera you will automatically see the HUD on the TV. The camera screen will go blank. You are unable to record video whilst tethered to a TV. However you will be able to take stills. This feature is mainly for use for playback. Press the ‘MENU’ button a few times until you get to Playback mode. Playback Mode Use the and buttons to navigate through the available videos and photos and press ‘REC’ to view the file. When a file has been selected a further option is available.
-
Page 28: Micro Sd Card
Micro SD Card Micro SD Card Requirements • Micro SD Card 32GB or less • Class 4 minimum. Class 6 maximum Using a Micro SD Card Insert the micro SD card in to the micro SD card slot on the body of the camera. Push until it clicks into place. Go through the menu settings and format the card. Your card is now ready to record. - Page 29 Micro SD Card Your PC/Laptop should automatically detect the micro SD card as a mass storage device and install the drivers needed. Wait until you see the confirmation that the drivers have been successfully installed. A dialogue box should open up asking you what action you would like to perform. Select Access Folder. Double click on the folder named ‘DCIM’ to access the video and image files you have on the micro SD card. To save to the PC/Laptop, either drag and drop or highlight the files you want and copy and paste to the desired location. AV Out Using a standard 3 pole 3.5mm to RCA cable (not supplied) you can connect the camera via the AV out port to a TV through the red, white & yellow composite connections. You are able to use all the camera’s modes as normal through this method of tethering unlike using the HDMI connection. After Sales Support UK/N.IRELAND HELPLINE N 01270 508538 REP.IRELAND HELPLINE N...
- Page 30 Legal Requirements Windscreen Mounted / Illegal Car Cams - Road Traffic Act 1988 Red zone = a 29cm wide band centered on the steering column and bounded top and bottom by the wiper swept area. Key: Red Zone Pink Zone Please be aware, if you use a suction mounted car camera in the UK, if the device (camera and / or cradle and / or suction cup) intrudes more than 4cm into the secondary (pink) wiper clearance zone, or intrudes more than 1cm into the primary (red) wiper clearance zone of the windscreen, you are committing a serious traffic offence (dangerous driving) under the UK Road Traffic Act 1988, and your vehicle is not roadworthy (it would fail an MOT).
- Page 31 Specification General L x W x D: 110mm x 44mm x 33mm (approx) Weight: Video System: PAL / NTFC Video Format: MOV (H.264) Video Resolution: Image Format: JPEG G Sensor: 3 Axis Battery Size: 300mAh (3.7V) Usage Time: Up to 30 minutes Illumination: White LED Language: English, Traditional Chinese, Simplified Chinese, Japanese, French, German & Russian Motion detection Cycled recording In-built microphone and Speaker Display Display Size: 2.7 Inch TFT (16:9) Display Resolution: 960 x 240 pixel Lens Image Sensor: 1/3 Inch colour CMOS sensor Minimal Focus: 1.5m Maximum Focus:...
- Page 32 INTENTIONALLY LEFT BLANK...
- Page 33 INTENTIONALLY LEFT BLANK...
- Page 34 Warranty Certificate Warranty This product is warranted to be free from defects in workmanship and parts for a period of 36 months from the date of purchase. Defects that occur within this warranty period, under normal use and care, will be repaired, replaced or refunded at our discretion, solely at our option with no charge for parts and labour. The benefits conferred by this warranty are in addition to all rights and remedies in respect of the product the consumer has under existing U.K. laws. Proof of Purchase This warranty is valid for the original purchase and is not transferable. Please keep your purchase receipt as proof of purchase and as proof of the date of when the purchase was made. The receipt must be presented with the warranty card when making a claim under this warranty. Service during the Warranty Period Please ensure the product is properly packaged so as to ensure that no damage occurs in transit. Also make sure that you have included a detailed explanation of the problem. Extent of the Warranty This warranty is limited to defects in workmanship or parts. All defective products or parts will be repaired or replaced. This warranty does not extend to accessories.
- Page 35 Warranty Card 1080P Dashboard Camera Model Number: 74275 Please keep your purchase receipt together with your warranty card Name: Address: Date of purchase: Location of purchase: Fault Description: We recommend that you attach a photocopy of your receipt, showing the date of purchase, to this warranty card and keep it for your reference. In the event of a product fault, please call the After Sales Support team. Please ensure that you have the product details (as shown on this card) to hand so that the support team are able to respond as quickly and efficiently as possible. Service Helpline After Sales Support QUESH LTD, UK/N.IRELAND HELPLINE N 01270 508538 B7, FIRST BUSINESS PARK REP.IRELAND HELPLINE N 1800 995 036 FIRST AVENUE, CREWE, CHESHIRE. WEBSITE: www.quesh.co.uk CW1 6BG EMAIL: enquiries@quesh.co.uk...
Need help?
Do you have a question about the 74275 and is the answer not in the manual?
Questions and answers