
Related Manuals for Unitech PA820


Summary of Contents for Unitech PA820
- Page 1 Ultra Rugged Industrial PDA - PA820 - User's Manual Version 1.0 © 2015 unitech Electronics Co., Ltd. All rights reserved. unitech is a registered trademark of unitech Electronics Co., Ltd.
- Page 2 Change Log Date Change Description Version © 2015 unitech Electronics Co., Ltd. All rights reserved. unitech is a registered trademark of unitech Electronics Co., Ltd.
-
Page 3: Preface
–Connect the equipment into an outlet on a circuit different from that to which the receiver is connected. –Consult the dealer or an experienced radio/TV technician for help. © 2015 unitech Electronics Co., Ltd. All rights reserved. unitech is a registered trademark of unitech Electronics Co., Ltd. -
Page 4: Fcc Label Statement
Interference-Causing Equipment Regulations. Cet appareil numerique de la classe B respecte les exigences du Reglement sur le material broilleur du Canada. © 2015 unitech Electronics Co., Ltd. All rights reserved. unitech is a registered trademark of unitech Electronics Co., Ltd. -
Page 5: European Conformity Statement
European Conformity Statement unitech Electronics co., Ltd herewith declares that the unitech product is in compliance with the essential requirements and all other provisions of the R&TTE 1999/5/EC directive, the EMC 2004/108/EC directive and the Low Voltage 2006/95/EC directive. The declaration of conformity is available for download at : https://portal.unitech.eu/public/Safetyregulatorystatement... -
Page 6: Taiwan Ncc Warning Statement
Taiwan NCC Warning Statement 交通部電信總局低功率電波輻射性電機管理辦法 第十二條:經型式認證合格之低功率射頻電機,非經許可,公司、商號或使用者 均不得擅自變更頻率、加大功率或變更原設計之特性及功能。 第十四條:低功率射頻電機之使用不得影響飛航安全及干擾合法通信;經發現有 干擾現象時,應立即停用,並改善至無干擾時方得繼續使用。 低功率射頻電機需忍受合法通信或工業、科學及醫療用電波輻射性電機設備 之干擾。 注意事項: 1. 使用過度恐傷害視力。 2. 使用30分鐘請休息10分鐘;2歲以下幼兒不看螢幕,2歲以上每天看螢幕不要超 過1小時。 © 2015 unitech Electronics Co., Ltd. All rights reserved. unitech is a registered trademark of unitech Electronics Co., Ltd. -
Page 7: Laser Information
Laser Information The unitech product is certified in the U.S. to conform to the requirements of DHHS/CDRH 21CFR Subchapter J and to the requirements of IEC 825-1. Class II and Class 2 products are not considered to be hazardous. The... -
Page 8: Battery Notice
Please do not leave battery unused for long time without being recharged. In spite of safety design in the battery pack from unitech, if you may observe the battery pack being deformed, you should stop using it immediately. -
Page 9: Battery Charge Notice
Please only use the original battery from unitech. Using third party battery can damage our products. When such damage is happened, it is not covered by unitech’s warranty policy. RISK OF EXPLOSION IF BATTERY IS CAUTION! REPLACED BY AN INCORRECT TYPE. -
Page 10: Adapter Notice
Please remove the power adapter when the battery is fully recharged. The bundled power adapter which comes with your unitech product is not meant to be used outdoors or without proper protection from prevent the power adapter being dropped by water, raining or very humid environment. -
Page 11: Worldwide Support
Worldwide Support unitech’s professional support team is available to quickly answer questions or assist with technical-related issues. Should an equipment problem occur, please contact the nearest unitech regional service representative. For complete contact information please visit the Web sites listed below: Taipei, Taiwan –... -
Page 12: Warranty Policy
The warranty period is varied from each country. Please consult with your supplier or unitech local office for actual length of warranty period to your purchased product. Warranty becomes void if equipment is modified, improperly installed or used, damaged by accident or neglect, or if any parts are improperly installed or replaced by the user. -
Page 13: Table Of Contents
Tour of the PA820......................- 6 - PA820 Front and Right View ...................- 6 - PA820 Rear and Left View ....................- 7 - Turning ON the PA820 for the First Time.................- 8 - Installing the Battery......................- 8 - Charging the Battery .....................- 10 -... - Page 14 Chapter 2..................... - 15 - Using the Hardware ......................- 15 - Using the MicroSD Memory Card..................- 15 - Using the SIM Card.......................- 16 - Using the Barcode Laser Scanner ................- 17 - Chapter 3..................... - 19 - Getting Connected ......................- 19 - Establishing Device-PC Connection................- 19 - WiFi Connection......................- 22 - u-CenterMobile for Quick GPS Connection..............- 27 -...
-
Page 15: Chapter 1
Versatile Capabilities The PA820 has a capacitive LCD with 480 x 640 pixel resolution and measures 3.5 inches diagonally. The LCD has an adjustable backlight which is designed to reduce reflections that allows users can easily stay focus on the screen even in all lighting conditions. - Page 16 -20°C to 60°C. Aside from all of its benefits, PA820 is compact enough to hold in one hand. With great ergonomic design, it creates unmatched data collection performance and high reliability to any applications such as military, logistics, field service and harsh environment.
-
Page 17: Specifications
Specifications Features Windows Embedded Handheld 6.5 operating system Ultra-Rugged Construction: IP66 rated, 1.8M drop and MIL-STD-810G certified Compact design: only 452g Large 3.5 -inch color TFT multi-touch sunlight-readable display Built in 1D scanner and 5 Megapixel camera Latest Bluetooth v2.1, GPS, and WiFi 802.11 a/b/g/n Wide Temperature Range: Operating: -20°C~ +60°C/ Storage: -30°C~ +70°C System Features TI AM3715 1GHz... - Page 18 WWAN 3.75G Radio UMTS / HSPA+, 3GPP release 6 / 7 USA: Dual Band UMTS/HSPA+ (850, 1900 MHz), Dual-Band GSM (850/1900 MHz) Dual Band UMTS/HSPA+ (900/2100 MHz), Power Source Main Battery 8.14 Watt-Hour 3.7V @2200 mAh 14.8 Watt- Hour 3.7V @4000 mAh Backup Battery Li-Coin battery Supports 2 hours backup Enclosure...
-
Page 19: Pa820 Product Introduction & Accessory Kit
PA820 Product Introduction & Accessory Kit PA820 Terminal USB Cable Power Adaptor Plugs Battery Hand Strap - 5 -... -
Page 20: Tour Of The Pa820
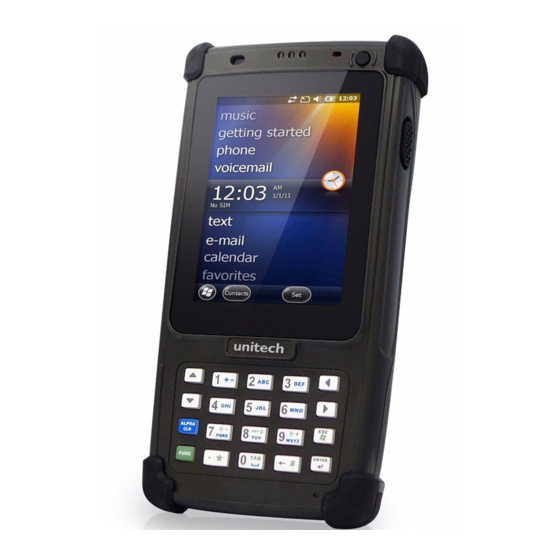
Tour of the PA820 The following sections describe the main components and features of the PA820. PA820 Front and Right View LED indicators Power button LCD touch screen Keypad Microphone Universal connector Receiver Scanner trigger button - 6 -... -
Page 21: Pa820 Rear And Left View
PA820 Rear and Left View Barcode scanner window Battery compartment tab 5M/AF camera Battery compartment LED flash light Earphone jack Speaker Scanner trigger button - 7 -... -
Page 22: Turning On The Pa820 For The First Time
Turning ON the PA820 for the First Time After you have initially charged your device for about 16 hours, the device is ready to be used. You can now start up your device. You can then calibrate the display, and set up the system time zone, date and time. - Page 23 2. Push up the backup battery switch to the“ON position by using a tip of a pen to turn on the backup battery. Backup Battery Switch 3. Slide and position the battery pack, making sure the battery Battery contacts are aligned with the Compartment contacts in the compartment.
-
Page 24: Charging The Battery
RAM memory. 1. Press and hold the release button on both sides of the USB charging cable and connect it to the PA820 (1). 2. Plug the AC adapter cable into the power jack of the USB charging cable (2). - Page 25 Checking the LED status Terminal LED indicators from left to right: -- GPRS Communication -- Scan -- Power Status Description GPRS module is GPRS Flashing Yellow enabled. Successful Scan Solid Green Terminal reading Solid Orange Being charged Power Solid Green Fully charged Checking the Battery Status If the battery level becomes low in the course of normal use, a status icon...
-
Page 26: Keypads And Function Buttons
Right cursor key Up cursor key Down cursor key When the PA820 turns on, the numeric mode is on by default. When you toggle to alpha mode, the CAPS mode is off by default. Use the Alpha key to toggle to CAPS. - Page 27 Using Function keys If you press the key once, it will appear a blue symbol in the status bar at the top of the screen. Then you can refer to the following table to execute the desired function or input. Function key definition Description Description...
-
Page 28: Using Alpha Keys
Using Alpha keys Alpha On Alpha Off CAPS Off CAPS On Space, @, $, “, 0 Space, @, $, “, 0 +, -, \, %, 1 +, -, \, %, 1 a, b, c, 2 A, B, C, 2 d, e, f, 3 D, E, F, 3 g, h, i, 4 G, H, I, 4... -
Page 29: Using The Hardware
Chapter 2 Using the Hardware Using the MicroSD Memory Card The PA820 has an expansion slot compatible with a range of MicroSD memory cards, which are primarily used to back up or transfer files and data. Inserting a Memory Card 1. -
Page 30: Using The Sim Card
Using the SIM Card The PA820 has a slot for a GPRS SIM card inside the battery compartment. Before installing the SIM card, please backup your data to prevent CAUTION! data loss because of a low backup battery. Inserting the SIM card 1. -
Page 31: Using The Barcode Laser Scanner
Using the Barcode Laser Scanner The PA820 has an integrated laser scanner, which reads all major 1D barcode labels with excellent performance. The reading software must be enabled in order to operate the scanner. NOTE: This can be a user-loaded application or a pre-loaded utility such as Scanner Settings or Scan2Key. - Page 32 3. Aim the laser scanner at the selected barcode, and press either one of the scanner trigger buttons on the device. If you enable Auto-Scan, you don’t have to press any button. Aim the laser scanner at the selected barcode while the laser emits light at regular intervals.
-
Page 33: Chapter 3
Chapter 3 Getting Connected The PA820 enables users to link to a host computer using an RS-232 cable, Bluetooth, WiFi, USB or GPRS connection for data communication. This chapter provides an overview of the PA820 communication options. Establishing Device-PC Connection... - Page 34 6. Synchronization will be initialized and will take place if you’ve chosen to synchronize periodically or upon connection. Your computer can create a partnership with multiple PA820s. Also, a NOTE: PA820 can create a partnership with up to two computers. - 20 -...
- Page 35 PA820 and your PC, or click on "Connect without setting up your device" if you want to connect the PA820 directly. 5. When the PA820 is successfully connected and synced to your PC, you will see the following window on the display. Now you can select the desired operation.
-
Page 36: Wifi Connection
WiFi Connection A wireless network can be added either when the network is detected or by manually entering network settings. Before following these instructions, make sure if authentication information is needed. Using the Summit Utilities You can use the Summit Client Utility tool to setup or change the WiFi settings. 1. - Page 37 Scan Available AP 1. Tap Profile to scan available APs. 2. Under Profile tab, tap Scan for available AP. - 23 -...
- Page 38 You may select a desired AP to create a new profile. Tap Configure. Tap Yes to create the new profile. - 24 -...
- Page 39 5. Enter the WEP key or network key. Tap OK. Commit and Activate 1. Tap Commit to activate the setting. - 25 -...
- Page 40 2. Under the Main tab, select the profile you want to activate from the drop-down menu of the Active Profile. 3. Under the Status tab, you can see the IP address, signal strength and quality. Tap OK to exit the Summit Client Utility. 4.
-
Page 41: U-Centermobile For Quick Gps Connection
u-CenterMobile for Quick GPS Connection Before you start to use your device for GPS navigation, use the u-CenterMobile program first to download ephemeris data (current satellite position and timing information) onto your device. This data is needed to accelerate GPS positioning. - Page 42 To Download Data Please follow the following steps to download the ephemeris data. 1. Tap Rx → Autobauding. 2. Tap Rx → Port. 3. Select COM4. - 28 -...
- Page 43 4. The tool starts to download the ephemeris data (current satellite position and timing information). When the download is finished, you will see the data shown in the upper right corner. - 29 -...
-
Page 44: Chapter 4
Chapter 4 Barcode Scanner Programs The PA820 provides an option for the barcode scanner, allowing you to scan and decode various types of 1D barcodes. Scanner Setting When it is necessary for the user to change the default barcode symbology for a... -
Page 45: Scan2Key
Scan2Key The Scan2Key application routes input from a scanner port to a keypad buffer, making all input from the scanner emulate input from the keypad. Using the Scan2Key, scanned data will be directed from the scanner port to any waiting (active/focused) text editor such as MS Mobile Word or a text box in an application. - Page 46 Char Check Transmit Barcode Enable / / Digit Check Others Symbology Disable verification Char/digit Label Code IV & V Check digital double MSI/Plessey module, *data length RSS (Databar)-14, RSS (Databar) expanded, RSS RSS (Databar) (Databar) limited, Send linkage bit, EAN128 emulation Standard 2 of 5 / Toshiba...
-
Page 47: Chapter 5
Chapter 5 Performing a Hardware Reset Performing a Hardware Reset You may have to perform a reset if the device freezes (i.e., the device no longer responds to the buttons or tapping on the screen). A soft reset allows your device to get a fresh start, similar to rebooting a computer. - Page 48 Method 2: From Windows Embedded 1. Tap Start → BootMode. The BootMode Screen appears. 2. Tap Warm Boot. The system is reset and you will lose unsaved data. - 34 -...
- Page 49 Performing a Cold Boot A cold boot will erase all data and all programs you have added, and will restore the device to the default factory settings. Never perform a cold boot unless a warm boot does not correct your problem. When you perform your next ActiveSync / Windows Mobile Device Center operation, you can restore any data that you previously synchronized to your computer or you can restore data that you backed up to a storage card.
- Page 50 Performing a Clean Boot Performing clean boot will set the terminal to the factory default settings. To perform a Clean Boot, long press the power button until the Power Menu appears. Tap Reset and the terminal will perform warm boot. After the Startup display appears, press and hold left trigger button and then press backspace key.
Need help?
Do you have a question about the PA820 and is the answer not in the manual?
Questions and answers