YSI Professional Plus User Manual
Multiparameter instrument
Hide thumbs
Also See for Professional Plus:
- Calibration tips (28 pages) ,
- Quick start manual (2 pages) ,
- Quick start manual (2 pages)
Table of Contents
Advertisement
Advertisement
Table of Contents

Related Manuals for YSI Professional Plus


Summary of Contents for YSI Professional Plus
- Page 1 USER MA N UAL...
-
Page 2: Table Of Contents
C o N t E N t S Warranty ......................i Introduction ....................... 1 Getting Started ....................1 Initial Inspection ................. 1 Battery Installation ................1 Setup ....................2 Keypad ....................9 Main Display ..................11 Menu Layout ..................11 Alpha/Numeric Entry ............... - Page 3 Dissolved oxygen (Do) ..............21 Sensor Maintenance ................60 Barometer ..................31 Sensor Storage ................... 66 Conductivity ..................32 troubleshooting ....................68 pH ....................... 38 Help ....................68 oRP ....................42 Error Messages ................. 69 Ammonium, Nitrate, Chloride ............45 Dissolved oxygen ................
-
Page 4: Warranty
Within the warranty period, YSI will repair or replace, at its sole discretion, free of charge, any product that YSI determines to be covered by this warranty. -
Page 5: Introduction
605178, 605109, 605179) is listed as 6 months. However, the true “working life” of these sensors may be 3-9 months depending on storage and usage in solutions other thank you for purchasing the YSI Professional Plus (Pro Plus). the Pro Plus than clean aqueous samples. -
Page 6: Setup
32.8, 65.6, and 98.4-feet) with options for special order lengths up to 100-meters (328-feet) on the 60520-x cables. Contact YSI or your local representative for additional information. In addition there are several cable options with built in sensors for the measurement of pH and oRP that are not considered field-rugged (non- replaceable sensors, less rugged single-junction sensors). - Page 7 Standard Pro Series Sensor Installation instructions. Conductivity/temperature sensor installation is described in the next section. For ease of installation, YSI recommends that you install a sensor into port 1 first; followed by Do installation, then port 2, and lastly C/t.
- Page 8 Align the connectors of the new sensor and the port. With connectors aligned, push the sensor in towards the bulkhead until you feel the sensor seat in its port. You will experience some resistance as you push the sensor inward, this is normal once you feel the sensor seat into the port, gently rotate the stainless steel sensor nut clockwise with your fingers, Do not use the tool.
-
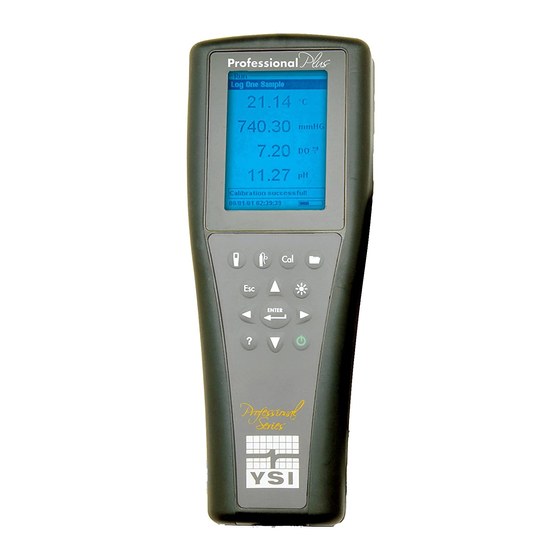
Page 9: Keypad
CoNNECtING tHE CABLE to AN INStRUMENt Keypad to connect a cable, align the keys on the cable connector to the slots on the instrument connector. Push together firmly, then twist the outer ring until it locks into place (figure 5). this connection is water-proof. Figure 5. -
Page 10: Main Display
Use to navigate right in alpha/numeric entry display the splash screen with the YSI logo then go directly to the main run screens. Can be pressed simultaneously with screen. the first time the instrument is powered up or if the instrument Backlight key to increase display contrast. -
Page 11: Alpha/Numeric Entry
S Y S t E M M E N U alpha/nuMerIc entry Press System to access any of the following menu items. the System menu will allow you to access the setup options of the instrument including; Date/ Time, GLP, Language, Radix Point, Logging, Auto-Shutoff, Backlight, (Software) -
Page 12: Glp
the GLP or ‘Good Laboratory Practice’ file saves detailed information Method (%, mg/L) about calibrations. It also includes diagnostic information about the sensors. Cal Value Calibrations are logged into a file, the GLP, for later review as needed. A single Sensor Value (Sensor Current) GLP file is utilized to store all calibration records and is capable of storing 500 Sensor type (Polarographic/Galvanic) - Page 13 User ID will be stored in the GLP file with each calibration record. Contact YSI technical Support at environmental@ysi.com or +1 937 767-7241 if User ID could be a person’s initials or badge you forget or misplace your password.
-
Page 14: Language
From the System menu, highlight Logging SW Version shows the instrument’s software version. the instrument’s software and press enter to view or change the logging can be updated via www.ysi.com/support. there you will find the new software options. Logging options include Use Site List, Use Folder List, Continuous Mode, and files and instructions on how to update the instrument. -
Page 15: Unit Id
If you receive an error message during a calibration that indicates questionable kits are for Polarographic sensors. See the Setup - Dissolved Oxygen section of results, you have the option to either accept or decline the calibration. YSI this manual for more information on the different types of membranes available recommends that you decline a questionable calibration since accepting it may from YSI. - Page 16 In terms of physical configuration, membrane material, and general performance, Selecting a Dissolved oxygen Membrane: YSI Professional Series Galvanic dissolved oxygen sensors are exactly like the Typical Response Professional Series Polarographic sensors. the advantage of using Galvanic...
- Page 17 Local DO allows for localized Do% measurements. this sets the calibration is achieved) and press enter to confirm. the Auto Stable Sensitivity can be value to 100% regardless of the altitude or barometric pressure. Highlight Local decreased or increased. Highlight Sensitivity and use the left and right arrow keys to slide the bar.
- Page 18 %, mg/L, or ppm calibration readings Hold All Readings must be reactivated following the zero calibration. For both ease of use and accuracy, YSI recommends after each use! performing the following 1-point Do % water saturated air calibration: It is not necessary to calibrate in both % and mg/L or ppm.
- Page 19 After selecting your User ID and/or Probe ID if appropriate, highlight Do and Calibrating Do% in Water Saturated Air: press enter. 2-Point Calibration with Zero Solution Place the sensor in a solution of zero Do. Highlight DO % and press enter to confirm. A zero Do solution can be made by dissolving approximately 8 - 10 grams of the instrument will use the internal barometer sodium sulfite (Na...
-
Page 20: Barometer
Highlight Calibration value and press enter to BaroMeter manually input the sample’s dissolved oxygen All Professional Plus instruments contain an internal barometer. value. Highlight Accept Calibration and press enter once the temperature and Dissolved DISPLAY - BARoMEtER oxygen readings stabilize. or, press Esc cancel the calibration. -
Page 21: Conductivity
Highlight Calibration Value and press enter to temperature all Specific Conductance values are compensated to. the default manually enter the correct “true” barometric is 25 °C. to change the Reference temperature, highlight Temp Ref and press pressure. Next, highlight Accept Calibration, enter. - Page 22 DISPLAY - CoNDUCtIVItY the Auto Stable Sensitivity can be decreased or increased. Highlight Sensitivity and use the left and right arrow keys to slide the bar. the more sensitive you Press Sensor , highlight Display and press enter. Highlight Conductivity and make it (larger black bar) the harder it is to achieve stability in a changing press enter.
- Page 23 Ensure the entire Conductance, Conductivity, or Salinity and conductivity sensor is submerged in the solution or the instrument will read press enter. YSI recommends calibrating in approximately of half the expected value! specific conductance for greatest ease.
- Page 24 DISPLAY - pH pH sensors can be used on 60510-X, 6051020-X, 6051030-X, 6051010-X, and Press Sensor , highlight Display and press Quatro cables. enter. If using a 605103 pH/oRP combination sensor on a 6051020 or 6051030 cable Highlight ISE (pH) and press enter. You will you can report both pH and oRP by configuring ISE1 as pH and ISE2 as oRP not be able to Display the sensor unless it is in the Sensor Setup menu.
- Page 25 in the Sensor Setup menu may be incorrect. If Sensitivity selected by User % Data Variance Threshold necessary, highlight the Calibration Value and 100 - Most Sensitive, Sensitivity 0.025% press enter to input the correct buffer value. bar is set to the far right 0.39375% once the pH and temperature readings stabilize, highlight Accept Calibration and press enter to...
-
Page 26: Orp
The actual readings displayed during the calibration will If a sensor is Enabled that isn’t connected to the NOT reflect the updated calibration information. These instrument, the display will show an unstable false values will not change until Cal is pressed to finalize reading, ?????, or ----- next to the units. -
Page 27: Ammonium, Nitrate, Chloride
% Data Variance Threshold input the value of the oRP calibration standard. 100 - Most Sensitive, Sensitivity 0.05% If using the YSI Zobell calibration solution, bar is set to the far right the Pro Plus will automatically determine the 0.62525% calibration value. - Page 28 Enabled allows you to enable or disable the ISE AUto StABLE - AMMoNIUM, NItRAtE, CHLoRIDE function and select which ISE sensor is installed Auto Stable indicates when a reading is stable. When Auto Stable is enabled, AS on the cable. will blink next to the parameter until it is stable.
- Page 29 10 and 1000 mg/L chloride mg/l for Chloride) into a clean, dry or pre-rinsed calibration cup. Carefully reagents. Nitrate and Ammonium standards can be purchased from YSI or other immerse the sensor into the solution. Allow at least 1 minute for temperature laboratory supply companies.
-
Page 30: Taking Measurements
After selecting your User ID and/or Probe ID if high concentration solution and one of the low concentration solutions should appropriate, highlight Ammonium, Nitrate, or be at ambient temperature. the other low concentration solution should be Chloride to access the appropriate calibration, chilled to less than 10 °C prior to calibration. -
Page 31: Conductivity
the sky and then twist tying, zip tying, or rubber banding the bulkhead to the During a continuous log, the Start Logging dialog box on the Run screen will cable. Making a simple curve to the cable without bending or breaking the cable change to Stop Logging. -
Page 32: Site List
D A t A M A N A G E R time qualifier you would like to set, press enter, and use the numeric entry screen to select the D E S K t o P S o F t WA R E date/time you wish to view. -
Page 33: Using The Communications Saddle
ManaGe loGGed data Data that has been logged to the Professional Plus can easily be uploaded to the WARNING: DO NOT connect the Communications Saddle to PC via the provided USB saddle. You can upload sensor data, GLP files, site lists, your PC before installing Data Manager. -
Page 34: Configure Instruments
InstruMent fIrMWare Even a very small amount of contamination (hair, grit, etc.) may cause a leak. the instrument’s firmware can be updated via www.ysi.com. there you will find To re-install the o-rings: the new firmware file and instructions on how to update the instrument. there Place a small amount of o-ring grease between your thumb and index finger. -
Page 35: Sensor Maintenance
In fact, visually, instructions: the anode may appear tarnished and operate just fine. YSI recommends using the 400 grit wet/dry sanding disks to resurface the electrodes if the sensor has Remove the sensor guard to access the sensor tip. - Page 36 (the goal is to simply sand off any At the time the membrane cap is changed, YSI recommends that you rinse the build-up without scratching or removing layers of the anode itself). Usually, 3 anode (silver shaft of the sensor) with purified water and wipe with a clean paper to 4 twists of the sanding disk are sufficient to remove deposits.
- Page 37 If this procedure is unsuccessful, as indicated by improper Soak the sensor for 30-60 minutes in one molar (1 M) hydrochloric electrode performance, contact YSI Technical Support or the acid (HCl). this reagent can be purchased from most lab supply Authorized dealer where you purchased the instrument.
-
Page 38: Sensor Storage
sensor can be regenerated by washing with alcohol and/or gently polishing with Long-term Storage - Conductivity fine emery paper in a circular motion to remove any deposits or discoloration, No special storage is required. Sensors can be stored dry or wet as long as then thoroughly washing with deionized water to remove any debris. -
Page 39: Help
GLP security area if the password is incorrect. If you forget the GLP Security Password please contact YSI tech Support at environmental@ysi.com, 800-897-4151, or +1 937 767-7241. help... -
Page 40: Dissolved Oxygen
dIssolVed oxyGen the dissolved oxygen sensors will use Probe Current (Do uA) and Probe Slope (%/uA) as part of their GLP file records. the following information indicates the acceptable values for each of these readings: Polarographic Do at 25 C, 100% saturated air environment at 760 mmHg º...
Need help?
Do you have a question about the Professional Plus and is the answer not in the manual?
Questions and answers