Denon RCD-M41 Owner's Manual
Hide thumbs
Also See for RCD-M41:
- Service manual (63 pages) ,
- Quick start manual (8 pages) ,
- Owner's manual (81 pages)

Subscribe to Our Youtube Channel
Related Manuals for Denon RCD-M41


Summary of Contents for Denon RCD-M41
- Page 1 Contents Connections Playback Settings Tips Appendix RCD-M41 CD RECEIVER Owner’s Manual You can print more than one page of a PDF onto a single sheet of paper. Front panel Display Rear panel Remote Index...
-
Page 2: Table Of Contents
Contents Contents Connections Playback Settings Tips Appendix Playback Accessories Inserting the batteries Basic operation Operating range of the remote control unit Turning the power on Features Switching the power to standby Part names and functions Selecting the input source Front panel Adjusting the volume Display Turning off the sound temporarily (Muting) -
Page 3: Adjusting The Tone
Contents Connections Playback Settings Tips Appendix Settings Listening to music on a Bluetooth device Playing music from Bluetooth device Menu map Pairing with other Bluetooth devices Menu operation Reconnecting to this unit from a Bluetooth device CLOCK SETUP Turning the Bluetooth function off for high sound performance playback ALARM SETUP ALARM ON/OFF... - Page 4 Contents Connections Playback Settings Tips Appendix Tips Tips Troubleshooting Resetting factory settings Appendix Playing back DATA CDs DIGITAL IN Playing back Bluetooth devices About Discs Last function memory Explanation of terms Trademark information Specifications Index Front panel Display Rear panel Remote Index...
- Page 5 Playback Settings Tips Appendix Thank you for purchasing this Denon product. To ensure proper operation, please read this owner’s manual carefully before using the product. After reading this manual, be sure to keep it for future reference. Accessories Check that the following parts are supplied with the product.
- Page 6 Contents Connections Playback Settings Tips Appendix Inserting the batteries NOTE 0 To prevent damage or leakage of battery fluid: 0 Do not use a new battery together with an old one. Remove the rear lid in the direction of the arrow and 0 Do not use two different types of batteries.
- Page 7 You can connect Bluetooth enabled devices such as smartphones and Denon’s popular M series gives you high sound quality based on the tablets with this unit to listen to music while browsing email and Web simple & straight concept. Circuitry is uncomplicated, signal paths are sites in the Internet away from this unit.
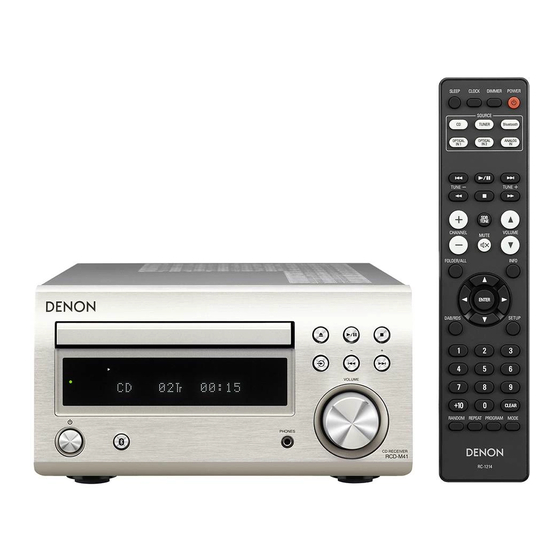
- Page 8 Contents Connections Playback Settings Tips Appendix Part names and functions Front panel For details, see the next page. Front panel Display Rear panel Remote Index...
- Page 9 Contents Connections Playback Settings Tips Appendix C Disc tray r t y Used to insert a disc. (v p. 27) D Disc tray open/close button (5) Opens and closes the disc tray. E Play/Pause button (1/3) Plays the track/Pauses the track. F Stop button (2) Stops playback.
-
Page 10: This Skips To The Start Of The Track
Contents Connections Playback Settings Tips Appendix L VOLUME knob This adjusts the volume level. (v p. 26) M Reverse-skip/Forward-skip buttons (8, 9) This skips to the start of the track. Preset/Tuning buttons (–, +) These select FM broadcast and AM broadcast. (v p. 31) Q0 Q1 Q2 J Headphones jack (PHONES) Used to connect headphones. -
Page 11: Rear Panel
Contents Connections Playback Settings Tips Appendix Display A Playback mode indicators D TOTAL indicator 1 : Lights up during playback. Lights up when the total number of tracks and total time of the CD are 3 : Lights up during pause. displayed. -
Page 12: Playback
Contents Connections Playback Settings Tips Appendix Rear panel AC IN ANALOG IN WOOFER DIGITAL IN OPTICAL SPEAKERS For details, see the next page. Front panel Display Rear panel Remote Index... - Page 13 Contents Connections Playback Settings Tips Appendix A Antenna terminals (ANTENNA) Used to connect FM antennas and AM loop antennas. (v p. 21) B Subwoofer connector (SUBWOOFER OUT) AC IN Used to connect a subwoofer with a built-in amplifier. (v p. 19) C Digital audio connectors (DIGITAL IN) ANALOG IN WOOFER...
- Page 14 Contents Connections Playback Settings Tips Appendix Remote control unit A POWER button (X) This turns the power on/standby. (v p. 25) B DIMMER button Adjust the display brightness of this unit. (v p. 44) C CLOCK button The current time appear on the unit. (v p. 43) D SLEEP button This sets the sleep timer.
- Page 15 Contents Connections Playback Settings Tips Appendix G Signal transmitter This transmits signals from the remote control unit. (v p. 6) H CHANNEL buttons (+, –) This switches between preset channels. (v p. 31) I FOLDER/ALL button This switches the playback range on a data CD. (v p. 29) J MUTE button (:) This mutes the output audio.
- Page 16 Contents Connections Playback Settings Tips Appendix O RANDOM button Switches the random playback. P REPEAT button Switches to the repeat playback. Q SDB/TONE button Adjusting the tone. (v p. 42) R VOLUME buttons (df) These adjust the volume level. (v p. 26) S Information button (INFO) This switches the track information shown in the display during playback.
- Page 17 Contents Connections Connections Playback Settings Tips Appendix o Contents o Cables used for connections Provide necessary cables according to the devices you want to connect. Speaker connection Connecting an analog device Speaker cable Connecting a digital device Connecting an FM/AM antenna Connecting the power cord Subwoofer cable NOTE...
-
Page 18: Speaker Connection
Contents Connections Playback Settings Tips Appendix Speaker connection Here we connect the speakers in the room to this unit. Turn the speaker terminal counterclockwise to loosen This section explains how to connect them using typical examples. NOTE 0 Disconnect this unit’s power plug from the power outlet before connecting the speakers. - Page 19 Contents Connections Playback Settings Tips Appendix Connecting the subwoofer Connecting speakers Use a subwoofer cable to connect the subwoofer. ANALOG IN WOOFER Speaker DIGITAL IN OPTICAL (SC-M41, sold separately) SPEAKERS ANALOG IN WOOFER DIGITAL IN OPTICAL Subwoofer SPEAKERS Front panel Display Rear panel Remote...
-
Page 20: Connecting An Analog Device
Contents Connections Playback Settings Tips Appendix Connecting an analog device Connecting a digital device You can connect this unit to various devices with analog audio output. You can connect this unit to devices with digital audio output (TV, digital gear, etc.). Analog Digital device... - Page 21 Contents Connections Playback Settings Tips Appendix Connecting an FM/AM antenna After connecting the antenna and receiving a broadcast signal, fix the antenna with tape in a position where the noise level becomes minimal. “Listening to FM/AM broadcasts” (v p. 31) 0 If you are unable to receive a good broadcast signal, we recommend installing an outdoor antenna.
- Page 22 Contents Connections Playback Settings Tips Appendix o Using the AM loop antenna o AM loop antenna assembly Suspending on a wall Put the stand section through the bottom of the loop Suspend directly on a wall without assembling. antenna from the rear and bend it forward. Insert the projecting part into the square hole in the stand.
-
Page 23: Connecting The Power Cord
Contents Connections Playback Settings Tips Appendix Connecting the power cord After completing all the connections, insert the power plug into the power outlet. AC IN DIGITAL IN OPTICAL EAKERS Power cord (supplied) To household power outlet (AC 120 V, 60 Hz) Front panel Display Rear panel... -
Page 24: Switching The Power To Standby
Contents Connections Playback Playback Settings Tips Appendix o Contents Other functions Basic operation Convenience functions Turning the power on Switching the power to standby Selecting the input source Adjusting the volume Turning off the sound temporarily (Muting) Playback a device Playing CDs Playing DATA CDs Listening to FM/AM broadcasts... -
Page 25: Basic Operation
Contents Connections Playback Settings Tips Appendix Basic operation Turning the power on POWER X Input source Press POWER X to turn on power to the unit. select buttons The power indicator lights green. 0 You can also press X on the main unit to turn on power from standby mode. VOLUME df Switching the power to standby MUTE... -
Page 26: Adjusting The Volume
Contents Connections Playback Settings Tips Appendix Selecting the input source Turning off the sound temporarily (Muting) Press the input source select button to be played back. The desired input source can be selected directly. Press MUTE :. “MUTE ON” is displayed. 0 You can also select the input source by pressing q on the main unit. -
Page 27: Playing Cds
Contents Connections Playback Settings Tips Appendix Playing CDs Playing CDs Press CD to switch the input source to “DISC”. 1 / 3 Insert a disc. (v p. 64) Playback starts. Press 5 on the main unit to open/close the disc tray. 0 You can set whether to automatically play CDs. - Page 28 Contents Connections Playback Settings Tips Appendix Playing tracks in a specific order Operation buttons Function (Program playback) Playback / Pause Stop Up to 25 tracks can be programmed. Skip to previous track / Skip to next track In the stop mode, press PROGRAM. (Press and hold) Fast-reverse / Fast-forward “PGM”...
-
Page 29: Playing Data Cds
Contents Connections Playback Settings Tips Appendix Playing DATA CDs This section explains how to playback music files that are recorded onto a CD-R or CD-RW. There are many music distribution sites on the Internet allowing you to download music files in MP3 or WMA (Windows Media ®... - Page 30 Contents Connections Playback Settings Tips Appendix Playing files Operation buttons Function Playback / Pause Stop Press CD to switch the input source to “DISC”. Skip to previous track / Skip to next track Load a CD-R or CD-RW containing music files into the (Press and hold) Fast-reverse / Fast- disc tray.
-
Page 31: Listening To Fm/Am Broadcasts
Contents Connections Playback Settings Tips Appendix Listening to FM/AM broadcasts For details about how to connect the antenna, see “Connecting an FM/AM antenna” (v p. 21). Listening to FM/AM broadcasts TUNER Press TUNER to select the reception band. TUNE +, – FM AUTO: When listening to an FM broadcast. - Page 32 Contents Connections Playback Settings Tips Appendix Automatically presetting FM stations Use TUNE + or TUNE – to select the station you want (Auto Preset) listen to. When a station is received, the “TUNED” indication will light. This unit can be preset with a total of 40 FM broadcast stations. When “FM AUTO”...
- Page 33 Contents Connections Playback Settings Tips Appendix o Giving station names to preset channels Presetting FM/AM stations manually This unit can be preset with a total of 40 FM/AM broadcast stations. Tune in the preset channel you want to name. Tune in the station you want to preset. Press ENTER twice.
-
Page 34: Listening To Preset Stations
Contents Connections Playback Settings Tips Appendix Listening to preset stations Setting the preset channels and changing the received frequency on Use 0 – 9, +10 or CHANNEL –, + to select the preset the main unit number. Preset/Tuning buttons (–, +) on the main unit can be used both for switching the preset channel and for tuning. -
Page 35: Settings
Contents Connections Playback Settings Tips Appendix Listening to music on a Bluetooth device Music files stored on Bluetooth devices such as smartphones, digital music players, etc. can be enjoyed on this unit by pairing and connecting this unit with the Bluetooth device. Communication is possible up to a range of about 32.8 ft/10 m. - Page 36 Press Bluetooth to switch the input source to “Bluetooth”. 0 When “Denon RCD-M41” is not displayed in the screen on the Bluetooth device, When using for the first time, the unit will go into the pairing mode search for devices on the Bluetooth device.
- Page 37 Contents Connections Playback Settings Tips Appendix Pairing with other Bluetooth devices Operation buttons Function Playback / Pause Pair a Bluetooth device with this unit. Stop Skip to previous track / Skip to next track Activate the Bluetooth settings on your mobile device. (Press and hold) Fast-reverse / Fast- Press and hold Bluetooth for 3 seconds or longer.
- Page 38 Contents Connections Playback Settings Tips Appendix Reconnecting to this unit from a Turning the Bluetooth function off for Bluetooth device high sound performance playback After pairing is completed, the Bluetooth device can be connected without Stopping Bluetooth function reduces a source of noise that affects sound performing any operations on this unit.
-
Page 39: Listening To Digital In
Contents Connections Playback Settings Tips Appendix Listening to DIGITAL IN Prepare for playback. OPTICAL IN1 ANALOG IN Check the connection “Connecting a digital device” (v p. 20), then OPTICAL IN2 turn on this units. Press OPTICAL IN1 or OPTICAL IN2 to switch the input source to “OPTICAL IN 1”... -
Page 40: Listening To Analog In
Contents Connections Playback Settings Tips Appendix Listening to ANALOG IN Prepare for playback. Check the connection, then turn on this units. Press ANALOG IN to switch the input source to “ANALOG IN”. Play the component connected to this unit. Front panel Display Rear panel Remote... -
Page 41: Convenience Functions
Contents Connections Playback Settings Tips Appendix Convenience functions Adjusting the tone Sleep timer function SLEEP DIMMER CLOCK Checking the current time Switching the display’s brightness SDB/ TONE Front panel Display Rear panel Remote Index... - Page 42 Contents Connections Playback Settings Tips Appendix Adjusting the tone n TREBLE Adjusts the treble sound. Press SDB/TONE to select the tone parameter to be –10 dB – +10 dB (Default : 0 dB) adjusted. n BALANCE Use o p to adjust the “SDB”, “BASS”, “TREBLE”, Use o p to adjust the left/right volume balance.
- Page 43 Contents Connections Playback Settings Tips Appendix Sleep timer function Checking the current time You can have the power automatically switched to standby once a set time Be sure to set the current time using “CLOCK SETUP” in the setup menu has elapsed.
- Page 44 Contents Connections Playback Settings Tips Appendix Switching the display’s brightness The brightness of the display can be adjusted to one of four levels. Press DIMMER. The brightness of the display switches each time the button is pressed. 0 If the buttons are operated when the display is turned off, information is displayed temporarily at a low brightness level.
-
Page 45: Menu Map
Contents Connections Playback Settings Settings Tips Appendix Menu map For menu operations, see the following page. By default, this unit has recommended settings defined. You can customize this unit based on your existing system and your preferences. Setting items Description Page CLOCK SETUP Sets the current time. - Page 46 Contents Connections Playback Settings Tips Appendix Menu operation CLOCK POWER Press SETUP. The menu is displayed on the display. Use ui to select the menu to be set or operated, then press ENTER. Use uio p to change to desired setting. Press ENTER to enter the setting.
- Page 47 Contents Connections Playback Settings Tips Appendix CLOCK SETUP ALARM SETUP Sets the current time. Audio from the set input source can be played back at a specified time. Audio can also be played at the same time every day. Use ui to set the “hours”. Use uio p to change to desired setting, then press ENTER to enter the setting.
-
Page 48: Alarm On/Off
Contents Connections Playback Settings Tips Appendix ALARM ON/OFF C VOLUME SELECT Use ui to adjust the volume, then press ENTER. Set the timer playback to on or off. D ON TIME Use ui to select “ONCE” or “EVERYDAY”. Use ui to select “hours” for the alarm start time, then press ENTER. -
Page 49: H/P Amp Gain
Contents Connections Playback Settings Tips Appendix H/P AMP GAIN SPK OPTIMISE Set the gain of the headphone amplifier. Set this according to the An optimizing filter suited for the properties of the speakers (SC-M41) can impedance of the connected headphones. It is recommended that this is be used. - Page 50 Contents Connections Playback Settings Tips Appendix CD AUTO PLAY When the CD tray is closed, the unit can detect the DISC, automatically switch the input source to DISC and start playback of the disc. Performs automatic playback. (Default): OFF: Does not perform automatic playback. CLOCK MODE The clock is constantly displayed.
-
Page 51: Troubleshooting
Contents Connections Playback Settings Tips Tips Appendix o Contents Troubleshooting Tips Power does not turn on / Power is turned off LED is flashing I want to play back music with a single operation from the standby state Operations cannot be performed through the remote control unit I want to turn on power to this unit from a Bluetooth device Display on this unit shows nothing I want to listen to high sound performance playback... - Page 52 I want to turn on power to this unit from a Bluetooth device Once you perform pairing between this unit and a Bluetooth device, you can turn on power to this unit by operating the Bluetooth device. Select “Denon RCD-M41” from the list of Bluetooth devices to turn on power to this unit.
- Page 53 Contents Connections Playback Settings Tips Appendix Troubleshooting If a problem should arise, first check the following. 1. Are the connections correct? 2. Is the set being operated as described in the owner’s manual? 3. Are the other devices operating properly? If this unit does not operate properly, check the items listed in the table below.
-
Page 54: Tips
Contents Connections Playback Settings Tips Appendix o LED is flashing Symptom Cause / Solution Page Flashing red. (Flashes at The amplifier circuit in the unit has malfunctioned. Disconnect the power and contact the repair center. - 0.25 second intervals) Flashing red. (Flashes at Protection circuit activated due to a rise in internal temperature. -
Page 55: Remote Control Unit
Contents Connections Playback Settings Tips Appendix o Operations cannot be performed through the remote control unit Symptom Cause / Solution Page Operations cannot be Batteries are worn out. Replace with new batteries. performed through the Operate the remote control unit within a distance of about 23 ft/7 m from this unit and at an angle of within remote control unit. -
Page 56: No Sound Comes Out
Contents Connections Playback Settings Tips Appendix o No sound comes out Symptom Cause / Solution Page No sound comes out of Check the connections for all devices. speakers. Insert connection cables all the way in. - Check that input connectors and output connectors are not reversely connected. -... -
Page 57: Desired Sound Does Not Come Out
Contents Connections Playback Settings Tips Appendix o Desired sound does not come out Symptom Cause / Solution Page Left/right volume balance is Press the SDB/TONE button on the remote control to adjust the balance. unbalanced. No sound from the sub Check the subwoofer connections. -
Page 58: Sound Is Interrupted Or Noise Occurs
Contents Connections Playback Settings Tips Appendix o Sound is interrupted or noise occurs Symptom Cause / Solution Page When making a call on When making a call, keep a distance of 0.7 ft/20 cm or longer between iPhone and this unit. -... - Page 59 Contents Connections Playback Settings Tips Appendix o Cannot playback Discs Symptom Cause / Solution Page Cannot playback when the The disc is dirty or scratched. Either clean the disc, or insert a different disc. 1/3 button is pressed, or cannot correctly play back a specific part of the disc.
-
Page 60: Bluetooth Cannot Be Played Back
Contents Connections Playback Settings Tips Appendix o Bluetooth cannot be played back Symptom Cause / Solution Page Bluetooth devices cannot The Bluetooth function in the Bluetooth device has not been enabled. See the Owner’s Manual of the - be connected to this unit. Bluetooth device to enable the Bluetooth function. -
Page 61: Resetting Factory Settings
Contents Connections Playback Settings Tips Appendix Resetting factory settings Perform this procedure if the display is abnormal or if operations cannot be performed. Various settings are reset to the factory default values. Make settings again. Place this unit in Standby mode using X. While pressing and holding q, press and hold X for 3 seconds. -
Page 62: Playing Back Data Cds
Contents Connections Playback Settings Tips Appendix Appendix Playing back DATA CDs o DATA CDs formats o Playable files CD-R and CD-RW discs created in the format described below can be Sampling Bit rate Extension played. frequency Writing software format 32/44.1/48 kHz 32 –... -
Page 63: Digital In
Contents Connections Playback Settings Tips Appendix DIGITAL IN Playing back Bluetooth devices This unit supports the following Bluetooth profiles. o Specifications of supported audio formats A2DP (Advanced Audio Distribution Profile) : When a Bluetooth device that supports this standard is connected, Optical monaural and stereo sound data can be streamed at a high quality. -
Page 64: About Discs
Contents Connections Playback Settings Tips Appendix About Discs o Discs playable on this unit o Loading discs A Music CDs Place the disc in the tray, label side up. Discs marked with the logo below can be played in Make sure the disc tray is fully open when inserting the disc. this unit. -
Page 65: Cleaning Discs
Contents Connections Playback Settings Tips Appendix o Cautions on loading discs o Cautions on storing discs Only load one disc at a time. Loading two or more discs can Be sure to remove discs after using them. damage the unit or scratch the discs. Be sure to store discs in their cases to protect them from dust, Do not use cracked or warped discs or discs that have been scratches, warping, etc. -
Page 66: Last Function Memory
Contents Connections Playback Settings Tips Appendix Last function memory This stores the settings as they were immediately before going into the standby mode. When the power is turned back on, the settings are restored to as they were immediately before going into the standby mode. Front panel Display Rear panel... -
Page 67: Explanation Of Terms
Contents Connections Playback Settings Tips Appendix Explanation of terms o Audio Sampling frequency Sampling involves taking a reading of a sound wave (analog signal) at MP3 (MPEG Audio Layer-3) regular intervals and expressing the height of the wave at each reading in This is an internationally standardized audio data compression scheme, digitized format (producing a digital signal). - Page 68 Contents Connections Playback Settings Tips Appendix o Others Finalizing Finalization is the process that makes recorded CD-R/CD-RW discs playable on compatible players. Pairing Pairing (registration) is an operation that is required in order to connect a Bluetooth device to this unit using Bluetooth. When paired, the devices authenticate each other and can connect without mistaken connections occurring.
-
Page 69: Trademark Information
Contents Connections Playback Settings Tips Appendix Trademark information The Bluetooth word mark and logos are registered trademarks owned ® Adobe, the Adobe logo and Reader are either registered trademarks or by Bluetooth SIG, Inc. and any use of such marks by D&M Holdings Inc. trademarks of Adobe Systems Incorporated in the United States and/or is under license. -
Page 70: Specifications
Contents Connections Playback Settings Tips Appendix Specifications o Audio section CD player Playable frequency response: 2 Hz - 20 kHz Wow & flutter: Below measurable limits (± 0.001 %) Sampling frequency: 44.1 kHz Audio amplifier Rated output: 2-channel 30 W + 30 W (6 Ω/ohms, 1 kHz, T.H.D. 10 %) o Tuner section [FM] [AM]... -
Page 71: Index
Contents Connections Playback Settings Tips Appendix o Bluetooth section Communications system: Bluetooth Version 4.0 Transmission power: Power Class 1 Maximum communication range: Approx. 10 m in line of sight Frequency band: 2.4 GHz band Modulation scheme: FHSS (Frequency-Hopping Spread Spectrum) Supported profiles: A2DP (Advanced Audio Distribution Profile) 1.3 AVRCP (Audio Video Remote Control Profile) 1.5... -
Page 72: Rear Panel
Contents Connections Playback Settings Tips Appendix o Clock/Alarm/Sleep Clock type: Crystal oscillator (Within 1 – 2 minutes per month) Alarm: Once alarm/Everyday alarm: One system each Sleep: Sleep timer: Max. 90 minutes o General Power supply: AC 120 V, 60 Hz Power consumption: 70 W Power consumption in clock mode :... -
Page 73: Rear Panel
Contents Connections Playback Settings Tips Appendix o Dimensions Unit : mm 5 1/8 (130) 8 3/8 (210) 1 1/4 (30) 1 1/4 1 1/4 (29) 6 (152) (29) o Weight : 9 lbs 4 oz (4.2 kg) Front panel Display Rear panel Remote Index... - Page 74 Contents Connections Playback Settings Tips Appendix Index Menu map ............45 Muting ............26 Adjusting the tone .......... 42 Alarm .............. 47 Rear panel ............12 Auto Standby ..........49 Remote control unit ........14 Resetting factory settings ....... 61 Bluetooth device ..........
- Page 75 3520 10547 00AD Copyright ©2017 D&M Holdings Inc. All Rights Reserved.
Need help?
Do you have a question about the RCD-M41 and is the answer not in the manual?
Questions and answers