
Related Manuals for Polycom GS-27

Summary of Contents for Polycom GS-27
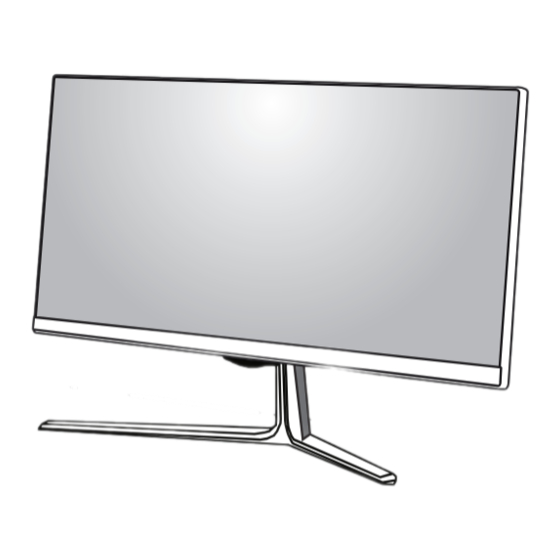
- Page 1 OWNER'S MANUAL LED MONITOR * LED Monitors are LCD Monitors with LED Backlighting. Please read the safety instructions carefully before using this product. GS-27 Display Accessory...
-
Page 2: Table Of Contents
Contents Contents UseR settInGs IMPoRtAnt PReCAUtIons Activating the Main Menu On Safety USER SETTINGS - Do not Open the Display: - Menu Settings - To Avoid Personal Injury : - Picture Settings - To Prevent Fire or Hazards: - Color Settings On Installation - Audio Settings Precautions to the AC Adapter and Power... -
Page 3: Important Precautions
IMPoRtAnt PReCAUtIons IMPoRtAnt PReCAUtIons This unit has been engineered and manufactured to ensure your personal safety, however improper use may result in potential electrical shock or fire hazards. In order to allow the proper operation of all safeguards incorporated in this display, observe the following basic rules for its installation, use, and servicing. on safety Use only the power cord supplied with the unit. -
Page 4: On Installation
IMPoRtAnt PReCAUtIons on Installation Do not allow anything to rest upon or roll over the power cord, and do not place the display where the power cord is subject to damage. Do not use this display near water such as near a bathtub, washbowl, kitchen sink, laundry tub, in a wet basement, or near a swimming pool. -
Page 5: On Cleaning
IMPoRtAnt PReCAUtIons Make sure to completely insert the power cord into the AC adapter. If loosely connected, the poor connection may cause a fire or electric shock. Be sure to use power cords and AC adapters provided. The use of non-approved products may cause a fire or electric shock. When unplugging the power cord, always pull it by the plug. -
Page 6: Licenses
LICenses LICenses Each model supports a different license. The terms HDMI and HDMI High-Definition Multimedia Interface, and the HDMI logo are trademarks or registered trademarks of HDMI Licensing LLC in the United States and other countries. -
Page 7: Assembly And Preparation
AsseMBLY AnD PRePARAtIon AsseMBLY AnD PRePARAtIon Product Contents Please check whether all the components are included in the box before using the product. If there are any missing components, contact the retailer where you purchased the product. Please note that the product and related components may look different from those shown in the illustrations. -
Page 8: Product And Button Description
AsseMBLY AnD PRePARAtIon Product and Button Description Input Connector DC switch Headphone Port touch Button (Power Button) note Make sure that the DC switch on the bottom of the product is turned on before turning on the monitor. -
Page 9: Moving And Lifting The Monitor
AsseMBLY AnD PRePARAtIon Moving and Lifting the Monitor CAUtIon Avoid touching the monitor screen as much When moving or lifting the monitor, follow these as possible. instructions to prevent the monitor from being - This may result in damage to the screen or scratched or damaged and to ensure safe trans- some of the pixels used to create images. - Page 10 AsseMBLY AnD PRePARAtIon Cable cover Stand hinge CAUtIon To protect the screen from scratches, cover the surface with a soft cloth. Input connector cover Stand body Stand base screws (2 pcs) (M4 x L10) screws (2 pcs) (M4 x L10)
-
Page 11: Installing On A Table
AsseMBLY AnD PRePARAtIon Installing on a table Adjusting the angle Lift the monitor and place it on the table in an Place the monitor mounted on the stand base upright position. Place the monitor at least 10 in an upright position. Adjust the angle of the screen. -
Page 12: Tidying Up Cables
AsseMBLY AnD PRePARAtIon tidying up Cables Using the Kensington lock As illustrated below, arrange the cables so that The Kensington security system connector is they run below the stand hinge and then cover located on the bottom of the Monitor. them with the cable cover from the bottom up. -
Page 13: Using The Monitor
UsInG tHe MonItoR UsInG tHe MonItoR HDMI Connection This monitor supports the *Plug and Play feature. CAUtIon *Plug and Play: A feature that allows you to add Do not press the screen for a prolonged a device to your computer without having to re- time. -
Page 14: Connecting To Headphones
UsInG tHe MonItoR Connecting to Headphones Connect peripherals to the monitor via the head- phones port. Connect as illustrated. (sold separately) note Peripheral devices are sold separately. Depending on the audio settings of the PC and external device, headphones and speaker functions may be limited. -
Page 15: User Settings
Enters the menu feature and selects and sets options. ◀ Enables the main menu. Disables the POLYCOM menu. (You can set each feature to suit your preference.) Enables the POLYCOM menu. (This mode is optimized for videoconferencing, and when in this mode, some features may not work.) -
Page 16: User Settings
UseR settInGs UseR settInGs Menu settings Menu To display the osD menu, press the Menu ( Volume button on the bottom of the monitor. Adjust options by using the ◀ , ▶ , and ▼ buttons. Brightness Select next Menu to set more options. Wide Wide/Original Reset... -
Page 17: Picture Settings
UseR settInGs Picture settings This feature only works in CUSTOM mode. Menu 〉 Next Menu 〉 Picture Contrast To display the osD menu, press the Menu ( Sharpness button on the bottom of the monitor. Black Level High Select next Menu by pressing the ▼ button. Overscan Go to Picture by pressing the ▶... -
Page 18: Color Settings
UseR settInGs Color settings This feature only works in CUSTOM mode. Menu 〉 Next Menu 〉 Color Gamma To display the osD menu, press the Menu ( Gamma 1 Color Temp Warm button on the bottom of the monitor. Six Color Select next Menu by pressing the ▼... -
Page 19: Audio Settings
UseR settInGs Audio settings This feature only works in CUSTOM mode. Menu 〉 Next Menu 〉 Audio Audio Settings To display the osD menu, press the Menu ( Bass button on the bottom of the monitor. Treble Select next Menu by pressing the ▼ button. Dialog Go to Audio by pressing the ▶... -
Page 20: Other Settings
The button tones can be heard on the following occasions: y DC Power On/Off y MENU OSD On y CUSTOM OSD On y POLYCOM OSD On Automatic Turns the monitor off automatically when there is no movement on the screen for a set period of standby time. -
Page 21: Troubleshooting
tRoUBLesHootInG tRoUBLesHootInG nothing is displayed on the screen. Is the monitor's power cord Check if the power cord is correctly plugged into the power outlet. plugged in? Is the power indicator on? Turn on the DC switch on the bottom of the monitor. Check your power cable connection and press the power button. - Page 22 tRoUBLesHootInG note Check if your graphics card's resolution or frequency is within the range supported by your monitor and set your graphics card to the recommended (optimal) resolution in Control Panel > Display > settings. Not setting your graphics card to the recommended (optimal) resolution may result in blurred text, a dimmed screen, a truncated display area or misalignment of the display.
-
Page 23: Product Specifications
PRoDUCt sPeCIFICAtIons PRoDUCt sPeCIFICAtIons LCD screen Type Thin Film Transistor (TFT) Liquid Crystal Display (LCD) Screen Pixel Pitch 0.3114 mm x 0.3114 mm Resolution Max resolution 1920 x 1080 @ 60 Hz Recommended resolution 1920 x 1080 @ 60 Hz Video signal Horizontal frequency 30 kHz to 83 kHz... -
Page 24: Hdmi Timing (Video)
PRoDUCt sPeCIFICAtIons Preset Mode (HDMI PC) Preset Mode Horizontal Frequency Vertical Frequency Polarity (H/V) Remarks (Preset mode) (kHz) (Hz) 720 x 400 31.468 70.08 640 x 480 31.469 59.94 640 x 480 37.5 800 x 600 37.879 60.317 800 x 600 46.875 75.0 1024 x 768... -
Page 25: Proper Posture
PRoPeR PostURe PRoPeR PostURe Proper Posture for Using the Monitor Adjust the screen so that you can comfortably look at it at a slight downward angle from your natural eye level. Take a break for approximately 10 minutes every hour to reduce any fatigue caused by extended us- age.
Need help?
Do you have a question about the GS-27 and is the answer not in the manual?
Questions and answers