Table of Contents

Related Manuals for Necta Korinto UL 120V


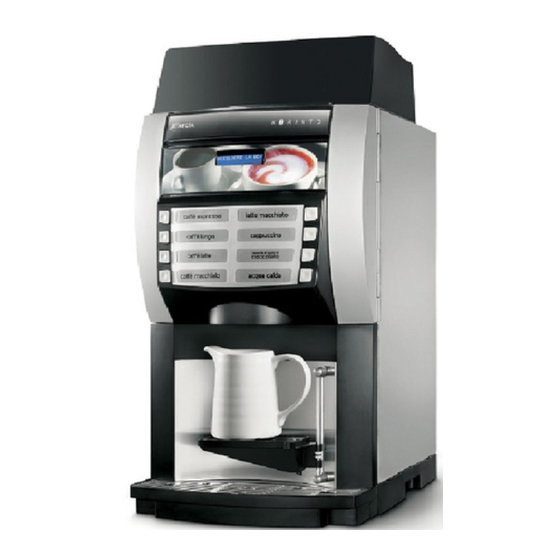
Summary of Contents for Necta Korinto UL 120V
- Page 1 INSTALLATION, USE AND MAINTENANCE MANUAL MANUEL D'UTILISATION, INSTALLATION ET ENTRETIEN Fresh brew Korinto UL 120V Pag. 1 English Pag. 45 Français DOC. NO. H 275V 00 EDITION 1 07 - 2006...
- Page 3 DICHIARAZIONE DI CONFORMITA’ DECLARATION OF CONFORMITY DÉCLARATION DE CONFORMITÉ KONFORMITÄTSERKLÄRUNG DECLARACIÓN DE CONFORMIDAD DECLARAÇÃO DE CONFORMIDADE VERKLARING VAN OVEREENSTEMMING INTYG OM ÖVERENSSTÄMMELSE OVERENSSTEMMELSESERKLÆRING YHDENMUKAISUUSTODISTUS Valbrembo, 01/04/2005 Dichiara che la macchina descritta nella targhetta di identificazione, è conforme alle disposizioni legislative delle direttive: 98/37/CE, 89/336, 73/23 CEE e successive modifiche ed integrazioni.
-
Page 5: Table Of Contents
TABLE OF CONTENTS INTRODUCTION PAGE 2 NOTES ON PROGRAMMING PAGE 16 IDENTIFICATION OF THE VENDING MACHINE PAGE 2 POWER ON PAGE 16 IN CASE OF FAILURE PAGE 2 OPERATING MODES PAGE 16 TRANSPORT AND STORAGE PAGE 2 NORMAL OPERATING MODE PAGE 16 POSITIONING THE VENDING MACHINE PAGE 3... -
Page 6: Introduction
IN CASE OF FAILURE INTRODUCTION In most cases, any technical problems are corrected by small repair operations; however, before contacting the manufacturer we recommend that this manual be read This technical documentation is part and parcel of the carefully. vending machine and must always follow the machine Should there be serious failures or malfunctions, contact in case it is moved or transfer of ownership, so as to the following:... -
Page 7: Positioning The Vending Machine
POSITIONING THE VENDING MACHINE WARNING FOR SCRAPPING The vending machine is not suitable for outdoor installa- tion. It must be positioned in a dry room where the tempera- ture remains between 2° C and 32° C, and not where water The symbol indicates that the machine may not be jets are used for cleaning (e.g.in large kitchens, etc.). -
Page 8: Power Consumption
Power supply voltage 120 V~ CAPACITY OF CONTAINERS Power supply frequency 60 Hz Installed power 1300 W Absorbed current 11.3 A PAYMENT SYSTEM k l i Using special kits, the machine can be fitted with payment systems with Executive, MDB or BDV protocol. The payment systems must be housed in the special side module (optional). -
Page 9: Loading And Cleaning
HYGIENE AND MAINTENANCE Chapter 1 According to current safety and health rules and regula- LOADING AND CLEANING tions, the operator of an automatic vending machine is responsible for the hygiene of materials that come in contact with foodstuff; therefore he must carry out mainte- POWER SUPPLY SWITCHES nance on the machine to prevent the formation of bacteria. -
Page 10: Controls And Information
CONTROLS AND INFORMATION LOADING PRODUCTS The machine should operate at an ambient temperature of Open the machine top panel and lift the container lids, fill 2°C to 32°C. the single containers with the appropriate products, taking The user controls and information are located on the care not to compress them to prevent packing. -
Page 11: Cleaning The Waste Trays
CLEANING THE WASTE TRAYS DISASSEMBLING AND CLEANING THE MIXERS The waste trays can be easily removed even with the door closed (see Fig. 7) permitting quick emptying and clean- When installing the machine, and then at least once a ing. week or even more frequently according to the use of the The fresh product container capacity is greater than that of machine and the quality of the inlet water, the mixers and... -
Page 12: Suspending From Use
- in order to remove the water funnel, rotate the green CLEANING THE FRESH-BREW UNIT ring nut anti-clockwise; Periodically, according to the operating condition of the pay special attention to closing it fully during machine and in any case at least weekly, it will be neces- reassembly;... - Page 13 The disassembly sequence is indicated below: Fig. 12 © by N&W GLOBAL VENDING SpA 07 06 275- 00...
- Page 14 After removing all parts, wash them thoroughly with food- safe detergents (dishware detergents) and dry them. The filter should be replaced periodically in any case. Reassemble all parts as indicated below: Fig. 13 © by N&W GLOBAL VENDING SpA 07 06 275- 00...
-
Page 15: Installation
The switch on key MUST NOT be left inside the ma- Chapter 2 chine, it must be kept by the qualified personnel INSTALLATION trained in the use of the machine. With the door open, there is no access to energised Installation and the following maintenance operations parts. -
Page 16: Connection To The Water Mains
CONNECTION TO THE WATER MAINS The machines are designed for connection to the drinking water mains, taking into account law provisions in force in the country where the machine is installed. The water pressure must be 7.3 to 123.3 psig (0.5-8.5 bar). Run some water from the mains until it is clear and without impurities. -
Page 17: Installing The Payment System
INSTALLING THE PAYMENT SYSTEM POWER ON Before switching the machine on, ensure that the grounds trays and the container lids are into place. The machine is sold without payment system, there- Each time the machine is switched on, the display shows fore the installer of such a system is responsible for the following message: any damage to the machine or to things and persons... -
Page 18: Initialising
INITIALISING FILLING THE WATER SYSTEM When the “Initialise” function is displayed the vending When the machine is switched on the conditions of the machine can be initialised restoring all default data. boiler are checked. This function should be used the first time the machine is If required by the conditions, the machine will automati- switched on and in the event of a memory data error or cally start an installation cycle, and namely:... -
Page 19: Brewer Unit Cycle
The piston returns and advances again, performing a wash BREWER UNITBREWER UNIT cycle of the product loading zone and completing the brewing cycle; the piston remains in position for a pro- After each time the machine is switched on the brewer unit grammable drying time. -
Page 20: Notes On Programming
Press any selection button to continue. Notes on programming It is possible to program the machine to enable the function that displays the controls to be performed before starting the machine, and namely: The machine electronic control allows or not the use of Tubing (nozzles etc.) many functions: All of the available functions are described in the machine... -
Page 21: Operating Modes
OPERATING MODES SURFING MODE The machine can be in three different operating modes. The interaction between system and user occurs through According to the operating mode, the buttons take on the following components: different functions. - Liquid crystal display (LCD) 2 lines of 16 characters. The available operating modes are as follows: - External direct selection push-button panel which takes FUNCTIONS... -
Page 22: Statistics
SELECTION PRICES FILLER MENU When pressing once the programming button located on This function is used for changing the sales price for each single selection and for each time band that may be set. the push-button card, the machine goes into “Filler menu” mode. -
Page 23: Displaying The Temperature
DISPLAYING THE TEMPERATURE TEST DISPENSING For complete or partial dispensing tests (water, powder, only and without accessories) each button (or combination of buttons according to the model) is assigned a selection FILL> Boiler temperature Boiler temperature T. = ##,# °C (see the dose selection table). -
Page 24: Technician Menu
Boiler TECHNICIAN MENU The machine will lock if after the maximum time of heating from the machine start, or from the last selection, the boiler Below is listed a summary explanation of the main func- fails to reach the operating temperature. tions useful for managing the operation of the machine, grouped by use logic and not necessarily in the order in CAN-BUS board... -
Page 25: Programming Parameters
READING PRESENT FAILURES Coin mechanisms When the “Failure” function is displayed, press the confirm It is possible to decide which of the payment system button “ ” to display the current failures. protocols available are to be enabled for the functions. If no failures are currently present, after pressing the The available payment systems are: confirm button “... - Page 26 FUNCTIONS COMMON TO ALL SYSTEMS Powder dose The powder dose expressed in grams can be set for each Immediate change selection button, for each product that composes such Normally, the amount of a selection is cashed after the selection. machine sends the message “Selection successful”. For correct conversion of product dose values, the flow When this function is enabled, disabled by default, the rate of the single doser units, expressed in g/s, can be...
- Page 27 Setting the regeneration counter DISPLAY It is possible to display the message This group of functions controls all parameters concerning “Replace water filter” after a programmable number of the display indications. selections. If set in the programming menu, it is possible to reset the message with the door closed through a password, after replacing the filter.
- Page 28 MISCELLANEOUS Free Vend password This function is used for setting the password that must be This menu contains some of the functions that are used entered while in normal operating mode (door closed) for less frequently concerning the machine parameters. activating the Free Vend function.
-
Page 29: Statistics
STATISTICS Printing Connect an RS232 serial printer having a Baud rate of Data on the machine operations is stored in both general 9600, 8 data bit, no parity, 1 stop bit to the serial port counters and relative counters, which can be reset without located on the push button board to print all the statistics losing total data. -
Page 30: Miscellaneous
“Language” MISCELLANEOUS When the machine is switched on for the first time or in any case after initialising, as well as the list of controls This menu contains some sub-menus, used less fre- to be performed, also the language used for the mes- quently, which permit control of the functions described sages on the display is proposed. -
Page 31: Maintenance
- remove the powder and the water funnels, the feeders, Chapter 3 the powder deposit drawers and the mixer wheels from the mixers (see Fig. 22); MAINTENANCE - in order to remove the water funnel the green ring nut must be rotated anticlockwise; Important notice!! Access to the machine interior for maintenance and/or pay special attention to closing it fully during... -
Page 32: Maintenance Of The Brewer Unit
- wash all parts with detergent being sure that all visible MAINTENANCE OF THE BOILER residue and product layers are mechanically removed, According to the hardness of the water and the number of using a brush if necessary; selections made, a periodic descaling of the boiler is Disinfection should be carried out using sanitising prod- necessary. -
Page 33: Periodical Cleaning
PERIODICAL CLEANING CLEANING THE PRODUCT CONTAINERS - Remove the containers from the machine; At least once a year, or more frequently according to the use of the machine and the quality of the inlet water, the - undo the fastening ring and slide out the auger from back entire foodstuff circuit system must be cleaned and sani- of the container;... -
Page 34: Printed Board Functions And Indicator Lamps
PRINTED BOARD FUNCTIONS AND INDICATOR LAMPS ACTUATION BOARD This board, placed at the back of the machine, (see Fig. 26) processes the information from the push-button card and from the payment system; it also controls the actuations, the input signals and the boiler board. The 15 V AC voltage required for board operation is supplied by a transformer which is protected by a T1.6 A fuse on the primary and by a T1.25 A fuse on the secondary... -
Page 35: Push-Button Board
PUSH-BUTTON BOARD This board controls the alphanumeric display, the selec- tion buttons and the programming button (see Fig 28). It supports the coin mechanism connectors as well as the printer port. Fig. 28 - Selection button connectors - Not used - To mechanical counter (optional) - To actuation/CPU board - Input... -
Page 36: Sigma Brewer Control Board
SIGMA BREWER CONTROL BOARD PAYMENT SYSTEMS EXPANSION BOARD This board, placed at the back of the machine, (see Fig. 31) processes the information from the brewer unit and con- This board (see Fig. 32) is supplied with the installation kit trols its operation. -
Page 37: Hydraulic System
HYDRAULIC SYSTEM - FRESH BREW 1 - Expansion spout 2 - Brewer unit 3 - Dispensing solenoid valves 4 - Boiler pump 5 - Safety thermostats 6 - Water inlet solenoid valve © by N&W GLOBAL VENDING SpA 07 06 275- 00... -
Page 38: Programming Menu Summary
Programming menu summary The machine can function in 3 different operating modes. - Normal vending mode - Filler menu - Technician menu In order to access the programming menus, press the programming button located on the push-button card: At this point the machine goes into Filler menu mode. The buttons shown in the figure are used for surfing through the different menus: Scrolling buttons UP ( ) and DOWN ( ) The UP and DOWN scrolling buttons are used for moving from one programming menu item to the next one, located... - Page 39 "Filler Menu" Summary 1 - STATISTICS 1.1 - STATIS. PRINTING 1.1.1 - PARTIAL PRINTING 1.1.1.1 - SEL. CNT. PRINT. 1.1.1.2 - PRINT BAND CNT 1.1.1.3 - DISC. CNT.PRINT. 1.1.1.4 - FAIL. CNT.PRINT. 1.1.1.5 - COIN MECH. PRINT 1.1.2 - TOTAL PRINTING 1.2 - PRINT REL.
- Page 40 "Filler Menu" Summary 1.4 - DISP. REL. STAT. 1.4.1 - SEL. CNT. DISP. 1.4.1.1 - CNT DIS. X S.SEL 1.4.1.2 - TOT CNT DISPLAY 1.4.1.3 - SEL.NO.CNT. DIS. 1.4.2 - DISPLAY BAND CNT 1.4.3 - DISC. CNT. DISP. 1.4.4 - FAIL. CNT. DISP. 1.4.5 - COIN MECH.
- Page 41 "Filler Menu" Summary 3 - TUBE CONTROL 3.1 - FILLING TUBE 3.2 - TUBE EMPTYING 4 - BOILER TEMPERAT. 5 - TEST 5.1 - COMP. DISPENSING 5.2 - WATER ONLY 5.3 - POWDER ONLY NEXT FUNCTION/ PREVIOUS FUNCTION / DECREASE DATA UNIT (-1) INCREASE DATA UNIT (+1) CONFIRM DATA / DELETE DATA /...
- Page 42 "Technician Menu" Summary 1 - FAILURES 1.1 - FAILURE READING 1.2 - FAILURE RESET 2 - SET PARAMETERS 2.1 - CASH 2.1.1 - PRICES 2.1.1.1 - SET INDIV. PRICE 2.1.1.1.1 - PRICE BAND 0 2.1.1.1.2 - PRICE BAND 1 2.1.1.1.3 - PRICE BAND 2 2.1.1.1.4 - PRICE BAND 3 2.1.1.1.5 - PRICE BAND 4 2.1.1.2 - SET GLOB.
- Page 43 "Technician Menu" Summary 2.2 - SELECTIONS 2.2.1 - SET WATER 2.2.1.1 - WATER DOSES 2.2.1.2 - SET WHIP DOSES 2.2.1.2.1 - SET WHIP DOSES 2.2.1.2.2 - SET MODALITY 2.2.1.3 - EL.VALVE SETTING 2.2.2 - SET POWDER 2.2.2.1 - POWDER DOSES 2.2.2.2 - DOSER SETTING 2.2.3 - SELECTION STATUS 2.2.4 - SEL.
- Page 44 "Technician Menu" Summary 2.5 - PRE-SELECTIONS 2.5.1 - WATER + 2.5.1.1 - SELECTION ENABL. 2.5.1.2 - DOSE VARIATION 2.5.1.3 - PRICE VARIATION 2.5.2 - WATER - 2.5.2.1 - SELECTION ENABL. 2.5.2.2 - DOSE VARIATION 2.5.2.3 - PRICE VARIATION 2.5.3 - STRONG 2.5.3.1 - SELECTION ENABL.
- Page 45 "Technician Menu" Summary 2.6 - MISCELLANEOUS 2.6.1 - FB DATA 2.6.2 - JUG FACILITIES 2.6.3 - PASSWORD 2.6.3.1 - SET PASSWORD 2.6.3.2 - ENABLE PASSWORD 2.6.3.3 - PWD AZZ. CONTAT. 2.6.3.4 - PWD JUG FACILITY 2.6.3.5 - PWD FREE VENDING 2.6.3.6 - PWD BLOCCO TAST.
- Page 46 "Technician Menu" Summary 3.3 - STATISTICS RESET 3.3.1 - PARTIAL RESET 3.3.1.1 - SEL. CNT. RESET 3.3.1.2 - DISC. CNT. RESET 3.3.1.3 - FAIL. CNT. RESET 3.3.1.4 - COIN MECH. RESET 3.3.2 - TOTAL RESET 3.4 - DISP. REL. STAT. 3.4.1 - SEL.
- Page 47 "Technician Menu" Summary 3.6 - EN. CNT AT START 3.7 - STATIS. PRINTING 3.7.1 - PARTIAL PRINTING 3.7.1.1 - SEL. CNT. PRINT. 3.7.1.2 - PRINT BAND CNT 3.7.1.3 - DISC. CNT.PRINT. 3.7.1.4 - FAIL. CNT.PRINT. 3.7.1.5 - COIN MECH. PRINT 3.7.2 - TOTAL PRINTING 3.8 - PRINT REL.
- Page 48 "Technician Menu" Summary 4 - TEST 4.1 - TEST DISPENSING 4.1.1 - COMP. DISPENSING 4.1.2 - WATER ONLY 4.1.3 - POWDER ONLY 4.2 - SPECIAL FUNCT. 4.2.1 - ESPR.UNIT ROTAT. 4.2.2 - RELEASE DOSE 4.2.3 - EMPTY ES. BOILER 4.2.4 - MANUAL INSTALL. 4.2.5 - FRESH BREW UNIT 4.3 - AUTOTEST 5 - MISCELLANEOUS...
- Page 49 Français TABLE DE MATIERES INTRODUCTION PAG. 48 NOTES SUR LA PROGRAMMATION PAG. 60 IDENTIFICATION DE L'APPAREIL PAG. 46 MISE EN ROUTE PAG. 60 EN CAS DE PANNE PAG. 46 ETATS DE FONCTIONNEMENT PAG. 61 TRANSPORT ET STOCKAGE PAG. 46 MISE EN PLACE DU DISTRIBUTEUR PAG.
- Page 50 EN CAS DE PANNE INTRODUCTION Dans la plupart des cas, les inconvénients techniques peuvent être éliminés avec de petites interventions de réparation. A ce propos nous vous conseillons de lire Cette documentation fait partie intégrante de l'appa- attentivement ce manuel avant de contacter le fabricant. reil et elle doit donc l'accompagner en cas de déplace- En cas de panne ou de mauvais fonctionnement persistant ment ou de transfert de propriété...
- Page 51 MISE EN PLACE DU DISTRIBUTEUR NOTICE POUR LA DEMOLITION Cet appareil ne s'installe pas à l'extérieur, mais en lieu sec, et avec des températures comprises entre 2° et 32°C. Ne jamais l'installer dans une pièce où l'on se sert de jets Le symbole indique que l’appareil ne peut être d'eau pour nettoyer (par ex.
- Page 52 Tension d'alimentation CAPACITÉ DES RÉCIPIENTS Fréquence d'alimentation Puissance installée 1300 é r Puissance absorbée 11.3 é f SYSTÈME DE PAIEMENT L'appareil peut abriter, en utilisant les kits prévus à cet effet, des systèmes de paiement fonctionnant avec les protocoles Executive, MDB ou BDV. é...
- Page 53 HYGIÈNE ET NETTOYAGE Chapitre 1 CHARGEMENT ET NETTOYAGE En relation avec les normes sanitaires et de sécurité en vigueur, l'opérateur d'un distributeur automatique est res- ponsable de l'hygiène des produits alimentaires, pour INTERRUPTEURS DE RÉSEAU prévenir la formation de bactéries, ainsi que de l'entretien machine.
- Page 54 COMMANDES ET INFORMATIONS CHARGEMENT DE PRODUITS L'appareil doit fonctionner à une température ambiante Ouvrir le toit de l'appareil et soulever le couvercle du comprise entre 2° et 32°C. récipient intéressé, introduire les produits à distribuer Les commandes et les notices pour l'utilisateur se trouvent dans chaque récipient en prenant soin de ne pas les sur le côté...
- Page 55 NETTOYAGE DU CUVETTE DÉMONTAGE ET NETTOYAGE MIXER Les bacs de collection des liquides usés peuvent être Au moment de l'installation, et puis toutes les semaines, aisément retirés (voir fig. 7) même à porte fermée pour en ou bien plus fréquemment par rapport à la fréquence effectuer rapidement la vidange et le nettoyage.
- Page 56 pour démonter l’entonnoir eau, il est nécessaire de NETTOYAGE GROUPE FRESH BREW faire tourner le collier vert dans le sens antihoraire ; Périodiquement, en fonction des conditions d’utilisation de veiller à bien le refermer lors du remontage ; l’appareil et, de toute façon, au moins une fois par se- - pour dévisser les rotors il suffit de bloquer avec un maine, il est nécessaire de nettoyer les éléments entrant doigt le disque monté...
- Page 57 La séquence de démontage des éléments est illustrée ci- après : Fig. 12 © by N&W GLOBAL VENDING SpA 07 06 275- 00...
- Page 58 Après avoir démonté tous les éléments, les laver soigneu- sement avec des détergents de type alimentaire (produits à vaisselle) et les sécher. Quoi qu’il en soit, le filtre devra être remplacé périodiquement. Remonter tous les éléments en suivant les instructions ci- après : Fig.
- Page 59 La clé de mise en marche ne doit pas être laissée à Chapitre 2 l’intérieur de l’appareil mais conservée par le person- INSTALLATION nel spécialisé formé à l’emploi de l’appareil. Lorsque la porte est ouverte on n'a pas l'accès aux L’installation et les opérations d’entretien qui suivent, qui parties sous tension.
- Page 60 RACCORDEMENT AU RESEAU DE L'EAU Certains modèles peuvent être reliés au réseau d’eau potable, en tenant compte des dispositions en vigueur dans le pays où l’appareil doit être installé. La pression du réseau doit être comprise entre 7.3 et 123.3 psig (0.5-8.5 bar). Faire couler l'eau du réseau hydraulique jusqu'à...
- Page 61 Débrancher de la carte poussoirs les câbles du panneau MONTAGE DU SYSTEME DE PAIEMENT des poussoirs et ôter le support des étiquettes en retirant les ailettes des fentes présentes sur la porte (voir fig. 18). L’appareil est vendu sans système de paiement, par Introduire les étiquettes dans les fentes et remonter le tout conséquent, la responsabilité...
- Page 62 INITIALISATION REMPLISSAGE DU CIRCUIT HYDRAULIQUE Lorsque le display affiche la fonction "Initialisation" l'appa- Les conditions de la chaudière sont contrôlées lors de la reil peut être initialisé en remettant toutes les données par mise en marche de l’appareil. défaut à l'état initial. Si les conditions le demandent, l’appareil effectue auto- Cette fonction doit être utilisée pour la première mise en matiquement un cycle d’installation, c’est-à-dire :...
- Page 63 Le piston recule et avance de nouveau en effectuant un CYCLE GROUPE D'INFUSION lavage de la zone de chargement du produit et en achevant l’infusion ; le piston reste en position durant une période de Après chaque mise en route de l’appareil, le groupe séchage programmable.
- Page 64 Il est possible de programmer l’appareil pour activer la Notes sur la programmation fonction d’affichage des contrôles à effectuer avant de mettre l’appareil en service, c’est-à-dire : L’électronique de contrôle de l’appareil permet d’utiliser de Tuyauterie (becs, etc.) nombreuses fonctions. Mixer Dans le programme de l’appareil sont décrites toutes les Convoyeur poudres...
- Page 65 ETATS DE FONCTIONNEMENT MODE DE NAVIGATION L'appareil peut se trouver en trois différents états de L’interaction entre le système et l’opérateur a lieu à travers fonctionnement. Les différentes fonctions sont activées les éléments suivants : par les positions des touches du pavé numérique. - Affichage à...
- Page 66 PRIX DES SÉLECTIONS MENU DU CHARGEUR En appuyant une seule fois sur le touche de programma- Cette fonction permet de modifier le prix de vente de tion placé sur la platine des boutons-poussoirs, l'appareil chaque sélection et de chaque plage horaire éventuelle- se trouvera en mode "Menu chargeur".
- Page 67 AFFICHAGE DE LA TEMPÉRATURE ESSAIS DE DISTRIBUTION Pour les essais de distribution complets ou partiels (d’eau, Poudre, seulement et sans accessoires) chaque touche (ou combinaison de touches, en fonction des modèles) CHAR> Température chaudière Température chaudière T. = ##,# °C actionne la sélection correspondante (voir la table des doses sélections).
- Page 68 Chaudière MENU DU TECHNICIEN La machine se bloque si après de temps maxi de chauf- fage depuis la mise en marche ou de la dernière sélection Nous fournissons ci-après une explication succincte des la chaudière n'a pas atteint la température de service. principales fonctions utiles pour gérer au mieux le fonc- tionnement de l’appareil.
- Page 69 LECTURE PRÉSENTES Monnayeurs Lorsque le display affiche la fonction "Pannes" après On peut choisir lequel des protocoles prévus pour le actionnement de la touche de validation “ ” toutes les système de paiement doit être habilité et puis en contrôler pannes présentes seront affichées.
- Page 70 FONCTIONS COMMUNES À TOUS LES SYSTÈMES Dose de poudre Pour chaque touche de sélection on peut programmer la Reste immédiat dose de poudre exprimée en grammes pour chaque pro- Normalement, le montant correspondant à une sélection duit dont la sélection se compose. est encaissé...
- Page 71 Configuration compteur de régénération DISPLAY Il est possible de visualiser le message "Remplacer filtre Ce groupe de fonctions contrôle tous les paramètres à eau" après un nombre programmable de distributions. Si relatifs à l’affichage à l’écran. elle est paramétrée dans le menu programmation, il est possible de réinitialiser –...
- Page 72 DIVERS Mot de passe vente libre Cette fonction permet de paramétrer le mot de passe qui Ce menu recueille quelques-unes des fonctions les moins doit être saisi en condition de service normal (porte fer- utilisées relatives aux paramètres de l’appareil. mée) pour l’activation de la fonction de Free-Vend.
- Page 73 STATISTIQUES Impression En connectant une imprimante série RS-232 ayant un Les données sur le fonctionnement de l'appareil sont débit de 9600 Bauds, 8 bits d'information, aucune parité, mémorisées soit à l'aide de compteurs généraux soit de 1 bit d'arrêt à la porte série placée sur la platine touche- compteurs relatifs pouvant être mis à...
- Page 74 "Exécution" pendant quelques seconde. DIVERS "Langue" Ce menu contient quelques sous-menus, dont l'utilisation Au moment de la première mise en marche du nouvel est moins fréquente, qui permettent de contrôler les fonc- appareil ou, quoi qu’il en soit, après son initialisation, outre tions qui suivent.
- Page 75 - Enlever des mixers les convoyeurs, les entonnoirs des Chapitre 3 poudres et les entonnoirs de l’eau, les tiroirs des poudres et les rotors des mixers (voir fig. 22) ; ENTRETIEN - pour démonter l’entonnoir eau, il est nécessaire de faire tourner le collier vert dans le sens antihoraire ;...
- Page 76 - laver toutes les pièces avec un produit détergent, tout en ENTRETIEN CHAUDIÈRE ayant soin d'éliminer mécaniquement les résidus visibles En fonction de la dureté de l’eau de réseau et du nombre de produit à l'aide, si besoin est, de brosses ou d'outils de sélections effectuées, il est nécessaire de procéder similaires ;...
- Page 77 NETTOYAGE PÉRIODIQUE NETTOYAGE RECIPIENTS A PRODUITS - Enlever les récipients de l’appareil ; Au moins toutes les années, ou plus fréquemment par rapport à l’utilisation de l’appareil et à la qualité de l’eau ò - Démonter les becs de sortie des produits et retirer les vis l’entrée, il faudra nettoyer et désinfecter complètement le sans fin du côté...
- Page 78 FONCTIONS DES CARTES ET DES VOYANTS LUMINEUX CARTE EXÉCUTIONS Cette carte, placée dans la partie arrière de l'appareil, (voir fig. 26) traite les informations envoyées par la platine des poussoirs et le système de paiement, et gère les actionnements, les signaux d'entrée, et la carte chaudière. La tension à...
- Page 79 CARTE TOUCHES-POUSSOIRS Cette carte commande le display alphanumérique, les touches de sélection et le touche de programmation (voir fig. 28). Elle supporte les connecteurs des monnayeurs et la porte d'imprimante. Fig. 29 - Carte touches - Support compteur de coups mécanique Fig.
- Page 80 CARTES CONTRÔLE SIGMA BREWER CARTE EXPANSION SYSTÈMES DE PAIEMENT Cette carte, située à l’arrière de l’appareil (voir fig. 31) pourvoit à élaborer les informations provenant du groupe Cette carte (voir fig. 32) est fournie avec le kit de montage infuseur et en contrôle le fonctionnement. des systèmes de paiement “change giver”...
- Page 81 CIRCUIT HYDRAULIQUE FRESH BREW 1 - Bec d’extension 2 - Groupe d'infusion 3 - Électrovannes distribution 4 - Pompe chaudière 5 - Thermostat de sécurité 6 - Electrovanne d'entrée d'eau © by N&W GLOBAL VENDING SpA 07 06 275- 00...
- Page 82 Resume menu de programmation Les distributeurs peuvent travailler dans 3 différents états de fonctionnement : - Service normal ; - Menu du Chargeur ; - Menu du Technicien. Pour pouvoir entrer dans les menus de programmation, il est nécessaire d’appuyer sur la touche de programmation située sur la carte touches-poussoirs : Dès lors, l’appareil se place dans la modalité...
- Page 83 Resume menu "Chargeur" 1 - STATISTIQUES 1.1 - IMPRESS. STATIS. 1.1.1 - IMPRES.PARTIELLE 1.1.1.1 - IMPRES.COMP.SEL. 1.1.1.2 - IMPR.COMP.PLAGES 1.1.1.3 - IMPRES.COMP.ESC. 1.1.1.4 - IMPRES.COMP.PAN. 1.1.1.5 - IMPRES.DONN.MON. 1.1.2 - IMPRESS. TOTALE 1.2 - IMPR.STAT.RELAT. 1.2.1 - IMPRES.PARTIELLE 1.2.1.1 - IMPRES.COMP.SEL. 1.2.1.2 - IMPR.COMP.PLAGES 1.2.1.3 - IMPRES.COMP.ESC.
- Page 84 Resume menu "Chargeur" 1.4 - AFF.STAT. RELAT. 1.4.1 - AFF. COMPT. SEL. 1.4.1.1 - AFF. COMPT. SIN. 1.4.1.2 - AFF. COMPT. TOT. 1.4.1.3 - AFF.COMP.S.N-M-D 1.4.2 - AFF.COMPT.PLAGES 1.4.3 - AFF.COMPT. ESCOM 1.4.4 - AFF.COMPT. PANN. 1.4.5 - AFF.COMPT. MONN. 1.4.5.1 - AFF.DONN.
- Page 85 Resume menu "Chargeur" 3 - AMENAGEM. TUBES 3.1 - CHARGEMENT TUBE 3.2 - VIDANGE TUBES 4 - TEMP. CHAUDIERE 5 - TEST 5.1 - DISTRIB. COMPLE. 5.2 - DISTR. EAU SEULE 5.3 - DIS.POUDRE SEULE FONCTION PRÉCÉDENTE/ FONCTION SUIVANTE/ AUGMENTATION DONNÉE (+1) DIMINUTION DONNÉE (-1) CONFIRMATION DONNÉE / ANNULATION DONNÉE /...
- Page 86 Resume menu "Technicien" 1 - PANNES 1.1 - LECTURE PANNES 1.2 - RESET PANNES 2 - SET PARAMETRES 2.1 - CASH 2.1.1 - PRIX 2.1.1.1 - SET PRIX INDIV. 2.1.1.1.1 - PRIX PLAGE 0 2.1.1.1.2 - PRIX PLAGE 1 2.1.1.1.3 - PRIX PLAGE 2 2.1.1.1.4 - PRIX PLAGE 3 2.1.1.1.5 - PRIX PLAGE 4 2.1.1.2 - SET PRIX GLOBAUX...
- Page 87 Resume menu "Technicien" 2.2 - SELECTIONS 2.2.1 - SET EAUX 2.2.1.1 - DOSES EAUX 2.2.1.2 - SET MIXER 2.2.1.2.1 - SET DOSE MIXER 2.2.1.2.2 - SET MODAL. MIXER 2.2.1.3 - REGLAGE ELE.VAN. 2.2.2 - SET POUDRES 2.2.2.1 - DOSES POUDRES 2.2.2.2 - REGLAGE DOSEURS 2.2.3 - ETAT DE SELECT.
- Page 88 Resume menu "Technicien" 2.5 - PRESELECTIONS 2.5.1 - EAU + 2.5.1.1 - ACTIVATION SEL. 2.5.1.2 - DOSE FILLING 2.5.1.3 - PRIX FILLING 2.5.2 - EAU - 2.5.2.1 - ACTIVATION SEL. 2.5.2.2 - DOSE FILLING 2.5.2.3 - PRIX FILLING 2.5.3 - FORT 2.5.3.1 - ACTIVATION SEL.
- Page 89 Resume menu "Technicien" 2.6 - DIVERS 2.6.1 - DONNESS GR. FB 2.6.2 - JUG FACILITIES 2.6.3 - PASSWORD 2.6.3.1 - SET PASSWORD 2.6.3.2 - HABIL. PASSWORD 2.6.3.3 - PWD AZZ. CONTAT. 2.6.3.4 - PWD JUG FACILITY 2.6.3.5 - PWD FREE VENDING 2.6.3.6 - PWD BLOCCO TAST.
- Page 90 Resume menu "Technicien" 3.3 - ANNULATION STAT. 3.3.1 - ANNUL. PARTIELLE 3.3.1.1 - ANNUL.COMPT.SEL. 3.3.1.2 - ANNUL.COMP.ESCO. 3.3.1.3 - ANN.COMPT.PANNES 3.3.1.4 - ANNUL.DONN.MONN. 3.3.2 - ANNULLAT. TOTALE 3.4 - AFF.STAT. RELAT. 3.4.1 - AFF. COMPT. SEL. 3.4.1.1 - AFF. COMPT. SIN. 3.4.1.2 - AFF.
- Page 91 Resume menu "Technicien" 3.6 - HABIL.COMPT.ALL. 3.7 - IMPRESS. STATIS. 3.7.1 - IMPRES.PARTIELLE 3.7.1.1 - IMPRES.COMP.SEL. 3.7.1.2 - IMPR.COMP.PLAGES 3.7.1.3 - IMPRES.COMP.ESC. 3.7.1.4 - IMPRES.COMP.PAN. 3.7.1.5 - IMPRES.DONN.MON. 3.7.2 - IMPRESS. TOTALE 3.8 - IMPR.STAT.RELAT. 3.8.1 - IMPRES.PARTIELLE 3.8.1.1 - IMPRES.COMP.SEL. 3.8.1.2 - IMPR.COMP.PLAGES 3.8.1.3 - IMPRES.COMP.ESC.
- Page 92 Resume menu "Technicien" 4 - TEST 4.1 - TEST DISTRIBUT. 4.1.1 - DISTRIB. COMPLE. 4.1.2 - DISTR. EAU SEULE 4.1.3 - DIS.POUDRE SEULE 4.2 - FONCTION SPECIAL 4.2.1 - ROTATION GROUPE 4.2.2 - DECLENCH. DOSE 4.2.3 - VIDANGE CHAUDIE. 4.2.4 - INSTALL. MANUEL 4.2.5 - GROUPE FR.
-
Page 93: Wiring Diagram
WIRING DIAGRAM LEGEND INITIALS DESCRIPTION INITIALS DESCRIPTION GENERAL COUNTER COFFEE UNIT MOTOR COFFEE UNIT MOTOR CAM GRINDER VOLUMETRIC COUNTER MD1-.. INGREDIENT MOTOR - INSTANT WATER INLET SOLENOID VALVE MDFB INGREDIENT MOTOR - FRESH BREW COFFEE DISPENSER SOLENOID VALV MF1-.. WHIPPER MOTORS ESP1-. - Page 94 LEGENDE SCHEMA ELECTRIQUE DESCRIPTION DESCRIPTION SYMBOLES SYMBOLES COMPTEUR DE COUPS GENERAL AFFICHAGE A CRISTAUX LIQUIDES CAME MOTEUR GROUPE CAFE MOTEUR GROUPE CAFE COMPTEUR VOLUMETRIQUE MOULIN A CAFE ELECTROVANNE ENTREE EAU MD1-.. MOTEURS DOSEURS SOLUBLES ELECTROVANNE LIVRAISON CAFE MDFB MOTEUR DOSEUR FRESH BREW ESP1-.
- Page 95 © by N&W GLOBAL VENDING SpA NOTE...
- Page 98 © by N&W GLOBAL VENDING SpA NOTE...
- Page 99 The Manufacturer reserves the right to modify, without prior notice, the characteristics of the equipment described in this publication; and further declines to accept any responsibility for any inaccuracies contained in this publication which can be ascribed to printing and/or transcription errors. All instructions, drawings, tables and information contained in this publication are confidential and can neither be repro- duced completely or in part, nor be transmitted to third parties without the written permit of the Manufacturer, who has the sole ownership.
Need help?
Do you have a question about the Korinto UL 120V and is the answer not in the manual?
Questions and answers