Table of Contents
Advertisement
Quick Links
Advertisement
Table of Contents

Subscribe to Our Youtube Channel
Related Manuals for Rhin-O-Tuff HD7700


Summary of Contents for Rhin-O-Tuff HD7700
- Page 1 Instruction Book for HD Punch Machines...
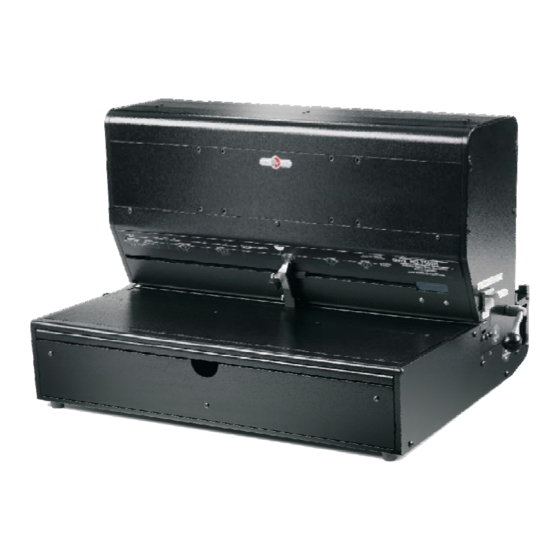
- Page 2 No matter what type of binding you need to carry out, these punches can handle the job. Maximum punching length for the HD7700, HD7000 is 14” (356mm) and the HD7500H is 24” (610mm). The HD7700, HD7000 and the HD7500H utilize quick-change die handles to secure the die assembly.
- Page 3 __Chip Drawer (1) __Power Cord (1) __Foot Pedal (1) __Oil (1) __Brush (1) __Instruction Book (1) __Reversing Tool (1) Inspected by:_________________ HD7700(H)/HD7650/HD7000 Plus/HD6700 Contents S/N:__________ __Punch (1) __Chip Drawer (1) __Power Cord (1) __Foot Pedal (1) __Oil (1) __Brush (1)
-
Page 5: Table Of Contents
Table of Contents Topic: Page Number: Safety Alert Symbols Safe operating guidelines Proper machine placement Providing electric power Die installation / Maintenance Setting the paper stop Punching paper Removing paper waste Paper jam 10-12 Troubleshooting... -
Page 6: Safety Alert Symbols
Always keep this instruction manual with the machine for reference to safe operating guidelines and correct operation of the machine. The HD7700/H, HD7650, HD7000, HD7000 Plus, HD6500, HD7100, HD6700 & HD7500/H need to be plugged into a wall outlet that... -
Page 7: Proper Machine Placement
Route cables away than the foot-pedal receptacle. from walkways HD7700 comes with a palm-switch that can be used instead of the foot-pedal. Decide which device you want to use to activate the machine and connect that device into the foot-pedal receptacle on the back of the machine. -
Page 8: Providing Electric Power
The assemblies. other end goes into the wall outlet. Die Installation: HD7700/H, HD7650, HD7100, HD7000, HD7000 WARNING Plus & HD7500/H: Diagram 1. Make sure the Crush hazard. machine is turned off before installing the Keep hands away from moving parts. - Page 9 Replace the chip drawer. Diagram 2. (Image of HD6500) Comb Die Backspace (Margin) Adjustment The comb die assemblies for the HD7700/H, HD7650, HD7100, HD6500, HD7000, HD7000 Plus, HD6700 and HD7500/H have a four position adjustable backspace. The positions are changed by pushing...
- Page 10 Removing Punch Pins Turn machine power off and remove die assembly from the machine. On the opposite side of the die assembly from the handle, push down on the pin retainer . Pull the pin capture away from the pin retainer to expose the punch pins.
-
Page 11: Setting The Paper Stop
Minor adjustments of the paper stop can now be made by turning the knob on the left side of the HD7700/H to move the paper stop left or right until the punch pattern is centered on the paper. -
Page 12: Punching Paper
Paper Jam: The HD7700/H, HD7650, HD7100, HD7000, HD7000 Plus, HD6500, HD6700 and HD7500/H punches use a circuit board for controlling the punch cycle, this circuit board also has the ability to automatically reverse the punch pins to their starting position in the event of a paper jam. - Page 13 Test cycle the machine by punching with no material in the punch, the machine will reset itself back to its home position. Reduce the amount of material being punched and continue working. HD7700/H, HD7650, HD7000 Plus and HD6700 WARNING Manual Reverse utilizes a reversing tool supplied Crush hazard.
- Page 14 WARNING HD7500/H Manual Reverse utilizes two Crush hazard. Turn reversing tools supplied with the punch. Keep hands away from moving parts. the machine power switch off and Lockout and disconnect power before servicing. unplug the power cord from the wall outlet.
-
Page 15: Troubleshooting
3) Die lock handle is in lock position off and back on 3) Move handle to unlock position NOTICE The HD7700/H, HD7650, HD7100, HD7000, HD7000 Plus, HD6500, HD6700 and HD7500/H have been tested with a duty cycle of 25 cycles per minute with a 1 minute rest period after 2 minutes of run time. - Page 16 IMPORTANT Be sure to fill out and return your Product Warranty Registration Card or Register online www.Rhin-O-Tuff.com/warranty_registration.asp Part Number 001169 Rev. 5. Feb 2012...
Need help?
Do you have a question about the HD7700 and is the answer not in the manual?
Questions and answers