Lenovo RackSwitch G8272 Quick Start Manual
Hide thumbs
Also See for RackSwitch G8272:
- Installation manual (118 pages) ,
- Product manual (32 pages) ,
- Quick start manual (7 pages)

Related Manuals for Lenovo RackSwitch G8272


Summary of Contents for Lenovo RackSwitch G8272
- Page 1 Lenovo RackSwitch G8272 ONIE Quick Start Guide for Lenovo Network Operating System...
- Page 2 LIMITED AND RESTRICTED RIGHTS NOTICE: If data or software is delivered pursuant a General Services Administration “GSA” contract, use, reproduction, or disclosure is subject to restrictions set forth in Contract No. GS-35F-05925. Lenovo and the Lenovo logo are trademarks of Lenovo in the United States, other countries, or both.
-
Page 3: Table Of Contents
..... .22 Uninstalling the Lenovo Network OS ....23 Using ONIE without Lenovo Network OS . - Page 4 Lenovo ONIE Quick Start Guide for G8272...
-
Page 5: Overview
Free Software Foundation. To read the license, visit the following link: https://github.com/opencomputeproject/onie/blob/master/COPYING For more details about ONIE, go to onie.org. Lenovo ONIE Image To download the Lenovo ONIE image, visit the following website: http://support.lenovo.com/ The ONIE images for the G8272 have the [ONIE] tag in their name, as follows: ... -
Page 6: Connecting To The G8272
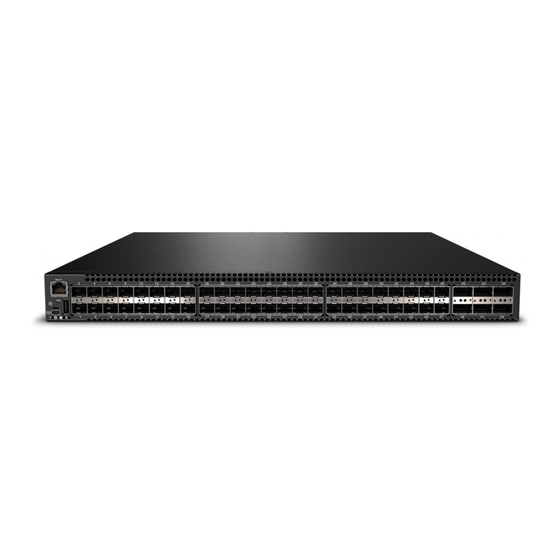
Connecting to the G8272 This section describes how to connect to the Lenovo RackSwitch G8272. For more details about the switch and on how to install the switch hardware, consult the Lenovo RackSwitch G8272 Installation Guide. Switch Unit The G8272 is a 1U GbE switch and it can be rack-mounted in a horizontal position. -
Page 7: Mini-Usb Serial Console Port
HyperTerminal, or PuTTY). The console port terminal emulation requirements are as follows: • Default baud rate: 9,600 bps • Character size: 8 characters • Parity: none • Stop bits: 1 • Data bits: 8 • Flow control: none © Copyright Lenovo 2017 Connecting to the G8272... -
Page 8: Geographic Layout Of The Temperature Sensors
The following illustrations show the location of the temperature sensors (pointed out with red arrows) on the main and CPU boards. Figure 5. G8272 CPU Board Temperature Sensors CPU Local U21, TCN75AVOA713, I2C @ 1001.011x on IIC1 bus Lenovo ONIE Quick Start Guide for G8272... - Page 9 Figure 6. G8272 Main Board Temperature Sensors © Copyright Lenovo 2017 Connecting to the G8272...
-
Page 10: Onie On The G8272
ONIE on the G8272 The Lenovo RackSwitch G8272 comes out of the box with Lenovo Enterprise Network OS (ENOS) already installed on the switch. To ensure maximum security, ONIE is not available on the switch by default. To enable the running of ONIE on the switch, you must follow these steps: 1. -
Page 11: Installing The Onie Fod License Key
Demand (FoD) license key. The process of obtaining and installing a FoD license key is described in the following pages. Obtaining the ONIE License Key The ONIE license key or activation key can be acquired using the Lenovo Features on Demand (FoD) website: http://fod.lenovo.com/lkms/ You can also use the website to review and manage the license, and to obtain additional help if required. -
Page 12: Installing The Onie License Key On Enos
To remove the ONIE license key from the switch, use the following command: G8272# software-key G8272(Software-Key)# rmkey key <license file> For example: G8272(Software-Key)# rmkey key fodEE3 Note: When removing the ONIE license key from the switch, the ONIE software image is also removed. Lenovo ONIE Quick Start Guide for G8272... -
Page 13: Installing The Onie License Key On Cnos
To remove the ONIE license key from the switch, use the following command: G8272(config)# no license install <license file> For example: G8272(config)# no license install fodEE3 Note: When removing the ONIE license key from the switch, the ONIE software image is also removed. © Copyright Lenovo 2017 ONIE on the G8272... -
Page 14: Installing Onie
ONIE license key. 1. Download an ONIE image for the switch from the following link: http://support.lenovo.com/ For ENOS, the ONIE image is called Lenovo Rackswitch G8272 [ONIE] v8.4.x.0. 2. Upload the ONIE image to a local server or a USB drive. - Page 15 : version 8.4.1.0 onie image: version 8.4.1.0 Currently scheduled reboot time: none In the command output, the current ONIE image installed on the switch is displayed under the Current FLASH software section. © Copyright Lenovo 2017 ONIE on the G8272...
-
Page 16: Installing Onie On Cnos
ONIE license key is not installed. 1. Download an ONIE image for the switch from the following link: http://support.lenovo.com/ For CNOS, the ONIE image is called Lenovo Rackswitch G8272 [ONIE] 10.x.x.0. 2. Upload the ONIE image to a local server or a USB drive. - Page 17 Currently set to boot software active image Currently scheduled reboot time: none Current port mode: default mode In the command output, the current ONIE image installed on the switch is displayed under the Current FLASH software section. © Copyright Lenovo 2017 ONIE on the G8272...
-
Page 18: Booting In Onie Mode
ONIE license key. For CNOS, the commands for booting in the different ONIE modes will display an error if the ONIE license key is not installed on the switch. Lenovo ONIE Quick Start Guide for G8272... -
Page 19: Booting In Onie Install Mode
The user can, at any point, reboot and run the ONIE installer again to install another Network OS. The Lenovo ONIE installer image, which installs the different Lenovo Network Operating Systems, is called onie-installer-powerpc-lenovo_g8272-r0, and it is available at the following link: http://support.lenovo.com/... -
Page 20: Booting In Onie Uninstall Mode
Are you sure you want the next boot to uninstall the OS? (y/n) Once you confirm, the switch will boot in ONIE uninstall mode on the next reload. For more details, see “Uninstalling the Lenovo Network OS” on page Lenovo ONIE Quick Start Guide for G8272... -
Page 21: Booting In Onie Update Mode
This will also install a different version of the ONIE boot loader, which does not support running Lenovo Network OS. If you wish to boot Lenovo NOS, you will have to re-install it by using ONIE Install mode (for more details, see “Booting in... -
Page 22: The Boot Management Menu
“Booting in ONIE Uninstall Mode” on page To boot the switch using the installed NOS image, press N. To exit the ONIE submenu and return to the Boot Management Menu, press E. Lenovo ONIE Quick Start Guide for G8272... -
Page 23: Uninstalling The Lenovo Network Os
Uninstalling the Lenovo Network OS If you wish to run another network operating system (NOS), you can uninstall the Lenovo Network OS by using the ONIE Uninstall mode. For more details, see “Booting in ONIE Uninstall Mode” on page Notes: ... -
Page 24: Using Onie Without Lenovo Network Os
Using ONIE without Lenovo Network OS If you have removed the Lenovo Network OS from the switch by using ONIE Uninstall mode, we recommend that you consult the official documentation from the ONIE website: https://github.com/opencomputeproject/onie/wiki/Quick-Start-Guide If you are having trouble with an ONIE-based installation, follow the suggestions from the ONIE website: https://github.com/opencomputeproject/onie/wiki/Quick-Start-Guide#...
Need help?
Do you have a question about the RackSwitch G8272 and is the answer not in the manual?
Questions and answers