Table of Contents
Advertisement
Advertisement
Table of Contents

Related Manuals for Merrithew Health & Fitness SPX Max Reformer


Summary of Contents for Merrithew Health & Fitness SPX Max Reformer
- Page 1 OWNER’S MANUAL PROFESSIONAL SERIES Reformer and Vertical Frame For video assembly instructions, visit merrithew.com/ eq-assembly Please review this important assembly, safety and warranty information about your new Merrithew equipment and keep it handy for future reference. ™...
- Page 2 NEVER stand with both feet on the wooden standing The SPX Max, V2 Max and Rehab V2 Max Reformers platform of an SPX Max Reformer. Step onto secured should be used by only one person at a time, carriage first before placing one foot onto wooden standing not weighing over 350 lbs / 159 kgs.
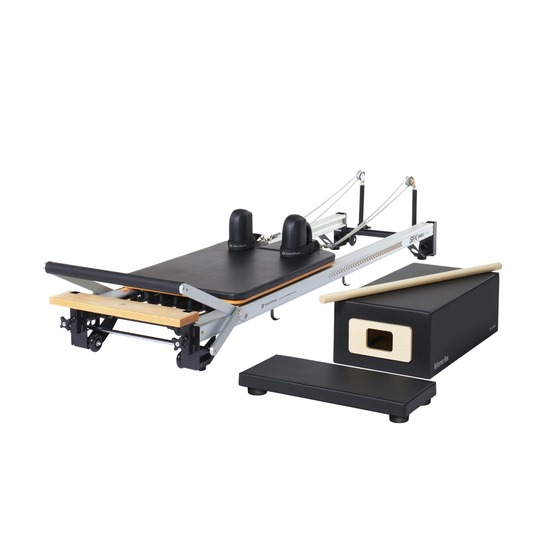
- Page 3 Merrithew Professional Reformers Favored among Pilates professionals for their superior adaptability, versatility, craftsmanship and smooth carriage ride, our professional Reformers feature easy adjustments to accommodate different sizes and abilities. Specially priced bundles offer popular accessories to add variety and challenge to your workouts. Reformer Bundles include: Max Plus Reformer Bundles also include: Reformer Box with Footstrap, regular or tall...
- Page 4 PART IDENTIFICATION Required Tools Universal Assembly Tool (supplied) Professional Reformers 1 Wooden Standing Platform 19 Double-Ended Swivel Spring Clip 38 Floating Roller [fig. E] 2 High-Traction Reformer Foot 20 Serial Number [fig. C] 39 Bronze Bushing [fig. E] with wheels 21 Roll-Up Pole Hooks 40 Spring Anchoring Bar [fig.
-
Page 5: Before Assembly
Fig. A – Spring Before Assembly Place all parts from the box in a cleared area and position on the floor in front of you. Remove all packing materials from the area and place back into the box. Do not dispose of the BALL END OF SPRING packing materials until assembly is completed. - Page 6 PART IDENTIFICATION The Vertical Frame Max Plus Vertical Frame 55 Fixed Eyehook 56 Spring Clip 57 Safety Chain 58 Traveling Pulley MAX PLUS 59 Traveling Pulley Eyehook MAX PLUS see inset on page 19 60 Vertical Sliding Track MAX PLUS 61 Roll-Down Spring, Black 62 Roll-Down Bar 63 Padded Long Spine Strap...
- Page 7 Traditional Vertical Frame TRAVELING PULLEY STOPPER POSITION PUSH-THRU BAR AND EYEHOOK LIGHT ARM SPRING WITH FOAM-GRIP HANDLE VERTICAL FRAME RECEPTACLE PUSH-THRU SPRING WITH EXTENSION STRAPS LOCKING SPRING CLIP...
-
Page 8: Mechanical Safety Check
SAFETY & USAGE Mechanical Safety Check Proper maintenance and timely replacement of your equipment or component parts is your responsibility. Conduct a regular inspection of the following: Daily Monthly Clean rails with a damp cloth using water only. Check ropes and straps for wear and replace as necessary. Ensure carriage stopper is fully inserted in one of the Check that spring bolts and spring balls are securely fastened. - Page 9 ASSEMBLY & SET-UP Assembling the Reformer STOP! Read these instructions completely before beginning or refer to our online assembly video at: merrithew.com/eq-assembly Prepare Rails Insert Carriage Stopper 1. Wipe rails [14] and inner c-channels [51], with a damp 2. To determine correct length of ropes [24], set carriage stopper cloth to remove dust and dirt.
- Page 10 ASSEMBLY & SET-UP Assembling the Reformer cont’d Insert Shoulder Rests Adjust Ropes 6. Insert shoulder rests [17] into receptacles with handles 7. To extend ropes, push rope down and out of retaining facing pulley posts and closest to outside edges of carriage. hook [48] and lift out of self-locking cleats [45].
- Page 11 Setting Up the Reformer Full instructions on proper set-up and execution of each exercise is provided in the STOTT PILATES ® Essential, Intermediate and Advanced Reformer manuals. This safety manual includes general guidelines only. Carriage Stopper Gearbar TRADITIONAL GEARBAR The carriage stopper [46] position determines how close the HIGH-PRECISION GEARBAR carriage slides in toward the wooden standing platform [1] and dictates the body’s range of motion.
- Page 12 ASSEMBLY & SET-UP Setting Up the Reformer cont’d Retractable Rope System Shoulder Rests Prior to use, confirm that the retractable rope system is in good Shoulder rests [17] are removable for specific exercises or order and rope [24] is secured through self-locking cleats [45] and for stacking of the Reformer (SPX Max only).
- Page 13 Installing the Vertical Frame Consult our online assembly video at merrithew.com/eq-assembly 1. Remove the receptacle covers and slide vertical frame into 2. MAX PLUS FRAMES: To use traveling pulleys [58] receptacles [71]. For Max Plus models, position pulley system extend ropes and detach double-ended swivel spring clips [19] facing carriage.
- Page 14 ASSEMBLY & SET-UP Setting Up the Vertical Frame cont’d Push-Thru Bar, Springs from Below Adjustable Pulley System Safety Chain CAUTION: THE SAFETY CHAIN MUST BE ATTACHED WHEN MAX PLUS ONLY: The spring-loaded track system provides USING THE PUSH-THRU BAR WITH SPRINGS FROM BELOW. adjustability for pulleys and spring hooks throughout the range of the vertical frame.
-
Page 15: Spring Clips
Leg Springs Extension Straps Leg Springs Extension Straps Long Spine Straps Attach leg springs [69] to traveling spring hooks [65] or The extension straps are valuable in supporting the fixed eyehooks [55] at desired height. Ensure spring clips [56] knees or legs in various exercises. are completely closed and secure. - Page 16 SAFETY & USAGE Reformer Accessories Accessory Boards Padded Platform Extender Accessory boards can be added to further increase This accessory extends the wooden standing platform [1] and can exercise options. Merrithew offers a range of choices. accommodate a variety of exercises, providing added comfort and ™...
- Page 17 Getting on the Reformer STOP! Before getting on, ensure the carriage stopper is inserted and at least one spring is securely attached to the gearbar. Standing or Kneeling Positions Secure Hands and Feet The carriage is a moving platform. Special attention must Whenever placing hands or feet on the footbar, shoulder rests or always be paid to maintaining your balance and stability, headrest, ensure they will not slip during exercise.
- Page 18 SAFETY & USAGE Storage and Stacking max plus ® ™ ® ™ Storing Shoulder Rests Stacking Reformers SPX MAX REFORMERS ONLY: When stacking, shoulder rests SPX MAX REFORMERS ONLY: Up to five SPX Max Reformers ™ [17] slide conveniently into brackets affixed to the underside of can be stacked on the optional rolling base or on a level floor the rail [14].
-
Page 19: Part Identification
SPX REFORMER WITH VERTICAL STAND Max Reformer with Vertical Stand ® This SPX Max Reformer model is equipped with a Vertical Stand, allowing it to be stored in an upright position. These instructions cover safe handling and storage of your equipment with the Vertical Stand. - Page 20 SPX REFORMER WITH VERTICAL STAND Standing the Reformer Upright Please read these instructions completely before beginning or refer to our online assembly video at merrithew.com/eq-assembly 1. If attached, first remove the vertical 2. Move the chrome adjuster bar [6] to set 3.
- Page 21 Lowering the Reformer To ensure your safety two people are required to lower a Reformer. 1. To prepare to lower the Reformer, 2. Holding the Reformer in place, use your 3. Walk your hands up the rails [14] as position one hand on each of the foot to push in one leg of the stand [54], you back up and lower the Reformer side rails [14] of the Reformer.
-
Page 22: Removing The Carriage
MAINTENANCE & REPLACEMENT PARTS Required Tool Removing the Carriage Universal Assembly Tool (supplied) Important: Removal of the carriage is essential prior to changing springs, rollers and ropes. Please note: Two people are required to remove and reinstall the carriage. 1. VERTICAL FRAME: Remove all springs from vertical frame, 2. -
Page 23: Replacing The Carriage
Required Tool Replacing the Carriage Universal Assembly Tool (supplied) 1. Remove carriage stopper [47]. 2. Wipe inside of aluminum rails (c-channels) [51] with a damp cloth using water only to remove dust or dirt. Spray onto cloth first. Avoid spraying liquid directly onto surfaces, rollers or rails. Insert carriage stopper [47] in one of six positions. - Page 24 MAINTENANCE & REPLACEMENT PARTS Spring Replacement Packages and Sleeves To ensure your Merrithew equipment works at its optimum level, as well as to ensure safety for you or your client, ™ it is recommended that all springs are replaced every two years Springs come in four different strengths to al.
- Page 25 Required Tools 2 Open End Wrenches, 1/2"(13mm) x 7/16"(14mm) Removing Springs Open End Pliers or Phillips Important: We recommend replacing your Reformer springs every two years to Wrench Vice Grips Screwdriver ensure maximum performance and safety at all times. Consult our online Assembly video at: merrithew.com/eq-assembly Ball End of Spring Bolt End of Spring SPRING BALL [10]...
- Page 26 MAINTENANCE & REPLACEMENT PARTS Required Tools 2 Open End Wrenches, 1/2"(13mm) x 7/16"(14mm) Installing New Springs Open End Pliers or Phillips Wrench Vice Grips Screwdriver 1. Remove nylon locknut [32] from spring bolt [31]. 2. Insert the spring [28] through the spring holder [33]. 3.
-
Page 27: Replacing Rollers
Required Tools Flat Head (slot) Screwdriver Ratchet Tool or Socket Drive Handle Replacing Rollers 1/2" Socket Attachment To begin: Remove all parts from their package and place in a cleared area. Consult our online assembly video at merrithew.com/eq-assembly For full instructions on removing Carriage, see page 22. 1. - Page 28 MAINTENANCE & REPLACEMENT PARTS Replacing Retractable Ropes Important: Read full instructions before beginning rope replacement. Consult our online assembly video at merrithew.com/eq-assembly Cotter Pin Rope Housing Reel Eyehook 1. Remove the carriage [15] and place face down on a blanket or 2.
- Page 29 Required Tool Phillips Screwdriver 7. Place screw and cup washer directly in the center of 8. To determine the direction rope [24] must coil, place empty replacement rope, 1⁄2" from the end and thread completely reel [42] on square shaft. Rotate reel in each direction. An audible through rope [24].
- Page 30 MAINTENANCE & REPLACEMENT PARTS Replacement Parts For more information and to place an order, visit merrithew.com/replacementparts or email equipment@merrithew.com Footbar Travelling Pulley Floating Rollers Floating Bronze Roller Bushing Single mount footbar uses 1/4" hex key Unscrew and remove the top screw of With carriage [15] removed from aluminum Double mount footbar uses 3/16"...
- Page 31 High-Traction Feet – V2 Max High-Traction Feet – SPX Plastic Feet Provides superior grip on all types of floor These high-traction rubber feet, designed For use on V2 Max, Rehab V2 Max and surfaces during high-energy exercises for all SPX Reformer models, provide Rack ’n Roll Reformers.
-
Page 32: Optional Items
ACCESSORIES Optional Items For more information and to place an order, visit merrithew.com/replacementparts or email equipment@merrithew.com Jumpboard Cross-Bow Cardio-Tramp ™ This Accessory Board is most often Curved handles extend above and beyond Provides a soft landing surface allowing for used for plyometric training as it mimics the Jumpboard offering ideal alignment plyometric activity for extended periods of the hard surface of the floor. - Page 33 Roll-Up Pole Gripper Mat Foam Cushions This solid maple roll-up pole is used to Non-slip rubber mats are handy to Available in three sizes. Used for comfort increase focus on scapular stabilization increase traction and prevent slipping. and additional support when performing while performing exercises.
-
Page 34: Warranty
THE FINE PRINT Warranty Merrithew warrants that all new equipment is free of manufacturing defects in workmanship and materials, subject to the terms below. ™ This warranty becomes effective at the invoice date of the original purchase. Parts repaired or replaced under the terms of this warranty will be warranted for the remainder of the original warranty period. - Page 35 Take Advantage of our Training Tools Training Manuals: Three fully illustrated manuals, developed for our Instructor Training Program, offer step-by-step instruction to the complete Reformer repertoire. Wall Charts: Full-size posters, measuring 27"x 39", depict exercises featured in the STOTT PILATES ® Reformer repertoire. Each exercise is described with name, equipment accessories, one photo, and suggested repetitions.
- Page 36 IMPORTANT Please keep this manual in a safe place. Go to merrithew.com/warranty to activate your warranty! Get the benefits: Ensure that you’ll be able to repair it under warranty should you encounter a problem. Make warranty service fast and efficient by having your information in our records. In the unlikely event of a replacement or safety notice, we’ll be able to contact you immediately.
Need help?
Do you have a question about the SPX Max Reformer and is the answer not in the manual?
Questions and answers