
Subscribe to Our Youtube Channel
Related Manuals for Merrithew Health & Fitness Reformer


Summary of Contents for Merrithew Health & Fitness Reformer
- Page 1 Reformer OWNER’S MANUAL Please review this important assembly, safety and warranty information about your new Merrithew Health & Fitness Reformer and keep it handy for future reference.
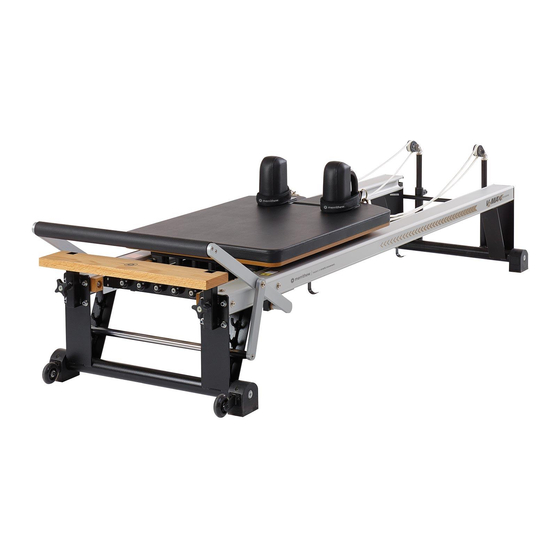
- Page 2 Note: Parts may not be exactly as shown. Photo shown is a Professional Reformer. Part IDs are the same for other Reformer models (SPX Max, Rehab and V2 Max Plus). Please see page 6 for all Reformers included. back oF...
-
Page 3: Required Tools
Fig A – SPRIng Fig E – RetRactable RoPe SySteM caRRIage [35] 18 41 15 16 ball enD oF SPRIng bolt enD oF SPRIng geaRbaR & SPRIngS VeRtIcal FRaMe RecePtacle & StaR knob SeRIal nuMbeR StIckeR cleat SySteM caRRIage StoPPIng SySteM Pulley block REQUIRED TOOLS: one flat... - Page 4 75 Locking Spring Clip [fig. K] Note: Parts may not be exactly as shown. Photo shown is a Professional Reformer. Part IDs are the same for other Reformer models (SPX Max, Rehab and V2 Max Plus). PluS-Style VeRtIcal FRaMe Reformer Owner’s Manual Reformer Owner’s Manual...
- Page 5 Fig i – tRaDItIonal VeRtIcal FRaMe tRaVelIng Pulley on MaX PluS FRaMe lIgHt aRM SPRIng wItH FoaM-gRIP HanDle SPRIng clIP on PuSH-tHRu baR VeRtIcal FRaMe RecePtacle eXtenSIon StRaPS PuSH-tHRu SPRIng wItH lockIng SPRIng clIP REQUIRED TOOLS: one open end wrench merrithew.com...
- Page 6 Vertical Frame with Retractable Rope System traveling Pulley System V2 Max Rehab V2 Max Plus ™ Reformer Rehab Reformer ™ includes Retractable Rope System includes and Vertical Frame with Retractable Rope System traveling Pulley System Reformer Owner’s Manual...
-
Page 7: Safety Instructions
This manual includes general guidelines for setup and usage. To get the most out of your Reformer, Merrithew Health & Fitness offers instructional DVDs and manuals. Personalized training is offered through our Licensed and Corporate Training Centers. -
Page 8: Mechanical Safety Check
Yearly Replace all spring clips Every 2 Years Replace all springs REPLACE ALL SPRINGS EVERY 24 MONTHS AND SPRING CLIPS EVERY 12 MONTHS OR AS NEEDED WITHIN THAT PERIOD. FAILURE TO PERFORM RECOMMENDED SAFETY CHECKS, OR USING Reformer Owner’s Manual... -
Page 9: Assembly Instructions
Assembly Instructions Place metal plate of wooden standing platform [1] Place swing arm support [7] in one of the footbar on threaded bolts on front of Reformer and fasten adjustment cradles [6] and fasten to small swing arm with ⁄ " lock nuts and washers. - Page 10 [1]. Insert pulleybars [47] into receptacles [40] at back of reformer 10 To extend ropes, depress below rope retaining hooks and tighten star knobs [3]. Ensure eyehooks [46] on top of [26] and lift out of self-locking cleats [25].
- Page 11 CONT’D 13 To determine correct length of ropes, set carriage stopper 14 Place soft reformer loops on carriage to line up fixed D-rings [30] in the second position. Attach springs to gearbar [9] on straps with end of metal plate of shoulder rests [37].
- Page 12 [38] and models, position pulley system facing carriage. For traditional soft reformer loops [34]. Pinch end loop of ropes and models, position highest eyehooks facing carriage. Tighten all insert through the bottom of traveling pulleys. Re-attach four hex bolts [71].
-
Page 13: Safety & Usage
SITTING OR LYING ON A BOx The gearbar position determines the amount of initial tension Always place reformer box in a stable position on the Reformer on the springs. The slot closest to the wooden standing platform and sit directly in the middle to avoid tipping. When using is referred to as position #1, the next is position #2, the last is footstrap, ensure it is underneath the wooden standing... - Page 14 #4 #3 #2 #1 SHOULDER RESTS FOOTBAR Shoulder rests are removable to allow storage of the reformer and to facilitate the use of a mat converter. The footbar can be set at four different heights to facilitate various reformer exercises and to accommodate physical differences and Attaching the shoulder rests abilities.
- Page 15 Preparing to reposition Ensure ropes do not drag and springs are attached to gearbar so carriage is secure. Stand at the back of reformer, grasp the horizontal metal bar or frame and gently lift. Lift reformer high enough to engage easy-roll wheels.
- Page 16 Roll-down bar can release at high velocity due to CAUTION: spring tension. Ensure a secure grip at ALL times. Gripper mats may be used. Reformer Owner’s Manual...
- Page 17 Attach leg springs, then attach extension straps to springs and attach padded long spine straps or reformer loops to straps. Ensure all spring clips are completely closed and secure. Ensure spring tension on Reformer is sufficient to return carriage completely.
-
Page 18: Required Tools
Removing Carriage spx max only "( "( Required for replacement of Reformer springs, carriage rollers and ropes. Remove all springs from vertical frame, To remove carriage, remove pulleybars and place them VERTICAL FRAME: including roll-down bar and safety chain. Loosen all four on floor, on either side of aluminum rails. - Page 19 Discard used nylon locknuts. New ones are NOTE: provided with new springs. We recommend that you replace the springs IMPORTANT: on your reformer every two years to ensure maximum performance and safety of your reformer at all times. Repeat steps 2 to 4 on remaining springs. merrithew.com...
- Page 20 Place 100% springs in remaining positions. Remove nylon locknut from spring bolt. Thread the spring bolt through the spring holding loop. Insert spring bolt through the corresponding Thread nylon locknut onto spring bolt. hole on spring anchoring bar. Reformer Owner’s Manual...
- Page 21 Replacing Springs CONT’D INSTALLING NEW SPRINGS CONT’D Hold fixed cube nut in place with ⁄ " wrench. Both nylon locknut and fixed cube nut should Using second ⁄ " wrench, tighten nylon locknut. be snug up against spring anchoring bar. NOTE: Do not reuse old nylon locknuts.
- Page 22 This step can be done by either removing carriage NOTE: or turning Reformer onto its side with springs engaged. Square Shaft Pull out cotter pin and remove plastic washer Remove rope housing reel from square shaft from rope housing reel.
- Page 23 There should be some resistance on reel or return reformer to upright position. and you should hear clicking as spring mechanism Feed ropes through pulleys, attach Reformer loops engages. Recoil full length of rope. and set ropes to desired length (see pages 10 - 12).
-
Page 24: All Models
Align fixed rollers with c-channels, then adjust floating Insert pulleybars into receptacles at back of ALL MODELS: rollers as necessary before guiding carriage into rails. Reformer and tighten star knobs. Ensure eyehooks on top of pulleybars are parallel to rails. CAUTION: We strongly advise that two people perform this operation to prevent damaging rollers. - Page 25 REQUIRED TOOLS: Replacing Carriage CONT’D one flat head screwdriver "( "( or pliers Slide vertical frame into VERTICAL FRAME MODELS: Replace shoulder rests and attach springs to gearbar. receptacles. For plus-style models, position pulley system NOTE: Ensure carriage stopper is in place before facing carriage.
-
Page 26: Replacement Parts
Do not use non-locking spring clips. PADDED SHOULDER RESTS CARRIAGE STOPPER REFORMER ROPES Only shoulder rest pads are shipped Only one is needed per Reformer. See page 22 NOTE: NOTE: RETRACTABLE ROPE SYSTEM: for replacement. Loosen bolts on handle Must be in one of the six positions for installation. - Page 27 PADDED LONG SPINE STRAPS FOAM GRIP HANDLES EXTENSION STRAPS Attach to soft reformer loops to extend the Provide cushioned hand grips for reformer Used between leg springs and soft length. Also attach to leg springs arm work, or attach to light arm springs reformer loops or padded long spine straps for leg work with any vertical frame.
-
Page 28: Optional Items
DOUBLE LOOP STRAPS ANKLE STRAPS ROLL-UP POLE Conveniently switch from arm work to attac h to reformer ropes and fasten around leg work without having to detach straps. ankles to provide a more secure connection Provides added scapular awareness. for leg work. - Page 29 It can also be used Positioning the Reformer Box Loop footstrap around wooden standing on the carriage for seated exercises. Place reformer box on top of carriage platform and adjust the length by attaching Installing the padded with either long or short side pressed spring clip to one of three D-rings.
-
Page 30: Limited Lifetime Warranty
Do not attempt to repair equipment yourself. reformer feet. We recommend that spring clips (including those attached to traditional-style ropes) be changed annually. Do not allow children to use or be around equipment without adult supervision. - Page 31 Reformer programs. Each exercise ® is described with name, equipment accessories, one photo, as well as suggested repetitions. A step-by-step exercise guide for the reformer repertoire can be downloaded by visiting merrithew.com/guide wall chart 27 x 39 in Contact Us Today: visit merrithew.com...
- Page 32 IMPORTANT Please keep this manual in a safe place. this is your Reformer Serial Number: 2200 yonge Street, Suite 500, toronto, ON, M4S 2c6 416-482-4050 416-482-2742 equipment@merrithew.com merrithew.com...
Need help?
Do you have a question about the Reformer and is the answer not in the manual?
Questions and answers
Hello - my reformer is 2 months old. I hear a slight “popping” sound on the left side when I push out the carriage. I checked and cleaned the wheels and tracks and all appears good. Could you please advise on the cause and how to resolve it?
A slight "popping" sound on the left side of a Merrithew Reformer when pushing out the carriage could be caused by a loose or worn spring, spring bolt, spring clip, or pulley component. To resolve it:
1. Inspect all springs for wear or damage and replace if needed.
2. Check that spring bolts and spring clips are securely fastened.
3. Inspect traveling pulleys and ensure threaded bolts are secure.
4. Perform monthly and yearly maintenance as recommended, including replacing spring clips yearly and springs every 24 months or as needed.
Proper maintenance and secure fastening should eliminate the popping sound.
This answer is automatically generated