HTC 10 User Manual
Hide thumbs
Also See for 10:
- User manual (276 pages) ,
- Quick start manual (3 pages) ,
- Settings manual (2 pages)
Table of Contents
Advertisement
Quick Links
Download this manual
See also:
User Manual
Advertisement
Table of Contents
Troubleshooting

Related Manuals for HTC 10


Summary of Contents for HTC 10
-
Page 1: User Guide
User Guide [UG template version 17a] [Sprint_HTC_10_Sense8_N7_MR_ug_en_03212017]... -
Page 2: Table Of Contents
Set Up Your Phone ..........................5 Parts and Functions ........................5 Charge the Battery ........................7 SIM Card ............................8 SD Card ............................10 Insert SD Card ........................11 Unmount and Remove the SD Card ................... 12 Format SD Card ........................12 Turn Your Phone On and Off ...................... - Page 3 Launch an App ........................25 Working with Two Apps at the Same Time ................. 26 Switch Between Recently Opened Apps ................27 Refresh Content of an App ....................27 Arrange Apps on the Apps Screen ..................27 Phone Number ..........................28 Silent Mode ..........................
- Page 4 Manage App Notifications ....................51 Front Indicator Light (LED) ......................51 Change LED Notification Settings ..................52 HTC BlinkFeed - Your Dynamic Home Screen ..............52 Customize the Home Screen ...................... 56 Choose a Home Screen Layout ..................56 Set the Home Wallpaper ..................... 57 Set Multiple Wallpapers ......................
- Page 5 Call Emergency Numbers ....................75 Call Using a Speed Dial Number ..................75 Voice Dialing ........................76 Call a Number in a Text Message, Email Message, or Calendar Event ......76 Make International Calls ..................... 76 Return a Missed Call ......................77 Answer Phone Calls ......................
- Page 6 Contacts Screen Layout ......................95 Find Contacts ........................96 Set Up Your Profile ......................97 Get in Touch with a Contact ....................97 Edit Contacts ..........................98 Delete Contacts .......................... 98 Import or Copy Contacts ..................... 99 Merge Contact Entries ......................99 Send Contact Information ....................
- Page 7 Switch between Gmail Accounts ..................119 Gmail Settings ........................119 Add an Exchange ActiveSync Account in Gmail .............. 120 Get Help with Gmail ......................121 Internet and Social Networking ......................122 Data Services General Information (4G LTE and 3G Networks ..........122 4G LTE ..........................
- Page 8 Turn NFC On ........................141 Beam Content ........................141 HTC Connect ..........................142 Share Media Using HTC Connect ..................142 Stream Music to Speakers Powered by Qualcomm AllPlay Media Platform ....143 Stream Music to Blackfire Compliant Speakers ............... 144 Apps and Entertainment ..........................
- Page 9 Create a Lock Pattern for Some Apps ................176 Calculator ..........................177 Clock ............................177 Set Alarms ........................178 Additional Clock Features ....................178 Weather ............................. 179 Voice Recorder ......................... 179 HTC Sync Manager ........................180 HTC Help ..........................182 viii...
- Page 10 Google Play Music Screen Layout ..................184 Create Playlists in Google Play Music ................184 YouTube ............................ 185 Sprint Zone..........................186 HTC BoomSound with Dolby Audio ..................186 HTC BoomSound for Speakers ..................186 HTC BoomSound for Headphones ................... 187 Personal Audio Profile ...................... 187 Settings ..............................
- Page 11 Sound & Notification Settings ....................196 Sound Profile and Vibrate ....................196 Volumes ..........................197 Notification and Alarm Sound ................... 197 Do Not Disturb ........................197 Incoming Calls - Ringtone ....................199 Incoming Calls - Other Options ..................199 System Sound Settings..................... 200 Notifications - Flash Notifications ..................
- Page 12 Font ........................... 212 Keyboard and Dialer Color ....................212 Fingerprint Scanner Settings ....................212 Accounts & Sync Settings ......................212 Add Your Social Networks, Email Accounts, and More ............ 212 Add One or More Google Accounts .................. 213 Manage Your Online Accounts ..................213 Location Settings ........................
- Page 13 Copyright Information ........................ 230 Index ................................232...
-
Page 14: Getting Started
Getting Started The following set of topics will introduce you to your phone, help you get set up with service, provide an overview of the phone screen, and get you started with basic phone operations. -
Page 15: Important Information
Important Information The following topics provide important information that should be read prior to using your HTC 10™. Radio Frequency Exposure Operating Instructions This device was tested for compliance with the applicable FCC and Industry Canada specific absorption rate (SAR) limits for radio frequency (RF) exposure during typical body-worn operations. To ensure that RF exposure levels remain at or below the tested levels, use a belt-clip, holster, or similar accessory that maintains a minimum separation distance of 1.0 cm between your body and the device, with either the... -
Page 16: Introduction
The following topics describe the basics of using this guide and your new phone. About the User Guide Thank you for purchasing your new HTC phone. The following topics explain how best to use this guide to get the most out of your phone. -
Page 17: Get Support From Sprint Zone
■ > > Help. Get Support from Sprint Zone In addition to your phone’s built-in Help menu, you can also access support for your phone and service through the preloaded Sprint Zone app. 1. Tap > > Sprint Zone. 2. Tap >... -
Page 18: Set Up Your Phone
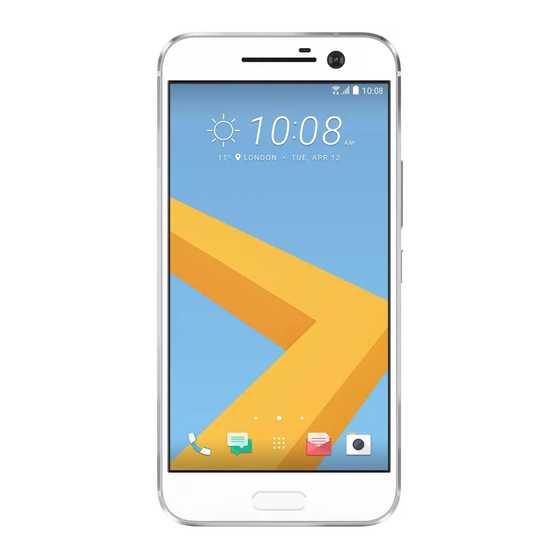
Set Up Your Phone The following topics give you all the information you need to set up your phone and wireless service the first time. Parts and Functions These topics illustrate your phone’s primary parts and key functions. Note: Your phone’s screens and apps layouts are subject to change. This user guide uses sample images only. -
Page 19: Back Panel
Proximity sensor While talking on the phone, the sensor detects talk activity and turns off the screen to prevent accidental key taps. ™ HTC UltraSelfie camera with Takes selfie pictures and videos with greater clarity with the built-in optical image stabilizer. -
Page 20: Charge The Battery
Notes: ● If the battery has been discharged for several days, you may need to charge HTC 10 for several minutes before powering it on. ● The battery is built-in and non-removable. Do not attempt to remove the battery. -
Page 21: Sim Card
3. Plug the other end of the USB cable into the AC adapter. 4. Plug the AC adapter into an electrical outlet. The indicator light illuminates when charging starts. The light turns green when the battery is fully charged. Fully charging a battery may take up to three hours. 5. -
Page 22: Nano Sim Card
Always power off the phone before inserting/removing SIM card. Nano SIM Card HTC 10 uses a nano SIM card. The nano SIM card is preinstalled in your HTC 10. If you need to remove or replace the card, refer to the following instructions. -
Page 23: Sd Card
Insert SIM Card The nano SIM card is preinstalled in your HTC 10. If you need to remove or replace the card, refer to the following instructions. Remember to power off your phone before inserting a SIM card. -
Page 24: Insert Sd Card
SD Card Cautions Data: Information stored on the SD card can become lost or changed accidentally as a result of damage. It is recommended that you keep a separate copy of important data. Sprint is not responsible for damages from data that is lost or changed. Reading/Writing Data: Never power off the phone while reading or writing data. -
Page 25: Unmount And Remove The Sd Card
Unmount and Remove the SD Card Follow these instructions to unmount and remove an SD card. Always unmount an SD card before removing it from your phone, and always power the phone off before inserting or removing an SD card. 1. -
Page 26: Turn Your Phone On And Off
If your SD card appears under Internal storage, tap the SD card name, and then tap > Format as portable > Format. After format is completed, tap Done. Turn Your Phone On and Off The instructions below explain how to turn your phone on and off. Turn Your Phone On ■... -
Page 27: Use The Touchscreen
Turn Your Phone Off 1. Press and hold the Power/Lock button to open the Phone options menu. Note: When the screen is locked and you press the Power/Lock button it will only turn off the screen and not the phone. You will need to turn the screen on before you press and hold the Power/Lock button to turn the phone off. -
Page 28: Swipe Or Slide
● Media gesture is turned on in Settings by default, which makes the three-finger gesture work only when sharing content or using HTC apps. ● The 3-finger gesture may not be available when TalkBack gestures are enabled. For details, see Navigate Your Phone with TalkBack. -
Page 29: Activate Your Phone
Activate Your Phone Follow the instructions below to activate your phone if it has not already been activated. Depending on your account or how and where you purchased your phone, it may be ready to use or you may need to activate it on your Sprint account. - Page 30 1. From the Welcome screen, select a language and tap Start to get started. To skip any section, tap Next or Skip. Note: If you are visually impaired or hard of hearing, touch and hold the screen with two fingers to enable TalkBack.
- Page 31 Which device? – If you have backed up your old phone’s data to your Google Account, you can easily restore that backup on your new phone using Android Backup Service. • If you want to restore a previous device backup with all your apps, tap the device from the list and tap Restore.
-
Page 32: Basic Operations
Swipe right for HTC BlinkFeed to show posts from your social networks, headlines from your favorite news media, and more. For details, see HTC BlinkFeed - Your Dynamic Home Screen. You can change the apps on the launch bar at the bottom of the Home screen. See... -
Page 33: Onscreen Navigation Keys
Tip: While you’re in another screen or app, tap to return to the last Home screen you visited. Onscreen Navigation Keys Your phone has onscreen navigation keys at the bottom of the screen which rotate when you change the orientation. The onscreen navigation keys do not show up when the screen is off, when you’re on the Camera viewfinder screen, or when you chose to hide it. -
Page 34: Using Quick Settings
Using Quick Settings In the Quick Settings panel, easily turn settings such as Wi-Fi and Bluetooth on or off. 1. Swipe down from the top of the screen to open the notification panel. Right below the Settings button, you'll see the first six Quick Settings tiles. 2. -
Page 35: Capture Screenshots
Under the Drag to add tiles section, drag a tile up to show it in the Quick Settings panel. 3. Tap Note: There is a limit to the number of tiles that can be shown in the first panel of Quick Settings. You may need to swipe left on the Quick Settings panel to see more Quick Settings tiles. -
Page 36: Apps List
Apps List The Apps screen includes any apps you download and install on your phone. The following table outlines the primary apps that have been preinstalled on your phone. Function/Service Shop the Internet using the Amazon app. Amazon Shop and read books right on your phone. Amazon Kindle Shop and listen to music using this app. - Page 37 Find useful content on how to use your phone, view troubleshooting Help information, and more. See Help. View your phone’s online user guide. HTC Mobile Guide Edit and share your favorite photos with this photo-sharing app. Instagram Help protect your phone from viruses and other threats. Lookout Jot down your ideas, to-do lists, and notes with this helpful app.
-
Page 38: Launch An App
Search, buy, and listen to music on your phone. Play Music Search, buy, and install apps to your phone. See Google Play Store. Play Store Change your phone settings. See Basic Settings. Settings Create, edit, and share worksheets. Sheets Create, edit, and share presentation slides. Slides Locate your family member’s whereabouts with this essential app. -
Page 39: Working With Two Apps At The Same Time
● Tap an app on the launch bar at the bottom of the Home screen. ● to go to the Apps screen, and then tap the app you want to use. ● On the Apps screen, tap , then enter the name of the app you’re looking for. Open an App or Folder from the Lock Screen ■... -
Page 40: Switch Between Recently Opened Apps
, and then open the app you want to use as the second active app. ■ To turn off the split-screen view, drag the handle of the screen divider to the edge of the screen. Or, touch and hold Switch Between Recently Opened Apps When you’re multitasking and using different apps on your phone or opened multiple Web pages from the Web browser, you can easily switch between the apps or Web pages you’ve recently opened. -
Page 41: Phone Number
5. When you’re done moving apps and folders, tap Group Apps into Folders 1. Tap > 2. Tap > Custom. 3. Tap > Rearrange apps. 4. Touch and hold an app, and then drag it over to another app to automatically create a folder. 5. -
Page 42: Silent Mode
2. Tap About > Phone identity. You will see the number listed under Phone number. Silent Mode Silent mode sets your phone’s ringtone, operation sounds, notifications, etc., not to sound to avoid disturbing others around you. Note: Camera shutter, video start/stop tones, and certain other sounds may still be active during silent mode. -
Page 43: Working With Text
Press and hold the Power/Lock button, and then tap Airplane mode. – or – Swipe down from the status bar to open Quick Settings and then tap When enabled, the Airplane mode icon is displayed in the status bar. Working with Text Enter, select, edit, and share text from apps that allow text input. -
Page 44: Enter Text By Typing
Enter Text by Typing The onscreen keyboard becomes available when you tap a text field in an app. Enter letters and numbers, change the keyboard layout or language, and more. ● Tap the keys on the onscreen keyboard to enter letters and numbers, as well as punctuation marks and symbols. -
Page 45: Enter Text By Voice
To enter a word in predictive mode, do any of the following: ● Tap the space bar to insert the highlighted word in the suggestion list. ● Tap a word from the suggestion list. To turn word prediction on or off: ■... -
Page 46: Typing Faster And More Accurate
2. Tap Language & keyboard. 3. Tap Virtual keyboard > TouchPal - HTC Sense Version > Smart input. 4. Select the options to enable. Change the Keyboard Language If multiple keyboard languages are available on your phone, you can choose which languages to enable in the onscreen keyboard. - Page 47 Switch to Landscape Mode 1. With two fingers, swipe down from the status bar and check if Auto rotate is turned on. 2. Open the app you need, and then tap a text field to show the keyboard. 3. Turn your phone sideways to bring up a bigger keyboard. 4.
-
Page 48: Google Account
4. To move the keyboard up, drag the center button up. Show Numeric Keys on the Top Row of the Keyboard 1. Open the app you need, and then tap a text field to show the keyboard. 2. Tap , swipe to the left, and then tap Settings. 3. -
Page 49: Create A Google Account
Google Account Cautions Be sure not to forget your Google Account ID or password. Create a Google Account If you do not already have a Google Account, you can create one online or using your phone. Notes: ● You can also create and sign into your Google/Gmail account through your phone’s Setup application. - Page 50 3. Tap Google, and then tap Or create a new account. 4. Follow the prompts to set up your account. Tap Next to proceed between steps, which may include: Enter your First name and Last name. Enter a desired Username. ...
-
Page 51: Sign In To Your Google Account
Sign In to Your Google Account If you have a Google Account but have not yet signed in with your phone, follow these instructions to sign in to your Google Account. 1. Tap > > Settings > Accounts & sync. 2. -
Page 52: Google Play Store
Google Play Store Google Play is the place to go to find new Android apps, books, movies, and music for your phone. Choose from a wide variety of free and paid content ranging from productivity apps and games to bestselling books and blockbuster movies and music. When you find what you want, you can easily download and install it on your phone. -
Page 53: Request A Refund For A Paid App
If you have not already set up a payment method, tap CONTINUE and then follow the prompts to arrange payment and complete the purchase. The selected app is downloaded and installed on your phone. Warning: Read the notification carefully! Be especially cautious with applications that have access to many functions or a significant amount of your data. -
Page 54: Uninstall An App
3. Tap an auto-update option, such as auto-update apps over Wi-Fi only. Note: Automatic updates are unavailable for some apps. Uninstall an App You can uninstall any app that you have downloaded and installed from Google Play. 1. Tap > >... - Page 55 You can now use your fingerprint to wake up and unlock your phone. Important: You’ll need to input your backup lock screen pattern, PIN, or password if the scanner doesn’t identify your fingerprint after five attempts. You’ll only have 10 additional attempts before your data is deleted from your phone.
-
Page 56: Add, Remove, Or Edit Fingerprints
Add, Remove, or Edit Fingerprints Follow these steps to manage your fingerprints on your phone. 1. Tap > > Settings > Fingerprint scanner. 2. Enter your pattern, PIN, or password. 3. Do any of the following: Tap Add fingerprint to add another fingerprint. ... -
Page 57: Update Your Phone
Update Your Phone From time to time, updates may become available for your phone. You can download and apply updates through the Settings > System updates menu. Software Update Cautions During update: The phone cannot be used until the software update is complete. It may take time to update your phone’s software. -
Page 58: Update Your Profile
> > Settings > System updates. 2. Tap HTC software update > Check now. Note: If you want to conserve data usage, you can select the Update over Wi-Fi only option before you tap Check now. 3. Follow onscreen instructions to download and install any available updates. - Page 59 2. Tap Update PRL and follow onscreen instructions. The phone will download and install the PRL update and you will see a confirmation when complete. Basic Operations...
-
Page 60: Your Phone's Home Screen
Your Phone's Home Screen The following topics describe how to use and customize your phone’s home screen, understand the status bar, and use the notification panel. Home Screen Basics The home screen is the starting point for your phone’s applications, functions, and menus. You can customize your home screen by adding application icons, shortcuts, folders, widgets, and more. -
Page 61: Status Bar
The status area of the status bar (on the right) displays phone and service Status Area status information such as signal strength, battery status, Wi-Fi and data connectivity, ringer status, and time. The status bar displays icons to notify you of your phone’s status (on the right Status Bar side) and notifications (on the left side). - Page 62 General notification (for example, sync error) More notifications available (tap to view) Missed call Call in progress Downloading Uploading USB connection Main Status Icons Icon Status Bluetooth active Headset connected Location service (GPS) is on Location service (GPS) is off Wi-Fi active Vibrate Speakerphone active...
-
Page 63: Notification Panel
Data synchronizing – connected to HTC Sync Alarm set Battery (charging) Battery (full charge) Notification Panel When you see notification icons, open the notification panel to check out details of the notifications that you’ve received. You can also quickly access settings from the notification panel. -
Page 64: Manage App Notifications
Tap the notification to open the corresponding app. To dismiss just one notification in the list, drag it left or right. To dismiss all notifications and close the notification panel, tap Clear all. Slide two fingers apart on the notification to expand it and see more details or see if there are more notifications bundled inside it. -
Page 65: Change Led Notification Settings
HTC BlinkFeed - Your Dynamic Home Screen Get the latest news about your interests or status updates from your right on HTC BlinkFeed. Set up which social networks, news sources, and more will appear. To go to HTC BlinkFeed, swipe right from the Home screen. -
Page 66: Turn Htc Blinkfeed On Or Off
Tip: You’ll see the clock widget on HTC BlinkFeed if you’ve set HTC BlinkFeed as the main Home screen. Turn HTC BlinkFeed On or Off You can turn HTC BlinkFeed on or off. 1. On the Home screen, slide two fingers together. -
Page 67: Select Feeds
4. Swipe across the screen to browse the categories. 5. Select one or more feeds. Show Content From Your Apps and Social Networks See your friends’ posts in social networks or show content from your HTC apps right on HTC BlinkFeed. Notes: ●... -
Page 68: Customize The Highlights Feed
5. Select the feeds to add. Read with Convenience Make reading HTC BlinkFeed content more convenient with resizable fonts or night reading mode. 1. Tap or swipe right to go to HTC BlinkFeed. -
Page 69: Customize The Home Screen
4. Compose your status update and post it on your social network. Remove Content From HTC BlinkFeed Whether it’s a tile or an entire feed, you can remove content you don’t want to see on HTC BlinkFeed. ● To remove a tile, touch and hold the tile you want to remove, and then tap Remove. -
Page 70: Set The Home Wallpaper
1. Tap and hold an empty space on a widget panel. 2. In the pop-up menu, tap Change Home screen wallpaper. 3. Choose from where you want to select a wallpaper. To use a wallpaper stored on your phone, tap HTC wallpapers or Live wallpapers. Your Phone's Home Screen... -
Page 71: Set Multiple Wallpapers
Tap Themes store to use a wallpaper from the Theme app. See Themes for details. To use a photo you captured with the camera, tap Photos. Tap Sprint ID to select a wallpaper from a downloaded Sprint ID pack. 4. -
Page 72: Organize Your Widget Panels
You won’t be able to add a new widget panel if you’ve already reached the maximum limit. ● If it’s not removed, HTC BlinkFeed always appears as the first panel. A widget panel cannot be inserted before HTC BlinkFeed. 1. Touch and hold an empty space on a widget panel. -
Page 73: Work With Stickers, Widgets And App Shortcuts
2. Touch and hold a widget panel thumbnail, and then drag it left or right to the position you want. 3. Tap Work with Stickers, Widgets and App Shortcuts Customize the launch bar, and add stickers, widgets, and app shortcuts to the Home screen. Customize the Launch Bar The launch bar on your Home screen gives you one-tap access to commonly used apps and other shortcuts. - Page 74 3. Tap > Widgets. 4. Scroll through the widgets or tap to search for specific widgets. Some widgets are available in different styles and sizes. 5. Touch and hold a widget, and then drag it to a widget panel you want to add it to. Change the Widget Settings You can modify basic settings of some widgets (for example, the Clock widget) from the Home screen.
-
Page 75: Customize The Lock Screen
6. Tap the newly added sticker, and then tap an app to link to the sticker. Note: If you need to link the sticker to a different app, touch and hold it on the widget panel, and then drag it to Relink. 7. - Page 76 Choose to set a screen lock pattern, numeric PIN, or other means of securing your phone. You’ll be asked to unlock the screen every time HTC 10 is turned on or when it’s idle for a certain period of time.
- Page 77 Touch and hold a notification to show, block, or silence notifications from the related app. HTC BlinkFeed Notifications From time to time, you’ll see HTC BlinkFeed notifications, such as a suggestion for a nearby restaurant or a recommended article. 1. Double-tap the notification to see the full notification. For restaurant recommendations, tap the notification text.
-
Page 78: Themes
Themes Themes brings a quick and easy way for you to customize your phone with wallpapers, sounds, icons, and more. Log in with your HTC Account to browse from the available themes in the Themes store, or make your own. -
Page 79: Create Themes
When you’re ready, tap Preview to see what your theme will look like. 9. Tap Finish, then name your theme and tap OK to save your theme. 10. To apply the theme right away, make sure you select the Apply this theme now option. Mix and Match Themes After selecting a theme, you can mix and match parts from other themes such as sounds, icons, wallpapers, and more. -
Page 80: Find Your Themes
6. Tap until you see the preview screen. Continue making changes until you’re satisfied with the result. 7. Tap Save copy to save your new theme, or if you're editing a theme that you copied, tap Save to save the changes. Find Your Themes Themes you created or downloaded can be found in your theme collection. -
Page 81: Motion Launch
Motion Launch is a combination of a motion gesture followed by a finger gesture. With Motion Launch, you don’t have to reach for the Power/Lock button to wake up your phone. Using a combination of simple gestures, you can wake up to your home screen, HTC BlinkFeed, and more. Turn Motion Launch On or Off Motion Launch is on by default. -
Page 82: Wake Up And Unlock
Make sure you’re not touching the screen when the phone vibrates. Wake Up and Unlock Go from sleep mode and unlock HTC 10 to the last screen you were using without reaching for the Power/Lock button. Note: If you’ve set up a screen lock with credentials, you’ll be asked to provide your credentials first before HTC 10 unlocks. -
Page 83: Wake To Htc Blinkfeed
Make sure you’re not touching the screen when the phone vibrates. Wake to HTC BlinkFeed Go from sleep mode to HTC BlinkFeed without reaching for the Power/Lock button. Note: If you’ve set up a screen lock with credentials, you’ll be asked to provide your credentials first before HTC 10 unlocks. -
Page 84: Motion Launch Troubleshooting
Note: If you’ve set up a screen lock with credentials, you’ll be asked to provide your credentials when you exit the Camera app. Motion Launch Troubleshooting In Settings > Display, gestures & buttons, tap Motion Launch gestures and make sure that the Motion Launch gestures you want to use are selected. -
Page 85: Making Connections
Making Connections The following set of topics will cover your phone’s ability to help you make connections, from phone calls and maintaining contacts, to text messages, email, Internet, and international services. -
Page 86: Phone Calls And Voicemail
Phone Calls and Voicemail The following topics outline the use of your device’s phone app to place and receive calls, use voicemail, set up and manage contacts, and more. Place and Answer Calls The following topics describe how to directly dial calls, how to answer incoming calls, and how to use the in-call screen options. -
Page 87: Troubleshooting
4. Tap the contact you want to call. To check other phone numbers associated with the contact, tap the contact photo. If the phone number has an extension, tap after connecting to the main line and then dial the extension number. -
Page 88: Call Emergency Numbers
■ After dialing the main number, touch and hold . A comma (,) is added to the number you are dialing. Enter the extension number, and then tap . You will be connected to the mainline and then to the extension number. –... -
Page 89: Voice Dialing
Set Up Speed Dial Your phone can store up to eight phone numbers in speed dial locations. (The number 1 is reserved for Sprint voicemail access.) To assign a speed dial number to a contact: 1. Tap > > People, and then tap a contact. 2. -
Page 90: Return A Missed Call
● To call someone in your contacts list, the stored phone number needs to have a "+" sign followed by the country code, area code, and phone number. 1. Tap > 2. Enter the first few letters of a contact name, and then tap a contact to call. If you don’t have the number stored, touch and hold the until a "+"... -
Page 91: Answer Or Reject An Incoming Call
When you receive a phone call from a contact, the Incoming call screen appears and displays the caller ID icon, name, and phone number of the calling party. When you receive a phone call from someone who is not stored in People, only the default caller ID icon and phone number appear on the Incoming call screen. -
Page 92: In-Call Screen Layout And Operations
In-Call Screen Layout and Operations While you’re on a call, you will see a number of onscreen options. ● Mute : Mute the microphone during an active call. Tap again to unmute the microphone. Note: If Mute is activated, the speaker mode is deactivated. ●... -
Page 93: Place Calls From History/People
Open contact card: Display the caller’s contact information. End a Call There are a couple of options for ending a phone call. ● On the call screen, tap End call. ● Slide the notification panel open, and then tap Hang up on the call notification. Tip: If the phone number of the person who called is not in your contacts list, you can choose to save the number to your contacts list after you hang up. -
Page 94: Open Call History
Note: Call history records only calls that occur while the phone is turned on. If a call is received while your phone is turned off, it will not be included in History. Open Call History Access your Call history to quickly call someone back or see who you have talked to recently. 1. -
Page 95: Block A Caller
Block a Caller When you block a phone number or a contact, all calls from the phone number or contact will be declined automatically. 1. Tap > 2. Swipe right to display the Call history tab. 3. Touch and hold the contact or phone number you want to block, and then tap Block contact > Note: To remove a caller from your blocked list, on the Call history tab, tap >... -
Page 96: Visual Voicemail Setup
Record your name announcement. Record your greeting. Important: Voicemail Passcode – Sprint strongly recommends that you create a passcode when setting up your voicemail to help protect against unauthorized access. Without a passcode, anyone who has access to your phone is able to access your voicemail messages. Visual Voicemail Setup This topic describes the Visual Voicemail feature of your phone's service, as well as the steps required to set up Visual Voicemail on your phone. -
Page 97: Review Visual Voicemail
Record your greeting. Important: Voicemail Passcode – Sprint strongly recommends that you create a passcode when setting up your voicemail to help protect against unauthorized access. Without a passcode, anyone who has access to your phone is able to access your voicemail messages. Review Visual Voicemail Visual Voicemail lets you easily access and select which messages you want to review. -
Page 98: Configure Visual Voicemail Settings
Help: View help topics for Visual Voicemail. Settings: Customize your Visual Voicemail settings. 3. Tap a message to review it. The following options are available while listening to voicemail messages. Call : Dial the number the message came from. ... -
Page 99: Change Your Main Greeting Via The Voicemail Menu
2. Tap > Settings. You will see the voicemail settings menu. 3. Select an option to change its settings. Avatar: Configure Avatar options. Display: Change your voicemail message theme and enter a name to identify yourself to people when replying or forwarding messages. -
Page 100: Optional Calling Services
Edit the Display Name via the Voicemail Menu From your Visual Voicemail menu, you can quickly change the name or number attached to your voice messages. 1. Tap > > Voicemail. 2. Tap > Settings > Display > Display name. 3. -
Page 101: Call Waiting
Call Waiting When you’re on a call, Call Waiting alerts you to incoming calls by sounding two beeps. Your phone’s screen informs you that another call is coming in and displays the caller’s phone number (if it is available and you are in digital mode). To respond to an incoming call while you’re on a call: 1. -
Page 102: Internet Calls
Internet Calls When you’re connected to a Wi-Fi network, you can make and receive calls through an Internet calling account. Note: Before you add an Internet calling account, make sure that you’ve registered with an Internet calling service that supports voice calls over Session Initiation Protocol (SIP). Internet calls to phone numbers may incur additional fees. -
Page 103: Call Settings
Lower the Ring Volume Automatically Your phone has a quiet ring feature that automatically lowers the ring volume when you move it. 1. Swipe down from the status bar, and then tap > Sound & notification. 2. Select the Quiet ring on pickup option. Make Your Phone Ring Louder in Your Pocket or Bag To help avoid missing incoming calls when your phone is in your pocket or bag, the pocket mode feature gradually increases the ring volume and vibrates when you receive a call. -
Page 104: Voicemail Settings
Most TTY phones connect via a 2.5 mm headset jack adapter. HTC provides a 2.5 mm headset jack adapter that connects to the USB Type-C port on HTC 10. To request this adapter, contact HTC at htc.com/us/contact/phone. - Page 105 1. Tap > > Settings. 2. Tap Call. 3. Tap CDMA call settings > TTY mode. 4. Tap TTY Full, TTY HCO, or TTY VCO. Tap TTY Off to turn TTY mode off. Note: When enabled, TTY mode may impair the audio quality of non-TTY phones connected to the headset jack.
-
Page 106: Contacts
Contacts The Contacts application lets you store and manage contacts from a variety of sources, including contacts you enter and save directly in your phone as well as contacts synchronized with your Google Account, your PC, compatible email programs (including Exchange Server), and your Facebook friends. Contacts Cautions Information saved in Contacts may be lost or changed if the battery is removed for a long period or left uncharged. -
Page 107: Save A Phone Number
Select Google if you want to save contacts to your Google Account; these will be synced automatically with your Google Account online. Select Phone as the sync account if you want your contacts on your phone only; they will not be synced with your Google Account. -
Page 108: Contacts Screen Layout
2. Enter a phone number and tap Save to People. 3. To add the number to an existing contact, tap Save to existing contact. To add a new contact, tap Create new contact. For an existing contact, tap the contact name and select a number type for the new number. ... -
Page 109: Find Contacts
Tap to show contact’s details. This also shows when a contact has sent you new Contact name messages. Contact image Tap to find ways to quickly connect with the contact. Contact link Tap to manage contacts from your social network and Web-based email accounts. suggestion My profile View your profile and edit your contact information. -
Page 110: Set Up Your Profile
Find people on your company directory (Microsoft Exchange ActiveSync account required). , enter the first few letters of the contact name in the Search people box, and then tap Search contacts in your Company Directory. Tip: Aside from searching for a contact by name, you can search using a contact’s email address or company name. -
Page 111: Edit Contacts
Tip: For more ways of getting in touch with your contact, tap an icon below the contact photo. Edit Contacts Once you’ve added a contact, you can add or edit any of the information in the entry, assign a caller ID picture, customize with a unique ringtone, and more. -
Page 112: Import Or Copy Contacts
1. Tap > > People. 2. On the People tab, touch and hold the contact, and then tap Delete contact. 3. Tap OK to confirm. Delete Multiple Contacts Clean up your contacts list by deleting entries that you no longer need. 1. -
Page 113: Accept Contact Link Suggestions
Accept Contact Link Suggestions When your phone finds contacts that can be merged, you’ll see a link notification when you open the People app. 1. Tap > > People. 2. On the People tab, tap the Contact link suggestion notification when available. You’ll see a list of suggested contacts to merge. -
Page 114: Send Contact Information
Send Contact Information Quickly share your contact card or People entries on your phone. 1. Tap > > People. 2. Do any of the following: To send someone’s contact information, touch and hold the name of the contact (not the icon or photo), and then tap Send contact as vCard. -
Page 115: Create A Group
Create a Group Create a group for your sporting buddies or family members so you can easily send them a message or email. 1. Tap > > People. 2. On the Groups tab, tap 3. Enter a name for the group. 4. -
Page 116: Back Up And Restore Contacts
4. Tap Save. Manage Your Contact Groups Put your favorite group at the top of the groups’ list or delete groups that you don’t need. 1. Tap > > People. 2. On the Groups tab, tap > Edit groups. 3. You can: ... -
Page 117: Private Contacts
5. If you have multiple backups available, select the backup you want to import, and then tap OK. 6. Enter the password you’ve set for this backup, and then tap OK. Private Contacts If you don’t want to show a contact’s name and photo on the lock screen when you have an incoming call, add the contact to your private contacts list. -
Page 118: Messaging
Messaging With wireless service and your phone’s messaging and data capabilities, you have the opportunity to share information through many different channels and accounts, including Gmail (Google), personal and corporate email, and text and multimedia messaging. Text and Multimedia Messaging With Text Messaging (SMS), you can send and receive instant text messages between your wireless phone and another messaging-ready phone. -
Page 119: Send A Multimedia Message (Mms)
Send a Multimedia Message (MMS) When you need to add a little more to a text message, you can send a multimedia message (MMS) with pictures, voice recordings, audio or video files, contact cards (vCard), or appointments (vCalendar). 1. Tap >... -
Page 120: Send A Group Message
4. Tap > Preview. Tap once on the preview screen to see playback controls. Tap to return to the compose screen. 5. When finished, tap to send, or tap to save the message as a draft. Send a Group Message Group messaging makes it easy to send a message to multiple contacts all at once. -
Page 121: Save And Resume Composing A Draft Message
Answer: In Message settings, tap Multimedia messages (MMS), and then turn Group Messaging on or off. Save and Resume Composing a Draft Message While composing a text or multimedia message, tap to automatically save your message as a draft. You can resume composing a draft message. 1. -
Page 122: Forward A Message
3. Tap the message, and then tap Forward. Receive Text Messages From Contacts Using an iPhone If you have just migrated your contacts from an iPhone to your new HTC phone, your contacts may still be texting you through iMessage and not through SMS or MMS. -
Page 123: Help Protect Your Messages
Note: If you are concerned about the size of your data downloads, you can choose to check the size and subject first before you download a multimedia message. On the All messages screen, tap > Settings > Multimedia messages (MMS). Clear the Auto-retrieve option. Help Protect Your Messages You can move private text messages to the Secure box. -
Page 124: Delete Messages And Conversations
1. Tap > > Messages. 2. Do any of the following: Touch and hold a contact (or phone number) and tap Block contact. To block multiple contacts, tap > Block contacts, select the contacts, and tap Block. When the contact sends you messages, you will not see them in the All messages screen or receive notifications and calls. -
Page 125: Text And Multimedia Message Options
4. Choose whether you want to protect the backup file with a password. 5. Enter a name for your backup file, and then tap OK. Back Up Text Messages Using Mail Important: You need to set up your email account in Mail. 1. - Page 126 • Received notification: Select this option if you want to receive a notification in the status bar when a new text or multimedia message arrives. • Play notification sound: If you want the phone to ring when a new message arrives, select this option.
- Page 127 • Priority setting: Set the priority for outgoing MMS messages. • Maximum message size: Set the maximum file size of a multimedia message. The multimedia message will not be sent out if it exceeds the file size set here. • Attachment storage: Select the storage where you want to save multimedia message attachments.
-
Page 128: Gmail
• Lets you customize the message thread’s background image and color and texture of message bubbles. General: Font size • Set the font size for message threads. General: Callback number • Enable or change the callback number for SMS messages. Gmail Use Google’s Gmail service and your Google Account to send, receive, and manage your Gmail messages. -
Page 129: Open Gmail Messages
● To view your draft email messages, in the inbox, tap Inbox > Drafts. ● To view your sent messages, in the inbox, tap Inbox > Sent. Open Gmail Messages Your phone allows you to access, read, and reply to all your Gmail messages. Open Gmail Messages from Notifications When new Gmail arrives, you will see in the status bar. -
Page 130: Manage Gmail Messages
Options when Reviewing Gmail Messages ● Replying to Gmail Messages: With the Gmail message open, tap , compose your reply message, and tap To reply to all, tap and choose Reply all. ● Forwarding Gmail Messages: With the Gmail message open, tap > Forward, enter a recipient and an additional message, and tap Send Manage Gmail Messages Your phone gives you control over how you manage your Gmail messages with labels, thread... -
Page 131: Mute Gmail Threads
3. Tap a label for the thread, and then tap OK. The thread is added to the selected label. Mute Gmail Threads If registered on a mailing list, there will be threads with always-continuing conversations. For long threads that are not important, mute the threads and they will no longer appear in the inbox. When mail arrives that includes user's address as a recipient or in Cc, mail will again appear in the inbox. -
Page 132: Report Spam Gmail
The search results appear. Tap a message or thread from the list to display it. Report Spam Gmail You can report spam Gmail messages from your phone’s Gmail inbox. 1. Tap > > Gmail. The inbox opens. 2. Touch and hold a conversation thread to add a checkmark to it, and then tap >... -
Page 133: Add An Exchange Activesync Account In Gmail
Account settings: Inbox type, Inbox categories, Notifications, Inbox sound & vibrate, Signature, Vacation responder, Sync Gmail, Days of mail to sync, Manage labels, Download attachments, and Images. Note: Available settings are subject to change. Add an Exchange ActiveSync Account in Gmail If you synchronize your phone with your Exchange ActiveSync account, you can read, manage, and send email in the same easy way as with a Gmail account. -
Page 134: Get Help With Gmail
Your corporate email account is set up and you will begin receiving email for the account in Gmail. Get Help with Gmail Find out more about how to use Gmail. ■ In the Gmail inbox, tap > Help & feedback. Messaging... -
Page 135: Internet And Social Networking
Internet and Social Networking Understand your phone's data connection and start your social networking with handy apps that are readily available on your phone. Data Services General Information (4G LTE and 3G Networks The following topics will help you learn the basics of using your data services, including managing your user name, launching a data connection, and navigating the Web with your phone. -
Page 136: Data Connection Status And Indicators
When you use data services, your user name is submitted to identify you to the network. Your user name is automatically programmed into your phone. You don’t have to enter it. Find Your User Name You can find your user name through your phone's device menu. 1. -
Page 137: Manage Your Data Usage
Manage Your Data Usage If you’re on a limited data allowance, it’s important to keep track of the activities and apps that usually send and receive data, such as browsing the Web, syncing online accounts, and sending email or sharing status updates. -
Page 138: Chrome Browser
3. Tap Mobile data usage and then tap 4. Tap Reset data usage, set the day of the month when your usage cycle resets, and then tap Set. This date is usually the start of your monthly billing cycle. 5. Tap Set data warning to enable, and then tap Data warning. 6. -
Page 139: Facebook
Tip: For more information, from your computer, visit: google.com/intl/en/chrome/browser/mobile/. Facebook Post updates, read what your friends are up to, upload pictures and check-ins, and more with on-the-go Facebook access. Install the Facebook App on Your Phone Before you use Facebook on your phone, you must download and install the app from the Google Play store app. -
Page 140: Hangouts
1. Tap > > Play Store. 2. Tap and search for "twitter." 3. Tap Twitter from the results list. 4. Tap Install, and then tap Accept. 5. When the download has completed, tap Open. To open the app from the Home screen, tap >... - Page 141 ● Ending a Video Chat: In the video chat window, tap ● Disabling Chat History: If you don’t want to keep chat history, in the chat window, tap > Turn history off. ● Delete Chat History: To delete all your chat history, in the chat window, tap > Delete > Delete. Note: You can use Hangouts as your phone’s default messaging app, or as a standalone IM app.
-
Page 142: Connectivity
Connectivity The following topics address your phone’s connectivity options, including USB file transfer and tethering, Wi-Fi, Bluetooth, and more. Wi-Fi Wi-Fi provides wireless Internet access over distances of up to 300 feet. To use your phone’s Wi-Fi, you need access to a wireless access point or "hotspot." Note: The availability and range of the Wi-Fi signal depends on a number of factors, including infrastructure and other objects through which the signal passes. -
Page 143: Wi-Fi Direct
3. Tap the wireless network that the phone is connected to, and then tap Disconnect. 4. If you want to remove the settings for this network, touch and hold the network name, and then tap Forget network. Wi-Fi Direct Use Wi-Fi Direct to connect directly to other Wi-Fi Direct devices simply via Wi-Fi, without an access point or via the Internet. -
Page 144: Enable The Bluetooth Feature
Hands-free calls Call hands-free, using Bluetooth-capable hands-free devices and headsets. Data exchange Exchange data with Bluetooth devices. Enable the Bluetooth Feature Use the settings menu to enable or disable your phone’s Bluetooth capabilities. ® ● Wireless connection to all Bluetooth functions is not guaranteed for the phone. -
Page 145: Connect To A Paired Bluetooth Device
4. Tap a device from the “Available devices” list, and follow the onscreen instructions to pair with the device. The Bluetooth device is paired to your phone. Methods to accept a Bluetooth connection differ depending on the devices used. Unpairing from a Paired Device 1. -
Page 146: Send Information Using Bluetooth
Send Information Using Bluetooth You can use Bluetooth to transfer information between your phone and another Bluetooth-enabled device such as a phone or notebook computer. Types of Data You Can Send via Bluetooth You can send the following types of information, depending on the device you are sending to: ●... -
Page 147: Bluetooth Tethering
Bluetooth. Notes: ● To make sure that the USB drivers for your phone are up-to-date, install the latest version of HTC Sync Manager on your computer. ● You may need to have tethering added to your data plan. Contact Sprint for details. -
Page 148: Virtual Private Networks (Vpn)
4. Tap Next. Tethering is turned on, and your phone’s Internet connection can be shared with a connected device. For Bluetooth tethering, pair your phone with the other device via Bluetooth. See Pair Bluetooth Devices for details. 5. Launch the Web browser on the other device to confirm you have an Internet connection. Virtual Private Networks (VPN) Add virtual private networks (VPNs) so you can connect and access resources inside a local network, such as your corporate network. -
Page 149: Disconnect From A Vpn
4. Enter your login credentials, and then tap Connect. When you are connected, the VPN connected icon appears in the notification area of the status bar. You can then open the Web browser to access resources such as your corporate network intranet. For more information, see Chrome Browser. -
Page 150: Transfer Content To Your New Phone
USB connection. Transfer Content from an Android Phone On your old Android phone, download the HTC Transfer Tool and use it to transfer your content to your new HTC phone. The types of locally stored content on your old phone that the HTC Transfer Tool can transfer include contacts, messages, calendar events, music, photos, videos, and some settings. -
Page 151: Transfer Content From An Iphone
Note: If the PIN code doesn’t appear, tap Retry on your old phone. If it still won’t appear, this may mean that your old phone is unable to connect to HTC 10. When this happens, try another transfer method. 6. Tap Confirm on your old phone. -
Page 152: Ways Of Transferring Contacts And Other Content Into Your Phone
3. Follow the steps shown onscreen to back up your iPhone content to your iCloud storage, and then tap Sign in. 4. Choose the iPhone backup that you want to transfer to HTC 10, and then tap Next. 5. Choose the types of content you want to transfer, and then tap Import. -
Page 153: Share Content With Nfc
● Download and use the HTC Sync Manager software on your computer. You can set it up to automatically get music, photos, and videos off your phone to your computer. You can also sync playlists from your computer to the phone. -
Page 154: Turn Nfc On
Turn NFC On Before you can beam content to another NFC-capable device, you need to enable NFC on your phone. 1. Swipe down from the status bar, and then tap 2. Under Wireless & Networks, tap More. 3. Tap the NFC On/Off switch to turn it on and off. Beam Content Make sure that both devices are unlocked and have NFC turned on. -
Page 155: Htc Connect
HTC Connect ® With HTC Connect , wirelessly stream music or video from HTC 10 to your speakers or TV by just swiping up the screen with 3 fingers. You can stream media to any of the following types of devices: ●... -
Page 156: Stream Music To Speakers Powered By Qualcomm Allplay Media Platform
3. Choose the device you want to connect to. 4. Once connected, use your phone to control the volume, pause or resume playback, and more. 5. To stop wireless media sharing and disconnect from the device, swipe down with three fingers on the screen. -
Page 157: Stream Music To Blackfire Compliant Speakers
Stream Music to Blackfire Compliant Speakers Play music simultaneously to multiple Blackfire compliant speakers from your phone. Before you start, make sure your speakers are connected to your Wi-Fi network. Refer to the documentation that comes with your speakers to set up and connect them to your Wi-Fi network. 1. - Page 158 2. Tap > > Settings > HTC Connect. Your phone then turns Wi-Fi on automatically and scans for media devices on your Wi-Fi network. You’ll then see the available Blackfire speakers listed. 3. Tap next to a speaker name.
-
Page 159: Apps And Entertainment
Apps and Entertainment The following set of topics will explore the features that make your phone so much more than a phone, from the camera and productivity apps to music, entertainment, and more. -
Page 160: Camera And Video
Camera and Video Take great photos and videos and make them more memorable by applying a variety of effects and scenes. You can use the front and main cameras to take and share pictures and videos. Capturing Pictures/Videos ● File Format for Pictures: File format for pictures is JPEG or DNG for RAW photos. ●... -
Page 161: Open The Camera And Adjust The Settings
You’ll see Photo mode, which is the default capture mode. Choose a Capture Mode Switch to a capture mode to use for taking photos or videos. The camera on HTC 10 separates capture modes into categories so that you can quickly find which mode you want. -
Page 162: Capture Mode Settings
5. You can quickly switch back to either Photo or Video mode when you're in other capture modes without opening the slideout menu. Right below the main shutter button, just tap to switch back to Photo mode or to switch back to Video mode. Capture Mode Settings You can change the settings for some of the capture modes such as Photo or Video mode. -
Page 163: Touch Autoexposure
1. Tap > Camera. 2. Switch to Photo or Selfie Photo mode. Or, select Pro mode. 3. Tap to open the slideout menu. — to change the photo quality and size, or aspect 4. Tap the current setting—for example ratio. Touch Autoexposure Turn Touch autoexposure on in Camera settings if you want the main camera to automatically adjust the exposure levels when you tap a darker area on the Viewfinder screen. -
Page 164: Close The Camera App
Close the Camera App to close the Camera app and return to the Home screen or the previous screen. Take a Picture Whether it’s moving or not, clearly capture any moment with your phone’s camera. Note: If you have an SD card installed, you can choose to save pictures and videos to the SD card. If no card is installed, pictures and videos are saved to your phone’s memory. -
Page 165: Record A Video
Pro mode with RAW format selected. Take Clear, Sharp Shots ● HTC 10 has auto features that make taking photos easy. The Photo mode in the Camera app gives you a quick and reliable way to take photos. ●... -
Page 166: Set The Video Resolution
1. Tap > Camera. 2. Switch to Video mode, if you're not in this mode. See Choose a Capture Mode. 3. When you’re ready to start recording, tap 4. Change focus to a different subject or area by just tapping it on the Viewfinder screen. You can also change the exposure after tapping by dragging up and down on the screen. -
Page 167: Take A Photo While Recording A Video - Videopic
5. To stop recording, tap Camera Features The HTC 10 camera is packed with several features that will make capturing photos and videos more enjoyable and memorable. Take Continuous Camera Shots Take photos of moving subjects. Whether it’s your kid’s football game or a car race, you can capture the action. -
Page 168: Record Slow Motion Videos
Record Slow Motion Videos Relive high speed action bit by bit and add a touch of suspense to your videos. Note: Audio is recorded when you’re in this mode, but will be turned on only when video is played in normal speed. - Page 169 2. Switch to Selfie Photo mode. See Choose a Capture Mode. 3. To change the skin smoothing level, drag the adjustment bar slider. Tip: The adjustment bar is shown on the Viewfinder screen by default. To hide it, tap to open the slideout menu, and then tap Makeup.
-
Page 170: Zoe Camera
4. When you see the shutter release icon slowly turn red, continue holding the phone steady as the camera captures the photo and 3-second video. Tip: When taking your shot using the Zoe camera, it's good practice to keep HTC 10 steady to capture moving subjects against a static background scene. -
Page 171: Hyperlapse
4. Pan left or right in either landscape or portrait view. Hold your phone as smoothly as you can to automatically capture frames. You can also tap to stop capturing anytime. The camera stitches the frames into a single photo. Hyperlapse Apply a fast motion effect in your videos. - Page 172 1. Tap > Camera. 2. Switch to Pro mode. See Choose a Capture Mode. 3. Tap a setting, and then drag its slider to make adjustments. 4. Tap a setting again to hide the slider. 5. To save the adjustment as a custom setting, tap , select Custom 1, 2, or 3, and then tap Save.
-
Page 173: Google Photos
Here are some of the things you can do when using Google Photos on HTC 10. ● View, edit, and share the photos and videos you've taken on HTC 10. You can also access the media files previously backed up to your Google Account. -
Page 174: Share Your Photos
3. Tap a thumbnail to view it in full screen. 4. To view an album, tap to open the slideout menu, and then tap Device folders. Or, if you see tabs at the bottom of the screen, you can tap the Albums tab, and then swipe across the collection thumbnails. - Page 175 3. Tap , and then tap RAW Enhancement. 4. Tap to toggle between before and after photos. 5. Tap when done. Trim a Video 1. Tap > > Photos. 2. Tap a video thumbnail to view it in full screen. 3.
- Page 176 3. Tap 4. Move the left and right sliders to divide your video into sections. 5. Tap a section that you want to adjust, and then tap a dot that corresponds to particular playback speed to modify the selected section. 6.
-
Page 177: Productivity
Productivity The following topics detail many of your phone’s productivity apps and features including how to search for information, use maps and navigation, and use essential apps such as the calculator, calendar, and clock. Calendar ™ Use Google Calendar to create and manage events, meetings, and appointments. Google Calendar helps organize your time and reminds you of important events. -
Page 178: Schedule Or Edit An Event
Schedule or Edit an Event You can create or edit events on your phone, and also sync events with your Google or Exchange ActiveSync calendars. Note: Editing events is not supported for all accounts. 1. Tap > > Calendar. 2. On any Calendar view, do one of the following: ... -
Page 179: Dismiss Or Snooze Reminders
In addition to the default storage that you get from Google Drive, you may be eligible to receive additional storage for free. Sign in to your Google Account on HTC 10 (and not from your computer or other non- HTC phones) to claim this offer. -
Page 180: Google Maps
For details, refer to the terms and conditions on the Google Drive support site support.google.com. ● The Drive app is owned by Google and is not provided by or associated with HTC Corporation. ● Uploading files requires you have the Drive app installed on your phone. If this app is not preloaded, you can download and install it from Google Play. -
Page 181: Search For A Location
Navigate the Map Navigate the map using finger gestures. ● Slide your finger on any direction to pan. ● Double-tap the map or slide two fingers apart over an area to zoom in. To zoom in while holding the phone with one hand, double-tap with your thumb and hold the second tap, and then drag your thumb down. -
Page 182: Get Directions
4. If there are multiple search results, they will be indicated by red dots or smart map icons. Scroll down the screen to see all of the search results. If the list collapses and shows only the map, tap Show list to display the search results again. 5. -
Page 183: Search For Information
7. Tap the info sheet to view the directions in a list. 8. When you’re finished viewing or following the directions, tap to reset the map. Your destination is automatically saved in the Google Maps history. Get Help with Google Maps Get help and more information about Maps. -
Page 184: Set Search Options
> Google. 2. Tap Get started. Or if you’ve previously set up the Google app on HTC 10 and turned it off, tap Get started > Set up. 3. Read the information screen and then tap Yes, I’m in. Google app's information cards will start to appear on the Google search screen. - Page 185 4. Swipe up the screen to see all available information cards. 5. To dismiss a card, swipe it right. Note: Depending on the information that you’ve allowed to share, more information cards will appear on the Google search screen as you use your phone to search the Web, create appointments, set reminders, and more.
-
Page 186: Screen Search
5. Set the reminder time or location details. 6. Tap When the reminder time is due or when you’ve arrived at the location, the Reminder card will appear in the Google search screen. You can then dismiss or snooze the reminder. Tip: To see a list of all your reminders, tap >... -
Page 187: Boost
3. Tap the Screen search On/Off switch. Search with Screen search Instantly search what's on your phone screen. 1. On the current app you’re in, touch and hold Screen search analyzes the screen and shows a card with information, apps, or actions related to the searched item or location. -
Page 188: Turn Smart Boost On Or Off
● Manage irregular app activities, stop unused apps from running in the background, lock apps with sensitive content, or uninstall apps you don't use. Turn Smart Boost On or Off The Smart Boost feature allows the Boost+ app to automatically free up memory space on your phone. Note: Smart Boost is turned on by default. -
Page 189: Use Game Battery Boost
Use Game Battery Boost Add a gaming app to the Game battery booster list so your phone automatically optimizes system resources and extend your phone's battery life while you're playing it. 1. Tap > > Boost+. 2. Tap Game battery booster. 3. -
Page 190: Calculator
Note: This will only serve as your authentication password to reset the lock pattern. 5. Tap the On/Off switch next to an app to require a lock pattern to open it. 6. Tap Tips: ● To change the app lock pattern, tap Lock apps > > Change pattern. ●... -
Page 191: Set Alarms
Set Alarms You can set up one or more alarms. 1. Tap the clock on your Home screen panel, if available. Or tap > > Clock. 2. On the Alarms tab, select the check button of an alarm and then tap that alarm. 3. -
Page 192: Weather
Additional options include Lap to keep track of laps and Reset to continue timing. Timer The timer provides a countdown timer for up to 99 hours, 59 minutes, and 59 seconds. 1. Tap the clock on your Home screen panel, if available. Or tap >... -
Page 193: Htc Sync Manager
HTC Sync Manager With HTC Sync Manager, enjoy the same media whether you’re at your computer or on the move. Use it also to store your same contacts, important documents, and other data on both your phone and your computer. -
Page 194: Transfer Iphone Content To Your Htc Phone
With HTC Sync Manager, easily transfer iPhone content such as contacts, messages, wallpaper, camera photos, and more to your HTC phone. If you’re using an HTC phone that has HTC Sense 6, HTC Sync Manager also enables your phone to find and install the same apps that you were using on your iPhone. -
Page 195: Htc Help
This helps you in finding the problem cause, and in determining whether you can resolve the problem or you need to call for support. ■ > > Help. Note: If HTC Help is not preinstalled on your phone, you can download it from the Google Play Store app. Productivity... -
Page 196: Entertainment And Activities
Entertainment and Activities Your phone lets you discover, download, and listen to your favorite music through a variety of music apps. Your phone is also equipped with fun apps that will keep you entertained anytime, anywhere. Google Play Music App The Google Play Music app lets you browse, shop, and play back songs purchased from Google Play as well as songs you have loaded from your own music library. -
Page 197: Google Play Music Screen Layout
Google Play Music Screen Layout The following diagram outlines the main features of the Play Music app player screen. Create Playlists in Google Play Music Organize music into playlists to fit every occasion. 1. Tap > > Play Music. 2. Tap >... -
Page 198: Youtube
YouTube View videos uploaded to YouTube and upload your own videos to your YouTube account. Watch YouTube Videos You can use the YouTube app to view videos on YouTube even if you aren’t signed in to a YouTube account. 1. Tap >... -
Page 199: Sprint Zone
1. Tap > > Settings. 2. Tap HTC BoomSound with Dolby Audio to toggle between Theatre mode or Music mode. ™ Note: HTC BoomSound with Dolby Audio is not available over HDMI, Bluetooth, Miracast , or USB audio out. -
Page 200: Htc Boomsound For Headphones
HTC BoomSound for Headphones Turn on HTC BoomSound with Dolby Audio and put on your headphones to enjoy refined audio details in a most personal way. 1. Plug your headphones into the headphone jack. 2. Tap > > Settings. 3. If this is your first time to plug in a headphone and you're prompted to set up an audio profile, tap Not now. -
Page 201: Settings
Settings The following set of topics will cover your phone’s settings menus and options. For an overview of the settings menu, see Basic Settings. Entertainment and Activities... -
Page 202: Connections Settings
Enable and set Wi-Fi options. Bluetooth Enable Bluetooth connections. Mobile data Settings for your mobile network and data connection. HTC Connect Options where to play media. Settings for data usage, NFC, Mobile network sharing, VPN, and USB More connection. Options for customizing your phone’s wallpaper, navigation bar, themes, Personalize sound, and more. - Page 203 Display, gestures & Change the display, motion gestures, and G-Sensor settings. buttons HTC BoomSound with Turn HTC BoomSound on or off, select a sound mode, or create a personal Dolby Audio audio profile. Sound & notification Set your sound profile, volumes, incoming call options, and system sounds.
-
Page 204: Airplane Mode Settings
This menu lets you turn your data connection on or off, and more. ■ Data Services General Information (4G LTE and 3G Networks) for details. HTC Connect Settings Configure settings for HTC Connect. ■ HTC Connect for details. More Wireless & Network Settings Additional options that let you view your data usage and set up VPN. - Page 205 HTC Mini+: Configure and manage your phone’s connection with the HTC Mini+ (sold separately). VPN: Configure your Virtual Private Network (VPN) settings so you can connect to your company’s intranet sites. See Virtual Private Networks (VPN). USB connection: Select the USB connection type when you connect the phone to your computer.
-
Page 206: Device Settings
Device Settings Adjust your phone's sound, display, storage, apps and battery settings. Display, Gestures & Buttons Settings Adjusting your phone’s display and gestures settings not only helps you see what you want, it can also help increase battery life. Glove Mode Turn Glove mode on to get better screen responses even when you’re wearing gloves. -
Page 207: Display Size
Display Size You can adjust the size of texts and screen content for your viewing comfort. 1. Tap > > Settings. 2. Tap Display, gestures & buttons. 3. Tap Display size and then select the size to use. Brightness By default, the screen brightness automatically adjusts depending on the surrounding lighting conditions. 1. -
Page 208: Night Mode
2. Tap Display, gestures & buttons. 3. Tap Color profile, and then select Vivid or sRGB. 4. Tap next to the color profile, and then drag the slider to the desired color temperature. Night Mode Enable Night mode in the evening to filter out blue light that can strain your eyes. 1. -
Page 209: Media Gesture
2. Tap Display, gestures & buttons. 3. Tap Motion Launch gestures and enable this feature. HTC BoomSound with Dolby Audio Turn the HTC BoomSound with Dolby Audio on and off and select a sound mode. ■ HTC BoomSound with Dolby Audio for details. -
Page 210: Volumes
4. Tap 5. To set your phone to always vibrate for calls in addition to any ringer settings, select the Vibrate option below Volumes. Volumes You can separately adjust your phone’s multimedia, ringtone and notifications, and alarm volumes. 1. Tap >... - Page 211 6. You can also tap More settings and then select Auto decline incoming calls to decline incoming calls and have them sent to voicemail. Tips: ● When the screen is on, press the Volume button and then tap End now to turn off Do not disturb mode quickly.
-
Page 212: Incoming Calls - Ringtone
2. Tap Sound & notification. 3. Tap Do not disturb > Automatic rules. 4. Tap Add rule. 5. Select whether to base the rule on a time or an event, enter a name for the rule, and then tap OK. 6. -
Page 213: System Sound Settings
1. Tap > > Settings. 2. Tap Sound & notification. 3. Select or clear the Quiet ring on pickup or Pocket mode options to enable or disable the features. 4. Tap Flip to mute and then select the mute setting. For more information, see Motion Launch. -
Page 214: Notifications - Lock Screen Notifications
7. Tap On the lock screen, and then choose whether to show or not to show notifications. 8. Tap Notifications access to control HTC Ice View notifications. Apps Settings Use the Apps menu to control your application settings or remove apps. -
Page 215: Disable Apps
Removable Storage Use a new SD card as removable storage to be able to insert and use the card on HTC 10 and other Android phones. Internal Storage Set up a new SD card as internal storage for more privacy and secure use. - Page 216 Set Up Your SD Card as Internal Storage When you insert a SD card that has not been used on HTC 10 before, the card will be mounted as removable storage by default. If the SD card is new or doesn't have content you want to keep, you can format the SD card to use it as internal storage for HTC 10.
- Page 217 SD card as removable storage, you can copy or move your files between the phone storage and SD card. You can also copy or move files to or from an external USB storage device when you have it connected to HTC 10. 1. Tap >...
-
Page 218: Copy Files To Or From Your Phone
You can copy your music, photos, and other files to your phone. Important: Save and close your files before copying them from your computer to HTC 10, or vice versa. Note: If you're using your SD card as internal storage, your computer will only show SD card content. -
Page 219: Power Settings
Manage Photos and Videos ● After taking continuous camera shots, keep only the best shot and discard the rest. ● After editing a photo or trimming a video, the original file is kept. You can delete original files or move them to online storage or to your computer. ●... -
Page 220: Use Power Saver Mode
2. Tap Power. 3. Tap Battery optimization. 4. Tap Not optimized > All apps to see the complete list of apps. 5. To turn off battery optimization in an app, tap the app name, and then tap Don't optimize > Done. -
Page 221: Check Battery History
3. If you see the Adjust power use section while viewing battery use details, you can tap the option underneath it to adjust settings that affect battery usage. Tip: Another way to check the battery usage per app is to go to Settings > Apps. Tap the app you want to check, and then tap Battery. -
Page 222: Manage Your Apps
Manage Your Display Lowering the brightness, letting the display sleep when not in use, and keeping it simple helps save battery power. ● Use automatic brightness (the default), or manually lower the brightness. ● Set the screen timeout to a shorter time. For more details, see Security Settings. -
Page 223: Memory Settings
More Battery Saving Tips To squeeze in a little bit more battery power, try these tips. ● Tone down the ringtone and media volume. ● Minimize the use of vibration or sound feedback. In Settings, tap Sound & notification and choose which ones you don’t need and can disable. -
Page 224: Personal Settings
Personal Settings Use these options to personalize your phone, set security, or manage your online accounts and apps. Personalize Settings Use the Personalize menu to customize your phone’s display, add items to the Home screen, or change the sound settings. Customize the Home and Lock Screen Settings Using the phone’s Personalize home screen menus, you can set the following settings. -
Page 225: Alarm
Accounts & Sync Settings The Accounts & sync settings menu lets you add and manage all your email, social networking, online storage, and HTC account. Add Your Social Networks, Email Accounts, and More Add your favorite social networks, email accounts, and online storages on your phone so you are connected anywhere you go. -
Page 226: Add One Or More Google Accounts
3. Tap 4. Tap an account type. You can set up these accounts on your phone: Amazon Photos, Exchange, Facebook, Google, HTC Account, LinkedIn for HTC Sense, Messenger, IMAP/POP3 email, and more. 5. Enter your account information and follow screen instructions to proceed. -
Page 227: Location Settings
4. Tap or > Remove. 5. Tap Remove account to confirm. Important: Some personal data may be retained by the third-party app after you have removed the account from your phone. Sync All Your Accounts Automatically 1. Tap > > Settings. -
Page 228: Google Location History
When you turn the Location setting feature on, the phone displays the icon on the status bar. When you turn Location setting off, the phone displays the icon. Important: Turning off a location service means no applications on your phone will collect your location data through that location service. -
Page 229: Use A Screen Unlock Pattern
7. Tap Lock phone after, and then specify the idle time before the screen is locked. To help make Smart Lock more reliable and more secure, you can to train HTC 10 to recognize your face in different situations, such as when you’re wearing glasses or sporting a beard. -
Page 230: Lock Screen And Password Settings
Use a Screen Unlock Password 1. Tap > > Settings. 2. Tap Security. 3. Tap Screen lock > Password. 4. Enter a password and tap Continue. 5. Enter your password again to confirm and tap OK. Note: If you fail to enter the correct password after five attempts, you will be prompted to wait for 30 seconds before you can try again. -
Page 231: Backup And Reset
Other backup options. Separately back up other data and file types if they’re not supported in HTC Backup and HTC Sync Manager. In some apps, you can back up data to the storage on the phone so you can easily restore them after a factory reset. -
Page 232: Factory Data Reset
To restore paid apps, you need to download and install them from Google Play. 1. When you turn on a new HTC phone for the first time or after a factory reset, wait until you're in the Get your apps & data screen. -
Page 233: Get Content From Another Phone
When finished, you will see the Welcome screen and Setup application. See Complete the Setup Screens to start over. Reset Phone Network Settings Reset the network settings when you're having problems connecting HTC 10 to your mobile data or Wi-Fi network and Bluetooth devices. 1. Tap >... -
Page 234: System Settings
System Settings Use these options to change the phone's language, keyboard, date and time, accessibility, and more. Accessibility Settings Use these settings when you’ve downloaded and installed an accessibility tool, such as a screen reader that provides voice feedback. You can turn accessibility functions or services on or off. 1. -
Page 235: Navigate Your Phone With Talkback
Large mouse pointer: When selected, your phone will display a large mouse pointer on areas you tap. Mono audio: When selected, your phone will combine channels when playing audio. Accessibility shortcut: Tap this option to quickly turn on accessibility features on your phone. - Page 236 1. Drag your finger on the screen to find the item. 2. Double-tap anywhere on the screen, but don’t lift your finger on the second tap. 3. Drag the item to a new spot and then lift your finger. To scroll through a screen: ■...
-
Page 237: Google Settings
3. Double-tap an item on the menu to select. Change the TalkBack Reading Speed and Pitch Important: The steps below are described using the regular gestures. Use the corresponding TalkBack gestures if you already have TalkBack turned on. 1. Tap >... -
Page 238: Keyboard And Input Methods - Virtual Keyboard
1. Tap > > Settings. 2. Tap Language & keyboard > Languages. The first language in the list is the display language. 3. Tap Add a language to add another language to the list, and then if necessary, select the regional variant of the selected language. -
Page 239: Printing
2. Tap Date & time. 3. Clear the Automatic date & time and Automatic time zone options. 4. Tap Set date, change the date and tap OK. 5. Tap Set time, adjust the time and tap OK. 6. Tap Select time zone, and then select the time zone in the list. 7. -
Page 240: About Phone
Software updates: Check if there are is a new software update available for your phone. Usage and error reporting: Send error, preference, and usage reports to HTC. Help: Enable quick tips to appear on the screen. ... -
Page 241: Getting Help
Getting Help The following set of topics will cover troubleshooting tips, phone specifications, and how to contact Sprint and manage your wireless service. -
Page 242: For Assistance
For Assistance The following topics address areas of support for your phone, including troubleshooting, specifications, account information, and customer service contact information. Troubleshooting Check the questions and answers below for troubleshooting solutions for common phone issues. Check Here First Problem: Phone freezes/operation is unstable. Answer: Turn the phone on again. -
Page 243: Copyright Information
Dolby Audio manufactured under license from Dolby Laboratories. Dolby and Dolby Audio are trademarks of Dolby Laboratories. HTC, the HTC logo, HTC 10, HTC BlinkFeed, HTC BoomSound, HTC Connect, HTC Sense, Motion Launch, VideoPic, Zoe, and all other HTC product and feature names are trademarks or registered trademarks in the U.S. - Page 244 The information is provided “as is" without warranty of any kind and is subject to change without notice. HTC also reserves the right to revise the content of this document at any time without prior notice. No part of this document may be reproduced or transmitted in any form or by any means, electronic or mechanical, including photocopying, recording or storing in a retrieval system, or translated into any language in any form without prior written permission of HTC.
- Page 245 Index 3-way Calling, 87 Connect, 132 4G, 122 Pair devices, 131 Accessibility Receive Files, 133 TalkBack, 222 Send Information, 133 Accessory Jack, 7 Turn on or off, 131 Activation, 16 Bonus Storage, 166 Airplane Mode, 29 BoomSound Settings, 196 Alarm, 178 Boost+, 174 Alarm Sound, 212 Brightness, 194...
- Page 246 Display, 193 Mute threads, 118 Auto-rotate Screen, 193 New messages, 116 Font Size, 193, 194 Read and reply, 116 DLNA Read messages, 116 HTC Connect, 142 Reply Email, 117 Do Not Disturb Report Spam, 119 Settings, 197 Search, 118 Index...
- Page 247 AllPlay, 143 Google Play Music, 183 Blackfire, 144 Google Search, 170 Share Media, 142 Google Settings, 224 HTC Sense Input Settings, 225 Google Voice Search, 170 HTC Sync Manager, 180 Google Voice Typing, 32 Get Help, 181 Google Voice Typing, 225...
- Page 248 Wake and Unlock, 69 Send Contacts, 101 Wake Phone, 68 Personal Audio Profile, 187 Wake to Camera, 70 Phone Wake to HTC BlinkFeed Screen, 70 Change Dialer Layout, 74 Wake to Widget Panel, 69 Dialer, 73 Motion Launch Settings, 196 Ringtone, 89...
- Page 249 Smart Dial, 73 Pattern, 216 Use Speed Dial, 75 PIN, 216 Using phone keypad, 73 Screenshots, 22 Phone Layout (illustration), 5 SD Card, 10 Phone Number Install, 11 Save to Contacts, 94 Internal, 202 Phone Update Removable, 202 Software, 44...
- Page 250 Share Photos and Videos, 161 Language, 224 Silent Mode, 29 Reading Speed, 224 SIM Card, 8 Turn On, 222 Handle, 8 Tap, 14 Install, 10 Text Sleep Mode, 195 Cut and Paste, 30 Slide, 15 Edit, 30 Slow Motion Video, 155 Share, 30...
- Page 251 Trim Video, 162 Voice Recorder, 179 TTY Mode, 91 Voice Typing, 32 Turn Device Off, 14 Voicemail, 82 Turn Device On, 13 Display name, 87 Twitter, 126 Greeting, 86 Two-finger Swipe, 15 Setup, 82 Update Phone Volume Back Up Data, 44 Key, 6 Prepare, 44 Wallpaper...
Need help?
Do you have a question about the 10 and is the answer not in the manual?
Questions and answers