
Related Manuals for illumina MiSeq System


Summary of Contents for illumina MiSeq System
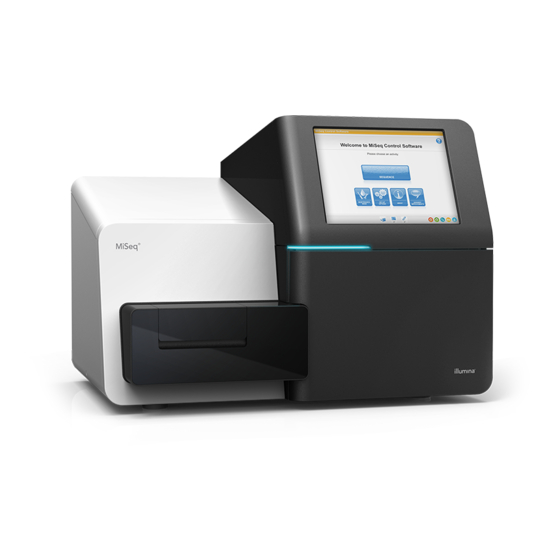
- Page 1 MiSeq System ® User Guide FOR RESEARCH USE ONLY ILLUMINA PROPRIETARY Part # 15027617 Rev. H March 2013...
- Page 2 The Software is licensed to you under the terms and conditions of the Illumina Sequencing Software License Agreement in a separate document. If you do not agree to the terms and conditions therein, Illumina does not license the Software to you, and you should not use or install the Software The instructions in this document must be strictly and explicitly followed by qualified and properly trained personnel in order to ensure the proper and safe use of the product(s) described herein.
-
Page 3: Revision History
Removed instructions for denaturing and diluting DNA libraries and 15027617 January preparing an Illumina PhiX control. See Preparing DNA Libraries for 2013 Sequencing on the MiSeq, Part # 15039740. Updated instrument wash instructions to add 25 ml 10% Tween 20 to 475 ml laboratory-grade water, instead of 500 ml laboratory-grade water. - Page 4 Part # Revision Date Description of Change Updated the following information: 15027617 October 2012 • Corrected PhiX control preparation instructions and expected cluster density of prepared PhiX control to 1000–1200 K/mm² • Noted that the procedure for denaturing and diluting libraries, Preparing Your Libraries, does not apply to Nextera XT libraries as well as TruSeq Amplicon libraries •...
- Page 5 Removed Sample Sheet Parameters section and sample sheet setup step in the workflow; Illumina recommends creating the sample sheet prior to sample preparation (See the MiSeq Sample Sheet Quick Reference Guide, Part # 15028392 and the Illumina Experiment Manager User Guide, Part # 15031335) MiSeq System User Guide...
- Page 6 Part # Revision Date Description of Change Updated software descriptions to MCS v1.2 15027617 April 2012 Added the following new procedures and sections: BaseSpace overview, Using Custom Primers, Generating FASTQ files, Troubleshooting Flow Rate Error, Performing a Volume Test, Performing a Maintenance Wash, and Idling the Instrument, which includes a standby wash.
-
Page 7: Table Of Contents
Run Setup Screens Sequencing Screen Run Folders Run Duration Required Disk Space Pausing or Stopping a Run Secondary Analysis Options Live Help Chapter 3 Performing a Run Introduction MiSeq Workflow Preparing Reagents Loading Sample Libraries onto Cartridge MiSeq System User Guide... - Page 8 Setting Up a Run Using MCS Cleaning the Flow Cell Loading the Flow Cell Loading Reagents Starting the Run Monitoring the Run Chapter 4 Maintenance Procedures Introduction Performing a Post-Run Wash Performing a Maintenance Wash Performing a Standby Wash Shutting Down the Instrument Chapter 5 Troubleshooting Introduction Resolving Run Setup Errors...
-
Page 9: Chapter 1 Getting Started
Chapter 1 Getting Started Getting Started Introduction Components MiSeq Reagent Kits Kit Contents and Storage Requirements Flow Cell Types Version Compatibility and Requirements User-Supplied Consumables Anti-Virus Software Starting the MiSeq MiSeq System User Guide... -
Page 10: Introduction
MiSeq Reporter—Integrated secondary analysis software processes data from primary analysis to perform alignment and provide information about each sample analyzed. Additional Resources The following documentation is available for download from the Illumina website. Part # 15027617 Rev. H... - Page 11 Provides information about sample sheet requirements. The Quick Reference Guide information in this guide is applicable whether you are creating a sample sheet manually or using the Illumina Experiment Manager. MiSeq Reagent Prep Guide Provides a description of kit contents and instructions for preparing the reagent cartridge before beginning your sequencing run.
- Page 12 Visit the MiSeq support page on the Illumina website for access to documentation, software downloads, and frequently asked questions. To view a comprehensive list of MiSeq training courses, go to www.illumina.com/training/miseq. Part # 15027617 Rev. H...
-
Page 13: Components
The reagent compartment door is secured by a magnetic latch. The MiSeq interface guides you through the run setup steps using the touch screen monitor. To load run components, you need to access the reagent compartment and the flow cell compartment. MiSeq System User Guide... - Page 14 Flow Cell Compartment Flow Cell Stage Flow Cell Compartment Door Flow Cell Latch Flow Cell Flow Cell Latch Release Button The flow cell compartment houses the flow cell stage, thermal station, and fluidics connections to the flow cell. The flow cell stage moves in and out of the optics module and holds the flow cell, which is secured by the flow cell latch.
- Page 15 During the sequencing run, the single lane is imaged in small imaging areas called tiles. All MiSeq flow cells have a single lane, but the number of tiles differ depending on the type of flow cell you are using. For more information, see Flow Cell Types on page MiSeq System User Guide...
- Page 16 Reagent Compartment Reagent Chiller Sipper Handle (shown in raised position) PR2 Bottle Waste Bottle Reagent Cartridge The reagent compartment contains the reagent chiller, and positions for the wash buffer (PR2) bottle and the waste bottle. During the run, the reagent chiller holds a single-use reagent cartridge. During the instrument wash, the reagent chiller holds the wash tray.
- Page 17 Each reservoir on the cartridge is numbered. Sample libraries are loaded onto the cartridge in position 17, which is labeled Load Samples. For more information, see Reagent Cartridge Contents on page MiSeq System User Guide...
-
Page 18: Miseq Reagent Kits
MiSeq Reagent Kits To perform a run on the MiSeq, you need one single-use MiSeq Reagent Kit, which is available in three kit types. Each type of MiSeq reagent kit includes a kit-specific flow cell type and reagents required for performing one run. Kit Type Flow Cell Type Available Kit Sizes... - Page 19 MiSeq Reagent Nano Kit v2 Consumable Catalog # MiSeq Reagent Nano Kit v2, 500 Cycles Catalog # MS-103-1003 MiSeq Reagent Nano Kit v2, 300 Cycles Catalog # MS-103-1001 TG MiSeq Reagent Nano Kit v2, 300 Cycles Catalog # TG-142-1001 MiSeq System User Guide...
-
Page 20: Kit Contents And Storage Requirements
Kit Contents and Storage Requirements Box 1: Store at -15° to -25°C Quantity Component Storage Description Reagent Cartridge -15° to -25°C Single-use pre-filled cartridge -15° to -25°C 5 ml tube, Hybridization Buffer Box 2: Store at 2° to 8°C Quantity Component Storage Description PR2 Bottle 2°... - Page 21 Optional use for custom Index Read primer Empty Optional use for custom Read 2 primer Laboratory-grade water Empty Empty NOTE For more information about using custom primers on the MiSeq reagent cartridge, see Using Custom Primers on the MiSeq, Part # 15041638. MiSeq System User Guide...
-
Page 22: Flow Cell Types
Flow Cell Types The flow cell is immersed in storage buffer in a flow cell container. The flow cell container cap color indicates the flow cell type: Clear cap—Cap color for a standard (14 tile) flow cell. Green cap—Cap color for a micro (4 tile) flow cell. Yellow cap—Cap color for a nano (2 tile) flow cell. -
Page 23: Version Compatibility And Requirements
Sequencing on a micro flow cell • MCS v2.1 or later (four-tile dual-surface imaging) • MiSeq Micro Reagent Kit v2 Sequencing on a nano flow cell • MCS v2.0 or later (two-tile single-surface imaging) • MiSeq Nano Reagent Kit v2 MiSeq System User Guide... -
Page 24: User-Supplied Consumables
* or equivalent Guidelines for Laboratory-Grade Water Always use laboratory-grade water to perform instrument procedures. Never use tap water or deionized water. Any of the following are acceptable examples: Illumina PW1 18 Megohm (MΩ) water Milli-Q water Super-Q water Molecular biology-grade water... -
Page 25: Anti-Virus Software
Anti-Virus Software Illumina strongly recommends that you purchase and install the anti-virus software of your choice to protect the computer against viruses. To avoid interfering with MiSeq operation or losing data, configure the anti-virus software updates as follows: Set for manual scans, not automatic scans. -
Page 26: Starting The Miseq
Starting the MiSeq NOTE It is best to leave the instrument on at all times. However, if the instrument must be turned off follow the shut down procedure described in Shutting Down the Instrument on page 89, and then wait a minimum of 60 seconds before turning the power switch back to the ON position. -
Page 27: Chapter 2 Miseq Software
Welcome Screen Perform Wash Screen Manage Files Screen Run Options Screen Manage Instrument Screen Run Setup Screens Sequencing Screen Run Folders Run Duration Required Disk Space Pausing or Stopping a Run Secondary Analysis Options Live Help MiSeq System User Guide... -
Page 28: Introduction
Introduction Three software applications are pre-installed on the instrument computer: MiSeq Control Software (MCS)—Controls instrument operation. Real Time Analysis (RTA)—Performs primary analysis. MiSeq Reporter—Performs secondary analysis. Optional software used off-instrument includes the Sequencing Analysis Viewer (SAV). For more information, see Sequencing Analysis Viewer on page MiSeq Control Software (MCS) The MiSeq Control Software (MCS) interface guides you through the steps to load the flow... -
Page 29: Miseq Concepts
For more information about analysis workflows and manifest file formats, see the MiSeq Reporter User Guide, Part # 15028784. For more information about sample sheets, see the MiSeq Sample Sheet Quick Reference Guide, Part # 15028392. MiSeq System User Guide... -
Page 30: Welcome Screen
Welcome Screen The MCS interface opens to the Welcome screen when the software launches. Figure 3 Welcome Screen Sequence—This option opens a series of run setup screens that guide you through the setup steps for your run. See Run Setup Screens on page Perform Wash—Provides options to start two types of instrument washes, either a maintenance wash or standby wash. - Page 31 Temperature of the flow cell in °C Status of BaseSpace connection (not connected shown) ® Status Icons In the top-right corner of the Welcome screen is a status icon that signals any change in conditions during run setup or during the run. MiSeq System User Guide...
- Page 32 Status Icon Status Name Description Status OK No change. System is normal. Attention Information that might require attention. Warning Warnings do not stop a run, but might require action before proceeding. Error Errors usually stop a run and generally require action before proceeding with the run.
- Page 33 Installation of the update begins automatically upon reboot. If your instrument is not connected to a network with internet access, you can update the software manually. For more information, see Manual Update Screen on page MiSeq System User Guide...
-
Page 34: Perform Wash Screen
Perform Wash Screen You can initiate three types of washes from the Perform Wash screen: maintenance wash, standby wash, and post-run wash. Maintenance Wash—The maintenance wash consists of three consecutive wash cycles that thoroughly flush the system. Perform a maintenance wash at least every 30 days. Procedure on page Standby Wash—The standby wash properly prepares the fluidics lines for sitting idle and consists of two consecutive wash cycles. - Page 35 Following standard run procedures, the sippers are raised by the software at the end of the sequencing run and prior to beginning a post-run wash. MiSeq System User Guide...
-
Page 36: Manage Files Screen
Manage Files Screen Use the Manage Files feature to move, upload, or delete files on the instrument computer. The screen is divided into five tabs: Runs, Sample Sheets, Manifests, Genomes, and Recipes. Figure 8 Manage Files Screen Manage Files Options From any tab on the Manage Files screen, select Browse to view files located in folders other than those currently selected. - Page 37 The file is uploaded to the folder indicated in the Directory field. Rename—Available only for sample sheets. Select the checkbox next to the sample sheet file, and then select Rename. Use the on-screen keyboard to rename the sample sheet. MiSeq System User Guide...
-
Page 38: Run Options Screen
20 minutes and a maintenance wash takes about 1 hour. Send Instrument Health—Illumina recommends selecting this option to help Illumina Technical Support in troubleshooting possible problems. The only files sent to Illumina are log files (interop files and log files). The instrument must be connected to a network with internet access to use this feature. - Page 39 After a run-specific recipe is created, it is copied to the output folder. NOTE By default, custom recipes are stored in D:\Illumina\MiSeq Control Software\CustomRecipes. MiSeq Control Software (MCS) requires two subfolders: V1 and V2. Any custom recipes created for use with the original MiSeq Reagent Kit (v1) must be placed in the V1 subfolder, and recipes created for use with the MiSeq Reagent Kit v2 must be placed in the V2 subfolder.
- Page 40 XT libraries. They contain the amplicon sequences to which clusters are aligned during analysis. MiSeqOutput—Sets the default location for analysis output files. Illumina recommends changing the default output folder to a network location for the purpose of sharing, long-term storage, and optionally using MiSeq Reporter off-line.
- Page 41 Separate each email address with a comma. Select Test to send a test email to notification recipients. Notify via email when—Select the checkbox for each of the run events that trigger a notification. MiSeq System User Guide...
-
Page 42: Manage Instrument Screen
Manage Instrument Screen The Manage Instrument screen contains controls for system settings, troubleshooting, manually updating software, and safely rebooting or shutting down the instrument software. Figure 12 Manage Instrument Screen System Settings—Provides the option to change IP Settings, machine name, or domain. System Settings Screen on page System Check—Provides troubleshooting options for checking the operational status of instrument components. - Page 43 Continue to progress to the third screen in the series of screens. Select This account. Enter the domain name (Domain\MiSeq1, for example) and password. Select Save and Continue. The credentials for MiSeq Reporter and BaseSpace are also updated. MiSeq System User Guide...
- Page 44 Figure 14 System Settings System Check Screen The System Check screen is typically used by an Illumina Technical Support representative during a Live Help session. Use of this feature is not required during normal operation or for instrument maintenance. Some system checks can be performed prior to contacting Illumina Technical Support, such as the Volume Test.
- Page 45 When the path to the installable software file appears on the screen, select Update. Alternatively, you can update your software automatically if your instrument is connected to a network. For more information, see Software Updates on page MiSeq System User Guide...
-
Page 46: Run Setup Screens
Run Setup Screens When you select Sequence on the Welcome screen, a series of run setup screens open in the following order: BaseSpace Option, Load Flow Cell, Load Reagents, Review, and Pre- Run Check. BaseSpace Options Screen The first screen in the run setup steps provides the option to use BaseSpace for storage and analysis. - Page 47 RFID was successfully read appears in the lower-right corner of the screen. In the event that the RFID cannot be read, you can obtain a temporary bypass code from Illumina that enables you to proceed with the run setup steps. For more information, see Resolving RFID Read Failure on page Select the help icon in the upper-right corner of the screen.
- Page 48 Figure 18 Load PR2 Bottle and Waste Bottle Figure 19 Load Reagent Cartridge Part # 15027617 Rev. H...
- Page 49 In the event that the RFID cannot be read, you can obtain a temporary bypass code from Illumina that enables you to proceed with the run setup steps. For more information, see Resolving RFID Read Failure on page You must use the reagent cartridge associated with the type of flow cell that you loaded. If the reagent cartridge is not compatible, a message appears on the screen.
- Page 50 Figure 20 Review Screen Change Folders In the lower-left corner of the Review screen, the current folder locations for recipes, sample sheets, manifests, and output folders are listed. To change folder locations, select Change Folders and browse to a preferred location. Using this option from the Review screen changes folder locations for the current run only.
- Page 51 If any errors occur during the pre-run check, a message appears on the screen that describes the error and the action to correct it. For more information, see Resolving Run Setup Errors on page MiSeq System User Guide...
- Page 52 Figure 22 Pre-Run Check Screen When the pre-run check is successful, the Start Run button becomes active. Part # 15027617 Rev. H...
-
Page 53: Sequencing Screen
The Sequencing screen opens when the run begins. This screen provides a visual representation of the run in progress, including intensities and quality scores (Q-scores). For MiSeq run specifications, visit the MiSeq System specifications page on the Illumina website (www.illumina.com/systems/miseq/performance_specifications.ilmn). - Page 54 Optimally, the cluster density should be 800K/mm². However, a range of 50K– 1300K/mm² is acceptable. Clusters Passing Filter (%)—Shows the percentage of clusters passing filter based on the Illumina chastity filter, which measures quality. This data appears only after cycle 25. NOTE The chastity of a base call is the ratio of the intensity of the greatest signal divided by the sum of the two greatest signals.
- Page 55 NOTE SAV is universal to Illumina sequencers, most of which use an eight-lane flow cell. Some views include drop-down lists showing lanes 1–8. The MiSeq flow cell is a single-lane flow cell, so your data appears when you select All or Lane 1.
-
Page 56: Run Folders
Each run on the MiSeq generates three run folders, each with a specific purpose: D:\Illumina\MiSeqTemp—When the run begins, a temporary run folder is written to the local drive of the instrument computer and used as a working area for MCS and RTA. - Page 57 All other files and folders created in the temporary run folder are not copied to the output and analysis folders. They contain temporary files that are not required for analysis or troubleshooting. MiSeq System User Guide...
- Page 58 Additional folders, such as the Alignment folder, are added by MiSeq Reporter during secondary analysis. For more information, see the MiSeq Reporter User Guide, Part # 15028784. Primary Analysis Results The primary analysis output from a sequencing run is a set of quality-scored base call files (*.bcl), which are generated from the raw image files.
- Page 59 Image files named 2101 through 2104 are tiles 1–4 on the bottom surface. For nano flow cells, image files are named for tiles one and two on the top surface, 1101 and 1102. The output files for each tile are located in the run folder in Data\Intensities\L001. MiSeq System User Guide...
-
Page 60: Run Duration
Additionally, run duration depends on the version of MiSeq reagents you are using and any performance enhancing upgrades installed on your instrument. For expected durations and other specifications, visit the MiSeq System specifications page on the Illumina website (www.illumina.com/systems/miseq/performance_ specifications.ilmn). -
Page 61: Required Disk Space
Files. From the Manage Files screen, select the Runs tab. Move or delete older run folders as appropriate. For more information, see Manage Files Screen on page 28. After clearing adequate disk space, select Restart Check. MiSeq System User Guide... -
Page 62: Pausing Or Stopping A Run
Pausing or Stopping a Run The MiSeq is designed to complete a run from beginning to end without user intervention. However, it is possible to pause a run or stop a run from the Sequencing screen. Pausing a Run You can temporarily pause a run before it has completed using the Pause button on the Sequencing screen. - Page 63 Primary analysis will continue for the last completed cycle. Figure 25 Stopping a Run Stopping a run is final. A stopped run cannot be resumed. The only option is to proceed to an instrument wash. MiSeq System User Guide...
-
Page 64: Secondary Analysis Options
BaseSpace Overview BaseSpace is Illumina's analysis environment. Using BaseSpace to store and analyze your run data provides the following benefits: Eliminates the need for onsite storage and computing... - Page 65 The same analysis workflows are supported on BaseSpace as with on-instrument analysis using MiSeq Reporter. You can connect to BaseSpace at https://basespace.illumina.com. Log in using your MyIllumina account login. The first time you visit, you will be asked to accept the BaseSpace agreement.
- Page 66 Sequencing During Analysis If a new sequencing run is started on the MiSeq before secondary analysis of an earlier run is complete, secondary analysis is stopped automatically. MiSeq computing resources are dedicated to either sequencing or analysis and the system is designed in such a way that the sequencing run setup command overrides the analysis command.
-
Page 67: Live Help
The MiSeq must be connected to a network with internet access to enable Live Help. The Live Help feature is an online assistance tool that enables a representative from Illumina Technical Support to view the MiSeq screen with your permission, and share control of the instrument. - Page 68 Part # 15027617 Rev. H...
-
Page 69: Chapter 3 Performing A Run
Chapter 3 Performing a Run Performing a Run Introduction MiSeq Workflow Preparing Reagents Loading Sample Libraries onto Cartridge Setting Up a Run Using MCS Cleaning the Flow Cell Loading the Flow Cell Loading Reagents Starting the Run Monitoring the Run MiSeq System User Guide... -
Page 70: Introduction
The sequencing run can be monitored from the Sequencing screen or monitored remotely using the Sequencing Analysis Viewer (SAV), an optional software application that you can download from the Illumina website. After the run is complete, always perform an instrument wash. -
Page 71: Miseq Workflow
Review run parameters and pre-run check results. Select Start Run. Monitor your run from the MCS interface or from another computer using Sequencing Analysis Viewer (SAV). Perform a post-run wash using laboratory-grade water mixed with Tween 20. MiSeq System User Guide... - Page 72 Analysis When the run is complete, the Illumina Experiment Manager analysis software launches automatically to perform secondary analysis, which includes alignment and variant calling. You can monitor secondary analysis using an internet connection from another computer.
-
Page 73: Preparing Reagents
Place the reagent cartridge in a water bath containing enough room temperature deionized water to submerge the base of the reagent cartridge. Do not allow the water to exceed the maximum water line printed on the reagent cartridge. MiSeq System User Guide... - Page 74 Personal injury can occur through inhalation, ingestion, skin contact, and eye contact. Dispose of containers and any unused contents in accordance with applicable local governmental safety standards. For more information, see the MSDS for this kit, at www.illumina.com/msds. Part # 15027617 Rev. H...
-
Page 75: Loading Sample Libraries Onto Cartridge
See Preparing DNA Libraries for Sequencing on the MiSeq, Part # 15039740. This step does not apply to all library types. Some Illumina sample preparation methods result in a ready-to-use normalized concentration of pooled libraries. Refer to the sample preparation guide for the kit used to prepare sample libraries. -
Page 76: Setting Up A Run Using Mcs
Setting Up a Run Using MCS [Optional] From the Run Options screen, check the folder locations for recipes, sample sheets, manifests, and the MiSeqOutput folder. For more information, see Run Options Screen on page From the Welcome screen, select Sequence to begin the run set up steps. The BaseSpace Options screen opens. -
Page 77: Cleaning The Flow Cell
Excess salts can affect flow cell seating on the instrument. If salts dry in the imaging area, imaging can also be affected. Figure 33 Rinse Flow Cell MiSeq System User Guide... - Page 78 Using care around the black flow cell port gasket (outlined in orange in the illustration below), thoroughly dry the flow cell and cartridge using a lint-free lens cleaning tissue. Gently pat dry in the area of the gasket and adjacent glass. Figure 34 Flow Cell Ports and Gasket Using an alcohol wipe, clean the flow cell glass, making sure that the glass is free of...
-
Page 79: Loading The Flow Cell
Carefully wipe the surface of the flow cell stage until it is clean and dry. Hold the flow cell by the edges of the flow cell cartridge near the Illumina label. Make sure the label is facing upward and place the flow cell on the flow cell stage. - Page 80 NOTE As the flow cell latch is closed, two alignment pins near the hinge of the flow cell latch properly align and position the flow cell. An audible click indicates the flow cell latch is secure. Figure 38 Close Flow Cell Latch Check the lower-left corner of the screen to confirm that the flow cell RFID was successfully read.
-
Page 81: Loading Reagents
Make sure that the waste bottle is empty. If it is not empty, empty the contents into the appropriate waste container. Slowly lower the sipper handle. Make sure that the sippers lower into the PR2 and waste bottles. MiSeq System User Guide... - Page 82 Do not leave the reagent chiller door open for extended periods of time. Open the reagent chiller door. Hold the reagent cartridge on the end with the Illumina label, and slide the reagent cartridge into the reagent chiller until the cartridge stops.
- Page 83 If the reagent cartridge is not compatible with the flow cell, a message appears. Select Back to load a compatible cartridge, or select Exit to return to the Welcome screen. Close the reagent compartment door. Select Next on the Load Reagents screen. The Review screen opens. MiSeq System User Guide...
-
Page 84: Starting The Run
Starting the Run After loading the flow cell and reagents, review the run parameters and perform a pre-run check before starting the run. Review Run Parameters Review Experiment Name, Analysis Workflow, and Read Length. These parameters are specified in the sample sheet. Review the folder locations in the lower-left corner. -
Page 85: Monitoring The Run
Cycle 1–4 Intensity Cycle 4–25 Intensity and Cluster Density Cycle 25 through run completion Intensity, Cluster Density, % PF, Yield, and Q-scores For MiSeq run specifications, visit the MiSeq System specifications page on the Illumina website (www.illumina.com/systems/miseq/performance_specifications.ilmn). MiSeq System User Guide... - Page 86 Part # 15027617 Rev. H...
-
Page 87: Chapter 4 Maintenance Procedures
Chapter 4 Maintenance Procedures Maintenance Procedures Introduction Performing a Post-Run Wash Performing a Maintenance Wash Performing a Standby Wash Shutting Down the Instrument MiSeq System User Guide... -
Page 88: Introduction
Flushes any remaining reagents from the fluidics lines and sippers Prevents salt accumulation and crystallization in the fluidics lines and sippers Prevents cross-contamination from the previous run Maintenance Frequency Illumina recommends that you perform the following maintenance procedures at the intervals shown below. Table 2 Maintenance During Normal Operation... -
Page 89: Performing A Post-Run Wash
The post-run wash takes approximately 20 minutes. Illumina recommends that you perform the wash directly following the completion of a run. If the wash is not performed at this time, you must perform a wash prior to the next run. - Page 90 Dispose of containers and any unused contents in accordance with applicable local governmental safety standards. For more information, see the MSDS for this kit, at www.illumina.com/msds. Slowly lower the sipper handle, making sure that the sippers lower into the wash bottle and waste bottle.
-
Page 91: Performing A Maintenance Wash
Load the wash tray and wash bottle onto the instrument: Open the reagent compartment door and reagent chiller door, and remove the used reagent cartridge or wash tray from the previous run. The reagent cartridge should slide easily from the chiller. MiSeq System User Guide... - Page 92 Slide the wash tray into the reagent chiller until it stops. Close the reagent chiller door. Raise the sipper handle in front of the PR2 bottle and waste bottle until it locks into place, and replace the PR2 bottle with the wash bottle. NOTE Discard the PR2 bottle after each run.
- Page 93 The sippers will remain in the down position. This is normal. Leave the unused wash solution in the wash tray and wash bottle to prevent the sippers from drying out and air from entering the system. MiSeq System User Guide...
-
Page 94: Performing A Standby Wash
NOTE Illumina recommends repeating the standby wash every 30 days that the instrument remains idle. User-Supplied Consumables Tween 20 (Sigma-Aldrich, catalog # P7949) - Page 95 Refill the wash components with fresh wash solution, as follows: Add 6 ml wash solution to each reservoir of the wash tray. Add 350 ml wash solution to the 500 ml wash bottle. MiSeq System User Guide...
- Page 96 Load the freshly-filled wash tray and wash bottle, as follows: Slide the wash tray into the reagent chiller until it stops. Close the reagent chiller door. Load the wash bottle and slowly lower the sipper handle, making sure that the sippers lower into the wash bottle and waste bottle.
-
Page 97: Shutting Down The Instrument
Figure 42 Manage Instrument Screen Toggle the power switch to the OFF position. NOTE Any time that you turn off the instrument, wait a minimum of 60 seconds before turning the power switch back to the ON position. MiSeq System User Guide... - Page 98 Part # 15027617 Rev. H...
-
Page 99: Chapter 5 Troubleshooting
Chapter 5 Troubleshooting Troubleshooting Introduction Resolving Run Setup Errors Resolving RFID Read Failure Troubleshooting Flow Rate Error Performing a Volume Test Measuring Expected Wash Volumes MiSeq System User Guide... -
Page 100: Introduction
Technical Support. For most errors, an on-screen message appears with instructions for correcting the error. For technical questions, visit the MiSeq support pages on the Illumina website for access to frequently asked questions, or log in to your MyIllumina account for access to support bulletins. -
Page 101: Resolving Run Setup Errors
1 hour, and a countdown appears on the screen. The options are to wait 1 hour or select Terminate Analysis. Any incomplete cycles will not be available for secondary analysis. MiSeq System User Guide... - Page 102 Error Action If you did not name your sample sheet with the reagent cartridge ID Sample Sheet Present for your run, the instrument cannot locate the appropriate sample sheet automatically. Browse to the sample sheet for your run. If you named your sample sheet with the reagent cartridge ID for your run, make sure that the sample sheet is located in the default sample sheet folder.
-
Page 103: Resolving Rfid Read Failure
Always select Retry before proceeding. If the RFID failed a second time, select Get Code. From a computer with internet access, go to https://my.illumina.com and log in to your MyIllumina account. From the MyIllumina page, click Account. In the Resources column, click MiSeq Self- Service. - Page 104 Consumable Barcode Number Location Flow Cell Above the barcode on the flow cell container label. Flow cell barcode numbers begin with an A (standard), D (micro), or G (nano). Example: A0E61 PR2 Bottle Below the barcode on the PR2 bottle label. Example: MS0011881-PR2 Reagent Cartridge Below the barcode on the reagent cartridge label.
-
Page 105: Troubleshooting Flow Rate Error
When the pump step is complete, select Restart Check. If the error persists, set the volume to pump 500 µl PR2 and repeat the process one more time. Contact Illumina Technical Support if the second attempt does not resolve the error. -
Page 106: Performing A Volume Test
Performing a Volume Test An obstruction in the fluidics lines might be the cause of poor reagent delivery or sequencing results. If an obstruction in the fluidics lines is suspected, perform a volume test. A volume test checks the health of the fluidics system by estimating the volume between two bubbles as they pass by the sensors. - Page 107 When prompted, slowly lower the sipper handle completely, making sure that the sippers lower into the wash bottle and waste bottle. Figure 46 Remove Droplet from Sipper Select Next. The volume test begins. When the volume test is complete, the results appear on the screen. MiSeq System User Guide...
- Page 108 Figure 47 Volume Test Results If the test did not pass, perform a maintenance wash. See Procedure on page When the maintenance wash is complete, repeat the volume test. Part # 15027617 Rev. H...
-
Page 109: Measuring Expected Wash Volumes
Before beginning a wash, empty the waste bottle. When the wash is complete, measure the wash volume in the waste bottle. Wash Type Expected Wash Volume Post Run Wash 17.25 ml Standby Wash 46 ml Maintenance Wash 17.25 ml MiSeq System User Guide... - Page 110 Part # 15027617 Rev. H...
-
Page 111: Index
Illumina-supplied 10 user-supplied 16 genome references 28 copying files and folders 28 customer support 107 cycles in a read 52 help, Live Help 59 help, technical 107 deleting files and folders 28 disk space checking 53 MiSeq System User Guide... - Page 112 post-run wash 81 power switch 18 PR2, loading 73 icons activity indicators 23 errors and warnings 23 sensors 23 Q-scores 45 status alert 23 idling the instrument 86 initialization 94 read length 52 instrument setup 34 reagent cartridge 8 intensities 45 reagent cartridge, contents 13 InterOp folder 49 reagent chiller, temperature 23...
- Page 113 46-47 tile numbering 51 troubleshooting flow rate 97 fluidics 98 RFID 95 run-specific files for 92 run setup errors 94 turning on the instrument 18 updating software 24, 37 user-supplied consumables 16 user name 18 MiSeq System User Guide...
- Page 114 Part # 15027617 Rev. H...
-
Page 115: Technical Assistance
1.800.812949 Other countries +44.1799.534000 MSDSs Material safety data sheets (MSDSs) are available on the Illumina website at www.illumina.com/msds. Product Documentation Additional product documentation in PDF is available for download from the Illumina website. Go to www.illumina.com/support, select a product, then click Documentation &... - Page 116 Illumina San Diego, California 92122 U.S.A. +1.800.809.ILMN (4566) +1.858.202.4566 (outside North America) techsupport@illumina.com www.illumina.com...
Need help?
Do you have a question about the MiSeq System and is the answer not in the manual?
Questions and answers