Table of Contents
Advertisement
Advertisement
Table of Contents

Related Manuals for Paradigm PERSONA 9H


Summary of Contents for Paradigm PERSONA 9H
- Page 1 PERSONA O w n e r s M a n u a l...
- Page 2 The Persona 9H is a “Hybrid speaker”. Consequently, there is an internal power supply to amplify the woofer system. This requires that Persona 9H be connected to an AC power source. For this reason, each Persona 9H includes an IEC standard power cord. This cord should be firmly inserted into the AC power receptacles on the rear panel of the speaker, and the opposite end to an AC wall outlet.
-
Page 3: Table Of Contents
Anthem Room Correction (ARC™) (Persona 9H Only) ....20 Basic Troubleshooting ....25... - Page 4 IMPORTANT SAFETY INSTRUCTIONS 1. Read these instructions. 2. Keep these instructions. 3. Heed all warnings. 4. Follow all instructions. 5. Do not use this apparatus near water. 6. Clean only with dry cloth. 7. Do not block any ventilation openings. Install in accordance with the manufacturer’s instructions. 8.
- Page 5 (servicing) instructions in the literature accompanying the appliance. WARNING! Do not use your Paradigm product(s) outside of the country of original sale—voltage requirements vary by country. Improper voltage can cause damage that will be potentially expensive to repair.
-
Page 6: Unpacking Instructions Persona 9H
UNPACKING INSTRUCTIONS PERSONA 9H IMPORTANT! Review These Steps Before Proceeding! IMPORTANT! When removing the speaker from the carton, ensure belt buckles, rings or other jewellery do not come into contact with the speaker and scratch the finish. -
Page 7: Unpacking Instructions Persona 7F, 5F, 3F And Persona C
IMPORTANT! When removing the speaker from the carton, ensure belt buckles, rings or other jewellery do not come into contact with the speaker and scratch the finish. UNPACKING INSTRUCTIONS PERSONA C Attach the two bases before positioning on tabletop. If using a Paradigm Stand, follow the instructions packed with the stand. -
Page 8: Accessories
ACCESSORIES 4 – Rubber Feet Power Cord (Persona 9H Only) 4 – Carpet Spikes 1 – Allen Key and Allen Key (for rubber feet) 9H, 7F, 5F and 3F Only 9H, 7F, 5F and 3F Only INTRODUCING PERSONA Persona Persona... -
Page 9: General Tips
GENERAL TIPS Break-In Although Paradigm Persona speakers sound great “out of the carton,” they will sound even better once they are “broken in.” Allow them to play for several hours before you begin any critical listening. NOTE: If your speakers have been transported or stored in the cold, let them warm to room temperature before use. -
Page 10: There Is A Limit
YOUR LISTENING ROOM Paradigm Persona speakers are designed to provide superior high-end sound in a wide variety of domestic settings. However, it is important to note that listening room construction, dimensions and furnishings all play a part in the quality of sound you will ultimately achieve. Your listening room will impose its own character on the performance capabilities of any speaker system. -
Page 11: Center Speaker Stand Mounting
(optional) The Paradigm Persona center channel speaker can be mounted to Paradigm’s B-18C stand if desired. Ask your Paradigm dealer for details. Paradigm’s B-18C stand is made expressly for the Persona C speaker and provides the perfect height and aesthetics. -
Page 12: Attaching Bumper Pads To Bookshelf/Center Speakers
Persona C center-channel speakers when placed on a shelf or other flat surface. This will isolate your speakers from the solid surface, improving overall sound quality. NOTE: As an alternative, you may choose to stand mount your Paradigm Persona B bookshelf speakers using Paradigm stands. Ask your Paradigm dealer for details. -
Page 13: Placement: Front Left & Right Speakers
SPEAKER PLACEMENT: FRONT LEFT & RIGHT SPEAKERS Paradigm Persona front speakers are designed to allow flexible placement while providing a very large window of sound throughout your listening room. To ensure the best performance possible we strongly recommend that you observe the placement guidelines on the following pages …... -
Page 14: Accurate Timbre
For the most accurate and natural timbre, place front speakers so that their high-frequency drivers are approximately at ear level, as shown below. Placing bookshelf models on Paradigm speaker stands (sold separately) or bookshelves raises their high- frequency drivers to approximately ear level, thereby ensuring the best performance possible. -
Page 15: Balanced Bass
SPEAKER PLACEMENT: FRONT LEFT & RIGHT SPEAKERS (cont’d) Balanced Bass Placing front speakers in corners will over-emphasize bass and reduce overall clarity. Avoid corner placement. Position front speakers 8 in (20 cm) or more from the wall behind the speaker and as much as possible from either side wall, as shown below. -
Page 16: Optimal Imaging
SPEAKER PLACEMENT: FRONT LEFT & RIGHT SPEAKERS (cont’d) Optimal Imaging Measure the distance from your main listening area to the front speakers (“X”). For best imaging, place speakers from three-quarters of that distance up to that same distance from each other (3/4 of “X” to “X”), as shown. -
Page 17: Placement: Center Speaker
SPEAKER PLACEMENT: CENTER SPEAKER Paradigm Persona C center channel speakers are designed to cover a large, wide listening area, allowing listeners throughout the room to hear center-channel information with unprecedented clarity and intelligibility. Placing your center channel speaker below (or above) the TV will ensure the best possible clarity and intelligibility. -
Page 18: Speaker Connection
SPEAKER CONNECTION IMPORTANT! Turn your amplifier(s) OFF before connecting your speakers. This will avoid damage which could result from accidental shorting of speaker cables. Speaker Cable / Speaker Wire It is wise to use the best speaker cable or wire you can. The length and type of speaker cable or wire used in your system will have an effect on your overall listening enjoyment. -
Page 19: Standard Connection For All Speakers
DO NOT attempt to bi-wire or bi-amplify speakers unless you have removed the jumper bars. All Paradigm Persona speakers have two sets of input terminals connected externally with jumper bars. These speakers can be bi-wired or bi-amplified to achieve even better performance. -
Page 20: Bi-Wire Connection
SPEAKER CONNECTION (cont’d) Bi-Wire Connection Bi-wiring can improve clarity and openness with less grain and more solidity to the bass. Two speaker cables are required for each speaker that is bi-wired. REMOVE JUMPER BARS! BEFORE BI-WIRING! -
Page 21: Bi-Amp Connection
SPEAKER CONNECTION (cont’d) Bi-Amp Connection IMPORTANT! When bi-amping, always use amplifiers with identical gain. If uniform amplifier gain is not maintained the speaker-to-speaker balance will be incorrect when vertically bi-amped, or the speaker system’s frequency balance will be incorrect when horizontally bi-amped. To prevent problems, use identical amplifiers (brand and model). -
Page 22: Horizontal Bi-Amplification
SPEAKER CONNECTION (cont’d) Passive bi-amping offers a dramatic improvement in clarity, openness and detail, with much better bass solidity and definition. The presentation of music and movie soundtracks is simply more intelligible and transparent. With passive bi-amping, the speaker’s internal passive crossovers remain connected. An external electronic crossover is not required and cannot be used (there is no direct electrical access to individual drive units). -
Page 23: Controls For Persona 9H
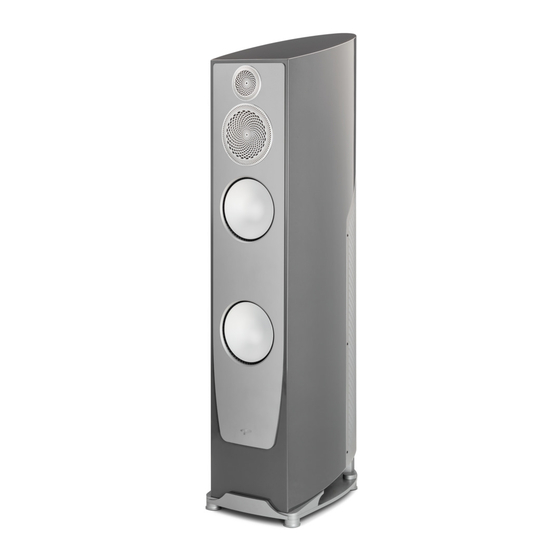
PERSONA 9H HYBRID LOUDSPEAKER 6-driver, 3-1/2-way Hybrid Floorstanding Loudspeaker with Active Bass Acoustic Suspension. A true full-range hybrid loudspeaker, Persona 9H is the perfect balance of powered woofers with a passive upper register array. Persona 9H sounds exceptional! Astounding bass and definition and neutral, transparent midrange reproduction. -
Page 24: Fine Tuning
FINE TUNING Since Paradigm Persona speakers are designed to provide exceptional high-end performance in a variety of room settings, fine tuning is simply a matter of making slight adjustments to their placement in the room, if necessary. Start with just the front speakers and listen to familiar music in stereo. The soundstage will be both wide and deep, but this can be tuned to your Personal preference by adjusting the toe-in (the amount the speakers are turned toward the listening area). -
Page 25: Anthem Room Correction (Arc™) (Persona 9H Only)
(reflections, resonances, standing waves, etc.) of the various surfaces and other obstacles in your room. ARC is easy to use, and just a few simple steps can customize your PERSONA 9H for your unique listening space. ARC is sophisticated, one of the most accurate and detailed digital room correction technologies available today. - Page 26 ANTHEM ROOM CORRECTION (ARC) – Persona 9H Only (cont’d) WHAT’S INCLUDED WITH ARC: Your ARC Kit Includes: • Microphone and microphone clip • Telescoping stand and base • 2 USB cables Each microphone has its own unique factory-set calibration file. You can download your microphone’s unique calibration file from anthemav.com/arc.
- Page 27 ANTHEM ROOM CORRECTION (ARC) – Persona 9H Only (cont’d) MICROPHONE POSITIONING & CONNECTION During all measurements, the microphone must point straight up. The microphone’s height is critical to proper measurement. The microphone should be positioned at ear-level when seated and should correspond with the height of the high- frequency drivers in the front speaker array.
- Page 28 ANTHEM ROOM CORRECTION (ARC) – Persona 9H Only (cont’d) TESTING PROCEDURE We recommend you measure audio response at a minimum of FIVE listening positions. Up to TEN positions can be tested with ARC if your room is unusually large (more than 40’ x 40’) or unusually shaped—more is not necessarily better.
- Page 29 ANTHEM ROOM CORRECTION (ARC) – Persona 9H Only (cont’d) BASIC ARC MEASUREMENT 1. With your microphone set in Position One, the “main measurement position,” use the USB to connect both the microphone and the ARC-ready equipment being measured to a USB input on your computer.
-
Page 30: Basic Troubleshooting
If a problem occurs, you can try the troubleshooting suggestions listed below. If one of these doesn’t remedy the problem, or you are not sure how to proceed, please contact the Paradigm Customer Support team and we will be happy to help. -
Page 31: 5-Year Limited Warranty
Dealer, Paradigm Electronics Inc. or Import Dis- ® tributor (outside the U.S. and Canada) to arrange, bring in or ship prepaid, any defective unit. Visit our website, paradigm. com for more information. Paradigm Electronics Inc. reserves the right to improve the design of any product without assuming any obligation to modify any product previously manufactured. - Page 32 Paradigm Electronics Inc., 205 Annagem Boulevard, Mississauga, ON, Canada L5T 2V1...
Need help?
Do you have a question about the PERSONA 9H and is the answer not in the manual?
Questions and answers