Table of Contents
Advertisement
This user manual is provided as a free service by FixYourDLP.com. FixYourDLP is in no way responsible
for the content of this manual, nor do we guarantee its accuracy. FixYourDLP does not make any claim
of copyright and all copyrights remain the property of their respective owners.
About FixYourDLP .com
FixYourDLP.com (http://www. xyourdlp.com) is the World's #1 resource for media product news,
reviews, do-it-yourself guides, and manuals.
Informational Blog: http://www. xyourdlp.com
Video Guides: http://www. xyourdlp.com/guides
User Forums: http://www. xyourdlp.com/forum
FixYourDLP's Fight Against Counterfeit Lamps:
http://www. xyourdlp.com/counterfeits
RecycleYourLamp.org – Free lamp recycling services for used lamps:
http://www.recycleyourlamp.org
Lamp Research - The trusted 3rd party lamp research company:
http://www.lampresearch.com
Discount-Merchant.com – The worlds largest lamp distributor:
http://www.discount-merchant.com
Disclaimer
Disclaimer
Sponsors:
Sponsors:
Sponsored by
D
D
M
M
Advertisement
Table of Contents

Related Manuals for Vivitek D5500 series


Summary of Contents for Vivitek D5500 series
- Page 1 Disclaimer Disclaimer This user manual is provided as a free service by FixYourDLP.com. FixYourDLP is in no way responsible for the content of this manual, nor do we guarantee its accuracy. FixYourDLP does not make any claim of copyright and all copyrights remain the property of their respective owners. About FixYourDLP .com FixYourDLP.com (http://www.
-
Page 2: Delta Elec. Inc. Vivitek Rev
Delta Elec. Inc. Vivitek rev.00 PROJECTOR D5500 Serial SERVICE MANUAL (Rev.00) T H E T R U S T E D S O U R C E F O R P R O J E C T O R L A M P S A N D A C C E S S O R I E S... - Page 3 Delta Elec. Inc. Vivitek rev.00 DLP DIGITAL PROJECTOR Rev.00 Model Name: D5500 Serial Revision Description Date Preliminary 07/28/2008 T H E T R U S T E D S O U R C E F O R P R O J E C T O R L A M P S A N D A C C E S S O R I E S...
-
Page 4: Table Of Contents
Delta Elec. Inc. Vivitek rev.00 CONTENTS 1. COMPLIANCE OF SAFE REPAIR ............………………………………..…….……5 1-1. Caution during disassembling and assembling ....……………………………………..…….……5 1-2. Lamp ................……………………………………………….……….….5 1-3. Lens ............…………………………………………………….…………….….5 2. SPECIFICATIONS ............…………………………………………………………..…6 2-1. Optical Specifications ……………………………………………………………………………………..………6 2-2. Electrical Specifications ……………………………………………………………………………..……………7 2-3. Mechanical Specifications …………………………………………………………………………………...….8 2-4.Environmental considerations…………………………………………………………….………….……...….8... - Page 5 Delta Elec. Inc. Vivitek rev.00 7-1. Fuse ………………………………………………………………………………………………………………..75 7-2 Thermostat ………………………………………………………………………………………………………...76 7-3 Bimetal ……………………………………………………………………………………………………………..77 7-4 Lamp Interlock Switch …………………………………………………………………………………………..78 8. Maintenance …………………………………………………………………………………………………………...79 8-1 Cleaning the projector …………………………………………………………………………………………..79 8-2 Replacing Consumable Parts ………………………………………………………………………………….83 9. Factory Preset Display Modes ……………………………………………………………………………………..87 10. Spare part list ………….…………….…..……………………………………………………….……………….…91 11.
-
Page 6: Compliance Of Safe Repair
Delta Elec. Inc. Vivitek rev.00 1. COMPLIANCE OF SAFE REPAIR Be sure to read this Service Manual before providing services. In the projector, full consideration is taken to ensure the safety for a fire, electric shock, injury, harmful radiation, and substance. Therefore, observe the notice described in this Service Manual so that the safety is kept when providing services. -
Page 7: Specifications
Delta Elec. Inc. Vivitek rev.00 2. SPECIFICATIONS This section provides technical information about the projector's performance. 2-1. Optical Specifications Item Description ® Projection system Single DLP chip, 5 segment color wheel Resolution 1024 x 768 pixels* (up to UXGA @ 60 Hz, up to SXGA+ @ 60 Hz on DVI-D) -
Page 8: Electrical Specifications
Delta Elec. Inc. Vivitek rev.00 2-2. Electrical Specifications Item Description 1 Analog RGB (Mini D-Sub 15P), 1 Analog RGB R/Cr, G/Y, B/Cb, H, V (BNC x 5), 1 Digital RGB (DVI-D 24P), 1 Component Y, Cb/Pb, Cr/Pr Inputs (RCA x 3), 1 Component (Mini D-Sub 15P) shared with COMPUTER 1 IN, 1 S-Video (Mini DIN 4P), 1 Video, 3 Stereo Mini Audio, 2 (L/R) RCA Audio. -
Page 9: Mechanical Specifications
Delta Elec. Inc. Vivitek rev.00 2-3. Mechanical Specifications Item Description 19.9" (W) x 7.6" (H) x 15.2" (D) Dimensions 505 mm (W) x 192 mm (H) x 385 mm (D) (not including protrusions) 45.1 lbs/20.5 kg Weight 2-4. Environmental Considerations... -
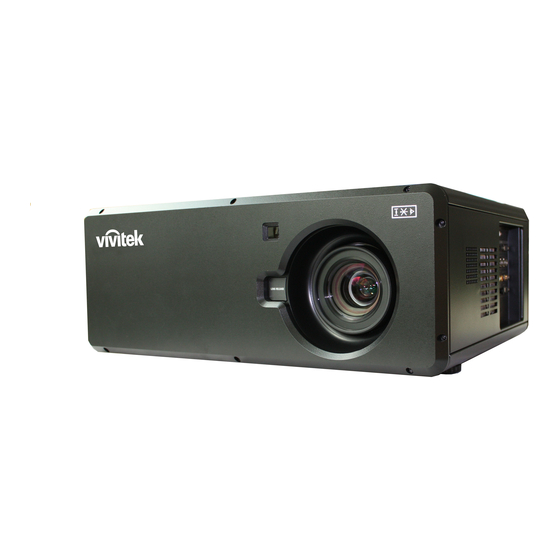
Page 10: Views Of Projector Parts
Delta Elec. Inc. Vivitek rev.00 2-5. Views of projector parts 1. Top view ABEL ESCRIPTION EE PAGE Lens control panel See Lens Controls Right-hand speaker Right-hand speaker Lamp cover Remove cover to replace lamp or color wheel Exhaust vent Exhaust vent – do not obstruct Rear intake vent Rear cooling intake –... - Page 11 Delta Elec. Inc. Vivitek rev.00 2. Bottom view ABEL ESCRIPTION EE PAGE Height adjusters Adjust projection height Contact your dealer for information on mounting the projector on a Ceiling support holes ceiling Note: When installing, ensure that you use only UL Listed ceiling mounts.
-
Page 12: Top Features
Delta Elec. Inc. Vivitek rev.00 2-6. Top Features 1. Lens Controls ABEL ESCRIPTION ZOOM Increase/decrease projected image size UP CURSOR RIGHT CURSOR Move image left, right, up, or down DOWN CURSOR LEFT CURSOR FOCUS Focus the projected image T H E T R U S T E D S O U R C E F O R P R O J E C T O R L A M P S A N D A C C E S S O R I E S... - Page 13 Delta Elec. Inc. Vivitek rev.00 2. OSD Controls and Status LEDs ABEL ESCRIPTION EE PAGE MENU Open / Close the OSD UP/ DOWN/ LEFT/ Navigate and change settings in the OSD RIGHT BUTTONS RIGHT CURSOR/ Increase volume VOLUME INCREASE CANCEL...
- Page 14 Delta Elec. Inc. Vivitek rev.00 ABEL ESCRIPTION EE PAGE Green POWER (LED) See Indicator Messages Orange Flashing AUTO Optimize image size, position, and resolution Select or change settings in the OSD LEFT CURSOR/VOLUME Decrease volume DECREASE T H E T R U S T E D S O U R C E F O R P R O J E C T O R L A M P S A N D A C C E S S O R I E S...
-
Page 15: Terminal Panel Features
Delta Elec. Inc. Vivitek rev.00 2-7. Terminal Panel Features T H E T R U S T E D S O U R C E F O R P R O J E C T O R L A M P S A N D A C C E S S O R I E S... - Page 16 Delta Elec. Inc. Vivitek rev.00 ABEL ESCRIPTION COMPUTER 3 IN Connect the DVI-D cable (not supplied) from a computer AUDIO IN Connect the audio cable (not supplied) from the input device COMPUTER 3 AUDIO OUT Audio loop-thru MONITOR OUT Connect to a monitor...
-
Page 17: Remote Control Parts
Delta Elec. Inc. Vivitek rev.00 2-8. Remote Control Parts Important: 1. Avoid using the projector with bright fluorescent lighting turned on. Certain high-frequency fluores- cent lights can disrupt remote control operation. 2. Be sure nothing obstructs the path between the remote control and the projector. If the path be- tween the remote control and the projector is obstructed, you can bounce the signal off certain reflective surfaces such as projector screens. - Page 18 Delta Elec. Inc. Vivitek rev.00 ABEL ESCRIPTION EE PAGE Up cursor Navigates and changes settings in the OSD Right cursor Navigates and changes settings in the OSD Down cursor Volume +/- Adjusts volume Mute Mutes the built-in speaker Zoom+ Zoom in...
-
Page 19: Inserting The Remote Control Batteries
Delta Elec. Inc. Vivitek rev.00 2.9. Inserting the Remote Control Batteries Remove the battery compartment cover by sliding the cover in the di- rection of the arrow. Insert the supplied batteries taking note of the polarity (+/-) as shown here. -
Page 20: Block Diagram
Delta Elec. Inc. Vivitek rev.00 2-10. Block Diagram T H E T R U S T E D S O U R C E F O R P R O J E C T O R L A M P S A N D A C C E S S O R I E S... -
Page 21: Explanation Of The Block Diagrams
Delta Elec. Inc. Vivitek rev.00 2-11. Explanation of the block diagrams 1. Input signal processing 1-1.RGB & Component & DVI input system The RGB(5BNC) and COMPONENT input signals are led through the multiplexer circuit. After these signals and DVI signal have been converted into 10-bit digital signals of RGB each at the A/D converter (U201) incorporated in the VIDEO amplifier, the resultant signals are output to the scaler (U400). - Page 22 Delta Elec. Inc. Vivitek rev.00 3. Audio signal processing The audio output is generated from the speakers via the amplifier (U900) provided with a • volume control. The volume control is conducted by the DC output from the D/A converter (U900).
-
Page 23: Wire Location
Delta Elec. Inc. Vivitek rev.00 2-12. Wire Location T H E T R U S T E D S O U R C E F O R P R O J E C T O R L A M P S A N D A C C E S S O R I E S... -
Page 24: Trouble Shooting
Delta Elec. Inc. Vivitek rev.00 3. TROUBLE SHOOTING 3-1. Operation check By making operation checks under normally operating conditions, a certain degree of judgment is possible on errors. Prior to the removal of the top cover, check the POWER indicator and the STATUS indicator. -
Page 25: Main Board Check
Delta Elec. Inc. Vivitek rev.00 3-2. Main Board check T H E T R U S T E D S O U R C E F O R P R O J E C T O R L A M P S A N D A C C E S S O R I E S... - Page 26 Delta Elec. Inc. Vivitek rev.00 CN110 CN109 T H E T R U S T E D S O U R C E F O R P R O J E C T O R L A M P S A N D A C C E S S O R I E S...
-
Page 27: Led State Indications
Delta Elec. Inc. Vivitek rev.00 3-3. LED State Indications Power LED Projector Status LED Condition LED Sequence Projector Condition AC Off Cooling ORANGE BLINK 0.5sON > 0.5sOFF After Power OFF Power up sequence GREEN BLINK 0.5sON > 0.5sOFF Start up... -
Page 28: Disassembly And Assembly
Delta Elec. Inc. Vivitek rev.00 4. DISASSEMBLY AND ASSEMBLY Removing the Lamp Cover and Lamp Module Look the full set projector. Look at the IO side. Look at the keypad of top side. Look at the keypad of top side. - Page 29 Delta Elec. Inc. Vivitek rev.00 Removing the Lamp Cover and Lamp Module Look at the top side. Loose these four screws and take out. Look the Lamp. Remove the lamp modules (upward view). Look the Lamp. Look the Lamp. T H E T R U S T E D S O U R C E F O R P R O J E C T O R L A M P S A N D A C C E S S O R I E S...
- Page 30 Delta Elec. Inc. Vivitek rev.00 Removing the Lamp Module and Front cover Look the Lamp. Look the Lamp. Remove the ten screws. Look the screws. Remove the front cover. Front side views. T H E T R U S T E D S O U R C E F O R P R O J E C T O R L A M P S A N D A C C E S S O R I E S...
- Page 31 Delta Elec. Inc. Vivitek rev.00 Removing the Back & Top cover Back cover view. Remove the ten screws. Remove the back cover. Back side view. PULL Pull the top cove in this direction. Then remove the Top cover. T H E T R U S T E D S O U R C E F O R P R O J E C T O R L A M P S A N D A C C E S S O R I E S...
- Page 32 Delta Elec. Inc. Vivitek rev.00 Removing the Top cover & Keypad board Look the top cover & keypad BD. Remove the FCC Cable from the keypad side. Remove the 7 screws. Then remove the keypad BD. Remove the 7 screws.
- Page 33 Delta Elec. Inc. Vivitek rev.00 Removing the Top cover Shield Check this hook-buckle when you Remove the twelve screws, and careful and assemble that. check this place when you assembled. Careful this area and check this place Disconnect. when you assemble this plate.
- Page 34 Delta Elec. Inc. Vivitek rev.00 Replace the color wheel Remove the four screws and take away. Review the color wheel. Review the color wheel. Remove the three screws. Remove the three screws and take this Color wheel module off. case away.
- Page 35 Delta Elec. Inc. Vivitek rev.00 Replace the color wheel and Removing the Lens Review the color wheel. Review the color wheel. Color wheel module off. Look at the Lens release button. Push the Lens release button, Turn anti- The Optical Lens review.
- Page 36 Delta Elec. Inc. Vivitek rev.00 Removing the Lens cap & lens ring Remove the screw. Remove the Lens cap & front IR assy. Disassemble the Lens cap & IR assy. Front IR BD views. Remove this screw. Take off the lens ring.
-
Page 37: Removing The Main Board
Delta Elec. Inc. Vivitek rev.00 Removing the Main Board Remove the five screws. Then take off the shield. Disassemble the back IR assy. Remove the screw & disconnect the wire. Remove the two hexagonal bolts then Remove these two screws. - Page 38 Delta Elec. Inc. Vivitek rev.00 Review the Main Board Review the Main Board Top side. Review the Main Board Bottom side. T H E T R U S T E D S O U R C E F O R P R O J E C T O R L A M P S A N D A C C E S S O R I E S...
-
Page 39: Removing The Lamp Cover
Delta Elec. Inc. Vivitek rev.00 Removing the Lamp cover Unplug these two hook-buckles, then Remove these four screws. disconnect. Arrange the wires as picture when you Review the screws. assemble it. Unplug these four hook-buckles and Careful and check this place when you T H E T R U S T E D S O U R C E F O R P R O J E C T O R L A M P S A N D A C C E S S O R I E S careful the assembly. - Page 40 Delta Elec. Inc. Vivitek rev.00 Removing the Lamp cover & Lamp module Careful and check this place when you Careful and check this place when you assembled. assembled. Unplug and check this hook-buckle. Review the Lamp cover. T H E T R U S T E D S O U R C E F O R P R O J E C T O R L A M P S A N D A C C E S S O R I E S The Lamp cover off.
- Page 41 Delta Elec. Inc. Vivitek rev.00 Removing the FAN module Take these two sets away. Take these two fans away. Care the fan wire assembly. See the connector location. Be careful the two side of arrow mark Be careful the two side of arrow mark direction.
- Page 42 Delta Elec. Inc. Vivitek rev.00 Removing the Fan module & Optical module Take these two sets away. Be careful the hook-buckles. Remove these six screws. Remove the screw. Then Remove the Optical engine Review the screws. T H E T R U S T E D S O U R C E F O R P R O J E C T O R L A M P S A N D A C C E S S O R I E S module.
- Page 43 Delta Elec. Inc. Vivitek rev.00 Removing the Optical module & Lens Shift / motor module Careful and check this place when you assembled. Careful and check this place when you assembled. The Optical module off. Remove these six screws. Review the screws.
- Page 44 Delta Elec. Inc. Vivitek rev.00 Remove the Lens Shift / motor module and Power shield The Lens Shift / motor module off. Careful and check this place when you assembled. Careful and check this place when you Careful and check this place when you assembled.
- Page 45 Delta Elec. Inc. Vivitek rev.00 Removing the Power shield & Lamp holder Arrange the wires as picture when you assemble it. Careful and check this place when you assembled. Review the Power Shield. Careful and check this place when you assembled.
- Page 46 Delta Elec. Inc. Vivitek rev.00 Removing the Lamp holder and Take care the assembly Arrange the wires as picture when you Arrange the wires as picture when you assemble it. assemble it. Disassemble this connector. Disconnect the connectors. Then remove the Lamp holder module.
- Page 47 Delta Elec. Inc. Vivitek rev.00 Removing the blown Fan & Power Fan Remove the two screws. Review the screws. Review the Fan. See the connector location. T H E T R U S T E D S O U R C E F O R P R O J E C T O R L A M P S A N D A C C E S S O R I E S Remove the Power Fan.
- Page 48 Delta Elec. Inc. Vivitek rev.00 Removing the power fan & ballast shield Remove the five screws,then take off the View the Fan off. shield. Review the screws. Remove the two screws. T H E T R U S T E D S O U R C E F O R P R O J E C T O R L A M P S A N D A C C E S S O R I E S Remove the two screws.
- Page 49 Delta Elec. Inc. Vivitek rev.00 Removing the power Assy & ballast Assy Disconnect the connectors. Then take off the power Assy. Remove the screw. Remove the screw Careful and check this place when you assembled. Careful and check this place when you assembled.
- Page 50 Delta Elec. Inc. Vivitek rev.00 Remove Audio Board and Module Review the Audio module. Careful and check this wire when you assembled. Arrange the wires as picture when you assemble it. Arrange the wires as picture when you assemble it.
- Page 51 Delta Elec. Inc. Vivitek rev.00 Remove Audio Board and Module Careful and check this place when you assembled. Arrange the wires as picture when you assemble it. Remove the all hook-buckle. Disconnect the connector. Remove these two screws. Arrange the wires as picture when you assemble it.
- Page 52 Delta Elec. Inc. Vivitek rev.00 Remove Audio Board / Module and IO Board Remove these two screws. Review the screws. Disconnect the connector. Remove the Audio module. Remove th two screws & hexagonal bolts. T H E T R U S T E D S O U R C E F O R P R O J E C T O R L A M P S A N D A C C E S S O R I E S...
- Page 53 Delta Elec. Inc. Vivitek rev.00 Remove IO Board Remove these three screws. Review the screws. Then remove the IO BD Assy. Remove the seven screws. Remove the eight hexagonal bolts. Remove the IO BD. T H E T R U S T E D S O U R C E F O R P R O J E C T O R L A M P S A N D A C C E S S O R I E S...
- Page 54 Delta Elec. Inc. Vivitek rev.00 Remove the protection BD & the speaker Remove these 8 screws and the Transformer & Remove the Fan. Power saving Board take away. Remove the two screws and take away Remove the three screws and take away the L speaker.
- Page 55 Delta Elec. Inc. Vivitek rev.00 Remove BD ADJ FOOT & Bottom shield Remove the two screws and take away Review the ADJ FOOT and screw. the ADJ foot. Remove these screws and take away the Remove these 14 screws and take away the Bottom shield.
- Page 56 Delta Elec. Inc. Vivitek rev.00 Review the Bottom case Review the Bottom case. T H E T R U S T E D S O U R C E F O R P R O J E C T O R L A M P S A N D A C C E S S O R I E S...
- Page 57 Delta Elec. Inc. Vivitek rev.00 Appendix. Screw torque for D5500 Page Screw Type Screw Driver Torque (kg-cm) M3*L8 3100330800 3.5~4.0 M3*L8 3100300800 3.5~4.0 M4*L10 5.5~6.0 3109020700 M3*L8 3.5~4.0 3100300800 M3*L10 3.5~4.0 3100301000 M4*L16 5.5~6.0 3105120300 M4*L12 3102301200 5.5~6.0 M3*L8 3.5~4.0...
-
Page 58: Adjustment
Delta Elec. Inc. Vivitek rev.00 5. Adjustment 5-1 .Step of Into Service mode Using the remote controller and press key as below method to enter the service mode. Step1 Open Main menu and select “Expert ” item to enter Step2 the expert menu as right side picture. -
Page 59: Calibrate Vga (1024 X 768 @ 60Hz)
Delta Elec. Inc. Vivitek rev.00 5-2 . Calibrate VGA (1024 x 768 @ 60Hz) Select ADC Calibration Item and press “Select” key , and then you will see the Step1 picture as follow。 Select “Calibration”. In this menu input pattern with White(240,240,240) and Black(16,16,16) for calibrate VGA Source . -
Page 60: Calibrate Yuv
Delta Elec. Inc. Vivitek rev.00 5-3. Calibrate YUV In Service Mode Select ADC Calibration Item and press “Select” key , and then you Step1 will see the picture as follow。 Select “Calibration”. In this menu input pattern with 75﹪SMPTE pattern for... -
Page 61: Calibrate Video
Delta Elec. Inc. Vivitek rev.00 5-4. Calibrate Video In Service Mode Select DEC Calibration Item and press “Select” key , and then you Step1 will see the picture as follow。 Select “Calibration”. In this menu input pattern with 75﹪SMPTE pattern for... - Page 62 Delta Elec. Inc. Vivitek rev.00 YUV Calibration: Test Equipment: VG-828 Input Timing: 480P (Timing 953) Input Pattern: SMPTE Color Bar(Pattern 984) Red Level Blue Level White Level Black Level T H E T R U S T E D S O U R C E F O R P R O J E C T O R L A M P S A N D A C C E S S O R I E S...
- Page 63 Delta Elec. Inc. Vivitek rev.00 Video Calibration: Test Equipment: VG-828 Input Timing: NTSC (Timing 946) Input Pattern: SMPTE Color Bar(Pattern 984) White Level Black Level T H E T R U S T E D S O U R C E F O R P R O J E C T O R L A M P S A N D A C C E S S O R I E S...
-
Page 64: Color Wheel Index Adjustment
Delta Elec. Inc. Vivitek rev.00 5-5. Color Wheel Index Adjustment Using the remote controller and press key as below method to enter the service mode. Step1 Open Main menu and select “Expert ” item to enter Step2 the expert menu as right side picture. - Page 65 Delta Elec. Inc. Vivitek rev.00 Select “Color Wheel Index” (The default value is 29. The range is 0~360.) In this menu input pattern with “16 Gray Scale”. Fine-tune until the gray scale still distinct. Decrease the color to the minimum. Then switch “256 Gray Scale”, tune off G, B channel, check the smooth in brighter level of the R 256 ramp.
-
Page 66: Focus Adjustment
Delta Elec. Inc. Vivitek rev.00 5-6. Focus Adjustment 1. Remove the cosmetic lens cover (A) 2. Remove the cosmetic lens cover (B) T H E T R U S T E D S O U R C E F O R P R O J E C T O R L A M P S A N D A C C E S S O R I E S... - Page 67 Delta Elec. Inc. Vivitek rev.00 3. Remove the cosmetic lens cover (B) by screw Screw 4. Without Cosmetic Cover Figure T H E T R U S T E D S O U R C E F O R P R O J E C T O R L A M P S A N D A C C E S S O R I E S...
- Page 68 Delta Elec. Inc. Vivitek rev.00 5. The adjustment structure of lens mount Image adjustment screw Fixed Screw T H E T R U S T E D S O U R C E F O R P R O J E C T O R L A M P S A N D A C C E S S O R I E S...
- Page 69 Delta Elec. Inc. Vivitek rev.00 6. The function of lens mount adjustment Projector Screw for Image adjustment Screen curvature 7. Adjustment Procedure a. Move projection lens to be at center position of DMD b. Rotate fixed screw counterclockwise around 15 to 30 degree (loosen it) c.
- Page 70 Delta Elec. Inc. Vivitek rev.00 (A) Move PJ Lens at center position of DMD Input projector with cross pattern, then zoom-in and zoom out projection lens that center cross image overlap by adjusting lens shift. (B) Rotate fixed screw counterclockwise around 15 to 30 degree (loosen it)
- Page 71 Delta Elec. Inc. Vivitek rev.00 (C1)Adjust image adjustment screw to make image on screen from corner position to center position to be clear Image Criteria Pixel Shape is clear Coma flare is less then 2.5 pixel (C2)Adjustment Hint If upper area image...
- Page 72 Delta Elec. Inc. Vivitek rev.00 (D) Tighten fixed screw then glue it T H E T R U S T E D S O U R C E F O R P R O J E C T O R L A M P S A N D A C C E S S O R I E S...
-
Page 73: Security Notice
Delta Elec. Inc. Vivitek rev.00 6. Security Notice 6-1. Preventing the Unauthorized Use of the Projector The projector has an inbuilt security feature to lock the OSD control panels and deny remote control operation. The security feature has no default keyword; in the first instance of enabling the security feature, the user must define a keyword. - Page 74 Delta Elec. Inc. Vivitek rev.00 You are prompted to enable the PIN code lock Function. Select OK and press Select. Select On using the ▼ button. The PIN code lock window is displayed. Enter a keyword between 4 and 10 characters using ▲▼◄►.
-
Page 75: Unlocking The Projector
Delta Elec. Inc. Vivitek rev.00 6-2. Unlocking the Projector To unlock the projector, refer to the following guide. When the projector is locked, either by request during operation or at start up, the locked message is displayed. To unlock the projector, press Menu on the control panel or remote control. -
Page 76: Circuit Protections
Delta Elec. Inc. Vivitek rev.00 7. Circuit Protections This projector provides the following circuit protections to operate in safety. If the abnormality occurs inside the projector, it will automatically turn off by operating one of the following protection circuits. 7-1. Fuse Two fuse are located inside of the projector. -
Page 77: Thermostat
Delta Elec. Inc. Vivitek rev.00 7-2. Thermostat There are two thermostat inside of the projector to detect the internal temperature rising abnormally. When the internal temperature reaches near 120˚C, the thermostat opens to stop the operation of the main board circuit. -
Page 78: Bimetal
Delta Elec. Inc. Vivitek rev.00 7-3. Bimetal There are two bimetal inside of the projector to detect the lamp temperature rising abnormally. When the lamp1 temperature reaches near 110˚C or lamp2 temperature reaches near 130˚C, the bimetal opens to stop the operation of the power supply circuit. -
Page 79: Lamp Interlock Switch
Delta Elec. Inc. Vivitek rev.00 7-4. Lamp Interlock Switch The lamp interlock switch cuts off the drive signal to the lamp circuit when the lamp cover is removed or not closed completely. After opening the lamp cover for replacing the lamp ass’y, place the lamp cover correctly otherwise the projector can not turn on. -
Page 80: Maintenance
Delta Elec. Inc. Vivitek rev.00 8. Maintenance 8-1. Cleaning the projector 1. Cleaning the Cabinet Refer to the following guide to clean the projector cabinet. 1. Wipe off dust with a clean dampened cloth. 2. Moisten the cloth with warm water and mild detergent and wipe the cabinet. - Page 81 Delta Elec. Inc. Vivitek rev.00 3. Cleaning the Filters The projector uses three filters to keep the fans free of dust and other particles, and should be cleaned every 500 hours of operation. In dustier environments, it is recommended to clean the filters more frequently. If the filter is dirty or clogged, your projector may overheat.
- Page 82 Delta Elec. Inc. Vivitek rev.00 The rear filter can be accessed as shown. Once the filters are cleaned, please reset the filter hours via the Clear Filter Hours option in the Reset Menu Descriptions and Functions. Note: Using the projector without the air filter fitted inside, dirt and dust are sucked into the projector, causing failure.
- Page 83 Delta Elec. Inc. Vivitek rev.00 4. Cleaning the optical parts Carry out cleaning of the main unit and interior when replacing the lamp or making inspections. The glass cleaner used with the following parts is as follows. Product name : Kei-Dry Wiper 132-S (Kureshia Co., Ltd.) 1)Cleaning the Projection Lens *When dust and fingerprints, etc.
-
Page 84: Replacing Consumable Parts
Delta Elec. Inc. Vivitek rev.00 8-2. Replacing Consumable Parts During the course of normal usage, consumable parts become worn out resulting in reduced performance. The following guides detail how to replace the various consumable parts within the projector quickly and safely. - Page 85 Delta Elec. Inc. Vivitek rev.00 Important: 1. The lamp contains a certain amount of mercury and should be disposed of according to local ordinance regulations. 2. Avoid touching the glass surface of the new lamp: doing so may shorten its operation life.
- Page 86 Delta Elec. Inc. Vivitek rev.00 Pull firmly on the module handle in the direction shown to remove the lamp. Reverse steps 1 to 3 to install the new lamp module and replace the lamp cover. T H E T R U S T E D S O U R C E F O R P R O J E C T O R L A M P S A N D A C C E S S O R I E S...
- Page 87 Delta Elec. Inc. Vivitek rev.00 2. Resetting the Lamp Hours Counter After replacing the lamp(s), the lamp hour counter(s) should be reset to zero. Refer to the following guide: Press the Menu button on the OSD control panel or Remote Control to open the Main menu.
-
Page 88: Factory Preset Display Modes
Delta Elec. Inc. Vivitek rev.00 9. Factory Preset Display Mod 1.The following table shows compatible signal types, their resolution and frequency refresh rates. Horizontal: 15kHz, 31kHz to 90 kHz Vertical: 50 Hz to 85 Hz ESOLUTION REQUENCY EFRESH REQUENCY EFRESH... - Page 89 Delta Elec. Inc. Vivitek rev.00 Note: Images above flagged with "D" are supported by digital signal. An image with higher or lower resolution than the projector’s native resolution (1024 x 768) will be compressed. Some Composite and Sync on Green signals may not be displayed correctly.
- Page 90 Delta Elec. Inc. Vivitek rev.00 Screen Size GC805G GB942G GB940G 0.77 1.33 - 1.79 1.78 - 2.35 Diagonal Width Height Distance [inches] [inches] [inches] [m] [inches] [inches] [inches] 1.02 0.81 0.61 41.7 - 1.06 - 55.8 1.42 - 1.27 1.02 0.76...
- Page 91 Delta Elec. Inc. Vivitek rev.00 Screen Size GB949G GB957G 2.22 - 4.43 4.43 - 8.3 Diagonal Width Height Distanc [inches] [inches] [inches] [inches] [inches] 1.02 0.81 0.61 69.4 - 1.76 - 139.2 - 3.54 - 1.27 1.02 0.76 87.8 - 2.23 -...
-
Page 92: Spare Part List
Delta Elec. Inc. Vivitek rev.00 10. Spare part list_ Sanyo ( PDG-DXT10 Series ) v.10 Item Type Description Cover 3455355500 CASE SECC TOP Cover 3455354701 BRACKET AL LAMP COVER Cover 3455354500 BOTTOM SECC Cover 3455354401 FRONT COVER AL Cover 3455355001... - Page 93 5600600360 PWB ASSY BACK IR BD DP-3650 Ballast 0990075400 LAMP DRIVER 260W PULSE 4AC O3 Lamp 5811100560 MODULE LAMP HOUSING ASSY VIVITEK DP-3650 Lens shift 5811100139-S MODULE LENS SHIFT ASSY DP-3650 Optic engine 3797690500 OPTICAL ENGINE ASSY VIVITEK DP-3650 5811100565...
- Page 94 Delta Elec. Inc. Vivitek rev.00 No. 01 No. 02 No. 03 No. 04 No. 05 No. 06 No. 07 No. 08 No. 09 No. 10 No. 11 No. 12 No. 13 No. 14 No. 15 No. 16 No. 17 No. 18 No.
- Page 95 Delta Elec. Inc. Vivitek rev.00 No. 31 No. 32 No. 33 No. 34 No. 35 No. 36 No. 37 No. 38 No. 39 No. 40 No. 41 No. 42 No. 43 No. 44 No.45 N0.46 No. 47 No. 48 No. 49 No.
- Page 96 Delta Elec. Inc. Vivitek rev.00 No. 62 T H E T R U S T E D S O U R C E F O R P R O J E C T O R L A M P S A N D A C C E S S O R I E S...
-
Page 97: Required Adjustments When The Parts Replaced
Delta Elec. Inc. Vivitek rev.00 11. Required adjustments when the parts replaced ● necessary doing in repair center Take Actions Color Wheel Index Calibrate VGA, YUV Replaced Focus Adjustment & Video Adjustment Adjustment Main Board ● ● IO Board ●... - Page 98 Disclaimer Disclaimer This user manual is provided as a free service by FixYourDLP.com. FixYourDLP is in no way responsible for the content of this manual, nor do we guarantee its accuracy. FixYourDLP does not make any claim of copyright and all copyrights remain the property of their respective owners. About FixYourDLP .com FixYourDLP.com (http://www.
Need help?
Do you have a question about the D5500 series and is the answer not in the manual?
Questions and answers