Table of Contents
Advertisement
Quick Links
345 Bayview Avenue
Amityville, New York 11701
For Sales and Repairs 1-800-ALA-LOCK
For Technical Service 1-800-645-9440
or visit us at
http://tech.napcosecurity.com/
(Note: Technical Service is for security professionals only)
Publicly traded on NASDAQ
Symbol: NSSC
© ALARM LOCK 2015
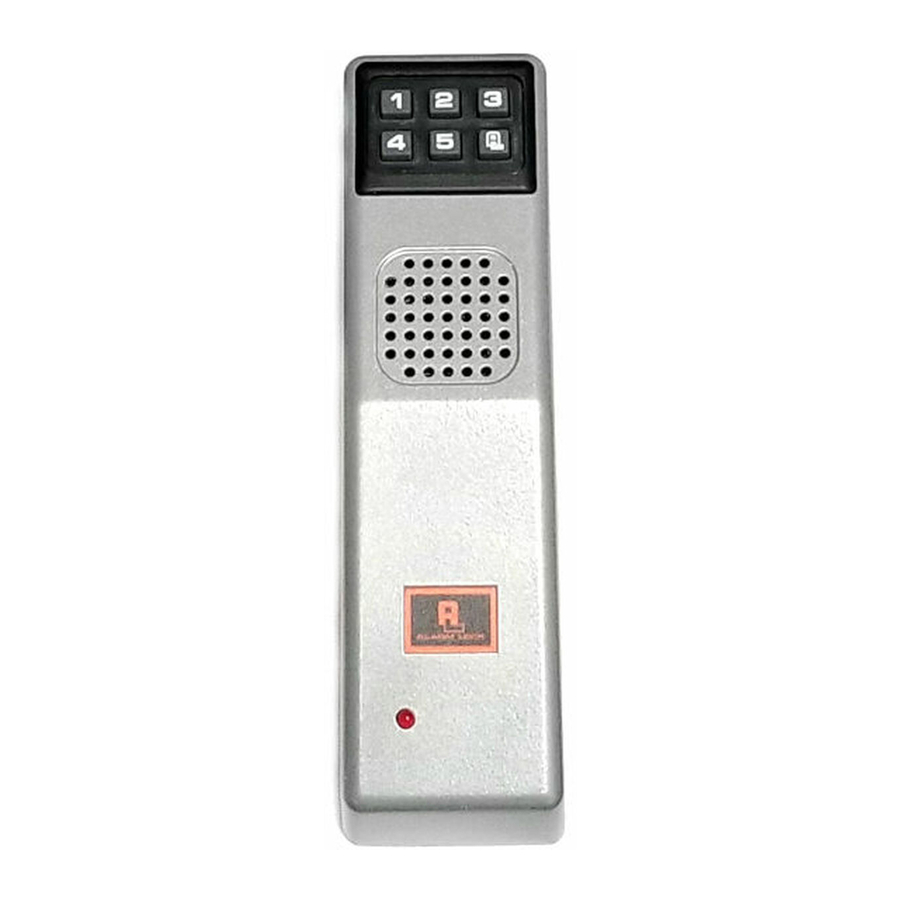
DESCRIPTION
The PG30 is a keypad operated surface-mounted micropro-
cessor-controlled door alarm. Three programmable security
levels provide degrees of access to suit various applications,
such as unattended fire stairways, airport security areas, de-
livery entrances, etc. The unit contains a Form-C relay as
well as provisions for an external power supply and external
reed-switch contacts.
The unit mounts on the door with a magnetic actuator on the
frame, or, if external wiring is required, vice versa. Entering
the Master Code will alternately arm and disarm the unit. A
selectable Annunciator feature beeps to signal opening of the
door while the unit is disarmed. Opening the door, removing
the cover or attempting to defeat the unit with a second mag-
net when armed, will activate the alarm. The unit may be op-
erated from outside the door with the addition of a model
PG30KPD External Keypad (optional).
SPECIFICATIONS
Dimensions: 9" x 2½" x 2⅜" (22.8cm x 6.3cm x 6.8cm)
(LxWxD)
Metallic Silver (PG30MS); Metallic Bronze
Finish:
(PG30MB)
Power Requirements: 9-volt alkaline battery (supplied). (The
PG30 may be used with Model PP100 (optional) or other
power supply providing 9-12VDC at 500mA).
Battery Life: Continuous Alarm, 3 hours; 2-Minute Shut-
down, see Table 1 below.
Alarms / Year
1
2
3
4
5
6
7
8
9
10
Table 1. Battery Life with 2-Minute Shutdown option.
Sounding Device: Piezo electronic sounder, sweep siren,
110dB at 10 feet.
Shipping Weight: 1lb., 10oz.
FEATURES
Three codes: Master, Management and Passage
Three levels of security to suit different applications
Three alarm types: Sweep, steady or pulsing siren
Two Annunciator volume levels
Automatic low-battery detection
MODEL PG30
Battery Life (Months)
17.6
17.4
17.1
16.8
16.6
16.3
16.1
15.8
15.6
15.4
Pilfergard Door Alarm
Installation Instructions
Provisions for external power supply
Provisions for external reed-switch contacts for multiple-
door monitoring
Built-in Form-C relay for connection to control panel or
other device
INSTALLATION
Note: In many applications, the need for a template may
be eliminated by using the Magnet Alignment procedure in
step 10. If outside keypad control or remote wiring is required,
however, the template must be used.
1. If using a template, select the proper template for the type
of door. (If not using a template, proceed to step 6).
2. Mark and drill 9/64" holes per template directions on the
door and jamb. (Four holes for base plate and two holes
for magnetic actuator). Note: Certain narrow-stile doors
require only two holes for mounting plate.
3. Mark and drill ⅜" hole per template for remote wiring to a
control panel.
4. For outside keypad control only: Drill ¾" hole as
shown on template. Refer to the PG30KPD instructions
for installation of outside keypad.
5. Knock out the necessary holes from the base plate and
install on the door with #8 sheet-metal screws (supplied).
If an outside keypad is used, ensure that its cable is rout-
ed through the hole in the base plate.
6. Connect the battery (a chirp will sound; this chirp will con-
firm that power is connected properly). Important: Press
the small CLEAR button at the lower-left corner of the
circuit board (see Fig. 1).
7. Remove the jumper ONLY on the side of the unit that the
magnet will NOT be installed.
8. Select
jumper
tions (J1 - J4) as fol-
lows: Refer to Fig. 1;
the unit is factory
supplied
with
Annunciator
option
enabled (J3 installed)
and 2-Minute Shut-
down alarm selected
(J4 removed).
Important: Changes in the jumper configuration do
not become effective until the unit is subsequently armed.
J1: Entry Delay. Alarm will sound 15 seconds after any
unauthorized entry through door if unit is armed. This
feature is used for authorized entry. To avoid an alarm
upon entry, disarm unit within 15 seconds. To enable
Entry Delay, install J1 across both pins.
J2: Exit Delay. Unit will be activated after 15 seconds
each time unit is armed to allow authorized exit without
an alarm. To enable Exit Delay, install J2 across both
pins.
WI739E 02/15
op-
OFF
the
CLEAR
1 2 3 4
Fig 1. CLEAR Button and Jumpers
ON
OFF
1
Advertisement
Table of Contents

Related Manuals for Alarm Lock PG30


Summary of Contents for Alarm Lock PG30
- Page 1 Power Requirements: 9-volt alkaline battery (supplied). (The install on the door with #8 sheet-metal screws (supplied). PG30 may be used with Model PP100 (optional) or other If an outside keypad is used, ensure that its cable is rout- power supply providing 9-12VDC at 500mA).
- Page 2 (The replace the Tamper Screw in its correct location will render PG30 may be mounted on a door with the addition of a the unit inoperable. Model 271 Flexible Cable). All wiring is made at its terminal strip.
- Page 3 be opened up to 15 seconds without activating an alarm. If no Codes: Master, Management, and Passage Codes; code is entered or if the door remains open longer than 15 Security Level (Level 1, 2 or 3); seconds, a non-latching alarm will sound; that is, when the ...
-
Page 4: Alarm Lock Limited Warranty
This warranty shall not apply to any equipment, or any part In no event shall ALARM LOCK be liable for an amount in thereof, which has been repaired by others, improperly excess of ALARM LOCK's original selling price of the...
Need help?
Do you have a question about the PG30 and is the answer not in the manual?
Questions and answers