Metz MECABLITZ 58 AF-2 digital Operating Instruction
For pentax with p-ttl / ttl
Hide thumbs
Also See for MECABLITZ 58 AF-2 digital:
- Operating instruction (230 pages) ,
- Operating instructions manual (230 pages) ,
- Addendum (16 pages)
Table of Contents
Advertisement
Quick Links
Advertisement
Table of Contents

Subscribe to Our Youtube Channel
Related Manuals for Metz MECABLITZ 58 AF-2 digital


Summary of Contents for Metz MECABLITZ 58 AF-2 digital
- Page 1 MECABLITZ 58 AF-2 digital for Pentax with P-TTL / TTL Operating instruction...
-
Page 2: Table Of Contents
8.2 Exposure control indicator in TTL flash mode ......130 1 Safety instructions ..........111 8.3 Warning indicator . -
Page 3: Safety Instructions
• Do not expose the flash unit or battery charger to dripping or splashing water such as rain! Thank you for purchasing a Metz product. We are happy to welcome you as a • Protect the flash unit from excessive heat and humidity! Do not store the customer. -
Page 4: Dedicated Flash Functions
2 Dedicated flash functions It is impossible to describe all camera types and their individual dedica- ted flash functions within the scope of these instructions. Therefore, plea- Dedicated flash functions are flash functions that have been specially adapted to se refer to the flash mode description in your camera’s operating instruc- a given camera system. -
Page 5: Switching The Flash Unit On And Off
environment, since they have no cadmium. 3.3 Switching the flash unit on and off The flash unit can be turned on by flipping the main • 4 alkaline-manganese dry cell batteries 1.5V, type IEC LR6 (size AA). switch to the „ON“ position. Maintenance-free power source for moderate power requirements. -
Page 6: Auto Off For The Flash Unit
3.5 Auto OFF for the flash unit 5 Operating modes (mode menu) To save battery power and prevent inadvertent battery drain, the flash unit is The flash unit supports , automatic , manual , SB and stro- factory-set to automatically switch to standby mode (Auto OFF) 10 minutes after boscope modes •... -
Page 7: Ttl- Flash Mode
The flash parameters for ISO, aperture and lens focal length or mirror position Setting procedure: Mode are set automatically, if the camera transfers the necessary data to the flash unit. • Press the button until „Mode“ flashes on the Mode The range indicator on the display of the control unit matches the flash parame- LC display. -
Page 8: Automatic Flash Mode
Setting procedure: Ensure that the contre-jour light source does not shine directly into the lens, as this will interfere with the camera’s TTL metering system. • Press the button until „Mode“ flashes on the Mode Mode LC display. An adjustment or display for the automatic TTL fill-in flash mode on the flash PTTL unit doesn't occur in this case. -
Page 9: Automatic Flash Mode
5.6 Automatic flash mode Set partial light output: When shooting in automatic fill-in flash mode in daylight, the automatic flash • Press the button (Parameters ) until „P“ flashes Para F 4.0 mode will automatically set a correction of between -1 and -2 f-stops to on the LC display for partial light output. -
Page 10: Strobe Flash Mode
5.8 Strobe flash mode Strobe number of flashes (N) The strobe flash mode is a manual flash mode. It allows several flash expo- In strobe mode, the number of flashes per shot (N) can be selected. sures to be made on a single photo, which can be especially interesting for The number of flashes can be set from 2 to 50 in intervals of one. -
Page 11: Spot-Beam Mode
The mecablitz LC display will indicate the flash-to-subject distance required for a 5.9 Spot-beam mode correct flash exposure, given the parameters selected. By changing the aperture In the spot beam mode, the AF measuring beam can be used to focus on a sub- setting or the partial light output, this value can be adjusted to fit the actual ject at low ambient light level without firing a flash when the shot is taken. -
Page 12: Setting Procedure For The Flash Parameters
6.1 Setting procedure for the flash parameters 6.2 Main reflector position (Zoom) If there is no digital data transfer between the camera and flash unit, the reflec- When a button is pressed for the first time, the LC display is illuminated. tor positions Depending on the flash mode set, various flash parameters are shown in the 24 mm - 28 mm - 35 mm - 50 mm - 70 mm - 85 mm - 105 mm (35mm format... -
Page 13: Flash Exposure Correction (Ev)
6.3 Flash exposure correction (EV) 6.4 Manual partial light output (P) Manual flash exposure correction (EV) can help offset extreme differences in In the manual mode and the strobe mode , the light output can also be contrast between the subject and background. Corrections from -3 f-stops (EV) adjusted to fit the shooting situation with the manual partial light output para- to +3 f-stops (EV) can be made, in 1/3 increments (also see 11.5). -
Page 14: Special Functions (Select Menu)
7 Special functions (Select menu) • Press the button to confirm the special func- tion selection. Special functions are selected using the „Sel“ (Select) button. Depending on the • Choose the setting desired using the camera model and flash mode set, various special functions are available. If arrows. -
Page 15: Flash Bracketing Series (Fb)
Beep signals when adjusting automatic mode settings: 7.3 Flash Bracketing Series (FB) A series of flash exposures (flash-bracketing FB) can be carried out in the • A short beep signal as an alarm in automatic mode indicates that the apertu- and automatic flash modes. -
Page 16: Extended Zoom Mode (Zoom Ext)
• The first shot is taken without a correc- Example: F 5.1 tion value. „FB 1“ will also appear on The focal length of the camera lens is 50 mm. The extended zoom mode sets a AZoom 28 the display. 7.7 m ISO 100 35 mm reflector position on the flash unit. -
Page 17: Adjusting Exposure Format (Zoom Size)
7.5 Adjusting exposure format (Zoom Size) 7.6 Cordless remote mode (Remote) With some digital cameras it is possible to adjust the light angle of the main • When „Remote OFF“ appears, the cordless remote mode is deactivated. reflector to suit the chip format (the dimensions of the image recording module). •... -
Page 18: Meter-Feet Changeover (M/Ft)
7.7 Meter-Feet changeover (m/ft) 7.8 Secondary reflector The maximum flash range indicated by the flash unit’s display can either be The secondary reflector i is used for frontal brightening in the case of indirect shown in meters or feet. The setting can be adjusted under the menu option lighting when the main reflector is pivoted to the side or upwards (see 11.3). -
Page 19: Modelling Light (Ml)
7.9 Modelling Light (ML) 7.10 Auto OFF Function (Standby) The modelling light is a high-frequency stroboscopic flash. It creates the impres- To save battery power and prevent inadvertent battery discharge, the flash unit sion of a semi-permanent light for a duration of about 3 seconds. The modelling is factory-set to automatically switch over to standby mode, while flash readi- light enables the user to assess light distribution and the formation of shadows ness and the LC display are switched off about 10 minutes after -... -
Page 20: Keylock
Setting procedure: 7.11 KEYLOCK The KEYLOCK function enables the user to lock the buttons on the flash unit to Select prevent them from inadvertently being pressed. When the KEYLOCK function is • Press the button repeatedly until „Select“ Standby activated, a symbol appears on the display above three buttons. -
Page 21: Contrast
• Use the buttons to make the desired 7.12 Contrast settings. The setting is effective immediately.. To facilitate subject and pictorial composition, the camera flash can be combi- ned with an external flash unit (mecablitz) to perform so-called contrast control –... -
Page 22: Indicators In The Camera Viewfinder
8 Indicators in the camera viewfinder 8.3 Warning indicator [ ] flashes slowly Information is only displayed in the viewfinder if the metering system is Flash is needed given the current photographic situation. Signal that a flash activated, e.g. when lightly touching the shutter release. Under certain unit needs to be used and/or that the (internal or external) flash unit should circumstances the information displayed in your camera's viewfinder may differ from those described below. -
Page 23: Motor Zoom Reflector
9 Motor Zoom Reflector 10 Wide-angle diffuser The zoom position of the main reflector can be adjusted for focal lengths of at With the wide angle diffuser , focal lengths of 12 mm or more can be illumi- least 24 mm (35 mm format). For lenses with focal lengths of 12 mm or more, nated (35 mm format). -
Page 24: Flash Techniques
11 Flash techniques 11.3 Bounce flash with secondary reflector When the main reflector is swivelled or tilted, the secondary reflector 11.1 Bounce flash also be activated in the Select Menu for frontal fill-in lighting of the subject (see Bounce flash illuminates the subject more softly and reduces dense shadows. It 7.8). -
Page 25: Manual Flash Exposure Corrections
11.5 Manual flash exposure corrections 12 Flash readiness indication The auto flash exposure mode of the flash unit, as of most cameras, is adjusted When the flash capacitor is charged, the flash readi- to a reflection factor of 25% (the average reflection factor of flash subjects). A ness symbol lights up on the flash unit, indicating dark background that absorbs much of the light or a highly reflective bright... -
Page 26: Correct Exposure Indication
14 Correct exposure indication The flash range can be expressed in either meters (m) or feet (ft) according to the chosen setting (see 7.7). There is no flash range indication in remote The correct exposure indication „OK“ only lights up mode or when the main reflector is swivelled or tilted. -
Page 27: Second Curtain Synchronisation (Rear, 2Nd Curtain, Slow2)
• Use the buttons to make the desired 16.2 Second curtain synchronisation (REAR, 2nd curtain, SLOW2) settings. The setting is effective immediately. REAR ON Some cameras offer the option of second-curtain synchronisation (2nd curtain mode), in which the flash unit is not triggered until the end of the exposure –... -
Page 28: High-Speed Flash Mode P-Ttl-Hss
16.4 High-speed flash mode P-TTL-HSS 17 Preflash function for red-eye reduction Different cameras with focal-plane shutters support the high speed flash mode The red-eye effect occurs when the person being photographed is looking more P-TTL-HSS (= High-speed synchronisation; see the camera's operating instruc- or less straight into the camera, the ambient lighting is poor, and the flash unit is tions). -
Page 29: Wireless P-Ttl - Remote System
Some cameras support the AF measuring beam in the flash unit only with the 19.1 Activating the remote flash mode as master camera’s central AF sensor. If a peripheral AF sensor is selected, then the AF • Press the button repeatedly until "Select" BEEP measuring beam will not be activated in the flash unit. -
Page 30: Activating The Remote Flash Mode As Controller
Setting the parameters 19.2 Activating the remote flash mode as Controller • Press the button repeatedly until "Select" BEEP Select appears on the display. Master Remote AZoom 35 • Use the buttons to select "Remote" • Press the button repeatedly until the desired EV 0 Para from the menu. -
Page 31: Activating The Remote Flash Mode As Slave
19.3 Activating the remote flash mode as Slave Setting the parameters • Press the button repeatedly until the desired parameter appears on the Para BEEP Select display. Here it is possible to make settings for... • Press the button repeatedly until "Select" Remote appears on the display. -
Page 32: Care And Maintenance
• An unauthorised power pack has been connected to the mecablitz. Use only a Metz Power Pack P76. • A Metz Power Pack P76 is connected and there are still batteries in the bat- tery compartment of the mecablitz. Remove the batteries from the mecablitz. - Page 33 A battery symbol appears on the display • There is a Metz Power Pack P76 connected to the mecablitz and there are • The main reflector is in its normal position or tilted downwards.
- Page 34 Automatic switching to the flash sync speed fails to occur. The REAR mode cannot be activated on the flash unit. • The camera has a between-the-lens shutter (as do most compact cameras), • No data exchange took place between the flash unit and camera. Lightly Switching to sync speed is therefore unnecessary.
-
Page 35: Technical Data
Flash unit with integrated wide-angle diffuser, operating instructions, • Approx. 250 with NiMH batteries 2100 mAh T58 bag, mounting foot • Approx. 180 with high-capacity alkaline manganese batteries • Approx. 430 with Metz Power Pack P76 (special accessory) (at full light output) -
Page 36: Optional Accessories
23 Optional accessories We accept no liability for malfunctions of or damage to the flash unit caused by the use of accessories of other manufacturers. • Mecabounce 58-90 (Order No. 000058902) With this diffuser, soft lighting can be achieved in a very simple manner. It gives your pictures a marvellous soft appearance. - Page 37 Zoom 6/9° 8/10° 10/11° 12/12° 16/13° 20/14° 25/15° 32/16° 40/17° 50/18° 64/19° 80/20° 100/21° 125/22° 160/23° 200/24° 250/25° 320/26° 400/27° 500/28° 650/29° 800/30° 1000/31° 63 1250/32° 71 1600/33° 80 Table 3: Guide numbers at maximum light output (P 1/1) 2000/34° 89 2500/35°...
-
Page 38: Table 4: Flash Durations At The Individual Partial Light Output Levels
Teillichtleistung Blitzleuchtzeit (s) Leitzahl Leitzahl Niveaux de puissance Durée d’éclair (s) Nombre-guide Nombre-guide Deelvermogensstappen Flitsdur (s) Richtgetal Richtgetal Partial light output Flash duration Guide number Guide number Livello di potenza Durata del lampo Numero guida Numero guida Potencia parcial Duración de destello Número-guía Número-guía (P=Flash Power) ISO 100/50 mm... -
Page 39: Table 5: Camera Shutter Speeds In Stroboscopic Mode
Flash frequency Table 5: Camera shutter speeds in stroboscopic mode f(Hz) (Flashes/sec.) Number of flashes 10 15 20 25 30 40 50 15 15 15 30 30 30 60 60 15 15 15 30 30 15 15 15 30 1/2 1 15 15 1/2 1 15 15... -
Page 40: Table 6: Recycling Times And Number Of Flashes With Different Battery Types
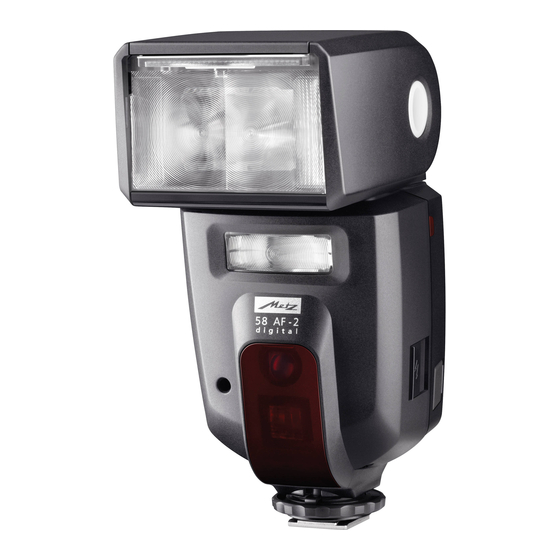
Battery type Number of flashes Recycling times Tempi di ricarica A / TTL min. /max. Zoom High-power 0,1 . . . 5 s 180 . . . 3000 alkaline-manganese Table 7: Maximum guide numbers at HSS-Mode NiMh 0,1 . . . 5 s 180 . - Page 41 Reflector card Unlocking button for the main reflector Main-reflector 90° 75° Wide-angle diffuser 60° PRESS 45° Battery compartment cover Sensor for cordless remote control Exposure ok indicator AF measuring beam 58 AF-2 0° -7° Power pack connection Main switch Firmware updates Multi-zone AF measuring beam Manual firing button and exposure ok indicator Secondary reflector...
- Page 42 Display Mode Para Reset Display Mode Para Gruppe B Select-Menü ** Display 5 sec. Display Gruppe A Mode-Menü* Parameter-Menü** TTL +1 Display Display ON/OFF Para — REAR ON/OFF Gruppe C Beep ON/OFF Bsp. für Displayanzeige des 58 AF-1: Remote Remote OFF/Master/Slave M (steht für Master) 1/3 —...
Need help?
Do you have a question about the MECABLITZ 58 AF-2 digital and is the answer not in the manual?
Questions and answers