
Related Manuals for Metz MECABLITZ 58 AF-1 N


Summary of Contents for Metz MECABLITZ 58 AF-1 N
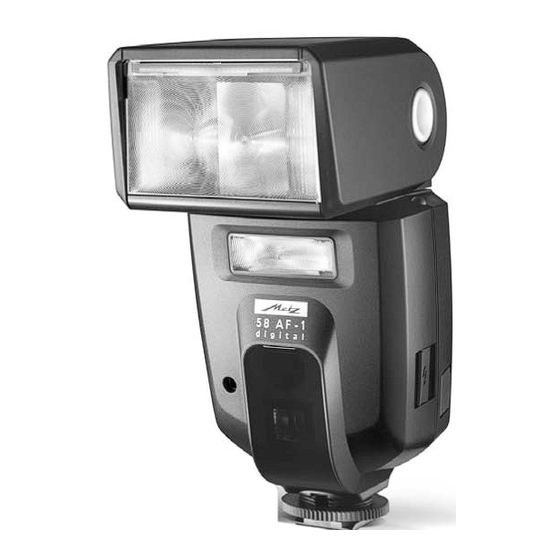
- Page 1 MECABLITZ 58 AF-1 N digital Bedienungsanleitung Mode d’emploi Gebruiksaanwijzing Operating instruction Manuale istruzioni Manual de instrucciones...
-
Page 2: Table Of Contents
10.2 Indirektes Blitzen mit Reflektorkarte ....... 18 Sicherheitshinweise ......... . 3 10.3 Indirektes Blitzen mit Zweitreflektor . -
Page 3: Sicherheitshinweise
• Verbrauchte Batterien/Akkus nicht ins Feuer werfen! • Aus verbrauchten Batterien kann Lauge austreten, was zur Beschädigung der Vielen Dank, dass Sie sich für ein Metz Produkt entschieden haben. Kontakte führt. Verbrauchte Batterien deshalb immer aus dem Gerät entnehmen. Wir freuen uns, Sie als Kunde begrüßen zu dürfen. -
Page 4: Dedicated-Blitzfunktionen
2. Dedicated-Blitzfunktionen Kamera-Gruppe Dedicated Blitzfunktionen A B C D E Die Dedicated-Blitzfunktionen sind speziell auf das Kamerasystem abge- • • • • • Blitzbereitschaftsanzeige im Kamerasucher / Kameradisplay stimmte Blitzfunktionen. In Abhängigkeit vom Kameratyp werden dabei ver- • • • • • Belichtungskontrollanzeige im Kamerasucher / Kameradisplay schiedene Blitzfunktionen unterstützt. -
Page 5: Blitzgerät Vorbereiten
3. Blitzgerät vorbereiten Wenn Sie das Blitzgerät längere Zeit nicht benutzen, entfernen Sie bitte die Batterien aus dem Gerät. 3.1 Montage des Blitzgerätes Batterien austauschen Blitzgerät auf die Kamera montieren Die Akkus/Batterien sind leer bzw. verbraucht, wenn die Blitzfolgezeit (Zeit Kamera und Blitzgerät vor der Montage oder Demontage ausschalten. -
Page 6: Automatische Geräteabschaltung / Auto - Off
Eingelegte Batterien / Akkus dürfen nicht im Blitzgerät verbleiben. 4. Displaybeleuchtung Zum Anschließen des Power Pack P76 bzw. des Verbindungskabels V58-50 Bei jedem Tastendruck am Blitzgerät wird für ca. 10 Sek. die (Zubehör) am Blitzgerät muss der Hauptschalter des Blitzgerätes in die lin- Displaybeleuchtung des Blitzgerätes aktiviert. -
Page 7: Ttl-Blitzbetrieb
• Die Taste „Return“ drücken. Das Display schaltet auf die normale Einstellvorgang: Anzeige zurück. Wenn die Taste „Return“ nicht gedrückt wird, schaltet • Taste „Mode“ so oft drücken, bis im Display „Mode“ angezeigt wird. das Display nach ca. 5 s automatisch auf die normale Anzeige zurück. •... -
Page 8: Ttl-Aufhellblitzbetrieb
das Display nach ca. 5 s automatisch auf die normale Anzeige zurück. Je nach Kameratyp wird nach Einstellung der Blitzbetriebsart BL vom Bei einer korrekt belichteten Aufnahme erfolgt für ca. 3s die Blitzgerät automatisch der geeignete Aufhellblitzbetrieb aktiviert: Belichtungskontrollanzeige „o.k.“ (siehe 13). -
Page 9: Automatik-Blitzbetrieb
automatisch gelöscht bzw. lässt sich nicht aktivieren. Es wird dann der 5.6 Manueller Blitzbetrieb normale TTL-Blitzbetrieb bzw. D-TTL oder i-TTL durchgeführt (siehe Im manuellen Blitzbetrieb wird vom Blitzgerät ungeregelt die volle Kamerabedienungsanleitung)! Energie abgestrahlt, sofern keine Teillichtleistung eingestellt ist. Die Anpassung an die Aufnahmesituation kann z.B. -
Page 10: Blitzparameter (Parameter-Menü)
Beim Stroboskop-Betrieb werden mehrere Blitze mit einer bestimmten Anzeige zurück. Wenn die Taste „Return“ nicht gedrückt wird, schaltet Blitzfrequenz abgegeben. Die Funktion ist daher nur mit einer Teillichtleistung das Display nach ca. 5 s automatisch auf die normale Anzeige zurück. von max. -
Page 11: Einstellvorgang Für Die Blitzparameter
mit CPU ausgerüstet ist und die entsprechenden Daten an das Blitzgerät sen- • Mit den PLUS / MINUS -Tasten den gewünschten Wert einstellen. Die det. Für die automatische Datenübertragung muss die Kombination aus Einstellung wird sofort wirksam. Kamera und Blitzgerät montiert und eingeschaltet sein. Zusätzlich muss ein •... -
Page 12: Blitzbelichtungskorrektur (Ev)
manuell eingestellt werden. Im Display wird M-Zoom angezeigt. Für den Automatik-Blitzbetrieb und manuellen Blitzbetrieb müssen Einstellvorgang: Kamera und Blitzgerät auf den gleichen ISO-Wert eingestellt werden. • Taste „Para“ (Parameter) so oft drücken, bis im Display „Zoom“ angezeigt Einstellvorgang: wird. • Taste „Para“ (Parameter) so oft drücken, bis im Display „ISO“ angezeigt •... -
Page 13: Sonderfunktionen (Select-Menü)
7. Sonderfunktionen (Select-Menü) • Mit den Tasten UP und DOWN die gewünschte Einstellung vorneh- men. Die Einstellung wird sofort wirksam. Die Sonderfunktionen werden mit der Taste „Sel“ (Select) ausgewählt. Je • Taste „Return“ so oft drücken, bis im Display die normale Anzeige nach Kameratyp und eingestellter Blitzbetriebsart stehen verschiedene erfolgt. -
Page 14: Blitzbelichtungsreihen (Fb)
Einstellvorgang: Bei der Anzeige „FB 0“ ist die Blitzbelichtungsreihe deaktiviert. • Taste „SEL“ so oft drücken, bis im Display „Select“ angezeigt wird. • Die erste Aufnahme wird ohne Korrekturwert ausgeführt. Im Display wird zusätzlich „FB1“ angezeigt. • Mit den Tasten UP und DOWN den Menü-Punkt „BEEP“... -
Page 15: Drahtloser Remote-Betrieb (Remote)
Einstellvorgang: • Mit den Tasten UP und DOWN die gewünschte Einstellung vorneh- men. Die Einstellung wird sofort wirksam. • Taste „SEL“ so oft drücken, bis im Display „Select“ angezeigt wird. • Taste „Return“ so oft drücken, bis im Display die normale Anzeige •... -
Page 16: Einstelllicht (Ml) „Modelling Light
• Taste „Return“ so oft drücken, bis im Display die normale Anzeige • Einstellung „ P1/4“: Zweitreflektor arbeitet mit 1/4 Lichtleistung erfolgt. Wenn die Taste „Return“ nicht gedrückt wird, schaltet das Bei aktiviertem Zweitreflektor wird nach dem Speichern das Symbol Display nach ca. -
Page 17: Tastatur-Verriegelung (Keylock)
wird, nach einer bzw. nach zehn Minuten in den Strom sparenden • Mit den Tasten UP und DOWN den Menü-Punkt „KEYLOCK“ aus- Standby–Zustand. Zum Wiedereinschalten eine beliebige Taste drücken, bzw. wählen. Der ausgewählte Menü-Punkt wird dabei mit einem dunklen den Kameraauslöser antippen (Wake-Up-Funktion). Balken hinterlegt. -
Page 18: Weitwinkelstreuscheibe
Automatische Zoom-Anpassung 9. Weitwinkelstreuscheibe Die automatische Zoom-Anpassung des Hauptreflektors wird von Mit der Weitwinkelstreuscheibe können Brennweiten ab 18 mm ausge- Kameras der Gruppe B, C, D und E unterstützt wenn diese mit einem leuchtet werden (Kleinbild-Format). CPU–Objektiv ausgerüstet sind. Dabei passt sich die Zoomposition automa- Weitwinkelstreuscheibe aus dem Hauptreflektor nach vorne bis zum... -
Page 19: Indirektes Blitzen Mit Zweitreflektor
• Den Reflektorkopf um 90° nach oben schwenken. Bei Aufnahmen im Nahbereich ist zu beachten, dass bestimmte Mindestbe- leuchtungsabstände eingehalten werden müssen, um eine Überbelichtung zu • Die Reflektorkarte zusammen mit der Weitwinkelstreuscheibe oben vermeiden. aus dem Reflektorkopf nach vorne heraus ziehen. Der Mindestbeleuchtungsabstand beträgt ca. -
Page 20: Blitzbereitschaftsanzeige
Eine manuelle Blitzbelichtungskorrektur im TTL-Blitzbetrieb kann nur Kamerabetriebsart und gewählter Blitzsynchronisation (siehe auch dann erfolgen, wenn die Kamera diese Funktion unterstützt (siehe Kamerabedienungsanleitung und 18) verwendet werden. Bedienungsanleitung von Kamera)! Wenn die Kamera diese Funktion Bei Kameras mit Zentralverschluss (siehe nicht unterstützen bleibt der eingestellte Korrekturwert unwirksam. -
Page 21: Anzeigen Im Kamerasucher
Im Grenzfall, wenn das Blitzgerät keine ok-Anzeige durchführt, bzw. wenn tungen zu vermeiden! Die Anpassung an die jeweilige Aufnahmesituation das Blitzsymbol im Kamerasucher blinkt, die Belichtung jedoch noch korrekt kann z.B. durch Ändern des Blendenwertes erreicht werden. ist, erscheint keine Anzeige im LC-Display des Blitzgerätes! Im manuellen Blitzbetrieb M wird die Entfernung zum Motiv angezeigt, die Damit eine Unterbelichtungsanzeige erfolgen kann muss am Blitzgerät für eine korrekte Blitzbelichtung einzuhalten ist. -
Page 22: Error-Anzeige „Fee" Im Lc-Display Des Blitzgerätes
16.4 Error-Anzeige „FEE“ im LC-Display des Blitzgerätes 17. Blitzbelichtungs-Messwertspeicher Bei verschiedenen Kameras bzw. Kamerabetriebsarten (z.B. Programm P, Vari- Einige Kameras aus Gruppe E (siehe Tabelle 1) verfügen über einen Programme, Blendenautomatik S) ist es erforderlich, den Blendenring am Ob- Blitzbelichtungs-Messwertspeicher (FV-Speicher). Dieser wird vom Blitzgerät jektiv auf die maximale Blendenzahl einzustellen. -
Page 23: Synchronisation Auf Den 2.Verschlussvorhang (Rear-Betrieb)
18.2 Synchronisation auf den 2.Verschlussvorhang (REAR-Betrieb) Die Einstellung für die Langzeitsynchronisation SLOW erfolgt an der Kamera (siehe Kamerabedienungsanleitung)! Verwenden Sie bei lan- Einige Kameras bieten die Möglichkeit zur Synchronisation auf den 2. Ver- gen Verschlusszeiten ein Stativ um verwackelte Aufnahmen zu vermei- schlussvorhang (REAR-Betrieb). -
Page 24: Mehrzonen-Af-Meßblitz
Einige Kameratypen verfügen über eine Vorblitzfunktion gegen den „Rote- 21. Drahtloser Remote-Betrieb Augen-Effekt“. Dabei führen ein oder mehrere Vorblitze des Zweitreflektors Der drahtlose Remote-Betrieb ist kompatibel zum Nikon-System „Advanced dazu, dass sich die Pupillen der Personen weiter schließen und damit den Wireless Lighting“. -
Page 25: Einstellungen Am Master-Blitzgerät
Einstellung wird sofort wirksam. Das Slave-Blitzgerät muss auf den gleichen Remote-Kanal wie das Master-Blitzgerät eingestellt werden! Die Slave-Blitzbetriebsart (M, E- • Taste „Return“ so oft drücken, bis im Display die normale Anzeige TTL-Remote bzw. Manuell-Remote) kann am Slave-Blitzberät nicht ein- erfolgt. -
Page 26: Wartung Und Pflege
Tauschen Sie die Batterien bzw. Akkus gegen neue Batterien bzw. frisch gela- werden (Firmware-Update). dene Akkus aus! Nähere Informationen finden Sie im Internet auf der Metz-Homepage: Das Blitzgerät sollte nach dem Einschalten wieder „normal“ funktionieren. Ist www.metz.de dies nicht der Fall, so wenden Sie sich bitte an Ihren Fachhändler. - Page 27 Im Display erscheint erscheint eine Batteriesymbol Der Zweitreflektor lässt sich nicht aktivieren bzw. löst kein Blitzlicht aus • Am mecablitz ist ein Metz Power Pack P76 angeschlossen und im • Die Blitzbetriebsarten Stroboskop, Remote und Einstelllicht (ML) werden Batteriefach des mecablitz befinden sich Batterien. Batterien aus dem vom Zweitreflektor nicht unterstützt.
-
Page 28: Technische Daten
Die Aufnahmen sind zu hell. * Ca. 180 mit Hochleistungs Alkali-Mangan-Batterien • Im Nahbereich kann es zu Überbelichtungen (zu hellen Aufnahmen) kom- * Ca. 430 mit Metz Power-Pack P76 (Sonderzubehör) men, wenn die kürzeste Leuchtzeit vom Blitzgerät unterschritten wird. Der (bei jeweils voller Lichtleistung) -
Page 29: Sonderzubehör
Ausleuchtung: 25. Sonderzubehör Hauptreflektor ab 24 mm (Kleinbild 24x36) Für Fehlfunktionen und Schäden am Blitzgerät, verursacht durch die Verwendung von Zubehör anderer Hersteller, wird keine Gewähr- Hauptreflektor mit Weitwinkelscheibe ab 18 mm (Kleinbild 24x36) leistung übernommen! Zweitreflektor ab 35 mm (Kleinbild 24x36) •... - Page 30 Batterie-Entsorgung Batterien/Akkus gehören nicht in den Hausmüll! Bitte bedienen Sie sich bei der Rückgabe verbrauchter Batterien/Akkus eines vorhandenen Rücknahme- systems. Bitte geben Sie nur entladene Batterien/Akkus ab. Batterien sind in der Regel dann entladen, wenn das damit betriebene Gerät - abschaltet und signalisiert „Batterien leer“ - nach längerem Gebrauch der Batterien nicht mehr einwandfrei funktioniert.
-
Page 31: Garantiebestimmungen
6. Beanstandete Geräte bitten wir zusammen mit dem Kaufbeleg entweder über den Fachhändler oder direkt an die Firma Metz-Werke GmbH & Co Metz-Werke GmbH & Co KG KG - Zentralkundendienst - Ohmstrasse 55, 90513 Zirndorf, transportsi- cher verpackt unter genauer Schilderung der Beanstandung einzusenden. - Page 32 Consignes de sécurité ........33 10.2 Éclairage indirect au flash avec carte-réflecteur .
-
Page 33: Consignes De Sécurité
• Sortez immédiatement les piles usées du flash ! En effet, les piles usées peuvent „ couler“ et provoquer une dégradation du flash. Nous vous remercions d’avoir choisi un produit Metz et sommes heureux de • Ne rechargez pas les piles sèches ! vous saluer au sein de la grande famille de nos clients. -
Page 34: Fonctions Flash Dédiées
2. Fonctions flash dédiées Groupe d’appa- Fonctions flash dédiées reils photo Les fonctions flash dédiées sont des fonctions de flash adaptées spécialement A B C D E à un système d’appareil photo. Les fonctions de flash supportées dépendent • • • • • Témoin de disponibilité dans viseur / sur écran de l’appareil photo alors du type d’appareil. -
Page 35: Préparation Du Flash
où sont indiquées les fonctions de flash supportées par votre appareil • 4 accus au nickel-hydrure métallique de 1,2 V, type HR6 (AA / Mignon), photo ou à régler directement sur l’appareil photo ! Si vous utilisez un capacité nettement supérieure à celle des accus NiCd et moins nuisibles à l’environnement car sans cadmium. -
Page 36: Mise En Marche Et Coupure Du Flash
3.3 Mise en marche et coupure du flash • l’arrêt du système de mesure d’exposition de l’appareil photo... Mettez le flash en marche en appuyant sur l’interrupteur principal . Le ...pour éviter une consommation inutile d’énergie et ménager ainsi les piles flash est sous tension lorsque l’interrupteur principal est sur „ON“. -
Page 37: Mode Flash Ttl
5.2 Mode flash TTL Mode flash TTL ou D-TTL / i-TTL Le mode flash TTL vous permet de réussir sans peine vos photos au flash. BL Modes dosage automatique flash/ambiance en mode TTL ou D-TTL Dans ce mode, la mesure de l’exposition est effectuée par la cellule dans le 3D / i-TTL-BL (en fonction du type de l’appareil photo) reflex. -
Page 38: Dosage Automatique Flash/Ambiance En Mode Ttl
se de vue (voir le mode d’emploi de l’appareil photo). Procédure de réglage : En fonction du type d’appareil photo, le flash active automatiquement le • Appuyez à plusieurs reprises sur la touche „Mode“ jusqu’à ce que mode flash TTL „normal“, DTTL ou i-TTL (voir les tableaux 1 et 2) lorsque le „Mode“... -
Page 39: Mode Flash Automatique
• Le réglage est effectué sur le flash. • Réglez le mode de fonctionnement du flash avec les touches UP • Affichage sur le flash après la mémorisation : DOWN . Le mode de fonctionnement du flash sélectionné est mis en sur- brillance. -
Page 40: Mode Flash Stroboscope
Réglage de la puissance partielle : Si vous n’appuyez pas sur la touche „Return“ , l’écran revient automati- quement à l’affichage normal après 5 secondes environ. • Appuyez à plusieurs reprises sur la touche „Para“ (Paramètres) jusqu’à ce que „P“ pour „Puissance partielle“ apparaisse sur l’écran. Nombre d’éclairs en mode flash stroboscope (N) •... -
Page 41: Paramètres Du Flash (Menu „Parameter" (Paramètres)
que le paramètre du flash souhaité (F = Ouverture du diaphragme ou ment réglées sur le flash. Il n’est cependant pas possible de modifier les P = Puissance partielle manuelle) apparaisse sur l’écran. paramètres du flash pour l’ouverture (F) et la sensibilité (ISO). •... -
Page 42: Position Du Réflecteur Principal (Zoom)
cerne le mode flash automatique A et le mode flash manuel M, l’appareil En cas de transmission numérique des données entre l’appareil photo et le photo et le flash doivent être réglés sur la même ouverture du diaphragme. flash, les positions du réflecteur principal sont réglées automatiquement. „A–Zoom“... -
Page 43: Puissance Partielle Manuelle (P)
Dans le mode flash TTL, le réglage de la valeur ISO sur le flash est seulement 7.1 Procédure de réglage pour les fonctions spéciales nécessaire pour l’affichage exact de la portée de l’éclair et non pas pour la La première touche enfoncée active tout d’abord l’éclairage de l’é- fonction ! cran. -
Page 44: Fonction Bip (Beep)
7.2 Fonction bip (Beep) • Appuyez sur la touche „Set“ (Réglage) et confirmez ainsi la sélection de la fonction spéciale. L’utilisateur peut souhaiter que certaines fonctions de l’appareil du flash soit signalées par un bip sonore. Le photographe peut ainsi concentrer toute son •... -
Page 45: Mode Zoom Étendu (Zoom Ext)
La série d’expositions au flash est désactivée lorsque „FB 0 „ s’affiche à • Lorsque „Ext ON“ apparaît sur l’écran, le mode zoom étendu est activé. l’écran. • Lorsque „Ext OFF“ apparaît sur l’écran, le mode zoom étendu est désacti- •... -
Page 46: Commutation Mètres - Pieds (M / Ft)
Procédure de réglage : 7.7 Réflecteur secondaire Le réflecteur secondaire permet l'éclairage frontal dans les situations de • Appuyez à plusieurs reprises sur la touche „SEL“ jusqu’à ce que „Select“ luminosité indirecte lorsque le réflecteur principal est orienté vers le côté ou (Sélectionner) apparaisse sur l’écran. -
Page 47: Coupure Automatique Du Flash (Veille)
Lorsque le flash fonctionne comme un flash maître dans le système Procédure de réglage : remote sans fil Metz, le déclenchement de la lumière pilote déclenche également la lumière pilote du flash esclave (voir 21.4). • Appuyez à plusieurs reprises sur la touche „SEL“ jusqu’à ce que „Select“... -
Page 48: Verrouillage Du Clavier (Keylock)
• Appuyez sur la touche „Return“ . L’écran revient à l’affichage normal. - Lorsque „KEYLOCK ON?“ (Verrouillage clavier actif ?) s’affiche à l’écran, Si vous n’appuyez pas sur la touche „Return“ , l’écran revient automati- le verrouillage du clavier sera activé. quement à... -
Page 49: Diffuseur Grand-Angle
sans CPU, la position du zoom du réflecteur principal doit être adaptée 9. Diffuseur grand-angle manuellement. „M-Zoom“ s’affiche alors à l’écran. Procédure de réglage voir Le diffuseur grand-angle permet de couvrir des focales d’objectifs à partir 6.3. de 18 mm (film de petit format). Si vous utilisez un objectif zoom et n’avez pas absolument besoin de Retirez vers l’avant jusqu’en butée le diffuseur grand-angle du réflecteur... -
Page 50: Éclairage Indirect Au Flash Avec Carte-Réflecteur
10.2 Éclairage indirect au flash avec carte-réflecteur de parallaxe, le réflecteur principal est orientable vers le bas d’un angle de -7°. Pour l’abaisser, appuyez sur le bouton de déverrouillage du réflecteur L’éclairage indirect avec carte-réflecteur intégrée permet de générer des puis basculez ce dernier vers le bas. -
Page 51: Témoin De Disponibilité Du Flash (16)
Le réglage d’une valeur de correction peut entraîner la modification de la vitesse de synchronisation choisie par l’appareil dépend alors du mode portée affichée sur l’écran du flash et son adaptation à la valeur de correc- sélectionné sur l’appareil, du niveau de l’éclairage ambiant et de la distance tion (suivant le type d’appareil photo) ! Réglage voir 6.4. -
Page 52: Signalisations Dans Le Viseur
flash et si le témoin de bonne exposition clignote dans le viseur, l’écran du médian de la portée affichée pour laisser à l’automatisme d’exposition une flash affiche passagèrement la valeur de sous-exposition entre -0,3 IL à -3,0 latitude suffisante pour doser la lumière. La distance minimale flash-sujet à IL par 1/3 IL. -
Page 53: Dépassement De La Capacité D'affichage
16.3 Dépassement de la capacité d’affichage 17. Mémoire des valeurs mesurées d’exposition au flash Le flash peut afficher une portée maximale de 199 m ou 199 ft. Pour des Certains appareils du groupe E (voir tableau 1) disposent d’une mémoire des valeurs élevées de sensibilité... -
Page 54: Synchronisation Sur Le 2Ème Rideau (Mode Rear)
18.2 Synchronisation sur le 2ème rideau (mode REAR) Le réglage de la synchronisation en vitesse lente (SLOW) a lieu sur l’appareil photo (voir le mode d’emploi de l’appareil photo) ! Utilisez Certains appareils photo offrent la possibilité de synchroniser sur le 2ème un trépied pour éviter le bougé... -
Page 55: Pré-Éclairs Réducteurs D'yeux Rouges
19. Pré-éclairs réducteurs d’yeux rouges que l’illuminateur AF interne au reflex. L’illuminateur AF à plusieurs zones du flash n’est alors pas activé (par ex. appareils compacts ; L’ „effet des yeux rouges „ se présente toujours lorsque la personne photo- voir le mode d’emploi de l’appareil photo) ! graphiée regarde plus ou moins directement en direction de l’appareil photo, Les objectifs zooms peu lumineux (petite ouverture maximale) peuvent, en... -
Page 56: Réglage Et Désactivation Du Mode Remote
• Sélectionnez l’option de menu „Remote“ avec les touches UP 21.3 Réglage sur le flash esclave DOWN . L’option de menu sélectionnée est alors mise en surbrillance. • Appuyez sur la touche „Para“ pour sélectionner, les uns après les autres, les réglages pour la sélection du groupe esclave „Group“... -
Page 57: Maintenance Et Entretien
• Le bloc d'alimentation raccordé au mecablitz n'est pas autorisé. Veuillez saire de mettre le flash en marche pendant 10 minutes env. à intervalles de utiliser exclusivement un bloc d'alimentation Metz P76. trois mois environ. La charge des piles ou accus doit être suffisante pour que le témoin de recyclage s’allume au plus tard 1 minute après la mise en mar-... - Page 58 Un symbole de pile s'affiche à l'écran. déclenche pas d’éclair. • Un bloc d'alimentation Metz P76 est connecté au mecablitz et des piles se trou- • Le réflecteur principal est en position normale ou orienté vers le bas vent dans le compartiment à piles du mecablitz. Ôter les piles du mecablitz.
-
Page 59: Caractéristiques Techniques
* env. 5 s avec des piles alcalines au manganèse haute performance mission numérique des données, par ex. avec les appareils photo du grou- * env. 2,5 s avec le Power-Pack P76 de Metz (accessoire spécial) pe A. (à chaque fois à pleine puissance lumineuse) -
Page 60: Accessoires En Option
Iluminación: 25. Accessoires en option Reflector principal a partir de 24 mm (pequeño formato 24 x 36) Nous déclinons toute responsabilité pour le mauvais fonctionnement Reflector principal con difusor de gran angular a partir de 18 mm et l’endommagement du flash dus à l’utilisation d’accessoires d’autres (pequeño formato 24 x 36) constructeurs ! Segundo reflector a partir de 35 mm (pequeño formato 24 x 36) - Page 61 Elimination des batteries Ne pas jeter les batteries dans les ordures ménagères. Veuillez rendre vos batteries usées là où elles sont éventuellement reprises dans votre pays. Veillez à ne rendre que des batteries/accus déchargés. En règle générale, les batteries/accus sont déchargés lorsque l’appareil qu’elles alimentaient : —...
- Page 62 1. Veiligheidsinstructies ......... . . 63 10.2 Indirect flitsen met de reflecterende kaart .
-
Page 63: Veiligheidsinstructies
• Uit verbruikte batterijen kan loog lekken, wat beschadiging van de con- tactpunten tot gevolg heeft. Haal daarom verbruikte batterijen altijd uit Hartelijk dank voor uw beslissing om een product van Metz aan te schaffen. het apparaat. Wij verheugen ons, u als klant te mogen begroeten. -
Page 64: Dedicated Flitsfuncties
2. Dedicated flitsfuncties Cameragroepen Dedicated flitsfuncties A B C D E Dedicated flitsfuncties zijn speciaal op het camerasysteem ingestelde flitsfunc- • • • • • Aanduiding van flitsparaatheid in de zoeker, c.q. monitor van ties. Afhankelijk van het type camera worden daarbij verschillende flitsfunc- de camera ties ondersteund. -
Page 65: Flitser Gereedmaken
In het kader van deze gebruiksaanwijzing is het niet mogelijk, alle • 4 Nikkel-metaal-hydride accu’s 1,2 V, type HR6 (AA / Penlight) deze heb- cameramodellen met hun individuele flitsfuncties gedetailleerd te ben een duidelijk hogere capaciteit dan de NiCd-accu en zijn minder bezwaarlijk voor het milieu omdat ze geen cadmium bevatten. -
Page 66: In- En Uitschakelen Van De Flitser
3.3 In- en uitschakelen van de flitser • na het uitschakelen van het belichtingsmeetsysteem van de camera … De flitser moet via zijn hoofdschakelaar ingeschakeld worden. In de stand … naar de stand-by-functie (Auto-OFF) omschakelt om energie te sparen en ‘ON’... -
Page 67: Het Instellen Van De Flitsfuncties
5.1 Het instellen van de flitsfuncties 5.2 TTL-flitsen • Druk zo vak op de toets ‘Mode’, dat in het display ‘Mode’ wordt aangege- Bij TTL-flitsen bereikt u op de eenvoudigste manier zeer goede flitsopnamen. ven. De volgende functies staan ter beschikking: In deze functie wordt de belichtingsmeting door een sensor in de camera uit- gevoerd. -
Page 68: Ttl-Invulflitsen
gebruiksaanwijzing van uw camera). Het instellen: Afhankelijk van het type camera wordt door de flitser, bij de instelling van de • Druk zo vaak op de toets ‘Mode’, dat in het display ‘Mode’ aangegeven staat. functie TTL in het menu ‘Mode’, automatisch de standaard TTL-, D-TTL, c.q. •... -
Page 69: Automatisch Flitsenfunctie A
• De instelling vindt op de flitser plaats. • Stel met de toetsen UP en DOWN u de functie in. De geselec- • Aanduiding op de flitser na het opslaan: teerd functie verschijnt dan tegen een balkje. De instelling treedt onmiddel- lijk in werking. -
Page 70: Stroboscopisch Flitsen
De instelling treedt onmiddellijk in werking. bij maximaal mogelijke, met de hand ingestelde deelvermogen wordt dan automatisch aangepast. • Druk op de toets ‘Return’ . Het display schakelt naar de normale weer- gave terug. Als u niet op de toets ‘Return’ drukt, schakelt het display Flitsfrequentie (f) bij stroboscopisch flitsen na ong. -
Page 71: Flitsparameters (Menu 'Parameter')
In de stroboscopisch-flitsenfunctie worden geen diafragma- en met de hand op de flitser worden ingesteld. ISO–waarden in het display aangegeven! Als de hulpreflector • Druk zo vaak op de toets ‘Para’ (parameter), dat in het display de gewen- ingeschakeld is, is geen stroboscoopfunctie mogelijk. ste flitsparameter (zie hieronder) wordt aangegeven. -
Page 72: Stand Van De Hoofdreflector (Zoom)
geven wordt. 6.4 Correcties op de flitsbelichting (EV) Bij grote helderheidsverschillen tussen onderwerp en achtergrond kan het • Stel met de toetsen PLUS / MINUS de gewenste diafragmawaarde in. De nodig zijn een met de hand in te stellen correctie op de flitsbelichting (EV) uit instelling treedt onmiddellijk in. -
Page 73: Met De Hand In Te Stellen Deelvermogen (P)
6.6 Met de hand in te stellen deelvermogen (P) • Druk zo vaak op de toets ‘SEL’, dat in het display ‘Select’ wordt aangege- ven. In de manual flitsfunctie en de stroboscopisch-flitsenfunctie is het flitsvermogen door het met de hand (manual) instellen van een deelvermogen •... -
Page 74: Flitsbelichtingstrapje (Fb)
optische statusaanduidingen! weergave terugschakelt. Als u niet op de toets ‘Return’ drukt, schakelt het display na ong. 5 sec. naar de normale weergave terug. De Beep-functie geeft akoestisch het bereiken van de flitsparaatheid, de cor- recte belichting of een fout in de bediening aan. 7.3 Flitsbelichtingstrapje (FB) Akoestische melding na het inschakelen van de flitser: In de flitsfuncties TTL en automatisch-flitsen A kan een flitsbelichtingstrapje... -
Page 75: Extended-Zoomfunctie (Zoom Ext)
gedeactiveerd. De aanduiding ‘FB’ in het display dooft. • Met de toetsen UP en DOWN de gewenste instelling uitvoeren. De instelling treedt onmiddellijk in werking. Bij het instellen van het flitsbelichtingstrapje wordt de correctiewaarde altijd positief aangegeven! • Druk zo vaak op de toets ‘Return’ , dat het display naar de normale weergave terug schakelt. -
Page 76: Schakelen Tussen Meter En Feet (M / Ft)
7.6 Schakelen tussen meter en feet (m / ft) • Kies met de toetsen UP en DOWN het item uit. Het geselecteerde item wordt tegen een donker balkje getoond. De aanduiding van de reikwijdte in het display van de flitser kan naar keuze in meters m of in feet ft plaatsvinden. -
Page 77: Automatische Uitschakeling (Standby)
Als de flitser als master in het draadloos remote-systeem werkt, wordt • Druk op de toets ‘Set’ om uw keuze van deze extra functie te bevestigen. tegelijk met het ontsteken van zijn instellicht dat van de slaafflitser(s) • Stel met de toetsen UP en DOWN de gewenste instelling in. -
Page 78: Motorisch Gestuurde Zoomreflector
het display na ong 5 sec. terug naar de normale weergave. Aanpassing van de zoomreflector met de hand - Bij de aanduiding ‘KEYLOCK ON?’ wordt de toetsenvergrendeling geac- Als de flitser gebruikt wordt met een camera uit groep A of op een camera tiveerd;... -
Page 79: Groothoekdiffusor
9. Groothoekdiffusor 10.2 Indirect flitsen met de reflecterende kaart Door indirect te flitsen met de ingebouwde reflectorkaart kunnen bij per- Met de groothoekdiffusor wordt de verlichtingshoek van de flitser aange- sonen als volgt spitslichtjes in de ogen worden verkregen: past aan objectieven met een brandpuntsafstand vanaf 18 mm (kleinbeeld- •... -
Page 80: Met De Hand In Te Stellen Correcties Op De Flitsbelichting
Is de hoofdreflector naar beneden gezwenkt dan wordt dat in het Het met de hand corrigeren van de flitsbelichting kan bij de TTL-flits- display aangegeven met "TILT". functie alleen dan plaatsvinden, als de camera die functie ook onder- steunt (zie de gebruiksaanwijzing van uw camera)! Als de camera die Bij opnamen in het dichtbijbereik moet u er op letten, dat een bepaalde functie niet ondersteunt blijft de ingestelde correctiewaarde buiten minimumafstand aangehouden moet worden om overbelichting te vermijden. -
Page 81: Aanduiding Van De Belichtingscontrole
wijzing van uw camera en 18) worden toegepast. als het flitssymbool in de zoeker van de camera knippert, de belichting tóch correct is, verschijnt er geen aanduiding in het LC-display van de flitser! Bij camera’s met een centraalsluiter (zie de gebruiksaanwijzing van uw camera) en bij de FP synchronisatie bij korte belichtingstijden (zie Om überhaupt een aanduiding van onderbelichting te geven, moet op 18.4) vindt geen automatische omschakeling naar de flitssynchronisa-... -
Page 82: Automatisch Aanpassen Van De Aanduiding Van De Flitsreikwijdte
In de manual flitsfunctie M wordt de afstand tot het onderwerp aangegeven 16.4 Error-aanduiding ‘FEE’ in het LC-display van de flitser die voor een correcte belichting moet worden aangehouden. De aanpassing Bij sommige camera’s, c.q. camerafuncties (bijv. Program P, Vari-programm- aan de betreffende opnamesituatie kan bijv. -
Page 83: Flitssynchronisatie
lichting op een bepaald onderwerpsdetail afgestemd moet worden, dat niet de belichtingstijd ontstoken, onmiddellijk vóór de sluiter begint dicht te gaan. persé identiek aan het hoofdonderwerp hoeft te zijn. Dit is vooral een voordeel bij opnamen met langere belichtingstijden (langer dan bijv. -
Page 84: Automatische Fp-Synchronisatie Bij Korte Belichtingstijden
18.4 Automatische FP-synchronisatie bij korte belichtingstijden Bij sommige camera’s ondersteunt de functie van flitsen vooraf alleen de in de camera ingebouwde flitser, c.q. een schijnwerper in de Sommige camera’s uit groep E (bijv. D2Hs en D200) ondersteunen de auto- camerabody. Het instellen van deze functie moet dan op de camera matische FP-synchronisatie bij korte belichtingstijden (zie de gebruiksaanwij- gebeuren (zie de gebruiksaanwijzing van uw camera)! Bij gebruik zing van uw camera). -
Page 85: Instellen En Uitschakelen Van De Remote-Functie
De slaafflitser(s) wordt (-en) draadloos door de hulpreflector van de master- is de masterflitser, c.q. de groep gedeactiveerd. flitser draadloos op afstand ontstoken. Het licht van de hulpreflector draagt Als de masterflitser gedeactiveerd is heeft deze alleen een sturende niet bij aan de belichting van de opname. functie en draagt hij met zijn licht zelf niet bij aan de belichting. -
Page 86: Onderhoud En Verzorging
Firmware-update). In het display verschijnt de reikwijdte niet Nadere informaties vindt u in het internet op de Metz-homepage: www.metz.de • De hoofdreflector staat niet in de normale stand. • Op de flitser staat de remote-functie ingesteld. - Page 87 In het display verschijnt een batterijsymbool • De hoofdreflector staat in zijn normale stand of hij is naar beneden • Op de mecablitz is een Metz Power Pack P76 aangesloten en in het bat- gezwenkt. terijvak van de mecablitz bevinden zich batterijen. Haal deze batterijen uit De hulpreflector flitst hoewel hij is uitgeschakeld.
-
Page 88: Technische Gegevens
Aantallen flitsen: wordt het meetsysteem van de camera, c.q. van de flitser beïnvloed. Stel • Ong. 180 met Metz NiMH accupak 1600mAh met de hand een positieve correctie op de flitsbelichting van bijv. +1 EV in. • Ong. 180 met super-alkalimangaanbatterijen De opnamen zijn te licht. - Page 89 Verlichtingshoek 25. Bijzondere toebehoren Hoofdreflector vanaf 24 mm (kleinbeeldformaat 24 x 36 mm) Voor foute werking van en schades aan de mecablitz, veroorzaakt ... met groothoekdiffusor vanaf 18 mm (kleinbeeldformaat 24 x 36 mm) door het gebruik van accessoires van andere fabrikanten, zijn wij niet Hulpreflector vanaf 35 mm (kleinbeeldformaat 24 x 36 mm) aansprakelijk.
- Page 90 1. Safety instructions ..........91 10.2 Bounce flash with a reflector card .
-
Page 91: Safety Instructions
• Never recharge dry cell batteries! • Do not expose the flash unit or battery charger to dripping or splashing Thank you for purchasing a Metz product. We are happy to welcome you as water such as rain! a customer. -
Page 92: Dedicated Flash Functions
2. Dedicated flash functions Camera Group Dedicated Flash Functions A B C D E Dedicated flash functions are flash functions that have been specially adap- • • • • • Flash-ready indicator in camera viewfinder/camera display ted to a given camera system. Depending on the type of camera, different •... -
Page 93: Preparing The Flash Unit For Use
with a CPU (i.e., lenses without auto focus mode), results in certain • 4 lithium batteries 1.5V, type IEC FR6 L91 (size AA). Maintenance-free functional limitations. high-capacity power source with a low self-discharge rate. • Power Pack P76 with connecting cable V58-50 (optional accessory) 3. -
Page 94: Power Pack P76 (Optional Accessory)
3.4 Power Pack P76 (optional accessory) If necessary, the Auto OFF function can be set to occur after 1 minute of inac- tivity, or can be deactivated (see 7.9). If a battery-operated flash does not meet your needs in terms of number of flashes and recycling times, a Power Pack P76 (optional) can be connected to 4. -
Page 95: Ttl Flash Mode
• Press the „Return“ button , and the display changes back to the normal Setting procedure: view. If the „Return“ button is not pressed, the display will change • Press the „Mode“ button until „Mode“ flashes on the LC display. back to the normal view after about 5 seconds. -
Page 96: Ttl Fill-In Flash Mode
To test the TTL function with analog cameras, a roll of film has to be in • No extra settings are necessary on the flash unit, nor is there any display the camera. Please note whether there are limitations for your camera for this mode. -
Page 97: Automatic Fill-In Flash Mode
The maximum range is shown on the LC display. The shortest shot distance is to the normal view after about 5 seconds. approximately 10% of the maximum distance range. The subject should be Set partial light output: located within the middle third of the distance range shown on the LC display •... -
Page 98: Flash Parameters (Parameter Menu)
Strobe number of flashes (N) • Press the „Return“ button to change the LC display back to the normal view. If the „Return“ button is not pressed, the display will change back In strobe mode, the number of flashes per shot (N) can be selected. to the normal view after about 5 seconds. -
Page 99: Aperture (F)
Press the „Para“ button (Parameters) until the desired flash parameter (see view. If the „Return“ button is not pressed, the display will change back below) appears on the LC display. to the normal view after about 5 seconds. The following parameters are available: During digital data transfer between the camera and flash unit, inter- mediate values are also adjusted. -
Page 100: Light Sensitivity (Iso)
• Set the desired EV value using the PLUS/MINUS buttons. The setting takes Setting procedure: effect immediately. • Press the „Para“ button (Parameters) until „P“ appears on the LC display. • Press the „Return“ button to change the LC display back to the normal •... -
Page 101: Beep Function (Beep)
The following special functions are available, depending on the mode and flash on indicates that the flash unit is ready. camera model: Beep signals after taking a photograph: • A short (about two seconds) uninterrupted beep signal directly after a pic- TTL TTL-BL A ture is taken indicates that the shot was exposed correctly and the flash is ready again. -
Page 102: Extended Zoom Mode (Zoom Ext)
the display. The possible correction values range from 1/3 to 3 apertures in Flash bracketing in automatic flash mode A one-third aperture increments. The type of camera is not important for a flash bracketing series in automatic Setting procedure: flash mode A. •... -
Page 103: Cordless Remote Mode (Remote)
7.5 Cordless remote mode (Remote) mal state. If the „Return“ button is not pressed, the display is automati- cally reset to its normal view after about 5 seconds. • When „Remote OFF“ appears, the cordless remote mode is deactivated. • When „Remote Master“ appears, the flash unit is operating as a guiding 7.7 Secondary reflector master flash unit on the camera. -
Page 104: Auto Off Function (Standby)
• The modelling light is activated when „ML ON“ is displayed. reactivated merely by depressing any of the buttons or by touching the shut- ter release (wake-up function). • The modelling light is deactivated when „ML OFF“ is displayed. The flash unit should always be turned off by the main switch if it is not Setting procedure: going to be used for an extended period! -
Page 105: Motor Zoom Reflector
When using the wide-angle diffuser the main reflector is auto- is activated, a symbol appears on the display above the two middle matically moved to the 24 mm position! Because of the wide-angle buttons. diffuser, 18 mm appears on the display (see 9). Activating the Key-Lock function: Automatic zoom adjustment •... -
Page 106: Wide-Angle Diffuser
9. Wide-angle diffuser from the reflector head • Hold the reflector card and insert the wide-angle diffuser into the With the wide angle diffuser , focal lengths of 18 mm or more can be illu- reflector head. minated (35 mm format). Pull the wide-angle diffuser out from the main reflector as far as it will... -
Page 107: Manual Flash Exposure Corrections
that the flash light is not shaded by the lens. 11. Flash readiness indication 10.5 Manual flash exposure corrections When the flash capacitor is charged, the flash readiness symbol lights up on the flash unit, indicating that the flash is ready to fire. This means that The auto flash exposure mode of the flash unit, as of most cameras, is adju- flash light can be used for the next shot. -
Page 108: Correct Exposure Indication
13. Correct exposure indication 15. Displays in the camera viewfinder The correct exposure indication „OK“ only lights up if the shot was cor- Examples of displays in the camera viewfinder: rectly exposed in TTL flash mode (3D-TTL, D–TTL, i-TTL, etc.) or automatic A green arrow symbol lights up: flash mode. -
Page 109: Automatic Adjustment Of The Flash Range Indication
according to the chosen setting (see 7.6). There is no flash range indi- 16. 5 Guide number indication when using lenses without CPU cation in remote mode or when the main reflector is swivelled or til- Lenses without CPU (i.e., without electronic data transmission) do not transmit ted. -
Page 110: Flash Synchronisation
For more detailed information on adjustments and handling, refer to 18.3 Slow synchronisation (SLOW) the camera’s operating instructions. A slow exposure (SLOW) gives added prominence to the image background at lower ambient light levels. This is achieved by adjusting the shutter speed 18. -
Page 111: Preflash Function For Red-Eye Reduction
camera’s operating instructions). „FP“ will then also appear on the flash unit’s beam. In this case, the multi-zone AF measuring beam of the flash display panel, for example. unit is not activated (as in the case of compact cameras; see the camera’s operating instructions). -
Page 112: Settings On The Master Flash Unit
(Firmware Update). 21.3 Settings on the slave flash unit For more information, visit the Metz homepage at www.metz.de. • Use the „Para“ key to select, in succession, the settings for choice of slave... -
Page 113: Reset
A battery symbol appears on the display • There is a Metz Power Pack P76 connected to the mecablitz and there are 23. Troubleshooting batteries in the battery compartment of the mecablitz. Remove batteries Should the flash unit fail to function properly or meaningless content from the mecablitz. - Page 114 • The camera is equipped with a lens without CPU. Flash unit cannot be set for wireless remote operation as the master flash unit. The aperture setting on the flash unit is not automatically adjusted to that of the lens. •...
-
Page 115: Technical Data
Synchronisation: low-voltage ignition Number of flashes (at full light output): * Approx. 180 with NiMH batteries 1600 mAh * Approx. 180 with high-capacity alkaline manganese batteries * Approx. 430 with Metz Power Pack P76 (special accessory) (at full light output) -
Page 116: Optional Accessories
25. Optional accessories Disposal of batteries Do not dispose of spent batteries with domestic rubbish. We accept no liability for malfunctions of or damage to the flash unit caused by the use of accessories of other manufacturers. Please return spent batteries to collecting points should they exist in your country! •... - Page 117 1. Per la vostra sicurezza ........118 10.2 Lampo riflesso con pannello riflettente .
-
Page 118: Per La Vostra Sicurezza
• Non gettare nel fuoco le batterie o le pile esaurite! • Un’eventuale fuoriuscita di acido dalle batterie esaurite può provocare Vi ringraziamo vivamente per aver acquistato un prodotto Metz e siamo lieti danni al flash. Rimuovere subito le batterie esaurite dall’apparecchio! di potervi accogliere come nostri Clienti. -
Page 119: Funzioni Flash Dedicate
2 Funzioni flash dedicate Gruppo fotocamere Funzioni flash dedicate Le funzioni flash dedicate sono funzioni messe a punto specificatamente per i A B C D E diversi sistemi di camera. Le funzioni del flash supportate dipendono dal tipo • • • • • Indicazione di stato di carica del flash nel mirino/display del- di camera. -
Page 120: Preparazione Del Flash
In questo manuale non è possibile descrivere dettagliatamente le sin- • 4 batterie al nichel metallidruro 1,2 V, tipo HR6 (AA/Mignon), capacità gole funzioni dedicate ai rispettivi tipi di fotocamere, pertanto vi inviti- nettamente superiore rispetto alle batterie NiCd e maggiore compatibilità amo a consultare le avvertenze riportate nel libretto d’istruzioni della ambientale, poiché... -
Page 121: Accensione E Spegnimento Del Flash
3.3 Accensione e spegnimento del flash • dopo lo spegnimento del sistema di misurazione dell’esposizione della camera... Il flash si accende tramite l’interruttore principale . Quando l’interruttore è posizionato su „ON“ il flash è acceso..commuti su stand-by (Auto-OFF) per risparmiare energia ed evitare che le sorgenti d’alimentazione si scarichino inutilmente. -
Page 122: Procedura Per L'impostazione Delle Modalità Flash
5.1 Procedura per l’impostazione delle modalità del flash 5.2 Modo flash TTL • Premete il tasto „Mode“ finché sul display non comparirà „Mode“. Con il modo flash TTL potete ottenere con facilità delle buone riprese. La Possono essere selezionate le seguenti modalità: misurazione dell’esposizione nel Modo TTL viene effettuata da un sensore incorporato nella camera. -
Page 123: Modo Lampo Di Schiarita Ttl (Ttl Bl)
alla situazione di ripresa (vedi istruzioni d’uso della camera). Procedura per l’impostazione: In fase di impostazione della modalità TTL nel „Menu Mode“, il lampeggiato- • Premete il tasto „Mode“ finché sul display non comparirà „Mode“. re attiverà automaticamente, a seconda del tipo della camera, il modo flash •... -
Page 124: Modo Flash Automatico
• L’impostazione avviene sul flash. • Impostate il modo flash con i tasti UP e DOWN . La modalità del • Indicazione sul flash dopo la memorizzazione: flash selezionata viene dunque evidenziata rendendo l’impostazione attiva da subito. Gruppo D: • Premete il tasto „Return“ . -
Page 125: Modo Lampo Stroboscopio
„P“ per la potenza ridotta. Numero lampi stroboscopio (N) • Impostate il valore desiderato (1/1 - 1/256) con i tasti PIÙ/MENO. Con il modo flash Stroboscopico è possibile impostare il numero di lampi (N) L’impostazione è immediatamente attiva. per scatto. •... -
Page 126: Parametri Del Flash (Menu Parametri)
P = potenza ridotta manuale). essere modificati. • Impostate il valore desiderato con i tasti PIÙ/MENO. L’impostazione è Se si utilizza una camera munita di obiettivo senza CPU (ad es. obiet- immediatamente attiva. tivo senza autofocus), è necessario impostare a mano i parametri flash per il diaframma (F) e il focale dell’obiettivo (Zoom)! •... -
Page 127: Posizione Della Parabola (Zoom)
Procedura per l’impostazione: 6.4 Correzione dell’esposizione (EV) In caso di forte contrasto tra soggetto e sfondo immagine può essere neces- • Premete il tasto „Para“ (Parametri) più volte finché sul display non compare „F“. saria una correzione manuale dell’esposizione flash (EV). È possibile impo- •... -
Page 128: Potenza Ridotta Manuale (P)
6.6 Potenza ridotta manuale (P) e DOWN . Il punto del menu viene evidenziato in scuro. Nel modo flash manuale e nel modo Stroboscopico è possibile Le seguenti funzioni speciali sono disponibili in base al modo flash impostato adattare la potenza luminosa alle condizioni di ripresa impostando una e al tipo di camera in uso: potenza ridotta manuale (P). -
Page 129: Serie Di Esposizioni Flash (Fb)
Segnale acustico dopo l’accensione del flash: 7.3 Serie di esposizioni flash (FB) Nei modi flash e automatico è possibile effettuare una serie di • Un breve segnale acustico continuo (bip di circa 2 secondi) dopo l’accen- esposizioni flash (Flash-Bracketing FB). Una serie di esposizioni comprende sione indica lo stato di lampo pronto dell’apparecchio. -
Page 130: Modo Zoom Esteso (Zoom Ext)
Serie di esposizioni flash nel modo flash TTL Dopo aver attivato il modo esteso sul display si visualizzerà „E-Zoom“ di fianco alla focale. È possibile realizzare una serie di esposizioni flash nel modo TTL solo se la camera supporta l’impostazione di una correzione manuale dell’esposizione Per motivi di sistema il modo zoom esteso è... -
Page 131: Parabola Ausiliaria (Sr)
• Selezionate il punto del menu „m/ft“ con i tasti UP e DOWN . Il punto • Premete il tasto „Set“ e confermate così la selezione della funzione specia- del menu verrà evidenziato in scuro. • Premete il tasto „Set“ e confermate così la selezione della funzione specia- •... -
Page 132: Spegnimento Automatico Dell'apparecchio (Standby)
Se il flash lavora come controller nel sistema con controllo a distanza, • Effettuate l’impostazione desiderata con i tasti UP e DOWN . con l’emissione della luce pilota verrà emessa anche la luce pilota dei L’impostazione è immediatamente attiva. flash slave (vedi il punto 21.4). •... -
Page 133: Parabola Zoom Motorizzata
- Quando si visualizza „KEYLOCK OFF?“ il blocco dei tasti viene disattiva- l’impostazione è descritta al punto 6.3. Se utilizzate un obiettivo zoom e non avete sempre necessariamente Rimozione del blocco dei tasti bisogno del numero guida completo e del campo d’utilizzo del flash potete lasciare la posizione della parabola principale sulla focale Premendo un qualsiasi tasto compare sul display „UNLOCK? Press these iniziale dell’obiettivo zoom. -
Page 134: Tecniche Lampo
Per far rientrare il diffusore grandangolare XX piegarlo di 90° verso l’alto e aria dal menu Select (vedi il punto 7.7). spingerlo del tutto. L’impiego della parabola ausiliaria è sensato, e possibile, solo con lampo riflesso e parabola inclinata. 10. Tecniche lampo Se la parabola principale non è... -
Page 135: Correzioni Manuali Dell'esposizione Flash
10.5 Correzioni manuali dell’esposizione flash 11. Indicazione di stato del flash Il sistema di esposizione automatica del flash e della maggior parte delle Quando il condensatore flash è carico, sul flash si accende la spia di carica camere è regolato su un fattore di riflessione pari al 25% (il fattore medio di del flash per indicare che il flash è... -
Page 136: Indicazione Di Corretta Esposizione
ottenere la potenza piena del flash non selezionate tempi di otturazio- 15. Indicazioni sul mirino della camera ne più brevi di 1/125s. Esempi di indicazioni sul mirino della camera: Il simbolo flash verde si accende: 13. Indicazione di corretta esposizione Richiesta di utilizzo/accensione del flash. -
Page 137: Adattamento Automatico Dell'indicazione Campo D'utilizzo
di ripresa è possibile, ad esempio, modificando l’apertura del diaframma ma massimo. sull’obiettivo e selezionando una potenza piena o una potenza ridotta „P“. Se la ghiera dei diaframmi non si trova sul numero di diaframma massimo, Il campo d’utilizzo può essere visualizzato a scelta in metri (m) o in compare sul display LC del flash o sulla camera l’indicazione d’errore „FEE“! piedi (ft), (vedi il punto 7.6). -
Page 138: Sincronizzazione Del Lampo
ne del sensore AF. Premendo il tasto AE-L/AF-L sulla fotocamera (questa Su alcune camere la funzione REAR non è possibile in determinati modi di definizione varia da tipo a tipo) il flash emette un lampo di prova. Nel miri- funzionamento (ad es. alcuni programmi „Vari“ o „Scene“ o riduzione „effet- no della fotocamera compare l’indicazione del valore di misurazione memo- to occhi rossi“). -
Page 139: Pre-Lampi Contro L'effetto „Occhi Rossi
Tuttavia, per cause naturali, con la sincronizzazione a tempi corti FP il nume- 20. Flash di misurazione multizone AF ro guida, e quindi anche il campo d’utilizzo del flash, verranno in parte limi- Non appena la luce dell’ambiente non è più sufficiente per una messa a fuo- tati considerevolmente! Fate pertanto attenzione all’indicazione del campo co automatica, la camera attiva nel lampeggiatore il flash di misurazione d’utilizzo sul display LC del flash! La sincronizzazione con tempi corti FP vie-... -
Page 140: Impostazione E Disattivazione Del Controllo A Distanza
gruppo può essere selezionato individualmente sul flash controller il modo • Nei modo flash TTL, con i tasti (-) e (+), si possono impostare dei valori di TTL o manuale M. correzione per l’esposizione da -3 EV a +3 EV in passaggi da un terzo. Nei modo flash M con i tasti (-) e (+) si imposta la potenza ridotta. -
Page 141: Cura E Manutenzione
Il display mostra il simbolo di una batteria energia sufficiente, la spia di carica del flash impiega non più di un minuto • Un Metz Power Pack P76 è collegato al mecablitz e sono presenti delle per accendersi. batterie nell'apposito alloggiamento del mecablitz. - Page 142 Il flash di misurazione AF del lampeggiatore non si attiva. Non è possibile impostare il modo flash di schiarita • Il flash non è carico. • Non ha avuto luogo lo scambio dati tra flash e fotocamera. Premere leg- • La fotocamera non lavora nel modo Single-AF (S-AF). germente lo scatto della fotocamera.
-
Page 143: Dati Tecnici
* Circa 180 con accumulatore NiMH 1600mAh * Circa 180 con batterie alcaline al manganese ad alte prestazioni * Circa 430 con Power-Pack Metz P76 (accessorio a richiesta) (sempre a potenza luminosa piena) Tempo di ricarica (sempre a potenza luminosa piena):... -
Page 144: Accessori Opzionali
Parabola ausiliaria, a partire da 35 mm (formato piccolo 24x36) l cattivo funzionamento e i danni eventualmente provocati al flash Orientamento e posizioni della parabola principale: dall’utilizzo di accessori non prodotti dalla Metz non sono coperti dal- la nostra garanzia! verso l’alto -7° 45° 60° 75° 90°... - Page 145 Smaltimento delle batterie Le batterie non vanno gettate insieme ai rifiuti domestici. Si prega di utilizzare un sistema di smaltimento adeguato, p. es. portandole al negozio dove le si è acquistate o ad un centro di raccolta apposito. Si prega di effettuare lo smaltimento soltanto di batterie scariche. Le batterie sono scariche, quando l’apparecchio, alimentato dalle stesse, - si spegne e segnala „batteria vuota“...
- Page 146 1. Indicaciones de seguridad ........147 10.2 Destellos indirectos con tarjeta reflectante .
-
Page 147: Indicaciones De Seguridad
Introducción contactos. Por lo tanto, deben retirarse siempre las pilas gastadas del aparato. Le agradecemos que se haya decidido por un producto Metz y nos complace • Las pilas secas no pueden recargarse. saludarle como usuario de nuestra marca. • No exponer el flash ni el cargador a gotas o salpicaduras de agua, por Como es natural, deseará... -
Page 148: Funciones Dedicadas Del Flash
2. Funciones dedicadas del flash Grupos de cámaras Funciones dedicadas del flash Las funciones dedicadas del flash son las que se adecuan de manera especi- A B C D E al al sistema de la cámara. Así, las funciones del flash serán compatibles •... -
Page 149: Preparación Del Flash
En el marco de estas instrucciones no es posible describir detallada- por ser recargables. mente todos los modelos de cámara y cada una de sus funciones de • 4 baterías de hidruro metálico de níquel de 1,2 V, tipo HR6 (AA/ flash dedicadas. -
Page 150: Conexión Y Desconexión Del Flash
3.3 Conexión y desconexión del flash ...pase al modo Standby (Auto-OFF) para ahorrar energía y proteger las fuentes de energía de descargas accidentales. La indicación de disposición El flash se conecta con el interruptor général . En la posición „ON“, el de disparo y los indicadores en la pantalla desaparecen. -
Page 151: Configuración De Los Modos Del Flash
5.1 Configuración de los modos del flash 5.2 Modo TTL • Pulsar la tecla „Mode“ hasta que aparezca „Mode“ en la pantalla. Con el modo TTL se consigue de forma sencilla una iluminación muy buena de las tomas con luz de flash. En este modo de funcionamiento, la exposici- Estos son los modos de funcionamiento que pueden seleccionarse: ón se regula por medio de un sensor integrado en la cámara. -
Page 152: Modo De Relleno Ttl (Ttl Bl)
Según el modelo de cámara, el flash activa automáticamente el modo TTL, de funcionamiento seleccionado aparece resaltado por una barra. El aju- DTTL o i-TTL estándar al seleccionar el modo TTL en el menú „Mode“ (consul- ste se aplica de forma inmediata. tar Tabla 1 y Tabla 2). -
Page 153: Modo Automático
• Este ajuste se realiza en el flash. 5.5 Modo de relleno automático Cuando se ajusta el modo de relleno automático con luz diurna, en el modo • Indicación en el flash después de memorizar: automático del flash se realiza una corrección de aprox. -1 EV a -2 EV Grupo E: de la exposición del flash (consultar 6.4 y 10.5). -
Page 154: Modo Estroboscópico
5.7 Modo estroboscópico Configuración: El modo estroboscópico es un modo de funcionamiento del flash manual. • Pulsar la tecla „Para“ (Parámetro) hasta que aparezca en la pantalla el Con este modo se disparan varios destellos durante una toma. Esto resulta parámetro de destello deseado (N o f). -
Page 155: Configuración De Los Parámetros Del Flash
Cuando se utiliza el flash con cámaras del grupo A (consultar Tabla 1) TTL TTL-BL A deben ajustarse los parámetros del flash manualmente. — — Cantidad de destellos estroboscópicos Si se utilizan cámaras de los grupos B, C, D y E, los parámetros del flash se —... -
Page 156: Corrección De La Exposición Del Flash (Ev)
seleccionar también valores intermedios. Con el modo de flash TTL, el ajuste • Ajustar el valor EV deseado con las teclas MÁS/MENOS. de la apertura en el flash sólo es necesario para indicar correctamente el El ajuste se aplica de forma inmediata. alcance, no para el funcionamiento. -
Page 157: Funciones Especiales (Menú Select)
• Pulsar la tecla „Return“ . La pantalla regresa a la indicación normal. Si TTL TTL-BL A no se pulsa la tecla „Return“ , la pantalla regresa automáticamente a la indicación normal aprox. 5 seg. después. Beep Beep Beep En el modo estroboscópico , la máxima potencia parcial seleccio- Remote Remote... -
Page 158: Horquillado De Flash (Fb)
Pitido tras la toma: valor de la corrección. Los valores de corrección pueden ir de 1/3 hasta 3 diafragmas en pasos de 1/3 de diafragma. • Un breve pitido continuado (aprox. 2 seg.) justo después de la toma indica que la iluminación es correcta y que el flash está preparado para disparar Configuración: de nuevo. -
Page 159: Modo De Zoom Extendido (Zoom Ext)
7.4 Modo de zoom extendido (Zoom Ext) 7.5 Modo remoto inalámbrico (Remote) Con el modo Extended-Zoom se reduce un nivel la distancia focal del reflec- • Si aparece „Remote OFF“ en la pantalla, el modo inalámbrico está desac- tor principal con respecto a la distancia focal del objetivo de la cámara. La tivado. -
Page 160: Segundo Reflector (Sr)
- Cuando aparece „m“, las distancias se indican en metros. 7.8 Luz de modelado (ML) Se trata de una secuencia de destellos estroboscópicos a alta frecuencia con - Cuando aparece „ft“, las distancias se indican en pies. una duración de aprox. 3 segundos, que produce la impresión de una ilumi- •... -
Page 161: Bloqueo Del Teclado (Keylock)
• después de desconectar el sistema fotométrico de la cámara, Con las cámaras analógicas que no son compatibles con el modo TTL, la función Wake-Up no puede activarse pulsando el disparador de la ...pase al modo Standby (Auto-OFF), a fin de ahorrar energía y proteger las cámara. -
Page 162: Reflector Con Zoom Motorizado
8. Reflector con zoom motorizado Ajuste manual de la posición del zoom con A-Zoom La posición de zoom del reflector principal también se puede modificar El zoom del reflector principal se puede ajustar a distancias focales de obje- cuando se utiliza el flash con una cámara que transmite los datos, por ejem- tivo a partir de 24 mm (pequeño formato 24 x 36). -
Page 163: Destellos Indirectos Con Segundo Reflector
tal se puede activar el segundo reflector en el menú Select (consultar 7.7) El segundo reflector no es compatible con los modos estroboscópico, de forma adicional. luz de modelado ML y modo remoto. El reflector adicional no se dispara si el principal está en su posición normal o inclinado hacia Al girar en vertical el reflector principal debe hacerse con un ángulo abajo. -
Page 164: Indicación De Disponibilidad Del Flash
ción que se puede utilizar también con el modo TTL. Consultar las instruccio- 12. Control automático de la sincronización del flash nes en el manual de la cámara. Según el tipo de cámara y el modo de funcionamiento de la misma, al apa- Motivo oscuro delante de un fondo claro: recer la indicación de disponibilidad de flash, la velocidad de obturación se Valor de corrección positivo (aprox. -
Page 165: Indicación De Subexposición En El Modo Ttl
destellos indirectos) y repetir la toma. Observar el indicador del alcance en Respecto a las indicaciones en el visor de la cámara, leer el manual la pantalla del flash (consultar 16). Para la indicación del control de la expo- de instrucciones de la cámara para saber de qué indicaciones dispo- sición en el visor de la cámara consultar también el punto 15. -
Page 166: Indicación De Error „Fee" En La Pantalla Del Flash
Para poder ajustar automáticamente la indicación del alcance, la Número guía Alcance = — — — — — — — — cámara debe estar equipada con un objetivo con CPU adecuado (con- Apertura sultar 6). Cuando el reflector no está en su posición normal, no se indica el 16.2 Ajuste manual de la indicación del alcance número guía. -
Page 167: Sincronización Normal
18. Sincronización del flash 18.3 Sincronización de velocidad lenta (SLOW) Con la sincronización de velocidad lenta SLOW, si la luminosidad ambiente 18.1 Sincronización normal es reducida, se puede resaltar más el fondo de la imagen. Esto se consigue En la sincronización normal, el flash se dispara al principio del tiempo de mediante velocidades de obturación en la cámara adaptadas a la luz obturación (sincronización con la primera cortinilla). -
Page 168: Predestellos Contra El „Efecto De Ojos Rojos
Debe recordarse que el número guía del flash depende también de la Para que la cámara pueda activar el destello de medición AF matrici- , debe ajustarse el modo de enfoque automático „Single-AF (S)“ velocidad de obturación cuando se utiliza la sincronización rápida FP: en la cámara y el flash debe mostrar la indicación de disponibilidad. -
Page 169: Configuración Del Flash Esclavo
21.1 Activación y desactivación del modo remoto 21.3 Configuración del flash esclavo • Pulsar la tecla „Sel“ hasta que aparezca „Select“ en la pantalla. • Con la tecla „Para“ seleccionar una tras otra la configuración del grupo esclavo „Group“, el canal remoto „Channel“ y la posición del reflector •... -
Page 170: Mantenimiento Y Cuidados
50 % de la carga disponible. En el funcionamiento a distan- cia inalámbrico, no es posible usar un indicador de consumo de la batería. En la pantalla aparece un símbolo de batería • En el mecablitz hay un Power Pack Metz P76 conectado, y en el comparti-... - Page 171 miento de las baterías hay baterías. Sacar las baterías del mecablitz. El modo de relleno BL no se puede ajustar. El destello de medición AF del flash no se activa. • No se produce transmisión de datos entre la cámara y el flash. Pulsar el •...
-
Page 172: Características Técnicas
* Aprox. 180 con pilas alcalino-manganesas de alta capacidad alcance indicado en la pantalla. * Aprox. 430 con Power-Pack P76 de Metz (accesorio opcional) No se pueden ajustar los parámetros de flash para la sensibilidad ISO y la Intervalo entre destellos (todos a plena potencia): apertura F en el flash. - Page 173 Por regla general, las baterías están descargadas cuando el aparato alimen- 25. Accesorios especiales tado por ellas Metz no asume ninguna garantía por funcionamientos erróneos o - se apaga y señala „baterías gastadas“ daños en el flash, causados al utilizar accesorios de otros fabricantes.
-
Page 174: Tabelle 3: Leitzahlen Bei Maximaler Lichtleistung (P 1/1)
Zoom 6/9° 8/10° 10/11° 12/12° 16/13° 20/14° 25/15° 32/16° 40/17° 50/18° 64/19° 80/20° 100/21° 125/22° 160/23° 200/24° 250/25° 320/26° 400/27° 500/28° 650/29° 800/30° 1000/31° 79 1250/32° 89 Tabelle 3: Leitzahlen bei maximaler Lichtleistung (P 1) 1600/33° 100 Tableau 3: Nombres-guides pour la puissance maximale (P 1) 2000/34°... -
Page 175: Tabelle 4: Blitzleuchtzahlen In Den Teillichtleistungsstufen
Teillichtleistung Blitzleuchtzeit (s) Leitzahl Leitzahl Niveaux de puissance Durée d’éclair (s) Nombre-guide Nombre-guide Deelvermogensstappen Flitsdur (s) Richtgetal Richtgetal Partial light output Flash duration Guide number Guide number Livello di potenza Durata del lampo Numero guida Numero guida Potencia parcial Duración de destello Número-guía Número-guía (P=Flash Power) ISO 100/50 mm... -
Page 176: Tabelle 5: Kameraverschlusszeiten Im Stroboskop-Betrieb
Blitzfrequenz Blitzanzahl Tabelle 5: Kameraverschlusszeiten im Stroboskop-Betrieb f(Hz) (Blitze/Sek.) Tableau 5:Vitesses d’obturation du reflex en mode stroboscope Nombre d’éclairs Tabel 5: Belichtingstijden bij de stroboscoopfunctie Fréquence f(Hz) Table 5: Camera shutter speeds in stroboscopic mode Aantal flitsen (éclairs/seconde) Tabella 5: Tempi di posa per il modo stroboscopico Flitsfrequentie Number of flashes Tabla 5: Velocidades de obturación en el funcionamiento... -
Page 177: Tabelle 6: Blitzfolgezeiten Und Blitzanzahl Bei Den Versch. Batterietype
Zoom Batterietyp Blitzfolgezeiten Blitzanzahl Type de pile/accu Temps de recyclage Nombre d’éclairs Type voeding Flitsvolgtijden Aantal flitsen Battery type Recycling times Number of flashes Tabelle 7: Maximale Leitzahlen* im HSS-Betrieb Tipo batterie Tempi di ricarica Numero ampi Tipo de pila Tiempo de secuencia de dest. - Page 178 Helfen Sie uns bitte, die Umwelt zu erhalten, in der wir leben. Il vostro prodotto Metz è stato progettato e realizzato con materi- Votre produit Metz a été conçu et fabriqué avec des matériaux et ali e componenti pregiati che possono essere riciclati e riutilizzati.
- Page 179 Hinweis: Opmerking: Avvertenza: In het kader de CE-markering werd Nell’ambito delle prove EMV per il Im Rahmen des CE-Zeichens wurde bei bij de EMV-test de correcte be-lich- segno CE è stata valutata la corretta der EMV-Prüfung die korrekte ting bepaald. esposizione.
- Page 180 Display Werkseinstellung (Reset) Display Mode Para Mode Para 5 sec. Mode-Menü* Parameter-Menü** Display Display Para — 1,0 . . . 45 E-TTL* M-Zoom 24..105 mm TTL-BL -3 ..+3 E-TTL-HSS* 1/1—1/256 6 . . . 6400 **abhängig vom Kameratyp und Blitzbetriebsart *abhängig vom Kameratyp 2 .
- Page 181 Select-Menü (Sonderfunktionen**) Display Gruppe B Display Gruppe A TTL +1 ON/OFF REAR ON/OFF Gruppe C Beep ON/OFF Bsp. für Displayanzeige des 58 AF-1: Remote Remote OFF/Master/Slave M (steht für Master) A TTL +1 2 / 3 EV 1/3 — 3 EV B TTL +2 1 / 3 EV MZoom 24 Standby...
- Page 182 Belichtungs o.k. Anzeige Exposition o.k. Belichting o.k.-aanduiding Exposure ok indicator Indicazione di corretta esposizione Indicación de exposición o.k. Entriegelungsknopf Hauptreflektor Bouton de déverrouillage pour réflecteur Hauptschalter Ontgrendelingsknop Hoofdreflector Interrupteur général Unlocking button for the main reflector Hoofdschakelaar Pulsante di sblocco della parabola principale Main switch Botón de desbloqueo del reflector principal Interruttore principale...
- Page 183 Reflektorkarte Carte-réflecteur Reflecterende kaart Reflector card Hauptreflektor Pannello riflettente Réflecteur principale Tarjeta reflectante Hoofdreflector Main-reflector Weitwinkelstreuscheibe Parabola principale Diffuseur grand angle Reflector principal Groothoekdiffusorschijf Wide-angle diffuser Diffusore grandangolare Difusor gran angular Sensor für Remote-Betrieb Batteriefachdeckel Senseur pour mode multi-flash sans fil) Couvercle du compartiment des piles AF-Messblitz Sensor voor draadloze afstandbediening...
- Page 184 Metz - Werke GmbH & Co KG • Postfach 1267 • D-90506 Zirndorf • info@metz.de • www.metz.de Consumer electronics Photoelectronics Plastics technology Industrial electronics 706 47 0029.A3 Metz - always first class.
Need help?
Do you have a question about the MECABLITZ 58 AF-1 N and is the answer not in the manual?
Questions and answers