Table of Contents
Advertisement
Quick Links
Advertisement
Table of Contents

Related Manuals for Kongsberg V series

Summary of Contents for Kongsberg V series
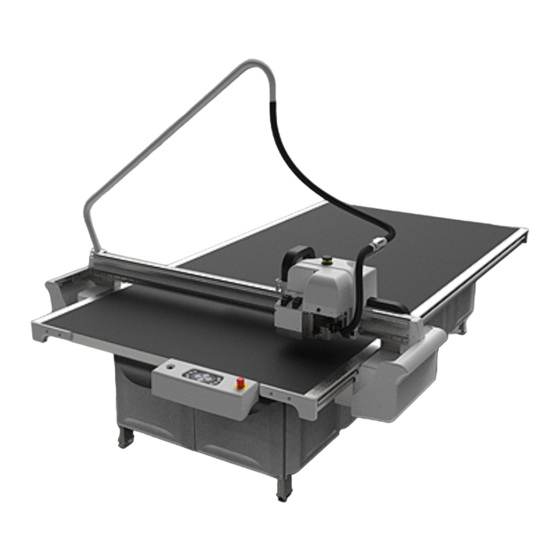
- Page 1 V-series User Manual 05 - 2015...
-
Page 2: Table Of Contents
V-series Contents 1. Preface......................................8 2. Change Record..................................... 9 3. Welcome......................................10 4. Using this manual..................................11 4.1 Main Sections...................................11 4.2 Name Styles and Symbols............................12 4.3 Pictures and Illustrations..............................12 4.4 Local Languages................................13 4.5 About XL-Guide dialogs............................... 13 5. Safety Regulations..................................14 5.1 Introduction..................................14 5.2 Responsibilities................................ - Page 3 Contents 6.3 Emergency Stop Button...............................26 6.4 DynaGuard..................................27 6.5 Operators Panel................................27 6.6 Pressurized Air system..............................29 6.7 Application programs available..........................30 7. XL-Guide......................................32 7.1 The Graphical User Interface............................. 32 7.2 The Main Menu................................32 7.3 The Main Toolbar functions............................34 7.4 File View....................................35 7.5 File View toolbar................................37 7.6 The Job View..................................38 7.7 Job View toolbar................................
- Page 4 V-series 10.1 Cutting Thick Materials.............................. 59 10.2 Hard Board Production.............................. 59 10.3 Multi Pass Creasing or Milling..........................60 10.4 Jobs including Reverse Score..........................61 10.5 Different Reference Point settings......................... 62 10.6 Change Tool in a Job..............................62 11. System Setup................................... 64 11.1 Introduction..................................
- Page 5 Contents 13.6 More....................................89 14. Job Layout....................................92 14.1 Introduction..................................92 14.2 Multi design layout functions...........................92 14.3 Job Layout Setup.................................93 15. Tool Configuration and Adjustment..........................95 15.1 Introduction..................................95 15.2 Adjust Active Tool.................................95 15.3 Lag Settings (for Rotating Tools)..........................96 15.4 Tool Height Calibration...............................98 15.5 Rotation Adjustment (for Rotating tools)......................98 15.6 Center Offset Adjustment............................99 15.7 Manual adjustment of Center Offset and angle.....................100...
- Page 6 V-series 16.10 i-cut camera................................130 17. Tool inserts....................................131 17.1 Crease Tool...................................131 17.2 Crease Tool, 60 mm..............................132 17.3 Static Knife................................... 133 17.4 Reciprocating Knife..............................134 17.5 Detachable Material Foot............................136 17.6 MicroCut..................................137 17.7 Foam knife..................................138 17.8 Bevel Knife..................................140 17.9 Bevel Knife U20................................141 17.10 VI45 Knife Tool................................141 17.11 KissCut..................................143 17.12 RotaCut..................................145...
- Page 7 Contents 20.2.1 Introduction..............................169 20.2.2 Filter Shaking..............................169 20.2.3 Remove Material Container........................170 20.2.4 Use Plastic Bag in Material Container....................170 21. Install software..................................172 22. Frequently Asked Questions............................173 22.1 Machine..................................173 22.2 Tools....................................173 22.3 XL-Guide..................................174 22.4 i-cut....................................175...
-
Page 8: Preface
Kongsberg AS does not warrant, guarantee or make any representations regarding the use, or the results of the use of the system or the information contained herein. Esko-Graphics Kongsberg AS shall not be liable for any direct, indirect, consequential or incidental damages arising out of the use or inability to use the system or the information contained herein. -
Page 9: Change Record
V-series 2. Change Record Date Description dd-mm-yy 02-06-2014 jhbe First edition of this document... -
Page 10: Welcome
This manual will provide a complete and detailed description of all V-series functions. It is aimed for operators of Kongsberg Cutting Tables and people preparing files for such equipment. Note: Some of the functions and equipments described in this manual are optional. -
Page 11: Using This Manual
V-series 4. Using this manual 4.1 Main Sections The manual is divided into the following Main Sections: Safety Regulations • All safety related issues are discussed. System Description • This chapter provides basic knowledge about the machine. Basic Operations • This chapter provides basic knowledge about how to operate the machine. Prepare for a Job •... -
Page 12: Name Styles And Symbols
V-series Fuse Replacement • Fuse location and specification. Appendices • FAQ - Frequently Asked Questions 4.2 Name Styles and Symbols Name or style Description Pop-up dialog This is the dialog that appears when you click the Right mouse button. Start button The italic style indicates this is a button on the Operator panel. -
Page 13: Local Languages
V-series 4.4 Local Languages This manual is available in a wide range of local languages. Screen pictures and illustrations remains in English language. 4.5 About XL-Guide dialogs To exit from any XL-Guide dialog, use the control buttons available. Using the cross in upper right corner is not recommended and the consequence is un-predictable. -
Page 14: Safety Regulations
V-series 5. Safety Regulations 5.1 Introduction The XN table is designed to conform to Safety Regulation standards. Nevertheless, operating the table can involve hazards if: • The operator does not follow the Operating Instructions. • The table is used for Non-intended purposes. In addition to the Safety Regulation described below, you will find safety warnings in the respective topics. -
Page 15: Requirements To Be Met By Operators
V-series 5.3 Requirements to be met by Operators Personnel operating the system must: • Be adequately trained. • Have read and understood the instructions described in Safety Regulation as well as any other safety warnings. 5.4 Definition of Use The intended use is described in the following chapters: •... -
Page 16: Danger Zones
V-series 5.5 Danger Zones 5.5.1 Danger Zones The area around the moving parts is considered to be a Danger Zone. The Danger Zone is identified by the means of a yellow / black floor marking. -
Page 17: Moving Parts, Laser Radiation And High Voltage
V-series 5.5.2 Moving Parts, Laser Radiation and High Voltage 5.5.3 Loose Clothing While working with this machine, do not: • Use ties • Use loose necklaces • Use scarfs 5.5.4 Noise Level • Hearing Protection should be used by any personnel exposed to the noise from the machine. -
Page 18: Ejection Of Parts
V-series 5.5.5 Ejection of Parts Potential risk when running MultiCUT: Personnel hit by breaking milling bit or small pieces of processed material. • Eye Protection should be used by any personnel working with MultiCUT. 5.6 Warning Sign Explanation Knife Blades are extremely sharp. This symbol is used in this documentation to indicate operations with Knife Blades and Milling Bits. -
Page 19: Safety Devices
V-series Hearing Protection The Hearing Protection symbol indicates areas where the use of hearing protection is compulsory. Eye Protection The Eye Protection symbol indicates areas where the use of eye protection is compulsory. Moving Parts Potential areas with a risk of being hit by Moving Parts are marked with the Moving Parts sign. -
Page 20: Main Power Switch
V-series Device no Description Main Power Switch Emergency Stop Button Warning Lamp Photo cell supervision Dynaguard 5.7.2 Main Power Switch The Main Power Switch turns power to the table on/off. 5.7.3 Emergency Stop Button Switch positions: - Emergency Stop is switched OFF. ... -
Page 21: Warning Lamp On Top Of Y Carriage
V-series - Emergency Stop is switched ON; Servo Power to the machine is switched off. Note: Activating the Emergency Stop Button does not provide a guarantee against injury! Due to the high kinetic energy of moving parts, do not underestimate Stop Distance of traverse, Y carriage and Tool Head. -
Page 22: Protective Equipment
V-series 1. Ensure the table is free from obstructions and ready for operation. 2. Reset the Safety System by pressing the Pause pushbutton. 3. Observe that Servo Power is switched on, 4. Press Start to continue. 5.8 Protective Equipment For the operator(s), Esko recommends the following Protective Equipment: Close-fitting clothes to avoid being caught by the beam or the tool head which can cause injuries. -
Page 23: Residual Risk, V-Series
V-series 5.10 Residual Risk, V-series Despite all safety protection means incorporated in this machine, there are some Residual Safety Risks to be aware of: Beneath traverse end The low part of the traverse ends is un- protected. Actions: • Children are not supposed to be in the machine area. - Page 24 V-series Machine with gallows The gallows is un-protected. Actions: • Do not bend down over the table or traverse while the machine is working. Rear side of traverse The DynaGuard Safety System photo cell beam c will stop the movement when hit. When the Feeder Paws are mounted, the distance between beam c and the mechanics is reduced.
-
Page 25: System Description, V-Series
V-series 6. System Description, V-series 6.1 Naming conventions Machine 1 Table top 6 Main Power on/off switch 2 Y carriage 7 Main Power on/off switch 3 Traverse 8 Emergency Stop button 4 Tools 9 Traverse Safety Stop switches (DynaGuard) 5 Main Power Unit (MPU) 10 Gallows for MultiCUT Axes X - X-axis... -
Page 26: Main Power Switch
V-series 6.2 Main Power Switch The Main Power Switch is located on the Operator Station: Switch positions: - the Main Power to the machine is switched OFF. - the Main Power to the machine is switched ON. 6.3 Emergency Stop Button Switch positions: - Emergency Stop is switched OFF. -
Page 27: Dynaguard
V-series 6.4 DynaGuard DynaGuard Safety System When DynaGuard is triggered, Servo Power to the machine is switched off. Continue after DynaGuard is triggered To continue operation, proceed as follows: 1. Ensure the table is free from obstructions and ready for operation. 2. - Page 28 V-series Mains Power on/off indication. Servo Power On Servo Power on/off control. Start Press this button to Start Operation. Stop / Safety System Reset Press this button to Stop Operation and Reset Safety System. Vacuum On/Off Press this button to switch Vacuum On/Off. Provides material hold down.
-
Page 29: Pressurized Air System
V-series Jog buttons Press the Jog buttons to move the tool head in the desired direction. The system must be in Stop mode, i.e. the Stop button must be lit, for these buttons to be operative. Note: It is possible to configure the jog direction, see Option->System setup. -
Page 30: Application Programs Available
V-series The compressed air input is connected to a combined Pressure Regulator Valve/Water Trap. Wall Outlet - Wall Outlet A - Air Tube R - Pressure Regulator Valve P - Pressure Gauge W - Water Trap T - Air Tube to Tools and Valves For details regarding air supply requirements, see Site Preparation Manual. - Page 31 V-series...
-
Page 32: Xl-Guide
V-series 7. XL-Guide 7.1 The Graphical User Interface The XN Graphical User Interface (GUI) contains these main elements: 1 Main Menu 5 Preview 2 Main Toolbar 6 Job View Toolbar 3 File View Toolbar 7 Job View 4 File View 8 ARS Toolbar ... - Page 33 V-series The following functions are available from Main Menu and sub-menus: File Open Open an Input File. Create a box Work with 123Box. Exit Terminate XL-Guide. View Position Display Display of table positions and parameters. View Messages Message Display; provides a log of system messages. Customize File View File View configuration.
-
Page 34: The Main Toolbar Functions
V-series User Manual A link to this document. 7.3 The Main Toolbar functions The left part of the Main Toolbar contains the following general functions: Selects application from the drop down list. View the Message Display. Enter Tool Configuration. Set Single Design operation. Set Multi Design operation. -
Page 35: File View
V-series Enter the Help system. The right part contains the following functions: Shows measured thickness of material on the table. Rewinds current job. T: Estimated total job time. R: Estimated remaining job time. Main Toolbar configuration From View->Toolbars, you can configure the Main Toolbar to show left / right / none of the Main toolbar. - Page 36 V-series A total of 5 columns can be displayed in the File View. The file name is always displayed in column 1. The other 4 columns can be customized in the Customize File View dialog. The files in the File View are sorted in normal or reversed order. The sorting is toggled by clicking the header of the columns.
-
Page 37: File View Toolbar
V-series 7.5 File View toolbar You will find the following buttons in the File View toolbar: Opens selected file. Selects disk drive for input files. Up one level. Shows file names only. Shows file names and details. Auto Open function Enable Move Finished File –... -
Page 38: The Job View
V-series • selecting View Finished Jobs from the pop-up menu in the File View Auto Open function Pressing this button activates the Auto Open function. The file at the top of the File View list will automatically be opened as a new job when the current job is finished. -
Page 39: Job View Toolbar
V-series 7.7 Job View toolbar Show job view in full screen. When in full screen display, the button face changes to this: Show job view in split screen. Enters zoom mode. The cursor changes to a magnifying glass. Select area to be zoomed. - Page 40 V-series Rotate direction of flute (corrugated) or grain (folding carton). Rotate direction of flute (corrugated) or grain (folding carton). Automatic Register System (ARS). Register to sheet edge. Enables XL-register functions. The select reference functions are disabled. Select Reference Point from the drop down list. Select a Job Setup file from the drop down list.
-
Page 41: Preview
V-series 7.8 Preview A single click on a file in File View will display the job in the Preview window. 7.9 Status bar The status bar at the bottom of the GUI shows brief descriptions of various functions in the GUI. The status bar can be toggled on and off from Main Menu->View->Status bar. -
Page 42: Critical Warning Display
V-series 7.10 Critical Warning Display When a situation occurs that requires an action from the operator, the following message box will be displayed: Additional information may be found in the Message Display: 7.11 Message Display The Message Display is available from the Main Toolbar button. The Message display offers additional information when troubleshooting the system. -
Page 43: Position Display
V-series Always on top Check this box if you want the Message display to stay on top. Log messages The system is prepared for output of additional system information, useful for service and troubleshooting. For normal operation disable this function to reduce the amount of messages. Show The type of information displayed in the Message display can be configured to: 1. -
Page 44: Accelerator Keys
V-series Displays table coordinates relative to table reference point Tool Rotation and Z - axes Display Z and Tool Rotation positions. • Z shows actual distance from Z axis zero position • Tool Rotation shows actual angle from Tool Rotation zero •... - Page 45 V-series Function Ctrl + O Open Input File Ctrl + P Set ball point pen pressure (N/A) Ctrl + S Step And Repeat setup Ctrl + T Tool Configuration Help in active window Ctrl + Alt + D Memory dump Ctrl + Alt + L Servo Log...
-
Page 46: Basic Operations
V-series 8. Basic Operations Keep away from Moving Parts during operation. Do not lean on Racks, Guide Ways or Traverse during operation, as this may cause personal injury. Before starting any operation, make sure that: • The Table is free from obstructions •... -
Page 47: Reset Safety System
V-series Servo Power Press the Servo On pushbutton. The Warning Lamp on top of the Y carriage should be on without flashing. Table Zero Sequence Press Start pushbutton to complete the Table Zero Sequence. The machine will move to the Selected Reference Point. The table is now ready for operation. -
Page 48: Continue After Safety Break
V-series 8.5 Continue after Safety Break If the Safety System is activated, all movements on the table are stopped and the Warning Lamp starts flashing. To continue operation, proceed as follows: Ensure the table is free from obstructions and ready for operation. Reset the Safety System by pressing the Pause pushbutton. -
Page 49: Prepare For A Job
V-series 9. Prepare for a Job 9.1 Introduction Keep away from Moving Parts during operation. Do not lean on Racks, Guide Ways or Traverse during operation, as this may cause personal injury. Before starting any operation, make sure that: • The Table is free from obstructions •... -
Page 50: Board Setup
The Input File formats available are: File extension Description .acm Kongsberg acm – format. This is the default input format for Kongsberg XN. Described in the Technical Reference manual for XN. .plt HPGL. Described in the Technical Reference manual for XN. -
Page 51: Flute/Grain Direction
V-series 9.5 Flute/Grain Direction Use the Toggle Flute Direction button to set correct direction for the actual job. Verify that the Flute/Grain Direction corresponds to the material. 9.6 Vacuum Section Selection From the Vacuum Section setup – dialog, configure a suitable vacuum area for the job. Select Vacuum Sections that corresponds to the outline of your material. -
Page 52: Job Execution
V-series 9.8 Job Execution Before execution, check this: Verify that the display of the job in Job View is reasonable. Ensure that all settings are proper. If you are milling, ensure the vacuum cleaner container is prepared. Empty the container regularly. Press Vacuum On to start the vacuum pump. - Page 53 V-series Introduction Using a matrix for folding carton sample making is a two-step process: 1. Prepare the matrix B with a channel underneath each crease line. 2. Place the material to be processed on top of the matrix and execute the program. An exact crease line is prepared when the material is forced down into the matrix channel.
-
Page 54: Milling Production
• If more than one sample is to be produced, repeat the procedure using the same matrix. Matrix function and ArtiosCAD ArtiosCAD has functions to automate the process, see Service Guide for ArtiosCAD – Kongsberg integration available on the XX-Guide CD. 9.11 Milling Production... -
Page 55: Multi Pass With Router Tool
V-series 9.11.1 Multi pass with Router tool The picture shows how to configure the Job setup file when running multi pass routing. Here, logical tool number 24 is specified to run one pass with depth = 3 mm and X/Y speed = 10 m/ min and a second pass with depth = 4 mm and X/Y speed = 5 m/min. - Page 56 V-series Tool height is manually adjusted, using the tool height adjustment wizards available from the Tool Configuration dialog. Automatic The tool height is automatically measured, using X-pad as described in next chapter. Automatic tool height measurement using X-pad Measure all tools, started from GUI, procedure Open the Tool Configuration dialog.
- Page 57 V-series • A wizard dialog appears: • Press the Measure tool button. • A wizard dialog appears. • Follow the instructions in the wizard to complete calibration. • Height settings Current setting (): The automatically measured height value. • Automatic measurement adjustment New offset setting (): Use this value to modify the height measured by the Measuring pad.
- Page 58 V-series How to cancel measuring or calibration All measuring pad operations are cancelled by: • Press Close in the active dialog. • Press Stop on Operators panel...
-
Page 59: How To Procedures, Advanced
V-series 10. How To Procedures, Advanced 10.1 Cutting Thick Materials When preparing materials with thickness between 45 – 50 mm (1¾ - 2 in.), the following rules apply: • No Camera operations are available. • Disable Measure Material Thickness. • In Selected Job->Ruler Setup, use T-function to specify the Cutting Depth. •... -
Page 60: Multi Pass Creasing Or Milling
V-series To prepare hard board materials, the procedure is as follows: 1. Mill through the top layer using MultiCUT. 2. Cut through the mid-section using the HF VibraCut Knife. 3. Mill through the bottom layer using MultiCUT. 1. Ensure that the Router Bit is sharp and proper for the job. 2. -
Page 61: Jobs Including Reverse Score
V-series Proceed as follows: 1. Open Job Setup file for editing. 2. Identify router line for multi pass. 3. Add one or more new lines with the same logical tool number and specify HS-Milling tool, depth and speed. 4. When executing the job with this Job Setup, the multi pass function will be carried out for the specified logical tool(s). -
Page 62: Different Reference Point Settings
V-series 10.5 Different Reference Point settings To define or modify reference point settings, go to the Set Reference point wizard. Reference points are selected from the Job View Toolbar. 10.6 Change Tool in a Job Sometimes, you would like more tool combinations than available in the tool head. This document describes through one example how this can be solved by using two different job setup files: You have a job where you want to run P1 with a crease tool and P2 with a knife tool. - Page 63 V-series Insert the knife tool in the tool head and run the same job.
-
Page 64: System Setup
V-series 11. System Setup 11.1 Introduction This chapter will explain functions and parameters that are important for the VL-system to run properly. Examine each step carefully to ensure proper settings: One time adjustments completed at the factory To be repeated if necessary. Adjust X1 to X2 Angle Register Table Size Set Ruler Position... -
Page 65: Jog Settings
V-series 11.2 Table Speed Select between High Quality, Normal or High Speed mode (Options->System Option- >System). In Job Setup, reduce the speed for the actual line. 11.3 Table Acceleration Options->System Option->Speed Setup->Acceleration Use this setting to reduce the overall acceleration on the machine. 11.4 Jog Settings Continuous Jog speed Options->System Option->Speed Setup->Jog Speed... -
Page 66: Set Reference Point
V-series Jog Directions Options->System Option->Speed Setup->Jog Panel Direction Specify jog direction for the Manual Jog joystick on the Operator panel. 11.5 Table Setup Main Menu->Options->Table Option CTRL+R 11.6 Set Reference Point Main Menu->Options->Table Option->Set Reference point Use this wizard to establish Reference Points. The Main Reference Point is a fixed position on the Cutting Table marked as a cross of drilled holes. -
Page 67: Set Ruler Position
V-series The Set Reference point wizard is an aid for adding or changing the table reference points. Procedure: Press the Set Reference Points button to set up any fixed reference points. Follow the instructions given by the wizard and define the number of fixed references you want. As many as 10 points can be defined. -
Page 68: Map Table Top Surface
V-series Procedure: 1. Remove all materials from the table surface. 2. The cutting underlay remains in place. 3. If the table is equipped with a conveyor belt, avoid measuring directly on the belt junction. 4. Execute the Table Top Reference function. 5. -
Page 69: Vacuum Control
V-series Use this wizard to obtain correct angle between X axis and Y axis. Procedure: 1. Execute the Adjust X1 to X2 Angle function. 2. Follow the instructions exactly as given by the wizard. Note: Select a set of drilled vacuum holes (1 and 2) in the Table Top as reference. - Page 70 V-series Vacuum is switched on using the Vacuum on push-button. If no job is started within 30 min. after the vacuum is switched on, the vacuum pump is switched off automatically (E). A job is started. The vacuum pump will be started automatically. The job is finished.
-
Page 71: System Options
V-series 11.13 System Options Main Menu->Options->System Option->System Ctrl+Alt+O 11.14 Display Units Options->System Option->System->Display units Select unit to be used for the GUI. 11.15 Language Options->System Option->System->Language Select language for the GUI. -
Page 72: Input File
ACM is the standard CAM format. The formats available are: File extension Description .acm Kongsberg acm – format. This is the default input format for Kongsberg XP. Described in the Technical Reference manual for XP. .plt HPGL. Described in the Technical Reference manual for XP. -
Page 73: Optimization
V-series Ignore Job Setup from Input file Inside an Input File, it is possible to specify a Job Setup file to be used during program execution. Enable this function to ignore the specified Job Setup file. Note: Most CAD systems do not add Job Setup file information to the Input File. 11.17 Optimization Options->System Option->System->Optimization Sequencing... -
Page 74: Vacuum Setup
V-series Line to circle tolerance Specifies the maximum allowed arrow height A when straight lines are converted to circles. Maximum allowed arrow height value is 0.2 mm / 0.08 inch. This setting will have impact on the performance regarding speed and quality. 11.18 Vacuum Setup 11.18.1 Vacuum Section Configuration Pressing the Vacuum Setup - button opens... -
Page 75: Router Setup
V-series Options->System Option->System->Park Position The following functions are available: Park position from file The park position is specified in the CAD system and transferred to XL via the input file. Go to reference point after job Move to the selected reference point after job finished. -
Page 76: Board Size
V-series This dialog defines what colors to be used for each line in Job Setup when a job is displayed in Job View. Colors are changed by clicking on any of the combo boxes and selecting the wanted color. Additional lines can be added at the bottom of the list. -
Page 77: Change Flute/Grain Direction
V-series Select the right board size from the Job View->Board Size drop down list. This will ensure a correct size of the displayed board in Job View. 11.23 Change Flute/grain direction Flute / grain direction is altered from: Main Menu->Options->Toggle Flute Direction Job View Toolbar->Toggle Flute Direction Pop-up dialog in Job View Ctrl + F... - Page 78 V-series Enter a % value in the edit box to scale the design. A value less than 100 will decrease the size, and a value greater than 100 will increase the size of the design. Use the Up/down arrows to step the scaling in steps of 10%. Scaling X, Scaling Y Enter a % value in the edit boxes to perform differential scale of the design.
-
Page 79: Step And Repeat
V-series d (in) d (in) (mm) (deg) (mm) (deg) (deg) (deg) 0,401 1,604 0,358 29/32 1,298 0,458 1,661 9/32 0,403 15/16 1,343 0,516 1,718 5/16 0,448 31/32 1,387 0,573 ... -
Page 80: Counter Setup Dialog
V-series If disabled, all crease lines in all designs are completed before the knife lines are carried out. (XxY) The Step and Repeat layout is available in two modes, determined by the (XxY) check box: (XxY) disabled Select a suitable board size, and specify the number of copies in the Number of Copies edit box. The number of copies will be distributed on the specified board with Y-axis priority, that is, one Y- column of jobs will be filled up before a new one is established. - Page 81 V-series Counter thickness, Automatic, minimum value Used when the thickness of the matrix and the material to be cut is equal. The thickness of the matrix and the material will be measured. The cutting depth is set to the half of the measured value. If the matrix thickness in this manner becomes less than the minimum value specified, the value specified will be used.
-
Page 82: Reference Points And Coordinate System
V-series 12. Reference Points and Coordinate System All X and Y coordinates in the Input File uses the selected Reference Point as origin. Two modes of operation are available: Fixed reference point Select a Reference Point from the Select Reference point drop down list. Panel reference point •... - Page 83 V-series The Main Reference point position The fixed reference point number 1 is defined as the Main Reference point. The other fixed reference points (2 – 10) are all specified relative to the Main reference point. Thus, moving the Main reference point will move these reference points as well. The Main reference point has to be correctly positioned in order to obtain: •...
- Page 84 V-series Rulers and reference points The ruler system ensures an easy and correct positioning of the material on the table. The Main Reference point shall be defined 10 mm inside the ruler. When you use the lower right ruler, the Reference Point will automatically be moved to an identical distance from the right ruler, as it is defined from the left ruler.
-
Page 85: Job Setup
V-series 13. Job Setup 13.1 Introduction Job Setup is a table that links Logical tool numbers (P - numbers) in the Input File to tools on the machine and describes their behavior. The Job Setup information is stored as a file on the front end PC. Notes •... -
Page 86: Job Setup Parameters
V-series 1. Job Setup is edited line by line. The parameters are described below. 2. When finished editing, use the Apply function to save to current or to a new file name. 3. Each line in Job Setup can be tested using the Test Line function. Follow the instructions in the dialog. - Page 87 V-series Across the flute Entering a positive value specifies a depth measured from the top of the material, but: • For knife cutting, a value = 0 specifies through-cut. • For pen, crease, drill and router, a value = 0 specifies the top of the material. If you specify a T+/- value, the value specifies a distance from the cutting underlay.
-
Page 88: Extended
V-series Test line n Select this function to execute a test figure with the selected tool n. The figure executed is a square 40 x 40 mm (1.6 x 1.6 inches). Use this function as a quick way to verify correct adjustments for the different tools. Circle adjustment line n The Circle lag parameter determines the quality of circles when cutting with knife. -
Page 89: More
V-series Reverse Score Enable this check box to specify that the tool shall work on the front side of the material. Stop Before Use When this function is enabled, the execution will stop at the beginning of this line and an operator message is displayed. - Page 90 V-series The following functions are available: OverCut Check this box to enable or disable the Knife Over-cut function. Applies to knife tools only. Specify the size of the over-cut at start and end of consecutive cut lines. When the direction change between two consecutive lines is bigger than 13.5 degrees, an over- cut corner action is performed.
- Page 91 V-series Extra lift of tool Add extra lift height to tools when moved in up position. Useful for warped boards or uneven surfaces.
-
Page 92: Job Layout
V-series 14. Job Layout 14.1 Introduction The system can operate in either Single Design Layout mode or Multi Design Layout mode Single Design Layout Press the Single Design Button to select Single Design layout mode. When a design is opened in this mode it is always located relative the selected reference point. -
Page 93: Job Layout Setup
V-series Note: All functions described here are available from Main Menu->Layout and from the Pop-up menu in Job view. Select a design A selected design is always shown in pink. After a design is opened it is always selected. It can also be selected by clicking on a line in the design or holding the left mouse button down and drag a square over the designs to select. - Page 94 V-series Snap The snap function is turned on and off by ticking the radio buttons on and off. Snap distance When the snap function is on, a design will be snapped to another design if it is positioned closer than the snap distance. Gap between designs This parameter defines the distance between designs after a snap function is completed.
-
Page 95: Tool Configuration And Adjustment
V-series 15. Tool Configuration and Adjustment 15.1 Introduction Main Toolbar->Tool Configuration Main Menu->Option->Tool Configuration Ctrl + T The Tool Configuration dialog is used for all tool settings and adjustments. The Tool Type mounted is identified by hardware codes inside each tool. Current tool configuration is displayed under Identified tools. -
Page 96: Lag Settings (For Rotating Tools)
V-series From the Adjust Selected Tool – dialog, all Tool Adjustment Wizards are executed. The following procedures are general descriptions of how to adjust the tools. See the description of each Tool Type for more specific information: We recommend using a sheet of Folded Carton material, 5-6 mm / 0.2 inch, when executing the adjustments. - Page 97 V-series Lag Setting Lag – lag value. This is the distance from the rotation center to the back of the knife blade. Enter the value as measured or as found using the Lag test, see below. Width – knife bottom width Enter the measured knife bottom width.
-
Page 98: Tool Height Calibration
V-series Circle Lag Circle quality is determined by a parameter called Circle Lag. The parameter value will vary depending upon the actual material. Therefore, the adjustment is located in the Job Setup dialog. 15.4 Tool Height Calibration 1. Select the Tool to be adjusted 2. -
Page 99: Center Offset Adjustment
V-series 1. Select the Tool to be adjusted. 2. Press the Adjust Active Tool button to enter the wizard selection dialog. 3. Select Rotation adjustment. 4. Follow the instructions given by the wizard, step by step. 5. Repeat the procedure for all Tools mounted. Manual Adjustment 1. -
Page 100: Manual Adjustment Of Center Offset And Angle
V-series 3. Select the Tool to be adjusted. 4. Press the Adjust Active tool button to enter the wizard selection dialog. 5. Select Center Offset Adjustment. 6. Follow the instructions given by the wizard, step by step. 7. Repeat the procedure for all Tools mounted. Manual Adjustment 1. -
Page 101: Tool Offset
V-series 2. Press the Manual adjustment of…. button to enter the adjustment dialog. 3. Key in or use the up/down arrows to specify the wanted offset. 4. Press Activate to enter the value. 5. Test the new settings. Note: All XP tools should, by default, be close to correct angle when the adjustment value is 0. The Manual adjustment of…. - Page 102 V-series Ignore Automatic Tool Identification Ignore Automatic Tool Identification may be used when the Automatic Tool Detection fails, and manual tool selection is necessary. If Ignore Automatic Tool Identification is checked, Tool Setup remains unchanged after: • Table Zero Position sequence •...
-
Page 103: Tooling System
V-series 16. Tooling System Knife Blades are extremely sharp. Take care when handling Knife Tools. Laser Radiation. Do not stare into beam! The tool head is equipped with a class II laser pointer. Emitted laser power < 1 mW. 16.1 Tool handling and care All tools are precision instruments and should be treated as such to ensure proper operation. -
Page 104: Tool Heads Available, Overview
V-series Motor cable and connector When disconnecting the motor cable, use the plug. 16.3 Tool Heads available, overview FlexiHead FlexiHead is a Multi-purpose Tool Head prepared for the following tools: Bevel knife KissCut knife Crease Knife Reciprocating knife Drill tool MicroCut RotaCut knife Foam cutting knife... -
Page 105: Tool Head Mount / Dismount
V-series 16.4 Tool Head mount / dismount >> >> Be careful not to apply too much force when fixing the signal cables. 16.5 FlexiHead... - Page 106 V-series Tool Head Description 1. Tool positions 1, 2, 3 with locking knobs 2. Outlet for Reciprocating Knife motor 3. Laser pointer 4. Measuring foot / material hold down foot. Has 3 functions: a. Measure the thickness of the material on the table b.
-
Page 107: Multicut
V-series Tool Rotation Adjust tool angle tangential to moving direction Center Offset Adjust tool sideways until centered Tool Offset Adjust offset to Laser Pointer. 16.6 MultiCUT Router Bits are extremely sharp! 16.6.1 Introduction MultiCUT 1. Tool position 1 (FlexiHead tool insert) - Page 108 V-series 2. Tool position 2 (FlexiHead tool insert) 3. Laser pointer 4. Tool position 3 5. Measuring foot / material hold down foot 6. Electrical connection, router spindle motor 7. Electrical connection, reciprocating motor 8. Suction hose 1. Suction house with brush for chip removal. During normal operation, the house is in down position. When changing bit, the house should be locked in its upper position.
-
Page 109: Safety Issues
V-series When MultiCUT is not in use, the suction tube is fixed to the traverse as shown here. 16.6.2 Safety Issues Suction house Always, when executing a job, let the suction house float on top of the material. In addition to chip removal, the house reduces the risk of being hit by small work pieces or by a breaking router bit. -
Page 110: Precautions
V-series Clean surface Keep the table and material surface clean, free from obstacles. 16.6.3 Precautions Spindle motor power consumption supervision Too high spindle power consumption indicates critical conditions for the motor and immediate actions should be taken: • Use correct and sharp milling bit. •... - Page 111 V-series Air valve operation Never operate the air valve while the spindle is running. This will destroy the spindle. Air pressure Never run IBAG spindle with air pressure disconnected This may destroy the spindle. Keep this in mind also for test purposes. Use clean air The spindle is sensitive for the pressurized air quality.
- Page 112 V-series Operation at low and high temperatures Never run a spindle when ambient temperature is below 10 °C, 50 °F. Continuous operation at temperatures above 30 °C, 86 °F is not recommended (MultiCUT). MultiCUT-HP spindle is water cooled, thus, the ambient temperature is not that critical for the spindle itself.
-
Page 113: Routing Advice
V-series Empty vacuum cleaner in time Do not leave the machine running if the vacuum cleaner can go full. This might cause damage. 16.6.4 Routing Advice Milling bits Use bits with short cutting lengths for thin materials. - Page 114 V-series For best performance and minimum wear, do not let the bit stick out more than necessary . Never use higher RPM than recommended by the bit supplier. Special care should be taken when using bits with cutting diameter larger than shank diameter. Bits with small cutting diameters (3-4 mm;...
- Page 115 V-series Acrylic or Multi Purpose bits Acrylic bits (A) are polished, extra sharp for Acrylic, wood etc. Multi Purpose bits (MP) have a higher wear resistance, and are suitable for aluface, plastics, MDF, plywood, wood etc. MP bits can be identified by a small tooth at the tip.
-
Page 116: Bits And Bit Change
V-series Milling direction The milling direction is important i order to obtain a good result. Correct directions are illustrated in the figure at left. The blue part is our product where we want the edges to be smooth and nice. Note Altering the milling direction is to be carried out in the CAD program. - Page 117 V-series Observe that the bit is not rotating. Use a cloth to hold the bit. Move the lever down to open the collet. Put the bit in a proper storage container. Insert a new bit. Close the collet Only the round part of the shaft should be inside the collet.
-
Page 118: Collet Change And Clean
V-series If a bit is stuck If a bit is stuck in the collet, the probable cause is low air pressure. To release a router bit from the collet, a pressure of approximately 7 bar is required. If necessary, check the table regulator setting, or the pressurized air source. - Page 119 V-series Apply the 13 mm (17 mm for MultiCUT-HP) key to hold the spindle rotor. Note: Do not turn the rotor when in CHUCK OPEN position. This might damage the spindle. Enter the collet tool with a dummy bit to the collet.
- Page 120 V-series Push the air clean button to help remove contamination. Clean the collet. Apply small quantities of grease to the threads of the collet when necessary. Avoid the clamping area. Do not use oil, as it could enter the clamping area and reduce the clamping force. Also apply small quantities of grease to the outer cone of the collet.
-
Page 121: Bit Length And Position
V-series Close the collet on a dummy bit. Chuck maintenance kits are available on the Esko web shop, www.esko.com. 16.6.7 Bit Length and Position Keep distance d small. For best performance and minimum wear, do not let the bit stick out more than necessary. -
Page 122: False Air Valve
V-series 16.6.8 False Air valve MultiCUT is equipped with a False Air Valve. When milling small parts, use the False Air Valve to reduce the suction force. 16.6.9 Tool Adjustment For FlexiHead tool positions, complete relevant adjustments as described for FlexiHead. For the router position, complete the following adjustments: Tool Height Correct tool height relative to table top. -
Page 123: Job Setup
V-series 16.6.10 Job Setup General information about the job setup dialog is found in the 'How to..' chapter. In this chapter, only the Router tool specific issues are described: Specifies the router depth measured from the top of the material. The depth is specified as an absolute value in mm or inch, or i % depending upon the 'Depth unit' setting. -
Page 124: Table Top And Height Adjustment
V-series 16.6.11 Table Top and Height Adjustment The following rules apply when adjusting MultiCUT/MultiCUT-HP T = Cutting table, C = Cutting underlay Map Table Top function is carried out on top of the Cutting underlay. U = Milling underlay The Table Top Reference function is carried out on top of the Milling underlay ... -
Page 125: Face Milling
V-series A stiff milling underlay (S) on top of the cutting underlay: If the thickness of the milling underlay (S) is > 5 mm (0.2 inch), the underlay is supposed to be more or less stiff. One typical milling underlay material is MDF, face ... -
Page 126: Miscellaneous
V-series 16.6.14 Miscellaneous Warm Up Machine Panel Toolbar->Warm Up To protect the Spindle, mandatory Warm Up is implemented. If the Spindle has been inactive for 8 hours or more, a 3 min. Warm Up is required. If the Spindle has been inactive for 4 weeks or more, an extended sequence is required, called Run This takes 20 minutes. -
Page 127: Measuring Foot
V-series 16.7 Measuring Foot The Measuring Foot has 3 functions: 1. Measure the thickness of the material on the table. 2. Map table top surface. 3. Measure the cutting underlay top level, used as reference for tool height control. No adjustments are necessary. 16.8 Laser Pointer The Laser Pointer (L in the illustration) is a Class II laser beam pointing device. -
Page 128: X-Pad
V-series 16.9 X-Pad 16.9.1 X-Pad Calibration Note: Remove any cup or cover surrounding the tool tip during this procedure. As a consequence, take care. In order to work properly, the X-Pad itself must be calibrated. The following tools are applicable when the calibration procedure is carried out: •... -
Page 129: Tool Depth And X-Pad
V-series 16.9.2 Tool Depth and X-Pad Be aware how X-Pad is working; it is the tool tip that is measured. Depending upon the actual tool, it might be necessary to add depth in order to achieve cut or drill hole through the material. Additional depth is entered in two ways: 1. -
Page 130: I-Cut Camera
V-series 16.10 i-cut camera Two adjustments are available: A - adjust the aperture. F - adjust camera focus. Note: When adjusting i-cut camera on MultiCUT/ MultiCUT-HP, the adjustment knobs are available in between the knife foot, as illustrated in the picture. -
Page 131: Tool Inserts
V-series 17. Tool inserts Knife Blades are extremely sharp. Take care when handling Knife Tools. 17.1 Crease Tool Crease Tool The Crease Tool is a multipurpose tool allowing a wide range of creasing wheels. Replace crease wheel Push the wheel into position ... -
Page 132: Crease Tool, 60 Mm
V-series 17.2 Crease Tool, 60 mm Use the ø60 mm Crease Tool to avoid cracking the liner. The crease wheel is attached to the tool after it has been mounted in the Tool Head. Note: When working with thin materials, avoid crease close to the Ruler. -
Page 133: Static Knife
V-series 17.3 Static Knife Static Knife is a multipurpose tool allowing a wide range of Knife Blades. Insert Knife Blade After a blade change, the tool depth should be checked again. -
Page 134: Reciprocating Knife
V-series Knife direction The locking screw will always point towards the The locking screw will always point towards the cutting direction cutting direction 17.4 Reciprocating Knife Reciprocating Knife is available in two models: Reciprocating Knife Running with 6000 RPM and amplitude +/- 0.15 mm (0.006 inches), this tool is recommended for light duty corrugated materials. - Page 135 V-series Common to both models: • To reduce material tear, a foot is available. • The same set of knife adapters can be used. Replace Knife Blade Pull out the electrical connection. Note: Pull using the connector, not just the cable.
-
Page 136: Detachable Material Foot
V-series Parameter Description Tool Offset Adjust offset relative to Laser Pointer. For more information about how to run the adjustment wizards, see Tool Configuration. 17.5 Detachable Material Foot The Detachable Material Foot is mounted in a standard FlexiHead tool position where a material hold down function is required. -
Page 137: Microcut
V-series 17.6 MicroCut The MicroCut tool is a special purpose knife tool for applications where exact cutting depth is required. 1 – Foot, floating on top of the material 2 – Foot pressure adjustment 3 – Depth meter. For details, see (218). 4 –... -
Page 138: Foam Knife
V-series 4. Loosen the hex-screw and insert the new blade. 5. When inserting the new blade, please make sure that: a. The back of the Knife Blade is aligned along the reference edge of the blade socket. (To ensure blade perpendicularity). b. - Page 139 V-series Knife tool and Foam knife tool combined Some knife tools offers the possibility to use both a standard knife blade and a foam knife blade in the same blade adapter. One example is the '34046268 Reciprocating knife tool T17/T28', prepared for the T17 and T28 knife blades.
-
Page 140: Bevel Knife
V-series The icon illustrates that the cutting depth value for the Foam knife is specified from the top of the cutting underlay and up. 17.8 Bevel Knife Bevel Knife is a special-purpose tool for 45 degree angled cuts. Lag = 3.5 mm / 0.14 in. How to replace a Knife Blade •... -
Page 141: Bevel Knife U20
V-series About tool adjustment For the Bevel Knife, we recommend the manual procedures for tool rotation and centre offset adjustment. Use a thin Folding Carton material when adjusting tool rotation and centre offset. Remember that you should look at the bottom side of the material for correct alignment. The adjustments depend upon the actual material due to weight, structure and thickness. - Page 142 V-series How to mount VI45 Knife Tool Remove the knife adapter from the tool and Position the tool adapter onto the shaft. insert the upper part into the tool position. Observe Alignment Pin orientation. Keep the knife adapter in this position while you turn the tool shaft…...
-
Page 143: Kisscut
V-series 17.11 KissCut KissCut is a special knife tool for vinyl cutting. The cutting depth is controlled by the downward knife pressure. For applications where a more accurate depth control is required, a simple foot solution is available. The tool is prepared for a wide range of Knife Blades. - Page 144 V-series The friction between the Alignment Pin A and When inserting a new Knife Blade, ensure the Knife Blade keeps the blade in place. the blade is correctly positioned relative to the Alignment Pin. Tool pressure Knife pressure is adjusted by turning the If higher knife pressure is needed, interchange Pressure Adjustment knob available on top of Pressure units.
-
Page 145: Rotacut
V-series 17.12 RotaCut RotaCut is a special tool for cutting light materials, as thin fabric. Maximum cutting depth is 2 mm / 0.07 inch. Note: Due to the characteristics of this knife tool, some restrictions apply to the use of it: •... - Page 146 V-series Be careful, though, not to adjust the cutting depth too deep into the cutting underlay (figure at left). U - cutting underlay M - material D - X/Y moving direction For more information about how to run the adjustment wizards, see Tool Configuration.
-
Page 147: Rigid Material Knife
V-series Push the foot into position. A self-locking mechanism ensures the foot is kept in place. Note: Be careful not to hit the sharp knife. Layer Setup for RotaCut Correct setting of Lag- and Width - values are shown. Lag: 3.5 mm / 0.14 inch Width: 7.0 mm / 0.28 inch ... -
Page 148: Rbi 90-16 (Rigid Board Insert)
V-series Insert / remove knife blade Ensure the blade is correctly aligned. Use a 3 mm Allen Key to fix / loosen the knife blade. After a blade change, the tool depth should be checked again. Tool Adjustment Use the standard adjustment wizards when adjusting the knife. We recommend using a sheet of corrugated material, 5-6 mm / 0.2 inch, when executing the wizards. -
Page 149: Drill Tools
V-series Insert / remove Knife Blade Ensure the blade is correctly aligned. Use Allen Key, 3 mm, to fix / loosen the Knife Blade. After a blade change, the tool depth should be checked again. Tool Adjustment Use the standard adjustment wizards when adjusting the knife. We recommend using a sheet of corrugated material, 5-6 mm / 0.2 inch, when executing the wizards. -
Page 150: Reboard Drill Tool
V-series How to replace a drill bit Push the drill bit towards the bottom of the collet. Use the wrench to fix the bit in the collet. After a bit change, the tool depth should be checked again. 17.15.2 Reboard Drill Tool Reboard Drill Tool is a tool insert for a standard XL tool position. -
Page 151: Drill Bit Dimensions
For more information about how to run the adjustment wizards, see Tool Configuration. 17.15.5 Drill Tool in ArtiosCAD ArtiosCAD has functions for Drill Tool in Sample Making, see Service Guide for ArtiosCAD – Kongsberg integration available on the documentation DVD. -
Page 152: Ball Point Pen
V-series 17.16 Ball Point Pen The Ball Point Pen tool is available for pen drawing. Tool pressure is adjustable by a knob on top of the tool. Ball Point Pen tool is prepared for Space Pen refills. Tool assembly and ressure adjustment A - Inner sleeve. -
Page 153: Liquid Ink Tool
V-series 17.17.1 Liquid Ink Tool Liquid Ink Tool is for ink drawing on foil. The tool is prepared for Staedtler 727HPK35-9 insert. Ink tool assembly 17.17.2 Fibertip Tool Fibertip Tool is for ink drawing. The tool is prepared for Staedtler Lumocolor insert. -
Page 154: Braille Tool
V-series Fibertip tool assembly 17.18 Braille tool The Braille Tool for XL/XN cutting tables will enable you to create signage readable by visually impaired people. - Page 155 V-series Braille Tool, how to add spheres 1. Keep the tool in upright position during this process. 2. Remove the cap and the plunger. 3. Pour spheres into the tool. 4. Insert the plunger and the cap. Shake the tool lightly. 5.
- Page 156 V-series Braille tool milling bit The supplied milling bit is heavily unbalanced and should not be run faster than 20.000 RPM to avoid excessive wear to the milling spindle! This also means that you should not use this bit when warming up the milling spindle as the warm up sequence exceeds 20.000rpm.
- Page 157 V-series i-cut Vision A standard configuration for Braille is included with i-cut version 7.2.1. If not available, the Braille Tool should be defined in the Edit Tools dialog with the following parameters enabled: • Velocity Select Z (max speed) • Z-axis Depth (0) •...
- Page 158 V-series Using the Braille tool with i-cut Preparing layers When making braille signage you need two identical layers with the braille pattern, one for milling holes and one for inserting braille spheres. These layers may consist of circles or points. Layer: Braille drilling (MultiCUT/MultiCUT-HP) Velocity Z Velocity Z is material dependent and may require experimentation.
-
Page 159: Vacuum Hole Cleaner
V-series Z-axis Depth Z-axis depth should initially be set to the material thickness. This parameter determines the pressure the Braille Tool will use to force the sphere into the hole. If you are using soft materials and notice indentations in the material you can lower the value to get a lighter pressure. - Page 160 V-series Connect the air tube in between the air supply to the Tool head How to operate the Vacuum hole cleaner The Vacuum hole cleaner tool is defined as a pen and operates as a pen tool. • Adjust the tool height until the tip of the Vacuum hole cleaner is 1,5 mm ( 1/16 inch ) above table surface (or cutting mat surface).
-
Page 161: Maintenance
V-series 18. Maintenance More information about maintenance is available in the Maintenance Manual. Warning Main Power should be switched off before cleaning is carried out. 18.1 Daily maintenance • Inspect the equipment in order to prevent any irregularities. • The table surface should be kept clean at all times. •... -
Page 162: Fuse Replacement
V-series 19. Fuse replacement Before starting the Fuse Replacement procedure: • Switch Power Off using the Main Power Switch • Remove the Main Power plug from the wall socket 19.1 MPU fuses MPU Location Note: MPU location is model dependent. All fuses are located on the rear side of the Main Power Unit (MPU). -
Page 163: X1 Fuses
V-series Fuse Location Procedure 1. Remove frame cover in front of MPU 2. Remove the metal shield covering F1/F2, F24/F48. 3. Remove one fuse, check with ohm – meter. If blown, replace with a new, identical fuse. 4. Repeat for each fuse. 5. - Page 164 V-series X1 Amplifier Location Fuse Location 1 – SCU unit 2 – 6/12A amplifier X1 Procedure 1. Remove X1 cover. 2. Check the X1 fuse with ohm - meter. If blown, replace with a new, identical fuse. 3. Replace covers. 4.
-
Page 165: X2 Fuses
V-series 19.3 X2 fuses X2 Amplifier Location Fuse Location 1 – 6/12A amplifier X2. Procedure 1. Remove X2 cover. 2. Check the X2 fuse with ohm - meter. If blown, replace with a new, identical fuse. 3. Replace covers. 4. Insert main power cable into the wall socket and turn main power ON. Fuse Details T 8A 250V 1 1/4 x 1/4 in. -
Page 166: Y/Z Fuses
V-series 19.4 Y/Z fuses Y Amplifier Location Fuse Location 1 – Y-amplifier unit 2 – TCU 3 – Z-axis motor Procedure 1. Remove Y cover. 2. Check the Y and Z fuse with ohm - meter. If blown, replace with a new, identical fuse. 3. -
Page 167: Tool Rotation/Reciprocating Knife Fuses
V-series Fuse Details T 8A 250V 1 1/4 x 1/4 in. (6,3 x 32 mm) T 4A 250V 1 1/4 x 1/4 in. (6,3 x 32 mm) 19.5 Tool Rotation/Reciprocating knife fuses Fuse Location Procedure 1. Fuses are available from beneath the Toolhead cover. 2. -
Page 168: Vacuum Cleaner Use
V-series 20. Vacuum Cleaner use 20.1 Vacuum Cleaner 25 1. Suction tube inlet 2. Container fixture 3. Filter unit locking mechanism 4. Motor 5. Filter unit How to empty container 1. Ensure vacuum cleaner motor is off. 2. Remove the suction tube (1). 3. -
Page 169: Vacuum Cleaner Zefiro
V-series 5. Lift and turn the container to release it from the fixture. 6. Empty the container. 20.2 Vacuum Cleaner Zefiro 20.2.1 Introduction 1 – Filter Chamber 2 – Filter Shaking Lever 3 – Removable Material Container Note: Carefully observe the Vacuum Cleaner filling level. -
Page 170: Remove Material Container
V-series 20.2.3 Remove Material Container Note: You can use the container with or without Plastic Bags. 20.2.4 Use Plastic Bag in Material Container Parts needed: Steel ring and plastic bag Fix the Plastic Bag to the ring in this way... - Page 171 V-series Ring and Plastic Bag ready for the container Fold/fix the Plastic Bag around the container Container with Plastic Bag ready for operation Detailed information about how to operate the Vacuum Cleaner is available in the Zefiro 75 Operators and maintenance manual.
-
Page 172: Install Software
V-series 21. Install software For information about software installation, see the Installation Manual for the actual machine. Available on the Documentation DVD. -
Page 173: Frequently Asked Questions
V-series 22. Frequently Asked Questions 22.1 Machine My machine does not react when switching on Please check electrical connection, do you have 230V? Is there enough compressed air, 7bar? Check all main fuses in the MPU, see Fuse Replacement Check all connections at the MCU behind the control panel Check all connections at the start up button and the emergency buttons: Safety system won’t reset Make sure all sensors are aligned correctly, check the black dots on the side of the traverse... -
Page 174: Xl-Guide
V-series After cutting, the design is difficult to remove from waste Check tool height After cutting, the corners are still fixed to the waste Check tool lag Bad quality in cutting, paper/cardboard tears Check rotation of the tool Offset in cut/crease lines Check tool center offset Offset between cut lines and crease lines Check tool offset... -
Page 175: I-Cut
V-series If there was a software update recently, check if the firmware on the machine and XL-Guide are of the same version Check the serial connection between PC and MCU Check the connection at the emergency button 22.4 i-cut Outside table limit Check your starting point.
Need help?
Do you have a question about the V series and is the answer not in the manual?
Questions and answers