
Related Manuals for Megger MIT400 Series


Summary of Contents for Megger MIT400 Series
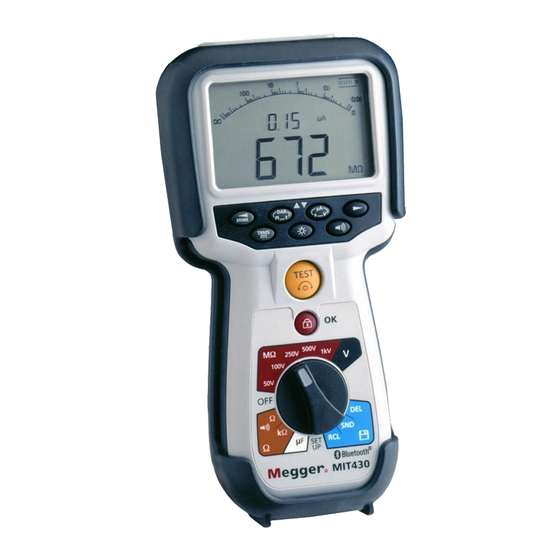
- Page 1 MIT400 Series Insulation and continuity testers USER GUIDE GlobalTestSupply www. .com Find Quality Products Online at: sales@GlobalTestSupply.com...
-
Page 2: Table Of Contents
USER GUIDE CONTENTS 1. Introduction Safety Warnings 3. Symbols used on the instrument 4. General Description Unpacking the carton Carton contents (all instruments) 5. Preparations for use (all instruments) Batteries Preliminary test lead check 6. General operating instructions General functions LCD Display Backlight operation 7. -
Page 3: Introduction
This user guide describes the operation and functions of the MIT400 series of insulation and continuity test instruments: These instruments are designed and manufactured by:... -
Page 4: Safety Warnings
Safety Warnings MIT400 series insulation testers Safety Warnings and Precautions must be read and understood before the instrument is used. They must be observed during use. The circuit under test must be switched off, de-energised, securely isolated and proved dead before test connections are made when carrying out insulation and continuity tests. -
Page 5: Symbols Used On The Instrument
3. Symbols used on the instrument Caution: risk of electric shock Caution: refer to accompanying notes Displayed on the LCD during an insulation test, warns that a hazardous voltage may exist at the test lead probes also observe voltage discharges to a safe level. -
Page 6: General Description
There are important documents that you should read and keep for future reference. Please complete the pre-paid warranty card and return it to Megger Limited as soon as possible to help us reduce any delays in supporting you should the need arise. -
Page 7: Preparations For Use (All Instruments)
5. Preparations for use (all instruments) 5.1 Batteries The Megger MIT400 series instruments are supplied with batteries fitted. When batteries become exhausted, refer to section17 for battery replacement. Warning: Do not switch the instrument on or connect test leads with the battery cover removed. -
Page 8: General Operating Instructions
6. General operating instructions Safety note: If greater than 25 V appears on the circuit under test the instrument will default to a voltage measurement and display the supply voltage. On supply voltages over 50 V the instrument will be prevented from performing an insulation test, protecting your instrument from damage. -
Page 9: General Functions
6.1 General functions Red test lead or Black Test lead switched probe connection LCD screen Function buttons Test button and Battery/internal lead null fuse access Insulation lock panel at rear button Voltage range Insulation test ranges Result recall and OFF positon transfer Resistance ranges Capacitance (μF) -
Page 10: Lcd Display
6.2 LCD Display Multifunction Auxiliary digital display analogue display Continuity indicator Units of parameters on auxiliary display Battery condition indicator Lock indicator Audible alarm indicator Warning – refer to TRMS indicator user manual Fuse blown indicator Units of parameters on main display Out of range indicator... -
Page 11: Test Lead Connections
7. Test lead connections Test leads connections are as indicated in figure 2 which shows the test lead sockets at the top of the instrument, as well as the switched probe socket and test lead. Black test lead connection Red test lead connection SP5 connection Figure 2 Test lead connections... -
Page 12: Ac/Dc Voltage And Frequency Measurements
8. AC/DC voltage and frequency measurements Note: Measured voltage must not exceed 600 V phase to earth or Phase to Phase Frequency measurement is not available on MIT400, MIT405 and MIT480 models. Procedure for measurement of voltage and frequency (Refer to Figure 5) DC indicated Screen B: Screen A (a.c.) -
Page 13: Insulation Resistance Testing - General
9. Insulation resistance testing - general Safety note: Insulation resistance testing is performed at high DC voltages and is hazardous if touched. Always observe the safety precautions when performing an insulation resistance test, and ensure all necessary health and safety precautions are observed. Automatic Discharge: Capacitive circuits are automatically discharged when the test button is released following an insulation test. -
Page 14: Insulation Resistance Testing - Timed Modes 'T', Pi And Dar
Symbol displayed if audible limits are enabled Screen B changes to G where required Step 1: Connect the test leads Step 4: Screen A Test result and actual test voltage Step 6: Step 3: Amps, volts and seconds selection button Press TEST and hold Alarm on/off Step 7:... - Page 15 DAR = 60 second value/30 second value During all insulation tests the symbol will flash indicating that a test voltage is present. (a) Insulation resistance testing – timed procedure (not MIT400, MIT405 or MIT480). (Refer to Figures 7) Screen B Screen C Screen D (Indicating a PI test)
- Page 16 Once selected, press and hold the [TEST] button to start the test. Use the LOCK [ ] button only for standard insulation resistance tests if required. ‘PI’, ‘DAR’ and ‘t’ automatically lock the test on for the duration of the test. For timed tests, the test will run for the time period defined in Set-up (see Set-up procedures...
-
Page 17: Mit40X Testing
10. MIT40X testing The MIT40X has a selectable insulation test range from 10 V to 100 V in 1 V increments. The test voltage selected is the nominal test voltage. e.g. If 10 V is selected the actual voltage at the probe tip will be within the stated tolerance of ±1 V. -
Page 18: Continuity Testing [ ] And Buzzer [ ]
11. Continuity testing [ ] and buzzer [ (refer to Figure 9) Test procedure Continuity test Contact current indication Step 3: Buzzer ON/OFF Step 2: Lead null Step 4: Connect test leads to conductor(s) Step 1: Figure 9 Continuity test and buzzer Turn the instrument ‘O O N’... -
Page 19: Resistance Measurements (K Range)
Note: The test current displayed is the actual test current used during the test, which will depend on the resistance of the circuit under test. 12. Resistance measurements (k Range) (Except MIT40X and MIT480) Test procedure (refer to Figure 10) Step 2: Connect leads to conductors... -
Page 20: Capacitance Measurements
13. Capacitance measurements (Except MIT400, 405, 410, 480) 13.1 Capacitance measurement procedure Step 2: (refer to Figure 11) Connect test leads Step 4: Distance Step 3: Test result Step :1 Figure 11 Capacitance range Turn the instrument ‘ON’ by rotating the selector switch to the capacitance [μF] position. -
Page 21: Setup Options
14. Setup options The setup position permits the user to adjust various threshold values and default settings. When SETUP is selected, the instrument firmware revision is displayed, followed by the buzzer alarm threshold. Displayed Default Setting Meaning Instrument symbol setting options Set top threshold for continuity buzzer in ohms. - Page 22 Lock symbol Step 2: Press Step 3: Press and hold Step 4: Save settings Step 1: Figure 12 Set up Setup procedure (refer to Figures 12) Turn the instrument ‘ON’ by rotating the selector switch to the Setup position. The firmware version is displayed prior to the first setting BUZ.
-
Page 23: Saving, Recalling And Downloading Test Results
15. Saving, recalling and downloading test results. (MIT420, MIT430, MIT481 and MIT485) 15.1 Saving test results After completing any test the result remains displayed on the screen for one minute. During this time the result may be saved in memory and recalled later. Step 1: Screen A result Step 2:... -
Page 24: Pi And Dar Recall
Procedure for recalling stored test results (refer to Figure 14) Memory usage indicator Step 2: Test result Units of stored number test Step 3: Press for Previous/Next Step 4: Press to view result Step 1: Switch to RCL Figure 14 Recall test results Turn the instrument ‘ON’... - Page 25 Screen B – t2 Screen A - Screen C – t1 Step 2: Screen D – VOLTAGE Select result Screen E – ID Step 1: Switch to RCL Figure 15 DAR recall results To recall a PI or DAR result: Rotate the selector switch to the recall (RCL) position and observe the latest unique test result identification number displayed.
-
Page 26: Deleting Test Results
16. Deleting test results (MIT420, MIT430, MIT481 and MIT485 only) Stored test results may be deleted singularly or all together. 16.1 Procedure for deleting a single test result (refer to Figure 16) Memory Step 4: usage Observe ‘new’ last indicator test result ID Step 2: Check... -
Page 27: Procedure For Deleting All Test Results (Refer To Figure 19)
16.2 Procedure for deleting all test results (refer to Figure 17) Screen B Screen A Step 2: Press ‘Next’ – Screen B appears Step 3: Press OK to delete all stored Screen C test results Step 1: Switch to DEL Figure 17 Deleting all test results Turn the instrument ‘ON’... -
Page 28: Preparing Your Mit430 Or Mit485 For "Bluetooth" Communications
“Additional Bluetooth Information” which can be found on the User CD. Run “Megger Download Manager” from the Windows start menu. Enable the Bluetooth function on your PC. Refer to your PC manual if necessary. -
Page 29: Preparing Your Mit430 Or Mit485 To Your Pc
3. Now press and hold the test button until you see the “<” and “>” symbols oscillating. Release the test button. The MIT430 /485 will search for “Bluetooth” computers. At the end of this search, the total number of “Bluetooth” devices will be shown on the main display. - Page 30 6. A message bubble may also be displayed on the pc against the Bluetooth icon. 7. Click on this message and enter a Passkey of “1234” to accept the connection of the test instrument. (You may also need to accept other message prompts that may be displayed as part of this setup sequence) If you get a message bubble or prompt asking you to accept a serial port connection then click and accept, ticking the “A A l ways allow”...
-
Page 31: Standard Download Operation
Having completed the initial installation and pairing, future downloads to the nominated PC becomes a very straightforward operation as described in the following simple steps. a) Run Megger Download Manager from the Windows start menu or short cut. b) Click once on the “Megger MIT430 + MIT485” icon. -
Page 32: Battery And Fuse Replacement
17. Battery and fuse replacement (refer to Figure 18) Figure 17 17.1 Battery condition and replacement The battery condition indicator is displayed at all times that the instrument is switched on, as below: 100%, 75% and 50% Replacement batteries type is: 5 x LR6 (AA), 1.5 V Alkaline, or 5 x 1.2V NiMH Note: NiMH or NiCAD rechargeable batteries show a lower charge than Alkaline batteries, and may not give much warning before becoming exhausted. -
Page 33: Blown Fuse Indicator
500 mA (FF) H.B.C.50 kA min 1000 V (32mm x 6mm) 18. Preventive maintenance The MIT400 series instruments require very little maintenance. Test leads should be checked before use to ensure there is no damage. Ensure batteries are removed if the instrument is left unused for an extended period. -
Page 34: Specification
19. Specification All quoted accuracies are at +20 °C. Insulation Nominal test voltages MIT400, 405 250 V, 500 V, 1000 V MIT410, 420,430 50 V, 100 V, 250 V, 500 V, 1000 V MIT480 50 V, 100 V MIT481, 485 50 V, 100 V, 250 V, 500 V, 1000 V MIT40X 10 V to 100 V variable (1 V increments) - Page 35 Lead resistance zeroing: Up to 9,99 Buzzer: Variable limit 1 , 10 , 20 Resistance EN61557 operating range: 0,01 k to 1000 k (0 to 1 M on analogue scale) Accuracy: ±3% up to 50 k then ±5% ±2 digits Open circuit voltage: 5 V ±1 V Short circuit current:...
-
Page 36: Basic And Service Errors
Fuse: Use only a 500 mA (FF) 1000 V 32 x 6 mm ceramic fuse of high breaking capacity HBC 50 kA minimum. Glass fuses MUST NOT be fitted. Safety Protection The instruments meet IEC 61010-1 to 600 V phase to earth, Category IV. * Refer to safety warnings (see section 2). -
Page 37: Accessories
Bluetooth identifier: B02872 QPLN Reference: Q11406_WT12_SGS “Contains Transmitter Module FCC ID: QOQWT12” The Bluetooth word mark and logo are owned by the Bluetooth SIG, Inc. and any use of such marks by Megger is under license. GlobalTestSupply www. .com Find Quality Products Online at:... -
Page 38: Repair And Warranty
Fax: +44 (0) 1304 207342 Fax: +1 610 676 8625 Megger operate fully traceable calibration and repair facilities, ensuring your instrument continues to provide the high standard of performance and workmanship you expect. These facilities are complemented by a worldwide network of approved repair and calibration companies which offer excellent in-service care for your Megger products.
Need help?
Do you have a question about the MIT400 Series and is the answer not in the manual?
Questions and answers