Table of Contents
Advertisement
Advertisement
Table of Contents

Related Manuals for Pyle PSBV210WIFI


Summary of Contents for Pyle PSBV210WIFI
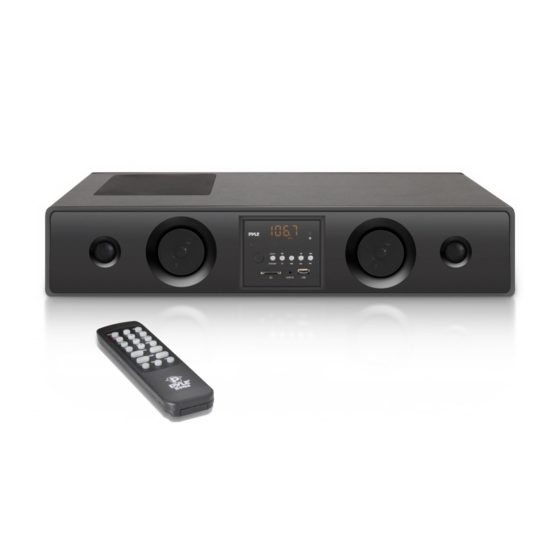
- Page 1 PSBV210WIFI Sound Bar User Manual...
-
Page 2: Table Of Contents
TABLE OF CONTENTS TABLE OF CONTENTS TABLE OF CONTENTS……………………………………………………………………………………………………………..1 IMPORTANT SAFETY INSTRUCTION…………………………………………………………………………….………..2-3 FEATURES ………….…………………………………………………………………………………………………………………..3 SPECIFICATIONS………………………………………………………………………………………………………………………4 PLACING THE UNIT………………………………………………………………………………………………………..………..4 SYSTEMS CONNECTIONS …………………………………………………………………………………………….………….5 1.CONNECT POWER SUPPLY ………………………………………………………………………………………….……….5 2.CONNECT WITH PC&MP3…………………………………………………………………………………………..………..5 3. CONNECT WITH TV/DVD ………………………………………………………………………………………….…………6 FRONT PANEL FUNCTIONS……………………………………………………………………………………………….……..7 BACK PANEL FUNCTIONS ………………………………………………………………………………………………..………7 REMOTE CONTROL FUNCTIONS ……………………………………………………………………………………………..8 HOW TO USE THE REMOTE CONTROL …………………………………………………………………………….………9 OPERATIONS ……………………………………………………………………………………………………………….……….10... -
Page 3: Important Safety Instruction
IMPORTANT SAFETY INSTRUCTIONS Warning To reduce the risk of fire or electric shock, do not expose this appliance to rain or moisture. Dangerous high voltages are preset inside the enclosure. Do not open the cabinet, refer to qualified personnel only. The lighting flash with arrowhead symbol, within an equilateral triangle, is intended to alert user to the presence of non-insulated “dangerous voltage”... -
Page 4: Features
9.Unplug this apparatus during lightning storms or when unused for long period of time. 10. Power source The product should be operated only from the type of power source indicated on the r ear of the unit. 11. Overloading Do not overload wall outlets and extension cords as this can result in a risk of fire or e lectric shock. -
Page 5: Specifications
SPECIFICATIONS Power Supply…………………………………………………AC:100-24V, 50/60Hz Peak RMS Output…………………………………..…………………………..300W Input Sensitivity…………………………………………………..…400mV ± 50mA S/N(A Weight)…………………………………………………………………≥80dB Channel Separated Rate (1KHz)………………………………………………≥ 40dB Woofer Impedance………………………………………………………………8ohm Tweeter and full range speaker impedance………………………………………4ohm THD (1KHz, 1W, 8Ohm)………………………………………………………≤ 0.5% Frequency Response …………………………………………………….20Hz-20KHz Dimensions (WXDXH)……………………………………………… 23.8'' x 9.8'' x 4.7'' Weight………………………...………………………………….……………13 lbs. -
Page 6: Systems Connections
SYSTEM CONNECTIONS 1. CONNECT POWER SUPPLY Insert the power plug into a wall socket; Make sure the voltage marked at the rear panel is same as your AC power. Do not operate with wet hands to avoid electric shock 2. CONNECT WITH PC/MP3 To listen to the sound source from PC( Computer ) or MP3 Players, connect the unit with the external device as below. -
Page 7: Connect With Tv/Dvd
3. CONNECT WITH TV/DVD To listen to the sound source from Television and/or CD/VCR/DVD/DVR players, connect the unit with the external device as below. -
Page 8: Front Panel Functions
FRONT PANEL FUNCTIONS BACK PANEL FUNCTIONS 1. PC mp3 FM ANT input jack 2. AUX 1 L+R input jacks. 3. AUX 2 L+R input jacks 4. DC:18V2.5A... -
Page 9: Remote Control Functions
REMOTE CONTROL FUNCTIONS 1. STANDY-BY : Press to turn on the unit from standby mode, Press again to turn the unit off (stand -by) 2. 3D: Press to turn on the surround sound effect, Press again to turn it off 3. -
Page 10: How To Use The Remote Control
HOW TO USE THE REMOTE CONTROL 1. Battery Installation: a. Slide and lift up the battery door. b. Install two “AAA” size batteries (included) into the battery compartment according to the polarity markings inside battery compartment. c. Replace the battery door BATTERY PRECAUTIONS Follow these precautions when using batteries in this device. -
Page 11: Operations
OPERATIONS 1. GENERAL OPERATION 1) Press the POWER button on the front panel of the unit to turn the unit to Standby mode. 2) Press the STANDBY button on the unit or remote control to power on the unit 3) Press the INPUT button on the unit or remote control repeatedly to select the input sources to USB, CARD, FM radio, Blue, AUX1, AUX2, PC as desired. -
Page 12: Listen To Fm Radio
2. LISTEN TO FM RADIO Connect the supplied 3.5mm audio cable to FM ANT jack on the rear of the unit as the figure below. Extend the wire and relocate it to get the best reception. 1. Power On the unit ad previous procedures. 2. -
Page 13: Sd/Usb Slot Operation
3. SD/USD SLOT OPERATION Before connecting USB flash drive or SD cards please make sure they are in right directions. Refer following figure. 1. Power ON the unit as previous procedures. 2. Insert SD cards to SD slot or USB memory stick to USB slot. 3. -
Page 14: Package Contents
3. When mobile phone had a call the unit will show “CALL” Press listening phone and the meanwhile you will enter hands free mode, the effect distance will be 1 meter. Hang up by repeat press the unit will resume to play music. -
Page 15: Mobile Phone Connect With Wifi Sound Bar
MOBILE PHONE CONNNECT WITH WIFI SOUD BAR Initial connect and set WIFI Sound bar ( Only initial use device should following below steps) 1. Initial use, you will need to install the APP software. Android phone go to Google play search “MUZO player” download and install, IOS systems phone go to APPSTORE search “MUZO player”... -
Page 16: Set Multdevice To One Group
SET MULTDEVICE TO ONE GROUP ADD MULTDEVICE Following below steps to set multi-device 1. Click the device LIST+ 2. Add the extra device steps as same as initial add device 3. You will see the added device show under your list after you finished the steps. -
Page 17: Muzo App Main Functions
SEPARATE MULTDEVICE The device will separate after you drag down the added device then you can play 2 different songs. MUZO APP MAIN FUNCTIONS Main menu slide to left&right to choose the music list and the music menu. Hold press music menu slide up change to music list, slide down to return. -
Page 18: Muzo Player Icon Function
MUZO PLAYER ICON FUNCTIONS... -
Page 19: Upgrade Muzo App On Line
UPGRADE MUZO APP ON LINE The upgrade will fail if power off or WIFI off during the upgrade procedures, the device will restart after upgrade succeeded.
Need help?
Do you have a question about the PSBV210WIFI and is the answer not in the manual?
Questions and answers