Table of Contents
Advertisement
Quick Links
Advertisement
Table of Contents

Related Manuals for Philips DTR3442B


Summary of Contents for Philips DTR3442B
-
Page 1: User Manual
Terrestrial User manual... - Page 2 We strongly recommend your careful reading of this manual before using this product. Note • As a result of rmware upgrading, it is possible that the content in this manual may not exactly correspond to the operation of the product. Register your product and get support at www.philips.com/welcome...
-
Page 3: Table Of Contents
Contents 12 Environment Meaning of logos present on the product or its packaging 1 Safety recommendations Product recycling and disposal Where to put your Set-top box? European Directive on Waste Electricaland Electronic Warnings and safety instructions Equipment (WEEE) Batteries Directive on the Restriction of use of certain hazardous Interference substances in electronic equipment (RoHS) USB Storage devices... -
Page 4: Safety Recommendations
1 Safety recommendations Warnings and safety instructions • As a precaution, in case of danger, the power Use of the Set-top box is subject to safety measures supply unit acts as a disconnecting mechanism for designed to protect users and their environment. the power supply. -
Page 5: Batteries
Always keep the power cord unit out of the reach of children or domestic animals. Only personnel approved by the manufacturer can repair the Set-top box. Failure to comply with these safety precautions will invalidate the guarantee. Have a specialised installer perform all connections if you want to use cables that are not provided with the Set-top box. -
Page 6: What's In The Box
2 What‘s in the box Your new equipment includes: High De nition Digital Remote control Television Receiver (DTR) with 2 batteries (AAA) Quick start guide warranty card Safety condition... -
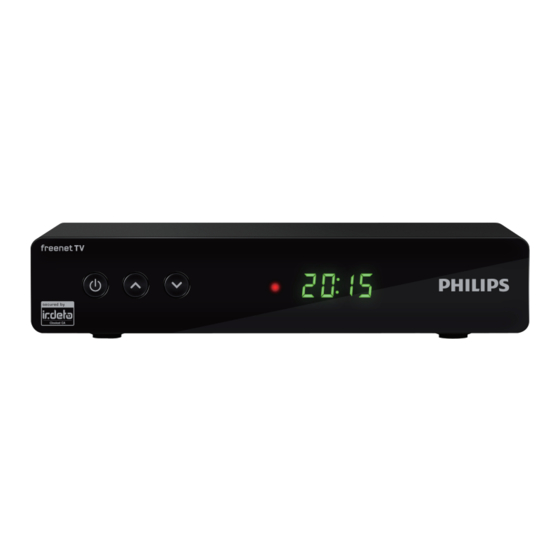
Page 7: Front Panel Of The Set-Top Box
Front panel of the Set-top box Rear panel of the Set-top box RF IN - Antenna input socket for connecting a terrestrial antenna system. Key to activate / deactivate the unit. LOOP OUT – Antenna signal output port for connecting with the input port of another receiver. -
Page 8: Overview Of The Remote Control
BACK Overview of the remote control • Press to return to the previous menu or return to previous channel you have been watching. INFO • Display program information. MENU • Enter the main menu. • The shortcut key to favorites list. •... -
Page 9: Connecting Your Devices
3 Connecting your devices Connection to the TV set Connection to a High-De nition television set Before installing your Set-top box: using an HDMI lead • Please check that the delivery is complete (see What‘s in the box, page 6). To take advantage of High De nition picture quality, you •... -
Page 10: Connection To A Home Cinema System
Connection to a Home cinema system Some programmes are broadcast with a high quality multichannel digital sound. The connection of your Set-top box to a Home cinema system will give you a cinematic surround sound experience when watching these programmes. This can easily be done by connecting with a coaxial cable (not supplied) the DIGITAL AUDIO output of your Set-top box to the digital audio coaxial input of your Home cinema ampli er... -
Page 11: Before Starting
4 Before starting The receiver is operated via the remote control. Please follow the guide of OSD (On Screen Display) as below: Open and close the OSD: In OSD, you can set all the functions of the terrestrial receiver. The call is made by the "MENU"... -
Page 12: Getting Started
5 Getting Started Setup Guider If you use the Set-top box for the rst time, the “Setup Guider” menu will appear. Press cursor button to set the Country, Language, Searching and network parameters, Password. Finally press the "OK" button to enter the program search page. Search Press the “Menu”... -
Page 13: Basic Operation
Basic Operation Favorites list Changing Channels The favorite lists can be lled with the favorite channels. which are chosen by users. Press “OK” button and open the TV list. You can change channels in two ways: Select a channel and press “Red” button to add it to the Press “▲... -
Page 14: System Setup
7 System Setup Setting Menu Setting menu allows you to do the General Setting, Video Setting, Audio Setting, Password Setting and Factory Setting. Press the "MENU" button to enter main menu. Press "▲" or "▼" button to highlight "Setting". ► Press "... -
Page 15: Factory Setting
Factory Setting This menu allows you to re-set the Set-top box back to factory settings, clear all existing channels. In the "Setting" menu, select "Factory", press "OK" button. You are asked to input a password (the default password is"0000"). A con rmation window is displayed. Select "Yes"... -
Page 16: Information
8 Information Signal You can check the detailed information of the channel, like In this menu, you can see the current information of this Set frequency, intensity, quality, etc. Top Box, Signal information and Network Information. Another way to enter this page is by pressing “Info” button twice while watching programs. -
Page 17: Digital Tv
9 Digital TV Please refer to “6 Basic Operation-Accessing the Electronic Program Guide (EPG)” From “Digital TV” menu you can check the program list, edit the programs, check EPG and activate timer function. Timer Setting & Timer Manage Program List In the “Digital TV”... -
Page 18: Update
10 Update We o er the functions for user to upgrade software version by OTA or by USB. OTA Update Enter "Update" menu, select "OTA Update". Press "OK" button, “OTA Update Setting” menu is shown. From here you can search OTA stream manually. USB Update Insert the USB disk. -
Page 19: Multimedia
11 Multimedia Picture browsing This function allows you to watch images from USB disk. ► In "Multimedia ", press " "button to select "Picture”, press Multimedia menu allows you to play music, videos, pictures "OK" button to enter the mode. and native recorded les from USB disk. -
Page 20: Environment
Preservation of the environment is an essential concern of Philips. electronic equipment (RoHS) The desire of Philips is to operate systems observing the environment and consequently it has decided to integrate Your receiver along with the batteries supplied comply with environmental performances in the life cycle of its products, the directive relating to the RoHS –... -
Page 21: Troubleshooting
The Set-top box automatically downloads ’over the air’ new software and services when they become available. You can also upgrade your Set-top box using a USB stick. Please check www.philips.com to nd more information and the most recent software version for your product. -
Page 22: Customer Support
14 Customer Support At Philips we believe that a high quality product should come with the highest quality customer service. In the design of this product we have taken great care to ensure the maximum quality possible and are sure that you will be delighted with your purchase. - Page 24 Philips and the Philips Shield Emblem are registered trademarks of Koninklijke Philips N.V. used under license. This product was brought to the market by X-GEM SAS, further referred to in this document as X-GEM SAS, and is the manufacturer of the product.
Need help?
Do you have a question about the DTR3442B and is the answer not in the manual?
Questions and answers