
Subscribe to Our Youtube Channel
Related Manuals for Atlantis A02-AP2-W54M


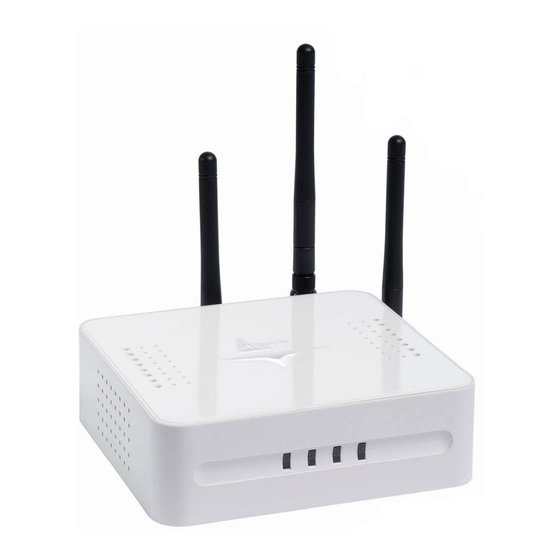
Summary of Contents for Atlantis A02-AP2-W54M
-
Page 1: Access Point
Wireless MIMO Multi-Function Access Point A02-AP2-W54M MULTILANGUAGE Quick Start Guide A02-AP2-W54M_GX01 Where solutions begin ISO 9001:2000 Certified Company... - Page 2 Dieses Produkt ist durch die Atlantis Land 3 Jahre Fast-Swap Garantie gedeckt. Für weitere Informationen, beziehen Sie sich bitte auf Web Site www.atlantis-land.com. ESPAÑOL Este producto esta cubierto por Atlantis Land con una garantía Fast-Swap de 3 años. Para mayor información diríjase a nuestro sitio Web www.atlantis-land.com.
- Page 3 MultiLanguage Quick Start Guide The award of the information is facultative, but its lack will prevent ATLANTIS LAND® from starting the Guarantee process requested. Registration on the web site www.atlantis-land.com within 15 days from the purchase of the product dismiss the customer from showing a valid proof of purchase (Sale Receipt or Invoice) in case of the request of intervention.
-
Page 4: Table Of Contents
MultiLanguage Quick Start Guide INDEX ITALIANO 1.1 Panoramica del Wireless Multi-Function Access Point..........10 1.2 Contenuto della confezione...................10 1.3 Requisiti di Sistema per la configurazione.............11 1.4 Schema di installazione del Wireless MIMO Multi-Function Access Point.....11 1.5 Precauzioni nell’uso del Wireless MIMO Multi-Function Access Point....12 1.6 I LED frontali ......................12 1.7 Le porte posteriori ....................13 1.8 Cablaggio......................14... - Page 5 MultiLanguage Quick Start Guide 1.9.4 Configurazione del PC in Windows XP ..............31 1.10 Default Setting ....................31 1.11 Password ......................31 1.12 LAN and WLAN Ports ..................32 1.13 Accessing the Access Point Web Configurator ...........32 1.13.1 Navigating the Access Point Web Configurator..........33 1.13.2 Wireless Wizard ....................35 1.14 Product Support ....................36 FRANCAIS...
- Page 6 MultiLanguage Quick Start Guide 1.9.1 Configuración del PC en Windows 95/98/ME.............60 1.9.2 Configuración del PC en Windows NT4.0 ............61 1.9.3 Configuración del PC en Windows 2000 ............61 1.9.4 Configuración del PC en Windows XP ...............62 1.9.5 Configuración en entornos MAC ................62 1.10 Verificación de la Configuración................62 1.11 Configuración de fábrica ..................63 1.12 Contraseña ......................63...
-
Page 7: Italiano
Atlantis Land spa che non si assume responsabilità per qualsiasi errore o inesattezza che possa apparire in questo manuale. Nessuna parte di questa pubblicazione può essere riprodotta o trasmessa in... - Page 8 ITALIANO Dichiarazione di Conformità Questo dispositivo è stato testato ed è risultato conforme alla direttiva 1999/5/CE del parlamento Europeo e della Commissione Europea, a proposito di apparecchiature radio e periferiche per telecomunicazioni e loro mutuo riconoscimento. Dopo l’installazione, la periferica è stata trovata conforme ai seguenti standard: EN 300.328(radio), EN 301 489-1, EN 301 489-17(compatibilità...
-
Page 9: Panoramica Del Wireless Multi-Function Access Point
ITALIANO La ringraziamo per aver scelto il Wireless MIMO Access Point, la via più semplice per il Wireless networking. Questo manuale è inteso come una guida rapida, pertanto per ulteriori dettagli sulla configurazione fare riferimento al manuale esteso presenti sul CDRom allegato. -
Page 10: Requisiti Di Sistema Per La Configurazione
ITALIANO Qualora mancasse uno qualsiasi di questi componenti rivolgersi immediatamente al rivenditore. 1.3 Requisiti di Sistema per la configurazione Prima di iniziare l’installazione del dispositivo controllare i seguenti requisiti: • Un Computer (almeno Pentium®III 600Mhz) con un qualsiasi Sistema Operativo e lo stack TCP/IP correttamente installato •... -
Page 11: Precauzioni Nell'uso Del Wireless Mimo Multi-Function Access Point
ITALIANO 1.5 Precauzioni nell’uso del Wireless MIMO Multi-Function Access Point Non usare il Wireless MIMO Multi-Function Access Point in un luogo in cui ci siano condizioni di alte temperatura ed umidità, l’Access Point potrebbe funzionare in maniera impropria e danneggiarsi. Non usare la stessa presa di corrente per connettere altri apparecchi al di fuori del Wireless Multi-Function Access Point. -
Page 12: Le Porte Posteriori
ITALIANO correttamente Spento o Lampeggiante (2 o più volte al secondo) in caso di problemi Quando lampeggia di verde indica l’invio di pacchetti WLAN sull’interfaccia wireless Accesa verde per indicare una connessiona a 100 o 10 Mbps e lampeggiante verde in caso di trasferimento dati 1.7 Le porte posteriori Porte Utilizzo... -
Page 13: Cablaggio
ITALIANO • Premere il tasto reset sino a che il dispositivo non effettuerà un reboot (il LED STATUS si spegne), solo quando il LED STATUS inizierà a lampeggiare, lasciare il reset. A questo punto il dispositivo ripartirà ripristinando condizioni iniziali. Avvitare le antenne fornite in dotazione sino a fine ConnettoriReverse SMA corsa. -
Page 14: Configurazione Del Pc In Windows 95/98/Me
ITALIANO L’indirizzo IP, normalmente appartenente ad una classe privata, deve stare nella classe 192.168.1.x con Subnet 255.255.255.0. Anzitutto è necessario preparare i PC inserendovi (qualora non vi fosse già) la scheda di rete / Adattatore Wireless. E’ necessario poi installare il protocollo TCP/IP. Qualora il TCP/IP non fosse correttamente configurato, seguire gli steps successivi: Qualsiasi workstation col TCP/IP può... -
Page 15: Configurazione Del Pc In Windows 2000
ITALIANO Selezionare l’opzione Specify an IP Address e ed introdurre un indirizzo IP del tipo 192.168.1.x (X compreso tra 1 e 253 escluso 254 che è l’IP utilizzato del Wireless MIMO Multi-Function AP) e subnet mask 255.255.255.0. Premere OK per terminare. 1.9.3 Configurazione del PC in Windows 2000 Andare su Start/Settings/Control Panel. -
Page 16: Configurazione In Ambiente Mac
Controllare l’indirizzo del PC digitando winipcfg per (Win95,98,ME) o ipconfig (per Win2000,XP) ed eventualmente reinstallare lo stack TCP/IP. 1.11 Settaggi di Default Prima di iniziare la configurazione del Wireless MIMO Multi-Function Access Point è necessario conoscere quali siano i settaggi di default: Nome Utente: admin Password: atlantis... -
Page 17: Password
1.12 Password Quando si configura Il Wireless MIMO Multi-Function Access Point con il browser , una volta inseriti username e password (admin, atlantis) premere su OK per entrare per la prima volta. E’ consigliato cambiare la password, al fine di aumentare la sicurezza. - Page 18 ITALIANO Premere OK per continuare. Apparirà a questo punto l’interfaccia di configurazione dell’apparato.
-
Page 19: Navigare Nell'interfaccia Web Di Configurazione
ITALIANO 1.14.1 Navigare nell’interfaccia Web di Configurazione Questa sezione descrive come navigare all’interno dell’interfaccia di configurazione. Sono disponibili 2 differenti menu: Cliccare su “Wireless Wizard” per configurare velocemente l’apparato tramite la configurazione assistita. Cliccare su “Login” per accedere alal configurazione vera e propria dell’apparato (fare riferimento alla manualistica su CDRom): Cliccare su “Status”... -
Page 20: Wireless Wizard
ITALIANO 1.14.2 Wireless Wizard Grazie a questo Wizard è possibile configurare il dispositivo in brevissimo tempo. Una volta scelta la regione di appartenenza (nel campo Select Region, impostare Others), cliccare su Next per proseguire. Il dispositivo effettuerà lo scanning automatico di tutte le frequenze (questo processo potrebbe impiegare diversi minuti) al fine di trovare il canale ottimale. -
Page 21: Supporto Offerto
è possibile contattare l’help desk telefonico (02/93907634) gratuito di Atlantis Land che fornirà assistenza da lunedì al giovedì dalle 9:00 alle 13:00 e dalle 14:00 alle 18:00 ed il venerdì dalle 9:00 alle 13:00. E’ possibile anche utilizzare il fax (02/93906161) la posta elettronica (info@atlantis-land.com... -
Page 22: English
Windows™ 98SE/2000/ME/XP are trademarks of Microsoft® Corp. Pentium is trademark of Intel. All copyright reserved. The Atlantis Land logo is a registered trademark of Atlantis Land SpA. All other names mentioned mat be trademarks or registered trademarks of their respective owners. - Page 23 ENGLISH CE Mark Warning This is a Class B product. In a domestic environment, this product may cause radio interference, in which case the user may be required to take adequate measures. CE in which Countries where the product may be used freely: Germany, UK, Italy, Spain, Belgium, Netherlands, Portugal, Greece, Ireland, Denmark, Luxembourg, Austria, Finland, Sweden, Norway and Iceland.
-
Page 24: An Overview Of Wireless Mimo Multi-Function Access Point
ENGLISH For more detailed instructions on configuring and using the Wireless MIMO Access Point, please refer to the online manual. This manual is think for fast configuration. 1.1 An Overview of Wireless MIMO Multi-Function Access Point Wireless MIMO Multi-Function Access Point allows a complete mobility maintaining a continuous connection. -
Page 25: System Requirements
ENGLISH 1.3 System Requirements Before installing the device, your PC should meet the following: • Intel® Pentium®III 600Mhz or compatible processor with TCP/IP stack • Internet Explorer V6.0 on Netscape V6.0 • CDRom 1.4 Hardware Installation of Wireless MIMO Multi-Function Access Point Follow these istructions to make a correct cabling of Wireless MIMO Multi-Function Access Point:... -
Page 26: The Front Leds
Place the Wireless Access Point on a stable surface. Only use the power adapter that comes with the package. Do NOT upgrade firmware on any Atlantis Land product over a wireless connection. Failure of the device may result. Use only hard-wired network connections. -
Page 27: The Rear Ports
ENGLISH 1.7 The Rear Ports Porte Meaning Connect the Power Adapter DC plug to the AP’s POWER (DC-IN) power jack. Ethernet port with 10/100Mbps Fast Ethernet connections, connect this port to switch/hub. If AP is power on: Reset • Press reset button for 2/3 seconds; device will reboot (release reset button when LED STATUS turn off). -
Page 28: Cabling
ENGLISH 1.8 Cabling Connect to the Switch/Hub • Plug in one end of the RJ45 network cable to the Switch/Hub port • Plug in the other end of the RJ45 network cable to the Wireless Access Point Check the installation The LEDs of the Access Point are clearly visible and the status of the network link can be seen instantly: •... -
Page 29: Windows 95/98/Me
ENGLISH Any TCP/IP capable workstation can be used to communicate with or through the Wireless Access Point to configure other types of workstations, please consult the manufacturer’s documentation. 1.9.1 Windows 95/98/ME Go to Start / Settings / Control Panel. In the Control Panel, double-click on Network and choose the Configuration tab. -
Page 30: Configurazione Del Pc In Windows Xp
Password: atlantis IP Address(192.168.1.254) Subnet Mask(255.255.255.0) Mode: Access Point SSID: A02-AP2-W54M Channel: 6 1.11 Password When there is a screen needs to enter the Network password, it means that there is a password settle, type in the password you entered before. -
Page 31: Lan And Wlan Ports
Open Internet Explorer 5.0 or above Web browser. Enter IP address http://192.168.1.254 (the factory-default IP address setting) to the address location. When there is a screen needs to enter the User name and Password, both of the default Username is “admin” and Password is “atlantis”.Click OK. -
Page 32: Navigating The Access Point Web Configurator
ENGLISH The screen will show the station summary of the AP when you login to the Wireless MIMO Multi-Function AP. 1.13.1 Navigating the Access Point Web Configurator This section describes how to browse on Web configuration interface. - Page 33 ENGLISH 2 Differents menu are available: Click on “Wireless Wizard” to set easily and fastly the Wireless MIMO Multi- Function AP through wizard configuration. Click on “Login” to enter to Web interface configuration of Wireless MIMO Multi- Function AP: Click on “Status” to see all details about AP, LAN and WLAN interfaces and event recorder.
-
Page 34: Wireless Wizard
ENGLISH 1.13.2 Wireless Wizard With this wizard setup, is possible set Wireless MIMO Multi-Function AP easily and fastly. Choose your region or country (on field Select Region, set Others), and click Next to continue. Wireless MIMO Multi-Function AP will make an automatic frequency scanning (it should during few minutes) to select best channel for trasmissions. -
Page 35: Product Support
If you have any problems with the Wireless MIMOAccess Point, please consult this manual. If you continue to have problems you should contact the dealer where you bought this device. If you have any other questions you can contact the Atlantis Land company directly at the following address:... - Page 36 ENGLISH...
-
Page 37: Francais
FRANCAIS Copyright Copyright. 2002 est la propriété de cette société. Tout droits réservés. Sont interdites, la reproduction, la transmission, la transcription, la mémorisation dans un système de sauvegarde où la traduction dans une autre langue ou en langage informatique quels qu’ils soient, de la présente publication, sous quelque forme que ce soit ou quelque en soit le moyen, électronique, mécanique, magnétique, optique, chimique, manuel ou de tout autre genre, sans avoir obtenu préalablement l’autorisation de notre entreprise. - Page 38 FRANCAIS Déclaration de Conformité Cet appareil a été testé et est conforme à la Directive 1999/5/CE du Parlement européen et du Conseil concernant les équipements hertziens et les équipements de terminaux de télécommunications et la reconnaissance mutuelle de leur conformité. Après évaluation du matériel, celui-ci est conforme aux normes suivantes : EN 300.328 (radio), EN 301 489-1, EN 301 489-17(compatibilité...
-
Page 39: Description
FRANCAIS Félicitations pour avoir choisit ce produit. Ce manuel a été rédigé pour une utilisation avancée du Wireless MIMOAccess Point. Pour plus de précisions, tant sur les méthodes de configuration que sur le paramétrage avancé, reportez-vous au Manuel sous format électronique (PDF) sur le CD Rom fourni. 1.1 Description Les 3 antennes de 2 dBi chacune et le MIMO XR™... -
Page 40: Câblage
FRANCAIS Lecteur CDRom 1.4 Câblage Après avoir terminé le câblage, raccordez l’alimentation pour mettre l’AP sous tension. Assurez-vous que les LEDs sont correctement allumées. Connectez un câble réseau (standard ou croisé) pour relier l’appareil à un Hub/Switch ou à un PC. Une fois toutes les liaisons effectuées et l’AP allumé, le produit effectuera un diagnostic (d'une quarantine de secondes). -
Page 41: Face Avant
FRANCAIS 1.6 Face avant Signification Allumée quand l’appareil est sous tension POWER STATUS Clitognante pour indiquer que le système est actif. Clignotante pour indiquer la transmission de données. WLAN Fixe, elle indique le fonctionnement correct du module wireless Allumée quand le LAN (réseau) est connecté Clignote lors des transferts de données... -
Page 42: Face Arrière
FRANCAIS 1.7 Face arrière Port Usage Connectez l’alimentation fournie à cette prise POWER (DC-IN) Lorsque l’appareil est allumé, à presser pour Reset effectuer le reset ou le restore. Les opérations sont: 5/6 secondes pour faire redemarrer le produit 15 secondes ou plus: retour aux conditions par défaut (exemple d’un oubli de password) Reliez directement... - Page 43 FRANCAIS Ethernet ou Wireless installée correctement et être connectés à l’appareil directement (sur câble à travers un Hub/Switch ou en wireless). Ils doivent avoir le protocole TCP/IP installé et correctement configuré avec une adresse IP qui doit rester dans le même sous réseau.
-
Page 44: Windows 95/98/Me
FRANCAIS 1.8.1 Windows 95/98/ME Allez dans Panneau de Configuration. Double-cliquez sur Réseau et afficher l’onglet Configuration. Sélectionnez le protocole TCP/IP -> NIC carte, ou une carte réseau Ethernet du Cliquez sur Propriétés. Dans l’onglet Adresse IP Sélectionnez l’option Specify an IP address et introduisez 192.168.1.2 (IP) et subnet 255.255.255.0 (Subnet Mask). -
Page 45: Vérification
FRANCAIS Double-cliquez sur Connexion au Réseau local. Cliquez Propriétés. Sélectionnez Protocole Internet (TCP/IP) et cliquez sur Propriétés. Sous l’onglet Général, sélectionnez par un clic la case Utiliser l’adresse IP suivante puis introduisez 192.168.1.2 (adresse IP) et 255.255.255.0 (masque de sous réseau). Cliquez sur OK pour terminer la configuration. -
Page 46: Mot De Passe
• Adresse IP (192.168.1.254), Masque de sous réseau=255.255.255.0 • Wireless: SSSID = A02-AP2-W54M, Channel = 6, WEP/WPA = non activé 1.11 Mot de Passe Il est conseillé de le changer afin d'augmenter la sécurité. Si vous l’avez oublier, il suffit de presser la touche reset pendant au moins 15 secondes: un retour aux réglages par défaut est effectué. -
Page 47: Configuration Avec Le Navigateur
Vous êtes dans le menu de configuration. Un mot de passe vous est demandé, pour la première connexion. Nom d’Utilisateur (User) = admin et Mot de Passe (Password) = atlantis et appuyez sur OK pour aller dans la configuration. Il apparaîtra à ce point le Menu Principal. -
Page 48: Wizard
FRANCAIS 1.13.1 Wizard Grâce à cet Wizard vous pourrez configurer le dispositif en très peu de temp. Vous devrez voir l’image en bas (dans le cas que n’est pas comme ça, cliquez sur le bouton Wizard). Chaque pays utilise des bandes de fréquences fixées par cet organisme, l’utilisateur final doit donc s’assurer du bon réglage de son AP sur un canal autorisé... -
Page 49: Support
FAI), vous pouvez contacter la « help desk » téléphonique gratuite d’Atlantis Land qui vous fournira assistance du: lundi au jeudi de 9.00 à 13.00 et 14.00 à 18.00. Le vendredi de 9.00 à 13.00. - Page 50 FRANCAIS...
-
Page 51: Español
A pesar de ello, no podemos garantizar la ausencia de estos. Atlantis Land no se hacen responsable de daños o pérdidas directas o indirectas, incluidos, pero sin limitación, los daños causados por la imposibilidad su uso, la pérdida de datos o software y/o los daños o pérdidas causados por el uso o... - Page 52 ESPAÑOL Aviso sobre el distintivo CE Este es un producto de Clase B. En un entorno doméstico este producto puede provocar interferencias de radio por lo que, si fuera así, es necesario que el usuario tome las medidas adecuadas Países CE donde este producto puede ser usado libremente: España, Alemania, Reino Unido, Italia, Bélgica, Holanda, Portugal, Grecia, Irlanda, Dinamarca, Luxemburgo, Austria, Finlandia, Suecia, Noruega e Islandia.
-
Page 53: Introducción Al Punto De Acceso Inalámbrico Multifunción
ESPAÑOL Gracias por comprar la tarjeta inalámbrica MIMO la cual proporciona la forma más fácil de conectarse a una red inalámbrica. Este documento es la guía rápida. Para una información más detallada consulte el manual incluído en el CDRom. 1.1 Introducción al Punto de Acceso Inalámbrico Multifunción El Punto de Acceso Inalámbrico Multifunción MIMO permite una extensa movilidad manteniendo siempre la conexión. -
Page 54: Requisitos Mínimos Del Sistema
ESPAÑOL Si falta cualquier de estos componentes comuníqueselo inmediatamente al comercio donde lo haya comprado. 1.3 Requisitos mínimos del sistema Antes de instalar el dispositivo asegúrese que su ordenador cuénta al menos con los siguientes requisitos: • Pentium®III 600Mhz con cualquier sistema operativo y una conexión TCP/IP correctamente instalada. -
Page 55: Precauciones De Uso Del Punto De Acceso Inalámbrico Multifunción Mimo
ESPAÑOL 1.5 Precauciones de uso del Punto de Acceso Inalámbrico Multifunción MIMO No usar el Punto de Acceso Inalámbrico Multifunción MIMO en lugares donde las condiciones sea de altas temperaturas y humedad ya que el producto se podría dañar. No utilizar el enchufe para conectar otros dispositivos que no sean el Punto de Acceso Inalámbrico Multifunción. -
Page 56: Los Led Frontales
ESPAÑOL 1.6 Los LED frontales En el panel frontal del Punto de Acceso Inalámbrico Multifunción MIMO se encuentras varias luces LED que nos indican el estado en que se encuentran varias funciones del producto según se describen en la siguiente tabla. Descripción Encendido verde cuando está... -
Page 57: Los Puertos Posteriores
ESPAÑOL 1.7 Los puertos posteriores Conector Inserir el conector del transformador a esta POWER (DC-IN) entrada. Conectar con un cable Ethernet, directo o cruzado, a la tarjeta de red de un ordenador o a un switch (conmutador). Con el dispositivo encendido: Reset •... -
Page 58: Cableado
ESPAÑOL apague STATUS (indicando que se ha reiniciado) y solo soltar una vez que vuelva a parpadear con la luz verde del LED de STATUS. Esta operación borrará todos los parámetros que haya configurado. Enroscar las antenas incluidas hasta que hagan Conectores Reverse SMA tope pero sin llegar a forzar las mismas. -
Page 59: Configuración Del Pc En Windows 95/98/Me
ESPAÑOL de estar dentro de la clase privada – no se usa en Interet – 192.168.1.x con máscara de red 255.255.255.0. En resumen, es necesario preparar el ordenador instalando la tarjeta de red o adaptador inalámbrico y el protocolo TCP/IP (si no viniese ya instalado por defecto). Para una configuración detallada, siga los pasos que se detallan a continuación. -
Page 60: Configuración Del Pc En Windows Nt4.0
ESPAÑOL Reinicie el ordenador para que los cambios surtan efecto. 1.9.2 Configuración del PC en Windows NT4.0 Vaya a Inicio/Configuración/Panel de Control, haga doble clic sobre sobre el icono de Red y seleccione Protocolos. Seleccione el protocolo TCP/IP, pulsando a continuación el botón de Propiedades. -
Page 61: Configuración Del Pc En Windows Xp
ESPAÑOL 1.9.4 Configuración del PC en Windows XP Vaya a Inicio/Configuración/Panel de Control y haga doble clic sobre sobre el icono Conexiones de red. Haga doble click sobre Conexión de área local pulsando a continuación el botón de Propiedades. Seleccione Protocolo Internet (TCP/IP) volviendo a pulsar sobre el botón de Propiedades. -
Page 62: Configuración De Fábrica
1.12 Contraseña La primera vez que se entra en el Punto de Acceso Inalámbrico Multifunción MIMO es necesario introducir el usuario (admin) y la contraseña (atlantis) con los que viene configurado de fábrica y pulsar después Acertar. Se aconseja vehementemente cambiar tanto el usuario como la contraseña una vez que se haya entrado, con el fin... -
Page 63: Puertos Lan Y Wlan
1.13 Puertos LAN y WLAN Eta tabla resume la configuración de fábrica de los interfaces LAN (Red Local) y WLAN (Red Local Inalámbrica): Puerto LAN Puerto WLAN 192.168.1.254 Dirección IP Modalidad=Access Point Canal=6 255.255.255.0 Máscara de Red SSID= A02-AP2-W54M Seguridad=Disabilitata... -
Page 64: Configuración A Través El Navegador
Introducir en la barra de direcciones del Internet Explorer la siguiente dirección IP que tiene el Punto de Acceso por defecto: “192.168.1.254 En el formulario introducir en nombre de usuario y la contraseña (admin/ atlantis) y pulsar Aceptar para continuar. -
Page 65: Navegar La Interfaz Web De Configuración
ESPAÑOL 1.14.1 Navegar la interfaz Web de configuración En esta sección se detalla como navegar dentro de la interfaz de configuración. En la pantalla inicial hay dos rutas posibles; entrar en la configuración del dispositivo o activar el asistente para la configuración: Pinchar sobre Wireless Wizard (Asistente para la configuración) para configurar rápidamente el dispositivo con el asistente. -
Page 66: Asistente Para La Configuración Inalámbrica
ESPAÑOL 1.14.2 Asistente para la Configuración Inalámbrica Gracias este asistente es posible configurar el dispositivo rápidamente. En el campo Select Region (Selección de zona), seleccionar en lista desplegable Others y pinchar en Next para proseguir. El dispositivo efectuará un sondeo automático de todas las frecuencias disponibles – lo cual puede llevar varios minutos –... -
Page 67: Soporte Técnico
El dispositivo guardará los cambios y se reiniciará con la nueva configuración. En el caso de que tuviera problemas, consultar el manual incluido en el CDRom. 1.15 Soporte Técnico Consultar el sitio Web http://www.atlantis-land.com o contactarnos a las siguientes direcciones de correo electrónico (info@atlantis-land.com o tecnici@atlantis- land.com). -
Page 68: Appendix
APPENDIX APPENDIX A For some European Country, it may have its own domain; users are responsible for ensuring that the channel set configuration is in compliance with the regulatory standards of these countries. Country Code Channel Regulatory Domains Region Others 1-11 USA/CANADA Others... -
Page 69: Appendix B
APPENDIX APPENDIX B TECHNICAL FEATURES Physical Interface - LAN: 1 x RJ45 10/100 Base-T Ethernet auto-crossover (MDI/MDI-X) - 4 diagnostic LEDs - Operation Voltage: 5V (DC) - Reset Button - WLAN: 3 x 2 dBi external orientable detachable Antennas (Reverse SMA) Hardware: -Wireless Chipset: Mini PCI Ralink RT2600®... - Page 70 APPENDIX - 3 X 2 dBi external Antennas (R-SMA) Wireless Distribution System With WDS mode, user can use wireless media to communicate two or more LANs through the AP with WDS mode, all of the LAN will be combined in the WDS group. The WDS feature makes the NetFly AP2-W54M an ideal solution for quickly creating and extending a wireless local area network (WLAN) in offices or other workplaces, or even at hotspots.
- Page 71 APPENDIX...
- Page 72 Atlantis Land S.p.A. Viale De Gasperi, 122 Mazzo di Rho – MI – Italy info@atlantis-land.com sales@atlantis-land.com Where solutions begin ISO 9001:2000 Certified Company...
Need help?
Do you have a question about the A02-AP2-W54M and is the answer not in the manual?
Questions and answers