Table of Contents
Advertisement
SINGLE-ZONE DUCTLESS
MINI-SPLIT SYSTEM
USER MANUAL
115V SYSTEMS:
2PAMSH09A-17
2PAMSH12A-17.2
208/230V Systems:
2PAMSH09B-17
2PAMSH12B-17.5
2PAMSH18B-17.7
2PAMSH24B-16
2PAMSH30B-18
2PAMSH36B-16
Before using your
air conditioner,
please read this
manual carefully
and keep it for
future reference.
The Right Temperature Since 1986
Advertisement
Table of Contents

Related Manuals for ACPro 2PAMSH09A-17


Summary of Contents for ACPro 2PAMSH09A-17
-
Page 1: User Manual
The Right Temperature Since 1986 SINGLE-ZONE DUCTLESS MINI-SPLIT SYSTEM USER MANUAL 115V SYSTEMS: 2PAMSH09A-17 2PAMSH12A-17.2 208/230V Systems: 2PAMSH09B-17 2PAMSH12B-17.5 2PAMSH18B-17.7 2PAMSH24B-16 2PAMSH30B-18 2PAMSH36B-16 Before using your air conditioner, please read this manual carefully and keep it for future reference. -
Page 3: Table Of Contents
Table of Contents User Manual Safety Precautions Warning .......................... 1 Caution ........................... 2 Part Names Indoor unit ........................3 Outdoor unit........................3 Display window....................... 3 Operating Instructions Operating temperature ....................4 Manual operation......................4 Airflow direction control ....................5 How the air conditioner works .................. -
Page 4: Safety Precautions
Safety Precautions To prevent injury to the user or other people and property damage, the following instructions must be followed. Incorrect operation due to ignoring or not following installation and usage instructions may cause harm or damage. The seriousness is classified by the following indications: WARNING This symbol indicates the possibility of death or serious injury. - Page 5 Safety Precautions • Never operate any controls with a wet • If the air conditioner is to be used in hand. Doing so may cause an electric conjunction with other heaters, the air shock. should be refreshed periodically; • Never use the device for any other otherwise there is a risk of lack of purpose than the intended use.
-
Page 6: Part Names
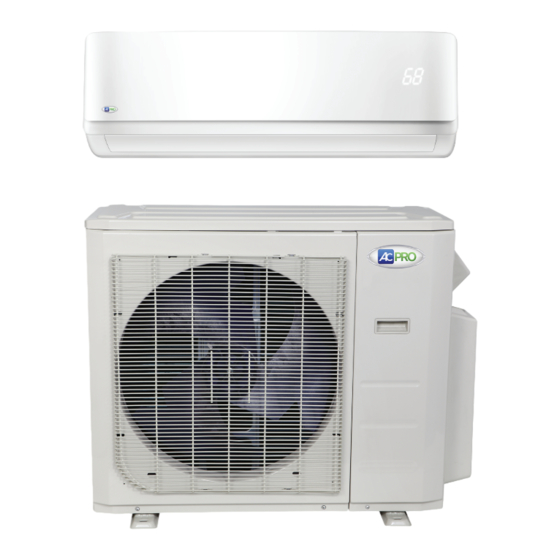
Part Names Indoor Unit 1. Front panel 2. Air inlet 3. Air filter 4. Air outlet 5. Horizontal air flow grille 6. Vertical air flow louver (inside) 7. Display window Outdoor Unit 8. Connecting pipe 9. Connecting cable 10. Stop valve NOTE: All of the illustrations in this manual are for explanation purposes only. -
Page 7: Operating Instructions
Operating Instructions Operating Temperature Mode Cooling Operation Heating Operation Drying Operation Temperature Room Temperature 62ºF~90ºF 32ºF~86ºF 50ºF~90ºF (17ºC~32ºC) (32ºC~86ºC) (10ºC~32ºC) 32ºF~122ºF 5ºF~86ºF 32ºF~122ºF (0ºC~50ºC) (-15ºC~30ºC) (0ºC~50ºC) 5ºF~122ºF/-15C~50ºC for models with low temperature cooling system NOTE: 1. Optimum performance will be achieved within these operating temperatures. If air conditioner is used outside of the above conditions, certain safety protection features might come into operation and cause the unit to function abnormally. -
Page 8: Airflow Direction Control
Airflow Direction Control • Adjust the air flow direction properly. Failure to do so may cause discomfort or uneven room temperatures. • Adjust the horizontal louver using the remote control. • Adjust the vertical louver manually. Adjusting vertical air flow (Up/Down) Perform this function while the unit is in operation. -
Page 9: How The Air Conditioner Works
How the Air Conditioner Works Basic Operation Modes: DRYING operation AUTO / COOL / DRY / HEAT* • The temperature is regulated while (*Model dependent) dehumidifying by cycling on and off of the cooling operation or fan only. The fan speed in AUTO operation DRYING mode is LOW. -
Page 10: Special Functions
Special Functions Refrigerant Leakage Detection Self Clean Function When refrigerant leakage is detected, the indoor • Airborne bacteria uses the moisture on the unit will display “EC” code or flash LEDs indoor heat exchanger to grow. Regular drying (depending on model). of the exchanger prevents this growth. -
Page 11: Care And Maintenance Before Maintenance
Care and Maintenance Care and Maintenance Before Maintenance Turn the system off before cleaning. To clean, wipe with a soft, dry cloth. Do not use bleach or abrasives. NOTE: Power supply must be disconnected before attempting to clean or service. CAUTIONS •... -
Page 12: Preparation For Extended Non-Operation
Care and Maintenance (cont.) Preparation for Extended Non-Operation If you plan to idle the unit for a long time, perform the following: 1. Clean the indoor unit and filters. 2. Operate the fan for about half a day to dry the inside of the unit.. -
Page 13: Troubleshooting Tips
Troubleshooting Troubleshooting Tips The following events may occur during normal operation and may not indicate malfunction. Before calling for service, please review the chart below. certified HVAC contractor. a certified HVAC contractor. NOTE: A highly recommended troubleshoot for any issue in general consists of turning off unit and powering the system off at disconnect or circuit breaker for 5 minutes. -
Page 14: Troubleshooting Guide
Troubleshooting Guide Before calling for service, please review the chart below. certified HVAC contractor. If the problem persist even after performing these checks or diagnostics, immediately stop operation and contact a certified HVAC contractor. Be sure to inform them of the detailed malfunctions and unit model number. - Page 16 The Right Temperature Since 1986 866-972-2776 www.ACPro.com This warranty does NOT cover: • Labor. • Damages incurred during shipping or transport. • Damages caused by improper installation, usage, or insufficient AC supply voltage. • Incorrectly matched systems or damage from modification or incorporation with other products.
Need help?
Do you have a question about the 2PAMSH09A-17 and is the answer not in the manual?
Questions and answers