Table of Contents

Related Manuals for KDDI W51H


Summary of Contents for KDDI W51H
- Page 1 Basic Contents/Ready Phone Call Manual Inputting Characters Address Book/ Pair Function Mail/ Hello Messenger Camera EZweb EZ Navi EZ FeliCa EZ・FM PC Site Viewer Simple Mode/ Teens Mode Other Functions Troubleshooting/ Remote Auto Lock Index...
- Page 2 Thank you for purchasing the W51H. Before using it for the first time, be sure to read the W51H Basic Manual (this PDF manual) so as to know how to use it correctly. After you finish reading this manual, store it and the printed materials that come with the phone in a safe place for future reference.
-
Page 3: Cellphone Etiquette
Cellphone Etiquette Mind your manners! A cellphone always emits weak radio waves while it is turned on. Enjoy operation of your cellphone without forgetting to be considerate of those around you. Some locations do not allow the use of cellphones. ■... -
Page 4: Cellphone Basics
Cellphone Basics Features Camera EZ Navi Hello Messenger Shoot photos and Enjoy meeting with the EZ Navi Walk, record movies, and members using our Passenger Seat Navi, send them by e-mail. original cartoon-like and Safety Navi characters. allow you to get Page various kinds of Page... -
Page 5: Manner Mode And Easy Voice Memo
Normally leave the phone turned on. The phone needs to be turned on to make and receive Power calls. Hold down F for at least 1.5 seconds to turn on W51H. After a while, W51H turns on with tone and the standby screen appears. Page You cannot talk on the phone if it is unable to receive a signal. -
Page 6: Never Use Your Cellphone While Driving
Never use your cellphone while driving! Holding a cellphone in your hand, talking on a cellphone, or looking at a cellphone display to send mail or to perform any other operation while driving is prohibited by Japanese law. (Revised Traffic Control Law, effective November 1, 2004) ×... -
Page 7: Beware Of Spam And One-Ring Calls
A “One-ring Call” (wan-giri in Japanese) rings your phone only once, in an attempt to make you call back to a service that automatically bills you very high charges. If W51H received a “One-ring Call”, the icon appears at the head of an incoming record. -
Page 8: Disaster Message Board Service
Disaster Message Board Service Disaster Message Board The Disaster Message Board lets you use EZweb to register information about your well-being in case of a major disaster. The information you register can be accessed from anywhere in Japan over EZweb or the Internet. ◆... - Page 9 Registration Access Disaster Message Board top screen Information registration screen Information screen ※ Registration contents are retained for up to 72 hours. ※ You can register up to 10 entries per phone number. Registering a new entry while there are already 10 registered entries, automatically overwrites the oldest entry.
-
Page 10: Table Of Contents
Contents Phone Call Making a Call ..........28 Making an International Call ...... 29 Cellphone Etiquette Answering a Call ........30 Redialing (Outgoing Records/Incoming Mind your manners! ........1 Records) ..........31 One-ring Calls ..........31 Cellphone Basics Changing the Ring Tone ......32 Features ............ - Page 11 Extension Mode ........109 EZ Channel-Plus/EZ Channel ....79 Smart Sensor Features ......110 EZ Navi Features Troubleshooting If you lose your W51H ......114 Safety Navi Features Index EZ FeliCa Communicating with Reader/Writer ... 85 Setting FeliCa Lock ........86 Using FeliCa-supported EZ Apps ....
-
Page 12: Ready
Ready Before using the W51H, check the contents of the package comes with your W51H. You should also familiarize yourself with basic operations, like how to charge the battery, how to turn the power on, etc. Checking the Contents of the Package ●... -
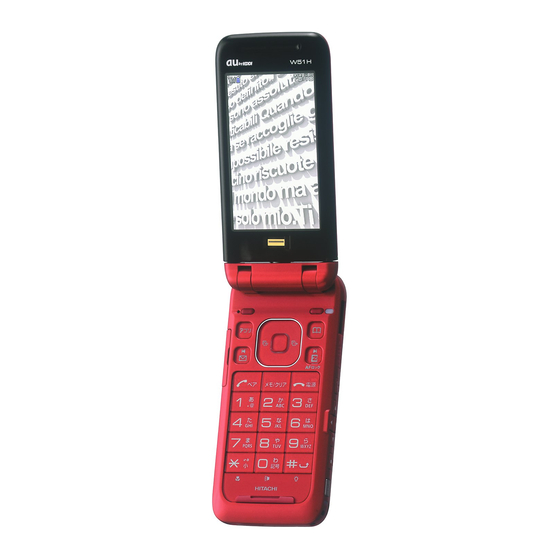
Page 13: Names Of Parts
During a call, do not cover the microphone with your hands or your chin. The microphone (placed on W51H ※ au IC-Card shown above) allows you to talk over your W51H in Viewfinder position. ※2: Take care to avoid covering the built-in antenna with... -
Page 14: Charging The Battery Pack
AC adaptor may be different from that shown in the illustration above. Pull out the connector of the common AC adaptor 01 (option) straight so ◎ as to be parallel to the W51H or the desktop holder connector terminal when you connect them. -
Page 15: Desktop Holder
To remove the W51H from the desktop holder, holding the holder by hand and remove W51H. ※You can connect the common AC adaptor 01 (option) to the W51H directly to charge the battery pack. Check the shape of the connector... -
Page 16: Turning On Power
Using Extension Mode ※ Using the Extension Mode, W51H automatically shuts down the radio wave after issuing the Low Battery Alert. This is quite a useful function that you can still check outgoing/incoming records, content of e-mail, address book, Schedule and so on when necessary. In this case, you can only use the functions which needs no radio wave. -
Page 17: Security Code And Passwords
Security Code and Passwords The W51H lets you use the numbers and passwords described below. Be sure to take steps so you do not to forget your numbers and passwords. You will need them to perform various operations and to access subscription services. -
Page 18: Selecting English As The Display Language
Selecting English as the Display Language While the standby screen is displayed, press c. Use a to select “ 機能設定 ” (Settings), and then press c (OK). Press 3 ( 画面表示/照明 ) (ScreenSetup/DisplayLighting). - Page 19 5 (Set Language). 2 (English). This selects English as the display language. Even if English is selected as the display language, schedule and other dates are displayed in the format year/month/day. Folder names inside of the Data Folder are also displayed in year/month/day format.
-
Page 20: Operation Basics
0 will display key help. ◎Holding down c/v for about one second toggles side key’s disabling feature on and off while W51H is folded. To cancel the side key’s disabling feature, follow the above procedure with W51H unfolded. -
Page 21: Display Indicators
Display Indicators The following explains the main icons that appear on the standby screen. Signal strength 1234 Battery level The microSD memory card (commercial item) is inserted into the cellphone. During a call / / ® EZ apps (BREW )/Hello Messenger/PC Site Viewer on Unread mail / /... -
Page 22: Main Menu
Main Menu Pressing c while the standby screen is displayed displays the main menu. Use a to select the icon, and then press c (OK) to access the function associated with the icon. Camera Music/Radio microSD Menu Hello Messenger Data Folder EZ FeliCa Menu W-Scene Settings Function/Setup... -
Page 23: Using Menus
■ Using Soft Keys Soft keys are the keys you use to execute the functions along with the bottom of the screen. The table below explains how to assign the soft keys to the on- screen functions. Note that the function of each soft key depends on the currently displayed screen. -
Page 24: Viewfinder Position And Self-Portrait Position
Viewfinder position ● Viewfinder position refers to the position with your W51H closed and its display turned over. In Viewfinder position, you can use side keys (( , v , n , m , g , f , b) to operate your W51H. -
Page 25: Basic Operations In Viewfinder Position
Basic Operations in Viewfinder Position In Viewfinder position, you can use side keys ( ( vnmh b) to play songs listed with au Music Player and read the data. For key operations in Viewfinder position, you can use nmh instead of a or use v instead of c . ( returns to the previous screen. -
Page 26: Initializing E-Mail And Ezweb
Initializing E-mail and EZweb An EZweb subscription is required to use e-mail and EZweb. If you did not subscribe when you purchased your phone, contact your nearest au shop or the au Customer Service Center. ※You will be assigned an e-mail address automatically when you perform the EZweb initialization procedure. -
Page 27: Looking Up Your Current Phone Number And E-Mail Address
Looking Up My phone number and Your Current Phone mail address Number and E-mail Address While the standby screen is displayed, press c. Use a to select “Settings,” and then press c (OK). Press 0 (Profile). Your current phone number and e-mail address appear. -
Page 28: Changing Your E-Mail Address
Changing Your E-mail Address E-mail address △△△ @ezweb.ne.jp Part you can change Domain name While the standby screen is displayed, press L. Press 9 (E-Mail Setup). Press 7 (Other Setup). When the EZweb connection confirmation screen appears, press 1 (Yes). Press 1 (E メールアドレ... - Page 29 Enter your Security Code, press c (OK), use j to select “ 送信 ” (Send), and then press c (Select). Use j to select “ 承諾す る” (Accept), and then press c (Select). Use j to select the text box, and then press c (Edit).
-
Page 30: Phone Call
Phone Call Making a Call While the standby screen is displayed, use the number keys (0 to 9) of the keypad to enter the phone number you want to call. When calling a standard phone, you need to enter the area code. Press N. -
Page 31: Making An International Call
Customer Service Center. ■ 001 KOKUSAI MOBILE TALK Application required. For inquiries, please contact the KDDI Customer Service Center. 0077-7160 (toll-free; open 9:00 to 20:00 on everyday including weekends and national holiday) フリーコール Ex: To call 212-123- △△△△ in the USA 001 010 1 212 123 △△△△... -
Page 32: Answering A Call
Answering a Call Press N to answer an incoming call. After you finish a call, press F to hang up. Display for Incoming Calls If the caller’s name is in your address book, it appears on the display. If not, only the caller’s phone number is displayed. A message appears when the phone number of the caller is not provided for some reason. -
Page 33: Redialing (Outgoing Records/Incoming Records)
Redialing (Outgoing Records/ Incoming Records) While the standby screen is displayed, press s. r : Displays outgoing records. l : Displays incoming records. Use j to select the record whose number you want to dial, and then press N. The phone stores up to 50 records each for the outgoing records and incoming records. -
Page 34: Changing The Ring Tone
Changing the Ring Tone While the standby screen is displayed, press c. Use a to select “Settings,” and then press c (OK). Press 2 (Sound/Vib/LED). Press 1 (Incoming Call). - Page 35 Press 2 (Melody). Press 1 (Fixed Sound). To hear the currently selected ring tone, press % (Check). Use j to select the ring tone you want, and then press c (OK). The ring tone is set. ◎ The initial setting is “Fixed Tone1.” ®...
-
Page 36: Adjusting The Ring Tone Volume
Adjusting the Ring Tone Volume To adjust the ring tone volume, perform steps 1 through 3 under “Changing the Ring Tone” (page 32), and then continue with the following steps. Press 1 (Incoming Call). Press 1 (Volume). To hear the ring tone at the current volume setting, press % (Play). -
Page 37: Adjusting The Earpiece Volume During A Call
Adjusting the Earpiece Volume during a Call During a call, use j to adjust the volume. u : Increases volume. d : Decreases volume. You can adjust the earpiece volume (level 1-6). When you set the maximum volume (level 6), is displayed on the screen. -
Page 38: Turning On Easy Voice Memo
Turning On Easy Voice Memo While the standby screen is displayed, hold down C for about one second. This turns on Easy Voice Memo, the icon appears on the display while Easy Voice Memo is turned on. You can use Easy Voice Memos (up to 4 memos), and each memo can contain up to 20 seconds recording time. -
Page 39: Playing An Easy Voice Memo
Playing an Easy Voice Memo When there is a recorded Easy Voice Memos The message “ Call” and “ EasyVoiceMemo” appear on the standby screen. Select “ Call,” and then press c (OK). The incoming records list appears. Use j to select the record with the icon, and then press c (Disp). -
Page 40: Inputting Characters
Inputting Characters Input characters using keypad keys 0 through 9. The table below shows the characters each key cycles through when you press it. Number of Presses 0 . @ - _ / : ! ? ~ ( ) # + , ^ ; < = > $ ¥ % & [ ] ’ ` { } ˝ Toggles between upper case and lower case (Example: a ⇔... -
Page 41: Inputting An E-Mail Address
Inputting an E-mail Address ■ Inputting “mark@ezweb.ne.jp” In this example, we will input “mark@ezweb.ne.jp” for “<E-Mail Add1>.” To input “<E-Mail Add1>,” perform steps 1 through 6 under “Registering an Address Book” (page 42), and then perform the following steps. Input “mark.” To input “m”: Press 6 once. -
Page 42: Inputting Pictographs And Useful Sentences
Inputting Pictographs and Useful Sentences The following procedure shows how to input pictographs and useful sentences into the body text when creating a new e-mail message. Press % (Char), and then (Pictograph). You can also select a pictograph by pressing #. Use a to select the pictograph you want, and then press c (Select). - Page 43 Use j to select the useful sentence you want, and then press c (OK). Here we will select “Happy birthday!” You can also input “Happy birthday!” by pressing 17. The following shows the input screens for symbols (double-byte) and emoticons. Symbol (Double-byte) Input In step 1 of the above procedure, press % (Char), and then 5 (&@) to display the “FullSym”...
-
Page 44: Address Book
Address Book Registering an Address Book While the standby screen is displayed, hold down & for about one second. <Name>,” and Select “ then press c (Edit). Enter the name, and then press c (OK). <Reading> is generated automatically when you enter a name. To input text →... - Page 45 Enter the phone number, and then press c (OK). When entering the number of a standard phone, be sure to include the area code. Use j to select <E-Mail Add1>,” and “ then press c (Edit). If you do not want to enter an e-mail address, jump to step 8.
-
Page 46: Editing An Address Book Record
Editing an Address Address Birthday Book Record Group Example: To edit the phone number of “Tom Carter” While the standby screen is displayed, press &, use a to select the record you want to edit, and then press & (Menu). Press 3 (Modify), and then 1 (Overwrite). -
Page 47: Adding Outgoing Or Incoming Record Data To The Address Book
Adding Outgoing or Incoming Record Data to the Address Book While the standby screen is displayed, press s, use j to select the phone number you want to save, and then press & (Menu). r : Displays outgoing records. l : Displays incoming records. Press 4 (Reg Add Book). -
Page 48: Dialing From The Address Book
Dialing from the Address Book While the standby screen is displayed, press &, and then use a to select the record whose phone number you want to dial. Press c (Disp). The details screen of the record appears. Use j to select the phone number, and then press N. -
Page 49: Pair Function
Pair Function You can save up to five phone numbers (like frequently used ones from the address book). You can make calls, send mails to or use Hello Messenger with these saved numbers (called Pair Partners) more easily. Registering a Pair Partner While the standby screen is displayed, press N. -
Page 50: Making A Phone Call, Sending Mail, Inviting A Pair Partner To A Hello Messenger Meeting
Making a Phone Call, Sending Mail, Inviting a Pair Partner to a Hello Messenger Meeting While the standby screen is displayed, press N. Use s to select the Pair Partner. Use j to select “Call,” and then press c (OK). Sending E-mail : After selecting “Send E-Mail”... -
Page 51: Mail
Mail EZweb subscription required Your W51H supports two types of mail: e-mail and C-mail. Using E-mail To use e-mail, you need to subscribe to an EZweb service. If you did not subscribe when you purchased your phone, contact your nearest au shop or the au Customer Service Center. -
Page 52: Using C-Mail
Using C-mail C-mail lets you exchange text messages that contain up to 50 double-byte characters (100 single-byte characters) with another au cellphone that supports C-mails. Page C-mail Center C-mail Center C-mail Center C-mail Center C-mail Center C-mail Center Sent using a phone number. Example: 090-0001-XXXX Received using a phone number. -
Page 53: Creating And Sending E-Mail Messages
Creating and Sending E-mail Messages While the standby screen is displayed, press L, and then press 1 (Create New). Select , and then press c (Edit). : Address to which the e-mail will be sent. You can send an e-mail up to five addressees at a time. - Page 54 Use j to select , and then press c (Edit). : Subject of the e-mail message. Enter the subject, and then press c (OK). Use j to select , and then press c (Edit). : Body of the e-mail message. Enter the body text, and then press c (OK).
-
Page 55: Reading Received E-Mail Messages
Reading Received E-mail Messages When you receive an e-mail The message “ E-Mail” and Received appear on the standby screen. e-mail icon Select “ E-Mail,” and then press c (OK). Press c (OK). : Indicates an unread message. : Indicates an already read message. Use j to select the unread e-mail you want to view, and then press c (Disp). -
Page 56: Reading An E-Mail Message With An Attached Photo Or Movie
Reading an E-mail Message with an Attached Photo or Movie Example: To see a photo attached to an e-mail. Use j to select the e-mail message, and then press c (Disp). Use j to select a file name, and then press c (Play). ◎... -
Page 57: Replying To A Received E-Mail Message
Replying to a Received E-mail Message To reply to an e-mail message, perform steps 1 through 3 under “Reading Received E-mail Messages” (page 53), and then perform the following steps. Press % (Reply). Press c (Edit), and then enter the body text. is prefixed with “Re:,”... -
Page 58: Avoiding Spam
Avoiding Spam It is recommended that you use our mail filter function to block spam. You can use “Supportive settings” to easily configure mail filter settings by answering questions that appear on the display. ■ Configuring Mail Filter Settings Example: To access the “サポート設定” (Supportive settings) 1 While the standby screen is displayed, press L. -
Page 59: Creating And Sending C-Mail Messages
Creating and Sending Hold down C-mail Messages . . . While the standby screen is displayed, hold down L for about one second, and then press 1 (Create New). Select , and then press c (Edit). Press 1 (Address Book), use a to select an addressee, and then press c (Select). -
Page 60: Reading Received C-Mail Messages
Use j to select , and then press c (Edit). Enter the body text, and then press c (OK). Press % (Send) or N. When the C-mail reaches the other party, the message “Completed.” appears, and the message is stored in your sending records. -
Page 61: Hello Messenger
Hello Messenger “Hello Messenger” is like a portable chat room which allows you to send text, sound and photo in real time to all the chatters (using au cellphone supporting this service). All chatters are represented by cartoon-style characters they selected. -
Page 62: Display The Hello Messenger Menu
Display the Hello Messenger Menu While the standby screen is displayed, press c. Use a to select “Hello Messenger,” and then press c (OK). When you start Hello Messenger for the first time, press c (OK) and select your own cartoon-style character, then Hello Messenger press c ( 設定... -
Page 63: Invite The Members To The Meeting
Invite the Members to the Meeting You can invite the members to start the meeting. To start the meeting, perform steps 1 through 2 under “Display the Hello Messenger Menu” (page 60), and then continue with the following steps. Use j to select “ スター ト... -
Page 64: When You Get An Invitation Message To Join
◎You can register the member from “ハローランキング” (Hello Ranking) or “グループ” (Group). ◎You can activate Hello Messenger from address book, outgoing/incoming records, phone number input screen to start the meeting. When You Get an Invitation Message to Join When you get an invitation message to join, ring tones sounds or your cellphone vibrates. -
Page 65: Camera Features
Camera Features Your W51H comes with a built-in 2.1-megapixel, 2.07-million effective pixel camera to shoot photos and record movies. You can attach the photos and movies that you shot/recorded to e-mail messages. Using the Camera Shooting a Photo (page 65) Recording a Movie (page 66) - Page 66 Auto focus W51H has built-in auto focus function. You can shot photos with the subject properly focused simply by pressing the shutter key. Photo and Movie Sizes The following shows the sizes of the photos and movies that can be recorded with your W51H.
-
Page 67: Camera
Camera Shooting a Photo While the standby screen is displayed, press c, use a to select “Camera,” and then press c (OK). Press 1 (Photo). Point the lens at the subject, and then press c (Shutter). The phone emits a shutter sound. Note that the phone emits the shutter sound even if it is in Manner Mode. -
Page 68: Recording A Movie
Recording a Movie While the standby screen is displayed, press c. Use a to select “Camera,” and then press c (OK). Press 2 (Movie), point the lens at the subject, and then press c (Rec). The phone emits a shutter sound to signal the start of recording. - Page 69 Meanings of the Photo Titles ■ The initial photo mode setting when you purchase your W51H is “Normal Shot (Wallpaper 240 × 320).” Meanings of the Photo Titles in the “Photo Folder,” which is in the Data Folder. 070328_1010 ∼ 0001...
-
Page 70: Shooting Photos And Recording Movies In Viewfinder Position
Shooting Photos and Recording Movies in Viewfinder Position Perform steps under “Viewfinder Position and Self-portrait Position” (page 22), and then continue with the following steps. Example: Recording movies in Viewfinder position Press v while the standby screen is displayed. Use mn and h to select “Camera,”... - Page 71 Point the lens at the subject, and then press b (Rec). The phone emits a shutter sound to signal the start of recording even if it is in Manner Mode. To shoot the photo, jump to step 6. Display Side key operation Display Side key operation End Camera...
-
Page 72: Viewing Photos And Movies
Viewing Photos and Movies While the standby screen is displayed, press c, use a to select “Data Folder,” and then press c (OK). Use j to select “Photo Folder,” or “Movie Folder,” and then press c (Detail). Selecting “All Data” displays a list of all photos and movies in the “Photo Folder”... -
Page 73: Attaching A Photo Or Movie To An E-Mail Message
Attaching a Photo or Movie to an E-mail Message Perform the procedure from step 1 to 3 under “Shooting a Photo” (page 65) or “Recording a Movie” (page 66), and then perform the following steps. Press % (E-Mail), and then press 1 (Attach). Photos you shot are stored in the “Photo Folder”... -
Page 74: Ezweb
EZweb EZweb subscription required Using EZweb To use EZweb, you need to subscribe to an EZweb beforehand. If you did not subscribe when you purchased your phone, contact your nearest au shop or the au Customer Service Center. In addition to an EZweb subscription, you also need to perform an initialization procedure before you can use EZweb. -
Page 75: Displaying The Ez Top Menu
Displaying the EZ Top Menu While the standby screen is displayed, press R, use s to select “EZweb,” and then press 1 (Top Menu). キーワード検索機能 (Search by keyword) Provides information search function by keywords カテゴリで探す (Search by category) Searches for a site by category EZサービスで探す... -
Page 76: Bookmarking Sites You Frequently Access
Bookmarking Sites You Bookmark Frequently Access Display favorite sites you want to bookmark, and press & (BrowserMenu). Press 1 (New bookmark). ※ You may not be able to bookmark some sites. Press & (Reg). Use j to select a folder, and then press c (OK). -
Page 77: Viewing A Bookmarked Site
Viewing a Bookmarked Site While the standby screen is displayed, press R. Use s to select “EZweb,” and then press 2 (Favorite Site). Use j to select a site or folder, and then press c (OK). If you selected a folder, use j to select a site, and then press c (OK). -
Page 78: Downloading Chaku-Uta
® Downloading Chaku-Uta ® To download a Chaku-Uta , perform step 1 under “Displaying the EZ Top Menu” (page 73), and then perform the following steps. Use j to select “ カテゴリで 探す ” (Search by Category), and then press c (OK). Use j to select “... -
Page 79: Downloading Chaku-Uta-Full
Downloading ® Chaku-Uta-Full While the standby screen is displayed, press R and use s to select “au Music.” Press 2 (Jump to EZ Music!). This operation connects the phone to “EZ Music!” For the operations after connecting, follow the instructions displayed on the screen. -
Page 80: Checking Charges
Checking Charges You can check call and transmission charges. While the standby screen is displayed, press c11. When the EZweb connection confirmation screen appears, press 1 (Yes). Use j to select the item you want to check, and then press c (Select). -
Page 81: Ez Channel-Plus/Ez Channel
EZ Channel-Plus/EZ Channel EZweb subscription required EZ Channel-Plus/EZ Channel provides the latest programs you registered to download. Each updated content is automatically downloaded to your W51H. ■ Displaying EZ Channel-Plus/EZ Channel Menu to select „ Press R. “ EZ Channel-plus. -
Page 82: Ez Navi Features
These functions enable you to check the location of an au cellphone supporting “Safety Navi” and receive an alert mail which is sent to a particular au phone whenever another phone enters (or is inside of) or exits (or is outside of) a preset area by operating W51H. -
Page 83: Ez Navi Walk
“EZ Navi Walk” A menu of useful options you can use while you are out. ★ ナビをする Searchable source of a route guidance (voice navigation) (Navigation) to your destination, shops, and facilities You can view a map of your current location or any other ★... -
Page 84: Safety Navi Features
EZweb subscription required You can check the location of another au phone and receive a notification message when you enter or leave a specific area during a predefined time period by your operation of W51H. “ いつでも位置確認 ” (Auto Position Search) Features •... - Page 85 “ 位置確認メール ” (Position Search Mail) Features • By sending e-mail from mother to child, she can confirm the child’s position. When child’s number is saved in Address Book, mother can confirm the child’s position easily without membership registration. Example: When the mother sent a mail Notice: When confirming, this service requires to her child: child’s operations.
-
Page 86: Ez Felica
■ Notes on Using EZ FeliCa ● Keep your W51H safe. In case your cellphone is lost, please contact the service company for details about EZ FeliCa-supported service. We recommend that you set FeliCa Lock or Remote Auto Lock in case of loss or theft. -
Page 87: Communicating With Reader/Writer
Be careful not to bump the FeliCa mark against reader/writer when holding over. ◎Bring the FeliCa mark close to reader/writer slowly when holding over. ◎If the FeliCa mark can not be read when holding over, move W51H all around over reader/writer. -
Page 88: Setting Felica Lock
◎ When FeliCa Lock is set, appears on the standby screen. ◎ In case you lost W51H, you can set the FeliCa Lock by setting Remote Auto Lock. Remote Auto Lock requires the initial setup beforehand. ◎ Even if you set Auto Lock, the FeliCa Lock will not be set. -
Page 89: Using Felica-Supported Ez Apps
Using FeliCa-supported EZ Apps “QUICPay” ( クイックペイ ) is prepared as FeliCa-supported EZ apps in W51H at the time of purchase. ■ Starting FeliCa-supported EZ apps While the standby screen is displayed, press c, use a to select “EZ FeliCa”... -
Page 90: Ez Fm
• EZweb subscription required The W51H allows you to listen to the FM radio. Before using an antenna Casio round-type earphone jack conversion adaptor 01 and MDR-E0931 by SONY have a built-in antenna to get a signal. When you listen to the EZ FM, connect Casio round-type earphone jack conversion •... -
Page 91: Listening To The Ez Fm
Listening to the EZ • While the standby screen is displayed, press c, use a to select “Music/ Radio,” and then press c (OK). Press 3 (EZ•FM). The precautions appear. Use j to check the precautions, use j to select “ 承諾する ” (Accept), and press c. -
Page 92: Listening To The Ez•Fm As A Bgm/ Stopping The Ez•Fm
■ Viewing and Operating the EZ•FM Icons appear if Main Operations: downloadable Operation information is Switches radio stations. provided. * Press 1 to 9 to switch to a radio station which is set to each Radio frequency key. Displaying Tunes in on the station by 0.1 changeover MHz. -
Page 93: Pc Site Viewer Features
PC, by high speed packet communication of 2.4 Mbps receiving at maximum. You can view WEB sites for PC with W51H Viewing a site with PC Site Viewer A WEB site for PC If you set the “Display... -
Page 94: Pc Site Viewer
In step 2 of the above procedure, search tool appears. You can enter keywords in search window, and select “Search” to find the desired page. ◎ If you change W51H into Viewfinder Position in the middle of a browse the screen is displayed sideways. -
Page 95: Using Pointcast
Using PointCast It’s It’s updated. updated. You can set a portion of a WEB site as the standby screen. You can set it to be automatically-updated at specified intervals. When a specified time elapses on the standby screen, the WEB site selected by “PointCast” is displayed. -
Page 96: Standby Screen
PC ⇒ http://my.kddi.com/ (MyKDDI) ※ Subscription is required before you can start using this service. au phone ⇒ R → “Top Menu” → “au お客さまサポー... -
Page 97: Simple Mode
Simple Mode Simple Mode lets you limit operations to the telephone function, address book, camera, e-mail, C-mail, EZweb, and other frequently used functions, which simplifies operations. Entering Simple Mode While the standby screen is displayed, press c, use a to select “Settings,” and then press c (OK). -
Page 98: Exiting Simple Mode
Exiting Simple Mode While the standby screen is displayed, press c. Use j to select “SETTINGS,” and then press c (Select). Press * (SimpleModeOFF). Press 1 (Yes). This returns to Usual Mode. -
Page 99: Using The Simple Mode Main Menu
Using the Simple Mode Main Menu For composing For using the and reading E-mail address book, and C-mail outgoing records messages, and for and incoming changing E-mail records, and for addresses registering data in the address book For checking the latest news For selecting the information... -
Page 100: Adding Data To The Address Book In Simple Mode
Adding Data to the Address Book in Simple Mode While the standby screen is displayed, press &, press 2 (Register), and then press c (Fix). Enter the name, and then press c (OK). To input text → “Inputting Characters” (page 38) Check the reading of the name you inputted, press c (OK), and then press... - Page 101 Press 3 (Input by Myself). You can also select data in sending records or receiving records. To go without saving e-mail address, press 4 (Not Input) and perform step 7. Enter the e-mail address, and then press c (OK). To input an e-mail address →...
-
Page 102: Using The Address Book In Simple Mode
Using the Address Book in Simple Mode Example: To view a record in address book While the standby screen is displayed, press &, and then press 1 (Look). Use a to select the address book record you want to view, and then press c (Select). -
Page 103: Creating And Sending E-Mail Messages In Simple Mode
Creating and Sending E-mail Messages in Simple Mode While the standby screen is displayed, press L, 1 (E-Mail), and then 1 (Create Mail). Press 1 (Address Book), use a to select an addressee, and then press c (Select) twice. You can select an addresses from sending/receiving records, or you can manually enter an address. - Page 104 Enter the body text, and then press c (OK). To input text → “Inputting Characters” (page 38) Press 3 (Not Attach). The confirmation screen appears. Press c (OK). In case of attaching some data with e-mail, operate the followings. (Data Folder): You can select a photo saved in the Data Folder and attach it to the e- mail message.
-
Page 105: Shooting A Photo In Simple Mode
Shooting a Photo in Simple Mode While the standby screen is displayed, press c, use j to select “CAMERA,” and then press c (Select). Press 1 (Photo), and then press 1 (Photo1). Photo 1 Wallpaper 240 × Photo 2 WVGA Wallpaper 800 ×... -
Page 106: Viewing Photos In Simple Mode
Viewing Photos in Simple Mode While the standby screen is displayed, press c, use j to select “DATA FOLDER,” and then press c (Select). Press 1 (Data Folder). Use j to select “Photo Folder,” and then press c (Select). Selecting “All Data” displays a list of all photos in the Photo Folder. - Page 107 Use a to select the photo you want to view, and then press c (Menu). Press 1 (Play). The photo appears. 2 (Delete): Deletes data. 3 (Attach E-Mail): Displays a screen for composing an e-mail message with an attachment. To create an e-mail message →...
-
Page 108: Teens Mode
Teens Mode Teens Mode can be used to block spam, and to block inadvertent access to phone numbers and URLs included inside mail messages. Teens Mode can also be used to restrict call time and the number of sending mail. Using Teens Mode ■... -
Page 109: Turning On Teens Mode
Turning on Teens Mode While the standby screen is displayed, press c, use a to select “Settings,” and then press c (OK). Press 5 (User Support), and then 3 (OperationSupport). Press 2 (Mode Setup), and then 3 (Teens Mode). Press 1 (Switch TeensMode), and enter the lock No., and press c (OK). -
Page 110: Other Functions
To stop Safety Buzzer, input the lock No., and then press c (OK). ※ You cannot turn off W51H or perform any other operation while the Safety Buzzer is sounding. The Safety Buzzer will continue to sound until you input the lock No. or the battery fully discharges. -
Page 111: Extension Mode
◎Even when Manner Mode is on, Safety Buzzer sounds. Extension Mode Using the extension mode, W51H automatically shuts down the radio wave after issuing the Low Battery Alert. This is quite a useful function that you can still check outgoing/incoming records, content of e-mail, address book, Schedule and so on when necessary. -
Page 112: Smart Sensor Features
Smart Sensor Features Using the fingerprint authentication function of Smart Sensor allows you to skip the operations of entering Lock No. with dial keys and to release the lock by sliding your finger on the Smart Sensor. Smart Sensor is also available to the operation of scrolling screen in viewfinder position and double tap. -
Page 113: Double Tap
If you use the function of Fingerprint authentication, you must change the Lock No. from the viewpoint of security. Operating the Smart Sensor functions as pressing gfmnv on the photo screen, the movie screen and the EZ Navi screen, and as scrolling and pressing v on the PC Site Viewer screen and the PC document Viewer screen in viewfinder position. - Page 114 In addition to the functions covered in this Basic Manual, your W51H also has the following features. Global Expert Infrared Communication W51H supports Global Expert based You can exchange the data saved in on au IC-Card. your address book, Schedule, or Data...
-
Page 115: Troubleshooting
※ If the battery level is very low, “NOW LOADING...” is shown on the display, and after a while display disappear. For more detailed information, visit one for the following HITACHI websites. • On your W51H phone, go to http://www.hitachi.co.jp/ez/faq/ (HITACHI Cellphone Q&A). (Japanese only) • On your computer, go to http://www.hitachi.co.jp/mobilephone/faq/ (HITACHI Cellphone Q&A). (Japanese only) -
Page 116: If You Lose Your W51H
■ Configuring Remote Auto Lock Settings You can set Auto Lock and FeliCa Lock on by making calls several times from the registered phone number to your W51H within the specified period of time. While the standby screen is displayed, press c414, input the lock No., and then press... - Page 117 After Remote Auto Lock turns active, your W51H is automatically turned off, and turned on again. ◎ Remote Auto Lock cannot be activated while your W51H is turned off or outside of the service area. ◎ When you purchase the W51H, its initial value in “Erase Data” setting is...
-
Page 118: Index
Index Easy Voice Memo ......36 Delete ..........37 Address Book ........42 Playback .......... 37 Adding outgoing or incoming record Turning on ........36 data to the address book ..... 45 E-mail ..........49 Dialing from the address book ..46 Avoiding spam ......... - Page 119 Key functions ........18 Redial (incoming/outgoing records) ... 31 Remote Auto Lock ......114 Mail ............. 49 C-mail ..........50 Safety Buzzer ........108 E-mail ..........49 Safety Navi ........82 Mail filter ......... 5, 56 Security Code and passwords ..15 Main menu ........
- Page 120 (toll free) Pressing "zero" will connect you to an operator, after calling "157" on your au cellphone. Sales: KDDI Corporation Okinawa Cellular Telephone Company Read this to access to the Manufactured by Hitachi, Ltd. au online manual...
Need help?
Do you have a question about the W51H and is the answer not in the manual?
Questions and answers