
Related Manuals for KDDI W62K


Summary of Contents for KDDI W62K
-
Page 1: Table Of Contents
Basic Manual Contents/ Getting Ready Phone Call Text Input Address Book/ Pair Function Mail Keitai! Kenkouroku Camera EZweb EZ Navi EZ News Flash Other Functions Troubleshooting/ Remote Ctrl Lock Index... - Page 2 Thank you for purchasing the W62K. Before using it for the first time, be sure to read the W62K Basic Manual (this PDF manual) so as to know how to use it correctly. After you finish reading this manual, store it and the printed materials that come with the phone in a safe place for future reference.
-
Page 3: Cellphone Etiquette
Cellphone Etiquette Mind Your Manners! A cellphone always emits weak radio waves while it is turned on, even when you are not talking with it. Enjoy using your cellphone without forgetting to be considerate of those around you. Some locations do not allow the use of cellphones ●... -
Page 4: Cellphone Basics
Cellphone Basics What You Can Do with W62K Mail EZweb EZ News Flash ● Mail: Send E-mail to other cellphones and PCs. ● EZweb: ® Download Chaku-Uta wallpaper, and other data. ● EZ News Flash: This service delivers the latest... -
Page 5: Simple Mode
(→Page 75). Simple Mode Your W62K has Normal Mode and Simple Mode. Simple Mode lets you display in the menu only frequently used functions such as phone and mail, in an easy-to-use manner. The phone is in Normal Mode at the time of purchase. -
Page 6: Manner Mode And Answer Memo
Manner Mode and Answer Memo Manner Mode Answer Memo Use Manner Mode to turn off the If you cannot answer a call, ring tone so as not to bother Answer Memo plays an others around you. answering message and records the caller's message. -
Page 7: Using Your Cellphone While Driving Is Prohibited
Using Your Cellphone While Driving is Prohibited Do not use your phone while riding a bicycle or a motorbike, or while driving a car. Doing so may cause an accident. Using a cellphone while driving a car or riding a motorcycle is prohibited by Japanese law. You may also be penalized for using a cellphone while riding a bicycle. -
Page 8: Beware Of Spam And One-Ring Calls
Beware of Spam and One-ring Calls! If you receive spam . . . →Page 55 You can set up mail filters to block specific mail or spoof E-mail. Your cellphone mainly has the following functions to block spam. ・Blocks mail identified as "未承諾広告※"(Unsolicited advertisement) ・Blocks specific mail ・Blocks spoof E-mail This mail again . -
Page 9: Disaster Message Board Service
Disaster Message Board Service Disaster Message Board The Disaster Message Board lets you use EZweb to register information about your safety in case of a major disaster. The information you register can be accessed from anywhere in Japan over EZweb or the Internet. ◆... -
Page 10: Contents
Cellphone Etiquette …………………………………………………………1 Mind Your Manners! …………………………………………………………………1 Cellphone Basics………………………………………………………………2 What You Can Do with W62K ………………………………………………………2 Simple Mode ……………………………………………………………………………3 Manner Mode and Answer Memo …………………………………………………4 Checking Power, Signal Strength, and Battery Level …………………………4 Using Your Cellphone While Driving is Prohibited ……………………………5 Beware of Spam and One-ring Calls! ……………………………………………6... - Page 11 …………………………………………………………69 What You Can Do with EZ Navi …………………………………………70 EZ News Flash ………………………………………………………………73 What You Can Do with EZ News Flash …………………………………………73 Setting EZ News Flash ………………………………………………………………74 Other Functions ……………………………………………………………75 Troubleshooting ……………………………………………………………76 If You Lose Your W62K ……………………………………………………………77 Index ……………………………………………………………………………81...
-
Page 12: Getting Ready
Getting Ready Checking the Contents of the Package ● W62K handset ● Battery pack ● Desktop holder ● CD-ROM (Japanese) ● Warranty (Japanese) ● Operating Precautions (Japanese) ● Global Passport mobile rental service Owner's ●対応OS (収録ソフトによって対応OSは異なります。) ® ® Microsoft Windows 98/98SE/Me/2000/XP/ このCD-ROMをご覧になるには、ブラウザソフト... -
Page 13: Names Of Parts
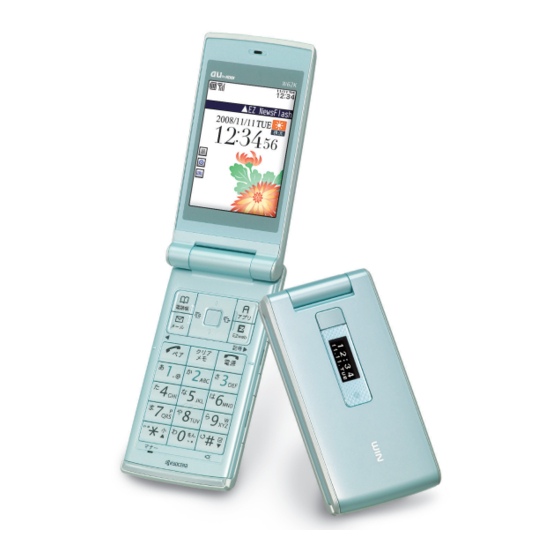
Names of Parts Earphone Strap mount Main display Earphone jack External connection jack Center key Jog key Cut-off corner Address key Application key Mail key EZ key au IC-Card Clear/Memo key Send key Power/End key Number keypad /Manner key #key Antenna (built-in) Do not take out this card if not Microphone... -
Page 14: Charging The Battery
Charging the Battery The battery pack that comes with the phone is not fully charged when purchased. Be sure to charge the battery pack before using the W62K for the first time and whenever the battery level has become depleted. -
Page 15: Turing Power On/Off
Turing Power On/Off At time of purchase, the appearance of the standby screen, main menu, and other displays will differ depending on the color of your W62K handset. In this manual, screens for a limpet blue handset are used. Turning power On &... -
Page 16: Display Indicators
Display Indicators The following explains the main icons that appear on the standby screen. <Main display> Icon Description Battery level Strength of received signal Calling Using EZweb EZ apps functioning microSD card inserted Incoming call that you did not answer When E-mail or C-mail is received When an emergency earthquake bulletin is received... -
Page 17: Initializing Your Phone
Initializing Your Phone After purchasing your phone, the initial settings screen is displayed when you first display the main menu. Perform the following steps. When the standby screen is displayed, press Select "自動設定"(Auto Setup) and press [選択](Select). ■ The following settings are applied for "自動設定"(Auto Setup). -
Page 18: Switching The Display Language To English
Switching the Display Language to English You can switch the display language for function names and other items to English. When the standby screen is displayed, press Select "機能設定"(Set Functions) and press [選択](Select). Select "画面表示"(Screen Setup) and press [選択](Select). Select "Set Language" and press [選択](Select). - Page 19 Select "Alphabet" and press [OK].
-
Page 20: Basic Operations
Basic Operations Key functions Displays the main menu Selects items and adjusts sound Displays EZ apps menu volumes Displays EZ Service Displays incoming menu records EZweb page scroll Displays outgoing records Returns to previous screen Displays Displays memo menu address book Toggles Answer Memo E-mail on and off (hold down at... - Page 21 Using the jog key Use the jog key to select items in each of the menu screens and move the cursor in the text input screen. Jog key For example . . . Selecting an item in the main menu (Page 21) Selecting an item in the various menus Moving the cursor to input text...
- Page 22 Using the operation guides Operation guides are displayed at the bottom of the screen. To use them, press the key in the same Operation guides location as the corresponding guide. Displayed operation guides differ depending on the screen. Address Application Center key Various functions are assigned to the 3 keys depending on the screen in operation.
-
Page 23: Main Menu
To return to the standby screen or previous screen When you have mistaken an operation and want to return to the previous screen or want to cancel an operation and return & to the standby screen, use <Standby screen> & Note ●... -
Page 24: Initializing E-Mail And Ezweb
Initializing E-mail and EZweb An EZweb subscription is required to use E-mail and EZweb. If you did not subscribe when you purchased your phone, contact your nearest au shop or the au Customer Center. Before using your phone, be sure to make the initial settings. -
Page 25: Checking Your Current Phone Number And E-Mail Address
Checking Your Current Phone Number and E-mail Address When the standby screen is displayed, press and press Your current phone number and E-mail address are displayed. Note ● Your phone number and E-mail address can be checked by pressing and then [Profile] while the standby screen is displayed. - Page 26 Select "Eメールアドレスの変更" (Change E-mail Address) and press [Select]. Select the input field and press [Edit]. Input your Security Code and press [OK]. Your Security Code is the 4-digit number that you wrote on the application form when subscribing. If the wrong Security Code is entered three times on the same day, you will not be able to change your E-mail address until the following day.
- Page 27 Select the input field and press [Edit]. Input your E-mail address and press [OK]. If your E-mail address won't change, try the following. ・Use a combination of both letters and numbers. ・Use a longer address (up to 30 characters). Refer to "Characters usable in your E-mail address"...
- Page 28 Characters usable in your E-mail address A different character is displayed each time you press a key as in the table. Number of presses ? (space) Allowable Characters in Your E-mail Address ・ Shaded characters/symbols cannot be used to the left of the "@" in "△△△@ezweb.ne.jp". ・...
-
Page 29: Phone Call
Making a Call Enter the phone number you want to call. When calling regular phones, you need to enter the area code. Press & After you finish a call, press to hang up. You can also hang up by closing the W62K. -
Page 30: Making An International Call
・ For charges, please refer to the au MOBILE PHONE SERVICE GUIDE or contact the au Customer Center. ■001 KOKUSAI MOBILE TALK Application required. For inquiries, please contact the KDDI Customer Service Center. 0077-7160 (toll-free; open 9:00 to 20:00 everyday including weekends and national holidays) Example: To call 212-123-△△△△in the USA... -
Page 31: Answering A Call
& After you finish a call, press to hang up. You can also hang up by closing the W62K. Note ● The Message menu "MissedCall: △" appears on the standby screen if you did not answer one or more calls. -
Page 32: Redialing (Outgoing Records/Incoming Records)
Redialing (Outgoing Records/Incoming Records) When the standby screen is displayed, press (Outgoing records) or (Incoming records). Records are displayed in order from the last made (received) call. Select a record with and press Note ● The phone stores up to 50 records each of outgoing and incoming. Adjusting the Earpiece Volume During a call, adjust the volume with : Increases the volume. -
Page 33: Adjusting The Ring Tone Volume And Melody
Adjusting the Ring Tone Volume and Melody When the standby screen is displayed, press . Select "Set Functions" and press [Select]. Select "Tone/Vib/Lamp" and press [Select]. Select "Incoming Setup" and press [Select]. Select "Incoming Call" and press [Select]. - Page 34 Select "Volume" and press [Select]. Adjust the volume with and press [OK]. STEP UP Ring tone volume gradually increases. Level 5 (Loud) Ring tone sounds at the set level. Level 1 (Soft) Ring tone does not sound. The volume is set to "level 3" when you purchase your phone.
-
Page 35: Turning On Manner Mode
Note ● When you are selecting a ring tone, you can play a ring tone with the following steps. Press [Play] at step 8 Pressing while a ring tone is playing will play the next one. You can also adjust the volume with ●... -
Page 36: Turning On Answer Memo
Note ● The W62K can store up to 10 Answer Memos, each of which can be up to 60 seconds long. ● Even when Answer Memo is off, you can record a caller's message with the following steps. -
Page 37: Playing An Answer Memo
Playing an Answer Memo When the standby screen is displayed, press Select "Answer Memo" and press [Select]. When there are unplayed memos, a " " icon is displayed. Select "Play Memo" and press [Select]. The Play Memo list is displayed. Select the memo to play and press [Play]. -
Page 38: Text Input
Text Input Basic Key Operation ■Switches the input mode (kanji/hiragana, letters, numbers, etc.) ■Switches pictographs/ ■Deletes text emoticons/double- byte symbols/single- ■Returns to state byte symbols before text was input or deleted ■Inputs text ■Switches capital/ small letters ■Confirms text ■Moves cursor Press ■Selects item Press... -
Page 39: Switching The Input Mode
Switching the Input Mode In the text input screen, press [ChrTyp]. Select the input mode and press [Select]. The input mode can be selected from the following. 漢あ Kanji/hiragana カナ Double-byte katakana Aa Double-byte letters Double-byte numbers ?& Double-byte symbols Pictographs カナ... -
Page 40: Character Key Assignments
Character Key Assignments Input mode Letter mode* Number mode . @ − _ / : abcABC2 defDEF3 ghiGHI4 jklJKL5 mnoMNO6 pqrsPQRS7 tuvTUV8 wxyzWXYZ9 . , − _ ’ !? (space) 0 ] . , − _ ’ !? (space) ] Switch capital/small letters −... -
Page 41: Inputting Text
Inputting Text Input single-byte alphanumerics Input "taro-2" Switch to single-byte letter input mode referring to steps 1 to 2 of "Switching the Input Mode" (→Page 37). Press (once), (once), (3 times), (3 times), (3 times), and (7 times). Note ● To continue inputting the same text or text assigned to the same key, move the cursor with and then input. - Page 42 Inputting useful sentences, emoticons, and pictographs Input the useful sentence "@ezweb.ne.jp" In the text input screen, press [Menu]. Select "Get" and press [Select]. Select "UsefulSentence" and press [Select]. Select "Internet" and press [Select]. Select "@ezweb.ne.jp" and press [OK]. Input the emoticon "o(^−^)o" Switch to emoticon input mode referring to steps 1 to 2 of "Switching the Input Mode"...
-
Page 43: Address Book
Address Book You can save up to 1,000 frequently used phone numbers and E-mail addresses. Registering to the Address Book When the standby screen is displayed, hold down for at least one second. Select [Name] and press [Edit]. Enter the name and press [OK]. - Page 44 Select [E-Mail Address1] and press [Edit]. Enter the E-mail address and press [OK]. Select attributes for the E-mail address and press [OK]. Press [Comp]. Note ● Address book records are numbered from 000 through 999. A new record is automatically assigned to the lowest available unused record number.
-
Page 45: Dialing From The Address Book
Dialing from the Address Book When the standby screen is displayed, press Select the name with Press Note ● After selecting the name in step 2, you can check the information in the address book by pressing [Detail]. Editing an Address Book Record Example: To change a phone number Select the name to edit referring to steps 1 to 2 of "Dialing from the Address Book"... - Page 46 Select "Edit" and press [Select]. ■ To delete Select "Delete", [Select]→select "Delete One", [Select]→select "YES", [OK] Select the phone number and press [Edit]. Edit the phone number and press [OK]. Select attributes for the phone number and press [OK]. Press [Comp].
-
Page 47: Adding Outgoing Or Incoming Record Data To The Address Book
Adding Outgoing or Incoming Record Data to the Address Book When the standby screen is displayed, press (Outgoing records) or (Incoming records). Select the number with and press [Menu]. Select "Add to Adr Bk" and press [Select]. Select "Store New" and press [Select]. -
Page 48: Pair Function
Pair Function Registering Pair Partners You can save frequently used phone numbers (up to three), allowing you to display them easily to make calls or send mail. When the standby screen is displayed, press Select "YES" and press [OK]. ■ If a pair partner is already registered Select [Select] Select the number to add with... -
Page 49: Using The Pair Function
Using the Pair Function When the standby screen is displayed, press , and select the partner with The name and phone number/E-mail address for the pair partner are displayed. Select from " ", " ", or " " with and press [Select]. -
Page 50: Dialing With One Touch Dial
Dialing with One Touch Dial You can make a call to any of the phone numbers registered to pair partners 1 to 3 by holding down , or on the number keypad for at least one second. Register partners to the Pair function before hand (→Page 46). When the standby screen is displayed, hold down any one of for at least one second. -
Page 51: Mail
Mail EZweb Subscription Required E-mail You need to subscribe to EZweb in order to use E-mail. If you did not subscribe to EZweb at the time of purchase, contact an au shop or the au Customer Center. You also need to configure the initial settings before you can use E-mail. If you have not configured the initial settings, please refer to "Initializing E-Mail and EZweb"... -
Page 52: Creating And Sending E-Mail
Creating and Sending E-mail When the standby screen is displayed, press . Select "Create New E-Mail" and press [Select]. The compose message screen appears. Select " (Destination)" and press [Edit]. Select "Get Adr Bk (1)" and press [Select]. You can select the address from the send/receive history or enter it directly. - Page 53 Select " (Body)" and press [Edit]. Enter the text body and press [OK]. Press [Send]. Mail is sent. ■ To make changes before sending Select from " (Destination)", " (Subject)", " (Body)", [Edit]→make changes...
-
Page 54: Reading Received E-Mail
Reading Received E-mail An E-mail notification tone is emitted when you receive an E-mail, and the Message menu "New E-Mail: △" is displayed in the standby screen. Select "New E-Mail:" and press [Check]. The inbox folder list screen is displayed. Select "メインフォルダ"(Main Folder) and press [Select]. -
Page 55: Reading E-Mail With Photos Or Movies Attached
Reading E-mail with Photos or Movies Attached Example: Viewing an attached photo Display the E-mail referring to steps 1 to 3 in "Reading Received E-mail" (→Page 52). Select an image with and press [Play]. Note ● Receiving attachment files may take some time. Receiving mail may also take some time depending on the condition of the radio waves in your area. -
Page 56: Replying To Received E-Mail
Replying to Received E-mail Display the text body of the mail you will reply to referring to steps 1 to 3 in "Reading Received E-mail" (→Page 52). Press [Reply]. The recipient's address is entered automatically. "Re:" is added to the title and the original E-mail is quoted. -
Page 57: Blocking Spam
Blocking Spam It is strongly recommended that you set up the Mail Filter to avoid spam. If you select "サポート設定"(Supportive settings), you can easily set up the Mail Filter by answering questions on the screen. ■Setting up the Mail Filter Example: Connecting to "サポート設定"(Supportive settings) When the standby screen is displayed, press... -
Page 58: Creating And Sending C-Mail
Creating and Sending C-Mail When the standby screen is displayed, hold down for at least one second. Select "Create New C-Mail" and press [Select]. Select [Destination] and press [Edit]. Select "Get AddressBook" and press [Select]. You can select your recipient from your send/receive history, or enter it directly. -
Page 59: Reading Received C-Mail
Press [Send]. Mail is sent. ■ To make changes before sending Select the destination or text body, [Edit]→make changes Reading Received C-mail When you receive C-mail, the C-mail notification tone will sound and the Message menu "New C-Mail: △" will appear in the standby screen. Select "New C-Mail:"... -
Page 60: Keitai! Kenkouroku
Keitai! Kenkouroku What You Can Do with Keitai! Kenkouroku You can keep a daily record of your weight in order to control your health, and if you become unsure you can check then and there using the "Self Diagnostic Health Check Tool". Developed by: JustSystems Corporation Supervising Director: Tsuguya Fukui (President, St. -
Page 61: Displaying Keitai! Kenkouroku Menu
Note ● This application was made in the hope that it will support users in maintaining and improving their health. However, the diagnosis results displayed in the Self Diagnostic Health Check Tool are only general possibilities and may not accurately reflect an individual user's health or potential illness. -
Page 62: Camera
Camera The W62K has a built-in CMOS camera with 1.31 megapixels that allows you to take photos. You can send the photos you took by E-mail, or set it as your standby screen. Basic Key Operation ■Adjust Brightness Press in the shooting screen... -
Page 63: How To Take Photos Successfully
Do not move the main unit for at least two seconds after you hear the shutter sound. Photo Size The following shows the sizes of the photos that can be recorded with your W62K. ■ Photo Size Photo Size Where to save Wallpaper : 240×320... -
Page 64: Shooting A Photo
Shooting a Photo When the standby screen is displayed, press . Select "Photo" and press [Select]. The photo shooting screen is displayed. Press [Shoot]. The shutter tone sounds and the photo is taken. Press [Save]. Note ● The photo size at the time of purchase is "Wallpaper". ●... -
Page 65: Attaching A Photo To An E-Mail
Attaching a Photo to an E-mail Immediately after the photo is shot (when the screen displays the preview image) press [E-Mail]. Create and send E-mail. To send the E-mail, refer to "Creating and Sending E-mail" (→Page 50). Note ● When you attach a photo to an E-mail, the photo is automatically saved in the Data Folder. -
Page 66: Viewing Photos
Viewing Photos When the standby screen is displayed, press . Select "Data Folder" and press [Select]. Select "Photo Folder" and press [Select]. Select the folder with the photographed date and press [Select]. Select the data and press [Play]. -
Page 67: Ezweb
EZweb EZweb Subscription Required About EZweb You need to subscribe to EZweb in order to use its services. If you did not subscribe to EZweb at the time of purchase, contact an au shop or the au Customer Center. You also need to configure the initial settings before you can use EZweb. -
Page 68: Displaying Au One Top
Displaying au one Top When the standby screen is displayed, press , select "EZweb" with . Select "au one Top" and press [Select]. Key word search function Offers an information search function using key word search. メール(Mail) Offers another E-mail address that you can also use in your PC. マイページ(My Page) Offers various information, useful tools or mass data storage capabilities to suit your needs. -
Page 69: Saving Your Favorite Websites
Saving Your Favorite Websites Display your favorite site and press [Brow. Menu]. Select "New bookmark" and press [Select]. Press [Reg]. The site you displayed in step 1 is bookmarked. Note ● Some information sites cannot be bookmarked. ● You can save up to 100 sites in your Bookmark(s). -
Page 70: Viewing Bookmarked Sites
Viewing Bookmarked Sites When the standby screen is displayed, press , select "EZweb" with . Select "Bookmark(s)" and press [Select]. Select an information site or a folder and press [Select]. If you selected a folder, select an information site from that folder and press [Select]. -
Page 71: Downloading Chaku-Uta
® Downloading Chaku-Uta Refer to the section "Displaying au one Top" (→Page 66) and display the au one Top screen. Select "カテゴリ検索"(Search category) and press [OK]. Select "着うた"(Chaku-Uta) and press [Select]. Select the information site you like and press [Select]. Follow the instructions on the screen to complete the download. -
Page 72: Ez Navi
"いつでも位置確認"(Auto Position Search) (monthly charge), "位置確認 メール"(Position Search Mail) (free of charge), and "エリア通知"(Area Message) (free of charge). Operating your W62K, you can check the location of an au cellphone that supports Position Search and automatically send an notification E-mail to a specified au cellphone when you enter (or are in) or leave (or are out) of a predetermined area during a pre-registered time period. - Page 73 Use "EZナビウォーク"(EZ Navi Walk) when you are out EZ Navi Walk menu Displays various You can search the route to your destination ナビをする menus that are useful (voice navigation), shops and facilities in your (Navigation)* for when you go out. area.
- Page 74 "災害時ナビ"(Evacuate Navi) for information about evacuation areas and way home The area map that is included in your W62K can be used to find the directions to the nearest shelter or to your home ("Evacuate Area Map"). You can also use the "Evacuate Navi" EZweb site to download a variety of contents, such as "Route...
-
Page 75: Ez News Flash
EZ News Flash EZweb Subscription Required EZ News Flash is a free service that transmits the latest news, weather and horoscope information to your standby screen. A telop of the latest news runs across the standby screen permanently, and you can select it to see the details. You can use EZ News Flash as soon as you perform a few simple steps after configuring the initial settings of EZweb (→Page 22). -
Page 76: Setting Ez News Flash
Setting EZ News Flash EZ News Flash can be used after performing a simple setting procedure (free of charge). Set EZ News Flash after performing "Initializing E-mail and EZweb" (→Page 22). When the standby screen is displayed, press . Select the telop and press [OK]. -
Page 77: Other Functions
Other Functions W62K also comes with these features. GLOBAL PASSPORT The W62K supports the Global Passport function using (GSM) the au IC-Card. Global Passport is an international roaming service that allows you to connect to the world by simply inserting your au IC-Card into a GSM mobile phone for overseas use. -
Page 78: Troubleshooting
Incoming Records. If you need further details, please access the website below. ・From your W62K: When the standby screen is displayed, hold down for at least one second. (Kyocera SiteK, in Japanese only) ・From a PC: http://www.kyocera.co.jp/prdct/telecom/consumer/support/qa/index.html... -
Page 79: If You Lose Your W62K
If You Lose Your W62K By setting the "Remote Ctrl Lock", you can set Auto Lock and Address Book Lock to prevent others from using your cellphone. Setting up the "Remote Ctrl Lock" operating environment When the standby screen is displayed, press . - Page 80 Enter Lock No. and press [OK]. Select "Caller No. List" and press [Select]. Select "00" and press [Edit]. Select "Input Phone No." and press [Select]. Enter the phone number and press [OK]. Press [Back]. By pressing "Address Book", you can retrieve a phone number and enter it.
-
Page 81: Remote Ctrl Lock
● You can register up to 3 phone numbers from which you can activate Remote Ctrl Lock. Set Auto Lock by remote control Call W62K under the conditions set by Remote Ctrl Lock. A guidance will play back to indicate the Remote Ctrl Lock has been activated and Auto Lock set. - Page 82 MyKDDI. Note ● You cannot activate Remote Ctrl Lock if W62K is not turned on, you are outside the coverage area or the Emission OFF is set. ● If you call a number in order to set Remote Ctrl Lock and the call is...
-
Page 83: Index
Index Symbol /Manner key ........11 Desktop holder ......10, 12 #key ............11 Disaster Message Board Service............7 Download ..........69 Drive Mode ..........5 Address Book ........41 Call ...........43 Edit ...........43 Register .........41 E-mail ............49 Register from Incoming/ Change address......23 Outgoing records .......45 Read..........52 Address key ........11 Reply..........54 Alphanumerics ........39... - Page 84 Operation Guide........20 Troubleshooting .........76 Other Functions........75 Outgoing records.......30 Useful sentence .........40 Pair Function ........46 Call ...........47 What you can do with W62K ...2 Register .........46 Send mail ........47 Passenger Seat Navi .......70 Your phone number Phone costs.........68 (my phone number)......23 Photo ............60...
- Page 85 (toll free) From au cellphones: area code not required (toll free) Read this to access to Sales: KDDI Corporation the au online manual Okinawa Cellular Telephone Cellphone and PHS operators collect and recycle Company unused telephones, batteries and battery chargers at stores bearing the ...
Need help?
Do you have a question about the W62K and is the answer not in the manual?
Questions and answers