Table of Contents
Advertisement
Quick Links
P 0 0 1
Basic Manual
read this manual to master
the cellular phone
Illustrations and
Screenshots
in This Manual
Notes on
Cell Phone Use
Contents
Getting Ready
Making and
Answering Calls
Character Input
Phone Book
Pair Function
Mail
Camera
EZweb
EZ News Flash/
au one Gadget
EZ Navi
TV (1 Seg)
In Case of
Loss of Your P001
Troubleshooting/
Appendix
Index
Advertisement
Table of Contents

Related Manuals for KDDI P001


Summary of Contents for KDDI P001
- Page 1 Character Input Basic Manual Phone Book Pair Function read this manual to master Mail the cellular phone Camera EZweb EZ News Flash/ au one Gadget EZ Navi TV (1 Seg) In Case of Loss of Your P001 Troubleshooting/ Appendix Index...
- Page 2 Introduction Thank you for purchasing the P001. Before using your P001, be sure to read the P001 Basic Manual (this PDF manual) to ensure correct usage. After you have finished reading this manual, store this PDF manual and the printed manuals in safe places so you can retrieve them whenever you need them.
-
Page 3: Illustrations And Screenshots In This Manual
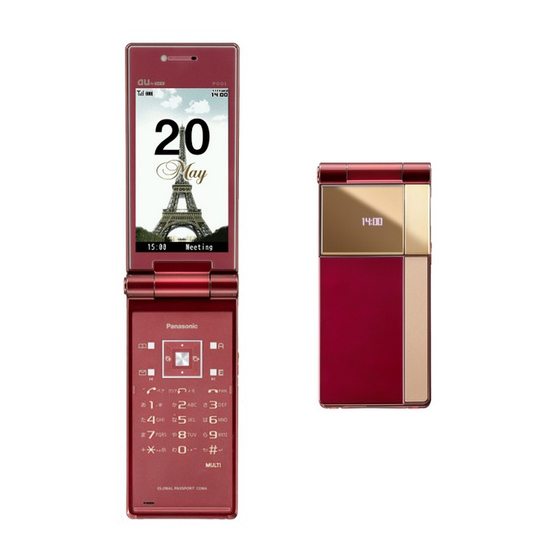
The screenshots in this manual are simplified and may look different from the actual cell phone screens. Also, part of screen may be omitted. • The display design themes of the P001 vary by model color. The screenshots for the Chianti Red models are used in this manual. -
Page 4: Notes On Cell Phone Use
Notes on Cell Phone Use • Refrain from talking in a loud voice. • Obtain the permission of other people before you take their photos with the cell phone’s camera. Cell Phone Etiquette • Do not record information with the cell phone’s camera The cell phone always emits weak radio waves when power in bookstores and other locations where taking photos is on. -
Page 5: Disaster Message Board Service
Disaster Message Board Service • The maximum storage period of the registered information is 72 hours. When a big scale disaster occurs, you can register • The maximum available number of registrations is 10 your safety information from EZweb. The registered per phone number. -
Page 6: Table Of Contents
Making and Answering Calls Contents Making a Call …………………………………………… 16 Making an International Call …………………………… 16 Introduction Answering a Call ………………………………………… 17 Illustrations and Screenshots in This Manual Returning a Call (Outgoing History/Incoming History) … 18 One-ring Calls …………………………………………… 18 Notes on Cell Phone Use Adjusting the Earpiece Volume during a Call …………... - Page 7 About Photo Modes …………………………………… 32 Setting Conditions for Activating the Remote Ctrl Lock … 46 Taking a Photo ………………………………………… 33 Remotely Activating the Remote Ctrl Lock on Your P001 … 46 Viewing Photos ………………………………………… 33 Activating the Remote Ctrl Lock EZweb by the Security Lock Service …………………………...
-
Page 8: Getting Ready
Getting Ready Checking the Contents of the Box The box contains the cell phone and accessories. • Cell phone • Battery pack • CD-ROM • Instruction Manual (Japanese) • Warranty (Japanese) • Safety Precautions (Japanese) • Global Passport CDMA Owner’s Guide (Japanese) •... -
Page 9: Names Of Parts
Names of Parts From the Front From the Back From the Sides ■ ■ ■ Lux sensor Earpiece Hand strap eyelet Flat-type earphone jack Built-in antenna Display Cursor key Down key (side)/ Up key (side)/ Center key Mobile light key Manner key Sub-display Phone book... -
Page 10: Using One-Push Open
E to select settings and then press ➡ key. [ (Select). You can answer a call by opening P001. Also, when you G to select User Support and then press have a missed call or new mail message, incoming history or ➡... -
Page 11: Charging The Battery Pack
Check the shape of the connector of the common AC adapter 01/02 (sold separately) and then plug it • Even if you open the P001, a new mail message is not straight into the external connection terminal. displayed when Auto Lock or Mail Restrict is effective. -
Page 12: Learning The Basics
Learning the Basics Key Assignments ■ : Display the ticker field, info pane, : Display incoming history. gadget (setting) icon and search window. : Display alert window/shortcut : Display outgoing history. icon. : Display Main menu. : Use phone book. : Activate EZapps. -
Page 13: Turning On Power
G to select 画面表示 (Screen Display) and Alert window Hiding/Redisplaying the ➡ ■ then press [ (選択 [Select]). Alert Window G to select Set Language and then press ➡ When the alert window is displayed on [ (選択 [Select]). the standby screen, you can temporarily hide it by pressing K (Back) and then G to select English and then press ➡... -
Page 14: Display Indicators
Display Indicators Display indicators inform you of mail arrival, current settings, etc. Display ■ ① ③ ⑤ ⑦ ⑨ Indicator Description Indicator Description ② ④ ⑥ ⑧ ⑩ ① Signal strength ⑩ Current date and time ② Battery level ⑪ Ticker field ⑪... -
Page 15: Using Main Menu
Each Main menu pattern has a different set of items. Info area ■ Classical Photograph Jewel You can display the information such as a clock or the memo to an info area. When the standby screen is displayed, press [. E to select settings and then press ➡... -
Page 16: Changing Your E-Mail Address
G to select the entry box, press [ (Input), ➡ Changing Your E-mail Address enter an e-mail address using single-byte You can change the account E-mail address alphanumeric characters, and then press name of your e-mail address. [ (OK). • For details on entering e-mail addresses, see page 23. -
Page 17: Security Code And Passwords
Security Code and Passwords EZ Password ■ Usage Subscribing or canceling subscriptions to You can use a Security Code and other passwords Example EZweb fee-based contents described below. Take care not to forget your Security Code and passwords, The four-digit number you wrote on your Initial Setting because they are required for performing various subscription form... -
Page 18: Making And Answering Calls
Making an International Call Making and Answering Calls au International Call Service ■ Making a Call Available without any additional application Example: To call 212-123-△△△△ in the USA When the standby screen is displayed, use 0 Press 005345. to 9 to enter a phone number. ↑... -
Page 19: Answering A Call
001 KOKUSAI MOBILE TALK Answering a Call ■ Application required. To answer a call, press Q. For inquiries, contact the KDDI Customer Service Center. • To end the call, press 0077-7160 (toll-free; open 9:00 to 20:00 everyday including Display When a Call is Received ■... -
Page 20: Returning A Call (Outgoing History/Incoming History)
Returning a Call (Outgoing History/ Adjusting the Earpiece Volume Incoming History) during a Call Example: Returning a call to a phone number in the During a call, use G. incoming history • : Increases the volume. When the standby screen is displayed, press D. •... -
Page 21: Changing The Incoming Ring Tone
Changing the Incoming Ring Tone Adjusting the Incoming Ring Tone Volume When the standby screen is displayed, press [. E to select settings and then press When the standby screen is displayed, press [. ➡ [ (Select). E to select settings and then press ➡... -
Page 22: Turning On The Answer Memo
Answering Service (Voice Mail) when your phone is turned off or when you are in a location where a signal Global Functions cannot be received. You can use the P001 overseas with global functions. ■ Playing a Message Setting Area ■... - Page 23 G to select Area Setting and then press ➡ [ (Select). G to select Overseas and then press ➡ [ (Select). A confirmation screen appears. G to select YES and then press [ (OK). ➡ Calling to Japan from Overseas ■...
-
Page 24: Character Input
Entering Alphanumeric Characters Character Input You can use the keys 1 to 0 to enter characters. More Character Entry Modes than one character is assigned to each key. The following table shows the key assignment for entering When a character entry screen is displayed, you can select characters. -
Page 25: Entering E-Mail Addresses
➡ Enter “@” . @: Press 1 twice. [ (OK). ➡ Enter “kddi” and then press k : Press 5 twice. d : Press 3 once and then C. d : Press 3 once. i : Press 4 three times. -
Page 26: Entering Pictograms
J (SubMenu). ➡ Press G to select Phrase and then press ➡ [ (OK). G to select Internet and then press ➡ [ (Slct). G to select .co.jp and then press [ (Slct). ➡ “.co.jp” is entered. Entering Pictograms When a character entry screen is displayed, press K (ChrTyp). -
Page 27: Phone Book
Phone Book • The phone book can store up to 1,000 entries. • The cell phone automatically saves an entry to the lowest available memory number from 000 to 999. Saving a Phone Book Entry • You can save three phone numbers and three e-mail addresses for each phone book entry. -
Page 28: Saving A Phone Number From The Incoming Or Outgoing History
Saving a Phone Number from the Incoming or Outgoing History Example: Saving a phone number from the incoming history to the phone book When the standby screen is displayed, press D and use G to select the phone number you want to save. -
Page 29: Pair Function
Making a Call to a Pair Partner Pair Function When the standby screen is displayed, press Q. You can register a maximum of five Pair Partners you contact often to easily call or send mail. F to select the person you want to call. ➡... -
Page 30: Mail
Creating and Sending E-mail Messages Mail When the standby screen is displayed, press L. Using E-mail G to select Create New and then press ➡ To use e-mail, you need to apply for an EZweb subscription. [ (Select). If you did not apply for an EZweb subscription at the time of G to select ➡... -
Page 31: Reading Received E-Mail Messages
G to select the fi le name and then press Reading Received E-mail Messages ➡ [ (Receive). When you receive an e-mail message, E-mail [ (Play). ➡ Press appears on the standby screen. " [ (Receive) • Selecting the file name or pressing F to select E-mail and then press ➡... -
Page 32: Rejecting Spam
Rejecting Spam カンタン設定 (Simple Settings) ■ Setting mail filters to reject spam is recommended. Set the fi lter by answering The サポート設定 (Supportive Settings) helps you to set questions サポート設定 mail filters easily by answering questions that appear on the This is recommended for users (Supportive Settings) screen. -
Page 33: Using C-Mail
E to select a phone book entry and then Using C-mail ➡ press [ (Detail). C-mail is a service that uses phone numbers as addresses G to select a phone number and then ➡ to exchange messages between au cell phones that press [ (Select). -
Page 34: Camera
Landscape Position ■ Camera Your cell phone has a CMOS camera with 3.24 effective megapixels for shooting photos and movies. You can use the self-timer and autofocus. Shot images can be used for the standby screen, and attached to e-mail messages. Lux sensor Photo Taking Tips When taking photos, position the cell phone so that... -
Page 35: Taking A Photo
Taking a Photo Viewing Photos When the standby screen is displayed, press [. When the standby screen is displayed, press [. E to select tools and then press E to select data folder and then press ➡ ➡ [ (Select). [ (Select). -
Page 36: Ezweb
EZweb EZweb is an information service that allows you to enjoy browsing the Internet on your cell phone. You can also download Chaku-Uta-Full ® , Chaku-Uta ® , news, and other contents from web pages. To use EZweb, you need to apply for an EZweb subscription. -
Page 37: Accessing Sites
Accessing Sites Viewing the au one Top ■ You can access EZweb from the au one Top. A variety of useful and fun sites are available on EZweb. When the standby screen is displayed, press M, use G to select au one Top and then press [ (Select). キーワード検索機能... -
Page 38: Bookmarking Frequently Accessed
Basic Operations Bookmarking Frequently ■ Use G to select the site you want to access and then Accessed Pages press [ (Select). Press L or R to return to the previous screen. Hold When the page you want to bookmark is down either key for at least one second to return to the au displayed, press J (Browser Menu). -
Page 39: Checking Charges
G to select the site you want to access Checking Charges ➡ and then press [ (Select). When the standby screen is displayed, press [. ➡ Select the data you want to download. E to select settings and then press ➡... -
Page 40: Ez News Flash/Au One Gadget
EZ News Flash/au one Gadget • Packet communication charges are incurred for using au one Gadget applications that require network Use the EZ News Flash/au one Gadget to display flash connection for information updates. news, or activate the set gadget on the standby screen. •... - Page 41 Canceling EZ News Flash ■ When the standby screen is displayed, use A to select the ticker fi eld and then press [ (News). J (メニュー [Menu]), use G to select ➡ Press サービス設定解除 (Service Cancellation) and then press [ (選択 [Select]). G to select YES and then press ➡...
-
Page 42: Ez Navi
Security Navi to Check Where EZ Navi Your Kids Are Using GPS (Global Positioning System), EZ Navi provides The Security Navi application is made up of the following useful positional information services. three functions: When the standby screen is displayed, press M いつでも位置確認... -
Page 43: Ez Navi Walk For When You Go Out
EZ Navi Walk for When You Go Out Two modes, フルモード (Full mode) and シンプルモード (Simple mode), are available for EZ Navi Walk. All functions of EZ Navi Walk can be used in Full mode. To use it easily, it is limited to basic functions in Simple mode. Full mode is set at the time of purchase. -
Page 44: Evacuate Navi To Guide You Home Or To Nearby Evacuation Areas During Disasters
Nearby public evacuation areas or the direction to your home can be determined using the map data pre-installed on the P001 ( 避難所マップ [Evacuate Area Map]). Other useful contents can be downloaded from the 災害時 ナビ (Evacuate Navi) section of the EZweb site, including 帰宅支援マップ... -
Page 45: Tv (1 Seg)
DBEX OFF: Approx. 3 hrs 20 min. Continuous The TV antenna is installed inside the P001 unit. Do not viewing time cover the TV antenna with your hand for better reception as DBEX ON: shown below when watching TV (1 Seg). -
Page 46: Initial Setup Of Au Media Tuner
Initial Setup of au Media Tuner Watching TV (1 Seg) To watch TV (1 Seg) using the au Media Tuner, you need to When the standby screen is displayed, press [. configure initial settings. E to select TV and then press ➡... -
Page 47: Basic Operations
Basic Operations Launch TV (1 Seg) to start receiving data broadcasts. The data operation screen appears when a data broadcast is received. Press K (Vol/Ch) on the data operation screen to switch to the TV operation screen. On the TV operation screen, pressing Q switches the display. -
Page 48: In Case Of Loss Of Your P001
This sets the time limit for receiving the set number of calls after the first call is received. You can activate the Remote Ctrl Lock by calling your P001 • You can set a time from one to ten minutes. -
Page 49: Activating The Remote Ctrl Lock By The Security Lock Service
Login to au Customer Support (http://cs.kddi.com/) and complete the application process by following the on- screen instructions. • The Remote Ctrl Lock cannot be activated when the P001 is turned off or out of the service area, or Emission OFF is set to ON. -
Page 50: Troubleshooting/Appendix
Troubleshooting/Appendix Symptom Possible Cause Remedy Page ● Is the battery pack charged? Charge the battery pack. Cannot turn on ● Did you hold down S for at least one power. Hold down S for at least one second. second? Hold down S for at least one second. ●... - Page 51 For more detailed information, visit the following au troubleshooting sites: - From an au cell phone: When the standby screen is displayed, press M ⇒ au one Top ⇒ auお客さまサポート (au Customer Support) ⇒ オンラインマニュアル (Online Manual) ⇒ 故障診断Q&A (Troubleshooting FAQ) - From a PC: http://www.kddi.com/customer/service/au/trouble/kosho/index.html...
-
Page 52: Specific Absorption Rate (Sar) Of Cell Phone
ICNIRP: http://www.icnirp.de/ MIC: http://www.tele.soumu.go.jp/e/ele/body/index.htm SAR Certifi cation Information ■ TELEC: http://www.telec.or.jp/ENG/Index_e.htm This model cell phone P001 meets the MIC’s* technical http://www.au.kddi.com/ regulation for exposure to radio waves. Panasonic Mobile Communications Co., Ltd.: The technical regulation established permitted levels of http://panasonic.jp/mobile/... -
Page 53: Fcc Rf Exposure Information
Note: assure the safety of all persons, regardless of age and health. This equipment has been tested and found to comply with The exposure standard for wireless cell phones employs the limits for a Class B digital device, pursuant to part 15 a unit of measurement known as the Specific Absorption of the FCC Rules. -
Page 54: Notes On Handling The Felica Reader/Writer (Touch Message)
• Hearing Aids Important Safety Information ■ Some digital wireless cell phones may interfere with some • AIRCRAFT hearing aids. In the event of such interference, you may Switch off your wireless device when boarding an aircraft want to consult your hearing aid manufacturer to discuss or whenever you are instructed to do so by airline staff. -
Page 55: Index
Starting a new line ………………………………………… 23 Index Charging the battery pack …………………………………… 9 Checking charges …………………………………………… 37 Numeric C-mail ………………………………………………………… 31 C-mail Safety Block ……………………………………… 31 1 Seg ………………………………………………………… 43 Creating and sending …………………………………… 31 Reading received mail …………………………………… 31 Contents …………………………………………………………... - Page 56 Export Administration Regulations………………………… 52 Internet ……………………………………………………… 34 EZ Navi ……………………………………………………… 40 Sites ……………………………………………………… 35,36 EZ Navi Walk ………………………………………………… 41 EZ News Flash ……………………………………………… 38 Canceling ………………………………………………… 39 Key assignments …………………………………………… 10 Changing the Reception Settings ……………………… 39 Info pane …………………………………………………… 38 Setting ………………………………………………………...
- Page 57 Ring tones Changing the type ………………………………………… 19 Pair Function ………………………………………………… 27 Changing the volume …………………………………… 19 Making a call to a Pair Partner ………………………… 27 Registering a Pair Partner ……………………………… 27 Sending mail to a Pair Partner …………………………… 27 SAR ………………………………………………………… 50 Passenger Seat Navi ………………………………………...
- Page 58 ▶みんなでQ&A「なるほど! au」 (au User’ s Forum) Read this code for an easy February 2009 Edition access to なるほど! au (au User’ s Forum). ▶ Sales: KDDI CORPORATION • ・The packet communication OKINAWA CELLULAR TELEPHONE COMPANY Manufactured by: Panasonic charge applies.
Need help?
Do you have a question about the P001 and is the answer not in the manual?
Questions and answers