Table of Contents
Advertisement
Quick Links
Advertisement
Table of Contents

Related Manuals for Baumatic BMO6S


Summary of Contents for Baumatic BMO6S
- Page 1 USER MANUAL 60CM BUILT-IN OVEN BMO6S AND BMO9S...
- Page 2 PREFACE Dear Customer, Congratulations on purchasing your new product from Home Appliances. To register your Parts and Labour Warranty, some conditions apply, please refer to your warranty card for more details and contact our Aftersales Support team on: 1800 444 357 and Select 1 Our Customer Care Centre is there to ensure you get the most out of your appliance.
- Page 3 PRODUCT - INSTALLATION DETAILS For future reference we suggest that you staple a copy of your purchase receipt here and complete the below so the information is always at hand. Model Number Description 60cm Built-In oven Serial Number (Located on rating label at bottom front frame of oven) Date of Purchase (DD-MM-YYYY)
-
Page 4: Safety Instructions
SAFETY INSTRUCTIONS Read this Instruction Manual carefully to obtain the best performance from your oven. Keep this manual so that it can be read by a new owner. Electrical Safety • To connect the oven to the power supply, the technician should use an H05RR-F, H05SS-F or H07RN-F power cable. -
Page 5: Cleaning And Maintenance
Safety in the use of the oven • The oven must always be operated with the door closed. • Only use the oven after it has been installed inside the kitchen unit (See Installing the Oven). • The tray and grill have a system for easy part removal and handling of food. -
Page 6: Cleaning The Oven Interior
Before First Use Cleaning and Maintenance There may be traces of grease and other substances Caution: in the oven as a result of its manufacturing process. These Disconnect the appliance from mains power supply before should be removed by means of the following procedure: any operation. -
Page 7: Cleaning The Oven Door
1 Open the oven door. Cleaning the Oven Exterior and 2 Fully rotate the two clamps (N) to stop the door from Accessories closing. Fig 13 3 Squeeze point 1 located on the upper part of both Clean the outside of the oven and accessories with warm sides of the oven door. -
Page 8: Technical Specifications
Electrical Connection Oven smoking during use Normal during first use. The installer must ensure that: Clean the oven regularly. • The mains power voltage and frequency correspond to Reduce the amount of grease or oil in the tray. what is marked on the rating label located at the front Do not use temperatures higher than of the oven just under the oven opening. - Page 9 Figures Fig 1 Fig 2 Fig 3 Fig 4 Fig 5 Fig 6 Fig 7 Fig 8...
- Page 10 Fig 9 Fig 10 Fig 11 Fig 12 Fig 13 Fig 14 Fig 15 Fig 16...
- Page 11 Fig 17 Fig 18 Fig 19 For 60cm ovens - tower installation Fig 20 For 60cm ovens - underbench installation min 40...
- Page 12 For 90cm ovens Fig 21 Fig 21 Fig 22 Void or Cut Out on base of cabinet for improved ventilation is required to protect both the oven and surrounding cabinets...
- Page 13 Fig 23...
- Page 15 This page has been left BLANK intentionally...
- Page 16 Code: BAUM_2016025 Date: 2016-10-11...
- Page 17 USER MANUAL 60CM BUILT-IN OVEN BMO6S BMO9S - TIMER / PROGRAMMER USER GUIDE...
-
Page 18: Important Note
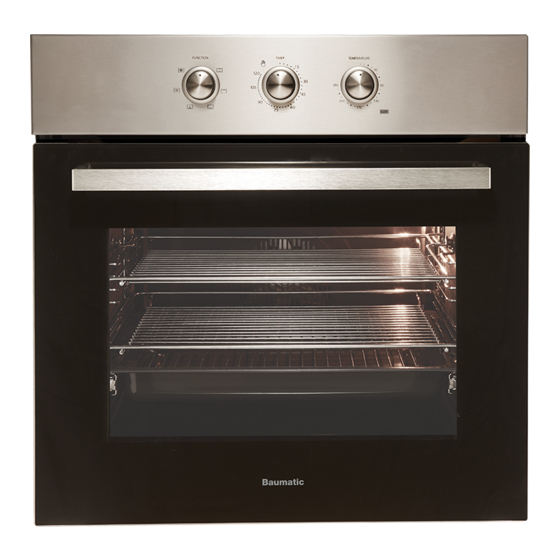
13 Light 14 Back Wall Panel 15 Fan Control Panel FUNCTION TIMER TEMPERATURE BMO6S BMO9S 1 Function selector 2 Minute minder timer 3 Electronic programmable timer 4 Temperature selector 5 Heating indicator light* * Indicates that the heat is going to the food and it goes out when the set temperature is reached... - Page 19 Programming the cooking time Use of the Oven 1 Press the MODE button until the indicator above the Manual use of the oven symbol begins to flash. 1 Turn the timing switch to the left to the position 2 Select the length of time, pressing the “+” or “–“ buttons. 2 Select a temperature and a cooking function.
-
Page 20: Timer-Overview
Caution 1) Switch into time adjustment mode. Pressing the MODE button the display on the screen shows any function programmed. It can be changed by pressing the “+” or “–“ buttons. On selecting the desired function, the indicator above the corresponding signal will light. - Page 21 3) After a few seconds, screen will return to clock mode 3) Adjust the cooking time using the buttons CANCELLING THE BUZZER SOUND 4) After a few seconds, the screen will indicate that After the programmed duration is elapsed, buzzer will cooking has started and show the current time sound.
-
Page 22: Child Lock
2) Set it to the desired time by using the + or – buttons. 2) Reset the timer 3) In a few seconds, screen switches to clock mode. Note: Your oven will be inoperative until you reset the We now have programmed our oven to get the food ready timer. -
Page 23: User Programmable Options
To deactivate the child lock, touch until key symbol disappears. Exception: A buzzer tone during child lock can be cancelled touching any button. USER PROGRAMMABLE OPTIONS: 1-Time of day display 12h / 24h Factory setting is 24 h display. Touching for 5 seconds, a double beep tone will be heard, the display mode toggles to 12 h mode (am / pm indication) Doing... -
Page 24: Oven Functions
Oven Functions MaxiGrill with fan Switch off oven Allows uniform roasting at the same time as surface browning. Ideal for grills. Special for large volume pieces, such as poultry, game etc. It is recommended to put the Conventional with fan item on a Appropriate for roasts and cakes. - Page 25 This page has been left BLANK intentionally...
- Page 26 This page has been left BLANK intentionally...
- Page 27 This page has been left BLANK intentionally...
- Page 28 Code: BAUM_2016025 Date: 2016-08-25...
Need help?
Do you have a question about the BMO6S and is the answer not in the manual?
Questions and answers