Sign In
Upload
Download
Table of Contents
Contents
Add to my manuals
Delete from my manuals
Share
URL of this page:
HTML Link:
Bookmark this page
Add
Manual will be automatically added to "My Manuals"
Print this page
×
Bookmark added
×
Added to my manuals
Manuals
Brands
Yamaha Manuals
Home Theater System
DVR-S60
Owner's manual
Yamaha DVR-S60 Owner's Manual
Hide thumbs
Also See for DVR-S60
:
Owner's manual
(33 pages)
,
Service manual
(108 pages)
1
2
3
4
5
6
7
8
9
10
11
12
13
14
15
16
17
18
19
20
21
22
23
24
25
26
27
28
29
30
31
page
of
31
Go
/
31
Contents
Table of Contents
Troubleshooting
Bookmarks
Table of Contents
Table of Contents
Important Safety Instructions
Checking the Accessories
Caution
Table of Contents
Controls
Front Panel
Display
Remote Control
Controls
Installing Batteries in the Remote Control
Using the Remote Control
Speaker Placement
Placing the Speakers
Placing the Center Speaker
Mounting the Front and Surround Speakers
Basic Connections
Speaker Connections
FRONT L/R, CENTER, SURROUND L/R 1 Khz, 10% THD, 8 Ω
Subwoofer
Audio
Video
Antenna Connections
Connecting to a TV with the Video Pin Cable
Monitor out Video (Rca)
Additional Connection Examples
Connecting to a TV with an S Video Cable
Connecting to a TV with a Component Video Cable
VCR Connections
S-Video
Audio
[U.S.A., Canada and Korean Models]
[U.K., Europe, Australia, China and General Models]
Dvr-S60
Progressive-Scan TV Connections
Headphones
Basic Operation
Turning the Power on and off
Direct Start Function
Selecting the Source
Adjusting the Volume
To Reduce the Volume Temporarily
Bass Extension
Selecting the Sound Mode
What to Do if
Adjusting the Clock
Selecting the Surround Mode
Selecting Dolby Pro Logic Mode
Playable Discs
Disc Play
Preparations
Loading a Disc
Starting Play
Stopping Play
Settings on the Set up Menu
Common Procedures of Settings
Language
Display
Speaker
Parental
Various Disc Playing Functions
Selecting a DVD Menu [DVD]
Selecting a Title Menu [DVD]
Return Button (RETURN) [Video CD]
Chapter (Track) Skip
Title Search [DVD]
Chapter Search [DVD]
Track Search [Video CD] [CD]
Time Search
Fast Play
Picture Zoom [DVD] [Video CD]
Viewing from a Desired Camera Angle (Multi-Angle) [DVD]
Angle Replay [DVD]
Repeat Play
Programmed Play [Video CD] [CD]
Selecting Subtitle Language [DVD]
Selecting Audio Soundtrack Language (Multi-Language) [DVD]
Changing the Audio Channel Output [Video CD]
Selecting On-Screen Information
Mp3 CD Operation
MP3 CD Information
MP3 CD Play
Language Code List
Listening to Video Sources
Listening to the Radio
Automatic/Manual Tuning
To Preset Stations
Listening to Preset Stations
To Receive FM Stereo Broadcasts
Timer Operation
Using the Timer
Using the Sleep Timer
Troubleshooting Guide
Specifications
Dvr-S60
Nx-S60C
Nx-S60S
Sw-S60
Advertisement
Quick Links
1
Subwoofer
2
Sw-S60
3
Nx-S60S
4
Specifications
Download this manual
See also:
Service Manual
U
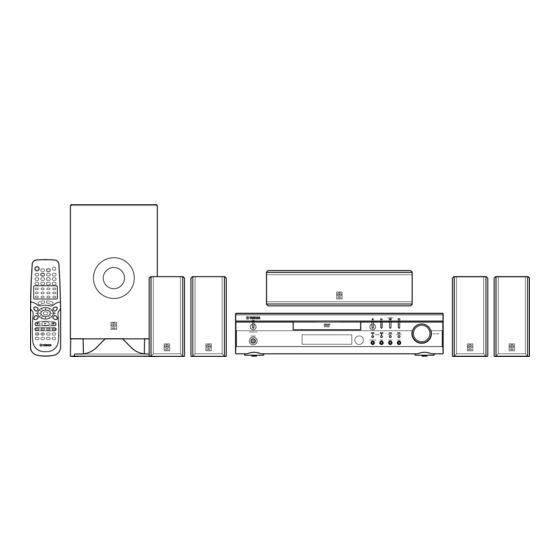
DVD HOME THEATER SOUND SYSTEM
DVX-S60
FM MODE
STANDBY/ON
VOLUME
TUNING
PRESET
MEMORY
PHONES
SURROUND
BASS
MUSIC
INPUT
DVX-S60: DVR-S60 + NX-S60S + NX-S60C + SW-S60
OWNER'S MANUAL
Table of
Contents
Previous
Page
Next
Page
1
2
3
4
5
Advertisement
Chapters
Table of Contents
6
Specifications
30
Table of Contents
Need help?
Do you have a question about the DVR-S60 and is the answer not in the manual?
Ask a question
Questions and answers
Related Manuals for Yamaha DVR-S60
Stereo System Yamaha DVR-S60 Service Manual
Home theater sound system (108 pages)
Home Theater System Yamaha DVX-S60 Owner's Manual
Dvd home theater sound system (33 pages)
Home Theater System Yamaha DVR-S150 Service Manual
Home theater sound system (100 pages)
Home Theater System Yamaha DVX-S200 Owner's Manual
Dvd home theater sound system/ dvd/super audio cd receiver (115 pages)
Home Theater System Yamaha DVX-S200 Service Manual
Home theater sound system (108 pages)
Home Theater System Yamaha DVX-S100 Owner's Manual
Dvd home theater sound system (82 pages)
Home Theater System YAMAHA DVX-S120 Owner's Manual
Dvd home theater sound system; dvd receiver (115 pages)
Home Theater System Yamaha DVX-S120 Owner's Manual
Dvd home theater sound system; dvd receiver / ampli-tuner dvd (332 pages)
Home Theater System Yamaha DVX-S301 Service Manual
Dvd home theater sound system (68 pages)
Home Theater System Yamaha DVX-S301 Service Manual
Dvd home theater sound system (68 pages)
Home Theater System Yamaha DVR-C310 Service Manual
Dvd home theater sound system (40 pages)
Home Theater System Yamaha DVX-1000 Owner's Manual
(120 pages)
Home Theater System Yamaha DVX-1000 Owner's Manual
(484 pages)
Home Theater System Yamaha DVX-1000 Service Manual
Dvd home theater sound system (dvd receiver/subwoofer/speakers) (86 pages)
Home Theater System Yamaha DVX-1000 Owner's Manual
(120 pages)
Home Theater System Yamaha DVX-700 Service Manual
Dvd controller dvr-700 subwoofer / system control ns-psw700 speakers ns-p700 (122 pages)
This manual is also suitable for:
Nx-s60s
Nx-s60c
Sw-s60
Table of Contents
Save PDF
Print
Rename the bookmark
Delete bookmark?
Delete from my manuals?
Login
Sign In
OR
Sign in with Facebook
Sign in with Google
Upload manual
Upload from disk
Upload from URL


Need help?
Do you have a question about the DVR-S60 and is the answer not in the manual?
Questions and answers