
Related Manuals for Iluv I9200


Summary of Contents for Iluv I9200
-
Page 1: Instruction Manual
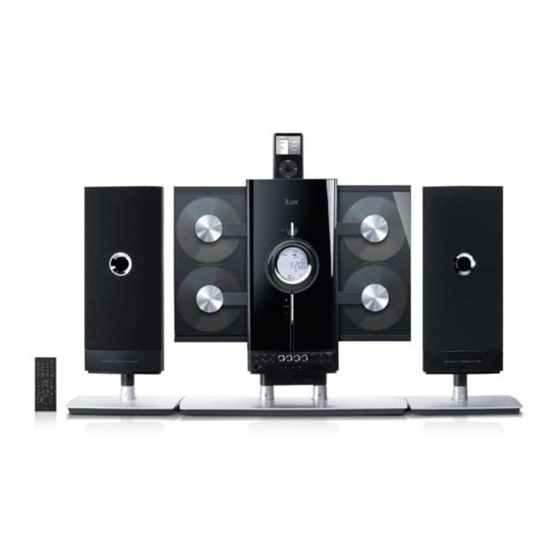
® High Fidelity Mini Audio System for iPod i9200 Instruction Manual Please read this manual carefully before operating and save it for future reference. Have a question? Visit http://www.i-Luv.com... - Page 2 High Fidelity Mini Audio System for iPod V10M11_IM_EN_12182007 - 1 - www.i-Luv.com...
-
Page 3: Important Safety Instructions
High Fidelity Mini Audio System for iPod V10M11_IM_EN_12182007 USER SAFETY GUIDE WARNING • TO PREVENT FIRE OR SHOCK HAZARD. DO NOT EXPOSE THIS APPLIANCE TO RAIN OR MOISTURE. • THIS APPLIANCE SHALL NOT BE EXPOSED TO DRIPPING OR SPLASHING WATER AND THAT NO OBJECT FILLED WITH LIQUIDS SUCH AS VASES SHALL BE PLACED ON APPARATUS. - Page 4 High Fidelity Mini Audio System for iPod V10M11_IM_EN_12182007 USER SAFETY GUIDE 12) Use only with the cart, stand, tripod, bracket, or table specified by the manufacturer, or sold with the apparatus. When a cart is used, use caution when moving the cart/apparatus combination to avoid injury from tip-over.
- Page 5 High Fidelity Mini Audio System for iPod V10M11_IM_EN_12182007 USER SAFETY GUIDE CLEANING Always disconnect unit from power supply before attempting to clean it. Use soft cloth moistened with soapy water, and wipe gently. Do not use solvents or abrasive materials. LASER SAFETY This unit utilizes laser technology.
- Page 6 High Fidelity Mini Audio System for iPod V10M11_IM_EN_12182007 USER SAFETY GUIDE FCC NOTICE TO A USER IN USA This equipment has been tested and found to comply with the limits for a Class B digital device, pursuant to Part 15 of the FCC Rules. These limits are designed to provide reasonable protection against harmful interference in a residential installation.
- Page 7 High Fidelity Mini Audio System for iPod V10M11_IM_EN_12182007 USER SAFETY GUIDE IC NOTICE TO A USER IN CANADA Since digital circuitry may cause interference to other radio or television tuners nearby, switch this unit off when not in use or move it away from the affected radio/television tuner. NOTE: This digital apparatus does not exceed the Class B limits for radio noise emissions from digital apparatus as set out in the Radio Interference Regulations of Industry Canada.
-
Page 8: Table Of Contents
High Fidelity Mini Audio System for iPod V10M11_IM_EN_12182007 TABLE OF CONTENTS GETTING STARTED Compatibility ………………………………………………………………………………… 9 General Features………………………………………………………………………………10 Main Unit Assembly and Disassembly …………………………………………………… 11 Speaker Assembly and Disassembly …………………………………………………….. 11 Wall-mounting Installation …………………………………………………………………. 12 Location of Controls (Front View of Main Unit) …………………………………………… 13 Location of Controls (Rear View of Main Unit) ………………………………………….. - Page 9 High Fidelity Mini Audio System for iPod V10M11_IM_EN_12182007 TABLE OF CONTENTS OPERATIONAL FEATURES (CONTINUED) Random play …………………………………………………………………………… 26 Repeat play …………………………………………………………………………… 26 Track selection ………………………………………………………………………… 26 Search operation ……………………………………………………………………… 27 Track intro-scan …………………………………………………………………………27 Mute function ……………………………………………………………………………27 Program memory ……………………………………………………………………… 27 MP3 Disc Operation …………………………………………………………………………...
-
Page 10: Getting Started
High Fidelity Mini Audio System for iPod V10M11_IM_EN_12182007 GETTING STARTED COMPATIBILITY Disc Size: 12cm / 8cm AUDIO CD Disc Type: CD File Format: MP3 (MPEG 1/2/2.5 Layer 3) MP3 CD Bit Rate: 32Kbps ~ 320Kbps DIGITAL Compatible with all iPod docking models except ®... -
Page 11: General Features
V10M11_IM_EN_12182007 GETTING STARTED Thank you for purchasing i9200. Unpack the unit and make sure all the accessories are put aside so they will not be lost. We recommend that you retain the original carton and packaging materials for future use, should you transport or ship the unit in the future. -
Page 12: Main Unit Assembly And Disassembly
High Fidelity Mini Audio System for iPod V10M11_IM_EN_12182007 GETTING STARTED CAUTION - This product may be used only with iLuv i9200 stand. Use with other stands may result in instability causing possible injury. Main Unit Assembly and Disassembly Speaker Assembly and Disassembly - 11 - www.i-Luv.com... -
Page 13: Wall-Mounting Installation
High Fidelity Mini Audio System for iPod V10M11_IM_EN_12182007 GETTING STARTED Wall-mounting Installation Secure the center unit and speakers on the wall (as shown below) using 8 dowels and 8 screws (supplied) - 12 - www.i-Luv.com... -
Page 14: Location Of Controls (Front View Of Main Unit)
High Fidelity Mini Audio System for iPod V10M11_IM_EN_12182007 GETTING STARTED Location of Controls (Front View of Main Unit) POWER Button STOP/ST. /MONO Button Used to turn the system on and off Interrupts the CD playback / clearing the Right CD Door CD program, provides stereo-mono Display switching for FM stations... -
Page 15: Location Of Controls (Rear View Of Main Unit)
High Fidelity Mini Audio System for iPod V10M11_IM_EN_12182007 GETTING STARTED Location of Controls (Front View of Main Unit) – Continued 18. TIMER Button 22. iPod PLAY/PAUSE || Button Starts iPod playback / Pauses iPod Activates the timer playback. 19. FOLDER DOWN Button 23. -
Page 16: Antenna Connection
High Fidelity Mini Audio System for iPod V10M11_IM_EN_12182007 GETTING STARTED Antenna Connection You can achieve acceptable reception if you use the supplied FM pigtail antenna. If so, the antenna should be elongated and not coiled or bunched up. If it hangs freely, it can be quite effective. - Page 17 High Fidelity Mini Audio System for iPod V10M11_IM_EN_12182007 GETTING STARTED Location of Controls (Remote Control) – Continued 34. POWER Button TUNING - SKIP/SEARCH Button Used to turn the system on and off CD backward title selection / CD 35. 0 - 9, +10 NUMERIC Buttons backward search operation / Manual Recalls TUNER preset stations / Choose tuning of stations, station search...
-
Page 18: First Time Use Of Remote Control
High Fidelity Mini Audio System for iPod V10M11_IM_EN_12182007 GETTING STARTED First Time Use of Remote Control For the first time use, the battery is pre-installed for your convenience. Pull out the insulation tag from the button battery tray before operating the remote control as shown below. Battery Installation Remove the battery tray by pressing point (1a) inside, then sliding area (1b) at the same time. -
Page 19: Operational Features
High Fidelity Mini Audio System for iPod V10M11_IM_EN_12182007 OPERATIONAL FEATURE Amplifier and Radio Operation Switching the unit ON Press the POWER button (1)/(34) to turn on the system. Operating mode selection The different operating modes can be directly selected using the buttons PLAY/PAUSE (13)/(41) for CD operation and TUNER/BAND (23)/(56) for radio reception. -
Page 20: Am/Fm Radio Operation
High Fidelity Mini Audio System for iPod V10M11_IM_EN_12182007 OPERATIONAL FEATURE Amplifier and Radio Operation – Continued AM/FM radio operation Turn the unit on by pressing the POWER button (1)/(34). Switch to the Tuner operating mode by pressing the button TUNER/BAND (23)/(56). Manual station selection Press button TUNER/BAND (23)/(56) repeatedly until the desired frequency band appears. -
Page 21: Tuner Preset Station
High Fidelity Mini Audio System for iPod V10M11_IM_EN_12182007 OPERATIONAL FEATURE Amplifier and Radio Operation – Continued Tuner preset station Each time the MEM./CLK ADJ. button (20)/(53) is pressed, the memory positions are called up one after another in ascending number order. The memory positions are selected directly using the numerical keys 1 - 0 / +10 (35) on the remote control. -
Page 22: Changing A Program Position
High Fidelity Mini Audio System for iPod V10M11_IM_EN_12182007 OPERATIONAL FEATURE Amplifier and Radio Operation – Continued Changing a program position If a memory position needs to be replaced by a station other than the current one, the new station can be programmed as described above, and this will automatically replace the original station. -
Page 23: Digital Clock And Timer
High Fidelity Mini Audio System for iPod V10M11_IM_EN_12182007 OPERATIONAL FEATURE Digital Clock and Timer Setting the digital clock When you first plug in the unit, the display shows: Note: The unit uses 12 hour format. To set the clock to the current time, proceed as follows: Press MEM./CLK ADJ. -
Page 24: Snooze Function
High Fidelity Mini Audio System for iPod V10M11_IM_EN_12182007 OPERATIONAL FEATURE Digital Clock and Timer – Continued Setting the timer – Continued To set the minutes, press the MEM./CLK ADJ. again and use TUNING + SKIP/SEARCH or TUNING - SKIP/SEARCH to adjust. Confirm by pressing MEM./CLK ADJ. -
Page 25: Compact Disc Operation
High Fidelity Mini Audio System for iPod V10M11_IM_EN_12182007 OPERATIONAL FEATURE Compact Disc Operation Safety notes for operation of the CD changer Press one of the OPEN / CLOSE buttons (15) or (16) to open the right or left CD cover (2) or (26). -
Page 26: Playing The Entire Cd
High Fidelity Mini Audio System for iPod V10M11_IM_EN_12182007 OPERATIONAL FEATURE Compact Disc Operation – Continued Inserting and ejecting the CD – Continued After having closed the disc cover, the CD system immediately begins to scan the content of the compact disc. After that, CD will start playback automatically if disc is read properly. Playing the entire CD Select the desired CD with the button CD SELECTION 1 - 4 (5) or DISC 1 - 4 (52) on the remote. -
Page 27: Random Play
High Fidelity Mini Audio System for iPod V10M11_IM_EN_12182007 OPERATIONAL FEATURE Compact Disc Operation – Continued Random play Press RANDOM before or during CD play. The tracks in the CD will be played in random sequence. To cancel random play, press STOP, or press the RANDOM button again. -
Page 28: Search Operation
High Fidelity Mini Audio System for iPod V10M11_IM_EN_12182007 OPERATIONAL FEATURE Compact Disc Operation – Continued Search operation While the CD is in play mode you can scan tracks by holding down TUNING + SKIP/SEARCH and TUNING - SKIP/SEARCH. The CD will continue to play until you find the track you want. - Page 29 High Fidelity Mini Audio System for iPod V10M11_IM_EN_12182007 OPERATIONAL FEATURE Compact Disc Operation – Continued Program memory – Continued For the next program position, reselect this or another CD and select a track. Confirm the selection using the MEM./CLK ADJ. button. To program other tracks in the memory, repeat steps 3 - 7.
-
Page 30: Mp3 Disc Operation
High Fidelity Mini Audio System for iPod V10M11_IM_EN_12182007 OPERATIONAL FEATURE MP3 Disc Operation Inserting and ejecting an MP3 disc The CD compartments (2)/(26) are opened for inserting or removing compact discs by pressing the OPEN / CLOSE (15)/(16) buttons. Insert the MP3 disc with the unlabelled side facing the unit. Press the center of the CD onto the black holder fitted with 3 retaining bearings. -
Page 31: Pause / Stop
High Fidelity Mini Audio System for iPod V10M11_IM_EN_12182007 OPERATIONAL FEATURE MP3 Disc Operation – Continued Playing the entire MP3 CD – Continued Press the || PLAY/PAUSE button to play the MP3 disc. Pause / Stop To briefly pause playback, press the || PLAY / PAUSE button (13)/(41). -
Page 32: Playback In Random Sequence
High Fidelity Mini Audio System for iPod V10M11_IM_EN_12182007 OPERATIONAL FEATURE MP3 Disc Operation – Continued Playback in random sequence Press the RANDOM button (6)/(37) in stop condition to start random play. By pressing button STOP (11)/(48), the random playback is cancelled. This function can be switched off by pressing the RANDOM button again. -
Page 33: Title Introduction
High Fidelity Mini Audio System for iPod V10M11_IM_EN_12182007 OPERATIONAL FEATURE MP3 Disc Operation – Continued Title introduction Press the INTRO button (14) during stop mode to playback the first 10 seconds of each title. Press the INTRO button again and the CD player plays will play the currently selected track. -
Page 34: Id3 Tag (Artist/Title)
High Fidelity Mini Audio System for iPod V10M11_IM_EN_12182007 OPERATIONAL FEATURE MP3 Disc Operation – Continued Programming memory – Continued To play back the program, press the || PLAY / PAUSE button (13)/(41). When || PLAY / PAUSE is pressed, the program can be played back again as long as MEMORY appears on the display unit (3). -
Page 35: Basic Operation With Ipod
To end the iPod playback, select CD or TUNER mode, or press the POWER button to off Charging your iPod To charge your iPod, insert your iPod into the built-in universal dock. Ensure that i9200 is connected to an outlet. -
Page 36: Care And Maintanence Guide
High Fidelity Mini Audio System for iPod V10M11_IM_EN_12182007 CARE AND MAINTENANCE GUIDE • Treat the disc carefully. Handle the disc only by its edges. Never allow your fingers to contact with the shiny, unprinted side of the disc. • Do not attach adhesive tape, stickers etc., to the disc label. •... -
Page 37: Specifications
High Fidelity Mini Audio System for iPod V10M11_IM_EN_12182007 SPECIFICATIONS GENERAL Power requirement AC: 120V ~ 60Hz DC: 1 x CR2032 for Remote Control Power consumption: 35 Watts Unit Dimension (w/ stand) Unit: 440 (W) x 110 (D) x 428 (H) mm (17.3” x 4.5” x 16.9”) Speakers: 148 (W) x 108 (D) x 415 (H) mm (5.8”... - Page 38 High Fidelity Mini Audio System for iPod V10M11_IM_EN_12182007 - 37 - www.i-Luv.com...
- Page 39 High Fidelity Mini Audio System for iPod V10M11_IM_EN_12182007 - 38 - www.i-Luv.com...
- Page 40 Electronics Corp. iPod is a trademark of Apple Inc. All logos and brands are the property of their respective owners. iPod is not included in this package. The specifications and product images or graphics may slightly differ from the actual product.
Need help?
Do you have a question about the I9200 and is the answer not in the manual?
Questions and answers