
Related Manuals for Grillo CLIMBER 10


Summary of Contents for Grillo CLIMBER 10
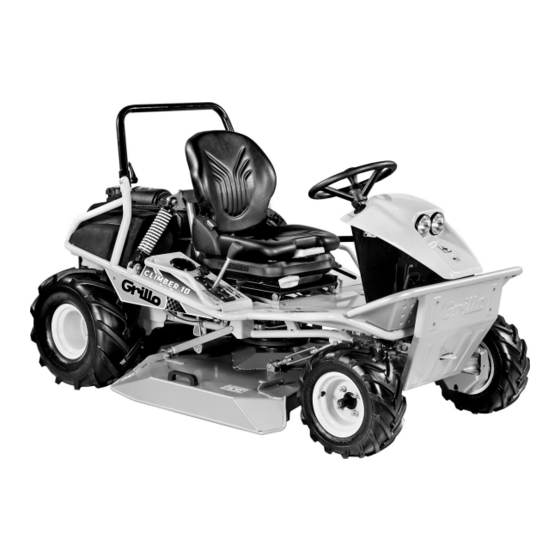
- Page 1 CLIMBER 10 AWD 22 – AWD 27 OPERATOR'S MANUAL MANUALE DELL'OPERATORE MANUEL D'UTILISATION BEDIENUNGSANLEITUNG MANUAL DE INSTRUCCIONES...
-
Page 3: Table Of Contents
SUMMARY Safety rules Informations and warnings Instructions: Warnings Identification and servicing Technical specifications Instructions for use Maintenance and lubrication Pictures EC Declaration of Conformity INDICE Norme antinfortunistiche Etichette e avvertenze Istruzioni: Avvertenze Identificazione e assistenza Caratteristiche tecniche Istruzioni d’uso Manutenzione e lubrificazione Figure Certificato di Conformità... - Page 4 SAFETY SYMBOLS - SIMBOLOGIA PER LA SICUREZZA - SYMBOLOGIE POUR LA SECURITE – SICHERHEITSSYMBOLE- SIMBOLOGÍA DE SEGURIDAD OPEN MANUAL- means that you must read the operator's manual very carefully. MANUALE APERTO - significa che dovete leggere attentamente il manuale di uso e manutenzione. MANUEL OUVERT –...
- Page 5 Take special care not to touch hot parts of the engine. Prestate particolare attenzione a non entrare in contatto con parti surriscaldate del motore. Veiller tout particulièrement à ne pas toucher des éléments surchauffés du moteur. Achtung – keine heißen Motorteile berühren! No tocar partes recalentadas del motor.
- Page 6 Prevent battery explosions: keep sparks, lighted matches and open flames away from the top of the battery. Battery gas can explode. Per prevenire l’esplosione della batteria, tenete scintille, fiammiferi accesi e fiamme lontani dalla stessa. Il gas della batteria può esplodere. Prévenir l’explosion de la batterie: tenir les étincelles, les allumettes et le feu loin de la batterie.
- Page 7 DANGER! Machine roll-over: Do not use this machine on slopes greater than 22° (40%). PERICOLO! Ribaltamento della macchina. Non usare questa macchina su pendii superiori ai 22° (40%). DANGER! Renversement de la machine. Ne pas utiliser cette machine sur des pentes supérieures à...
- Page 8 PARCHEGGIO ALTEZZA DI TAGLIO PARKING CUTTING HEIGHT CHOKE STATIONNEMENT HAUTEUR DE COUPE STARTER PARKIERBREMSE SCHNITTHÖHE STARTER STACIONAMIENT ALTURA DE CORTE STARTER ESTARTER VELOCE FAST RAPIDE SCHNELL VELOZ LENTA SLOW LENT LANGSAM LENTAMENTE INSERIMENTO PTO PTO ENGAGEMENT CONNECTION PRISE DE FORCE ZAPFWELLE EINSCHALTUNG CONEXIÓN TOMA DE FUERZA DIFFERENTIAL LOCK...
-
Page 9: Warnings
GENERAL DESCRIPTION AND INTENDED USE The Grillo Climber 10 AWD 22 - AWD 27 is a ride-on brush cutter designed for the cut of grass both on plain grounds and on slopes. WARNING! Before starting the engine, read this manual carefully. The... - Page 10 Climber 10/ Translation of the original instructions 21) Allow the engine to cool before storing it in any enclosure. 22) Never use drugs or alcohol immediately before or while operating the machine. Do not operate the machine when tired. 23) Wipe away any spilled fuel before starting the engine.
-
Page 11: Identification And Servicing
The guarantee is granted in compliance with the current law. The dealer will have to give the client a copy of the registration card of the machine, which they will print up from the Grillo website. For the engine the guarantee of the relative manufacturers apply. - Page 12 Climber 10/ Translation of the original instructions CUTTING SYSTEM: 1 single blade fitted with swing tips and double cutting edge. CUTTING WIDTH: 930 mm. PERIPHERAL BLADE SPEED: 83 m/sec. CUTTING HEIGHT: from 35 mm to 135 mm with continuous adjustment.
-
Page 13: Instructions For Use
– Adjust the seat shock absorber using the lever (fig. 1D – on 10 AWD 27 only). STARTING UP THE ENGINE CLIMBER 10 AWD 22 Push the throttle lever half-way. If the engine is cold engage the starter device (fig. 1B, n. 9). Turn the ignition key on the dashboard. - Page 14 Climber 10/ Translation of the original instructions 1B, n. 12). To stop the machine, bring the forward lever back into the stop position. This lever can be brought back to the stop position also by pressing the brake pedal (fig. 1, n. 4).
-
Page 15: Maintenance And Lubrication
Climber 10/ Translation of the original instructions 3) Frequently sharpen the mower blades. The cut will be better and the engine will not be strained too much. 4) Check the ground before mowing to make sure that there are no stones, sticks or foreign bodies. - Page 16 In case of need contact the nearest authorised service centre. For the Climber 10 AWD 27 a baffle (fig. 20) is delivered standard, which can be fixed under the cutting deck on the right side. It is used to disperse cut grass evenly and it has to be used with 12/15 cm grass only.
- Page 17 Climber 10/ Translation of the original instructions TRACTION RELEASE LEVER The traction release device is located at the back of hydrostatic axle (fig. 13). If the machine breaks down, use the lever under the rear bumper to allow the machine to be towed or moved by hand.
- Page 18 Climber 10/ Translation of the original instructions LUBRICATION POINTS (every 40 hours) TROUBLE-SHOOTING PROBLEM CAUSE REMEDY Dashboard OFF with key in “AVV.” (ON) pos. – Battery not supplying power – Check connecting cables – Recharge battery – Change the fuse Dashboard ON, but starter does not turn over with key in “AVV”...
- Page 19 Never attempt to make difficult repairs unless you have the necessary equipment and technical expertise. In the Climber 10 AWD 27 next to the electrical system main fuse there is another 10A fuse, always located behind the operator's seat, which protects the 12V cigar lighter plug (fig.
- Page 20 Climber 10/ Translation of the original instructions THE MACHINE DOES NOT REMAIN IN NEUTRAL POSITION Set the forward lever into neutral position and adjust the rod located under the seat on the right side, by loosening or fastening it until both wheels stop (fig. 32). This procedure must be carried out with wheels lifted from the ground.
- Page 21 La preghiamo di conservare questo libretto, che dovrà sempre accompagnare la macchina. DESCRIZIONE GENERALE E USO PREVISTO La macchina Grillo Climber 10 AWD 22 – AWD 27 è un trinciaerba con operatore a bordo, progettato per il taglio dell'erba, anche in pendenza.
- Page 22 Climber 10/Original instructions- Istruzioni originali- Original-Anleitungen- Instrucciones originales 27.Non fare nessun tipo di regolazione o pulizia col motore in moto. 28.Non fare controllare la macchina da nessuno mentre siete seduti alla guida col motore in moto. USI IMPROPRI DA EVITARE 29.Non permettere passeggeri sulla macchina.
-
Page 23: Identificazione E Assistenza
La garanzia è fornita nei modi e nei limiti indicati dalla legge vigente. Il rivenditore dovrà obbligatoriamente consegnare il certificato di garanzia della macchina al cliente finale, stampando una copia della registrazione dal sito Grillo. Per quanto riguarda il motore, valgono le condizioni previste dai rispettivi Produttori. - Page 24 Climber 10/Original instructions- Istruzioni originali- Original-Anleitungen- Instrucciones originales SEDILE: molleggiato e regolabile, con roll-bar. PIATTO DI TAGLIO: a scarico laterale / posteriore. TIPO DI TAGLIO: rotativo a 1 lama con terminali flottanti a doppio tagliente. LARGHEZZA DI TAGLIO: 930 mm.
-
Page 25: Istruzioni D'uso
Climber 10/Original instructions- Istruzioni originali- Original-Anleitungen- Instrucciones originales MESSA IN OPERA DELLA MACCHINA Controllare l’integrità della macchina e che non abbia subito danni durante il trasporto. Verificare i livelli olio, motore, nel serbatoio della trasmissione idrostatica. Verificare la pressione degli pneumatici: - 1,2 BAR ruote anteriori 4.00 –... - Page 26 Climber 10/Original instructions- Istruzioni originali- Original-Anleitungen- Instrucciones originales di avanzamento può essere riportata in posizione di stop anche premendo il pedale del freno (fig. 1, n. 4). – La leva (fig. 1B, n. 12) serve anche per la retromarcia, spostandola indietro la macchina retrocede - azionarla dolcemente.
-
Page 27: Manutenzione E Lubrificazione
Climber 10/Original instructions- Istruzioni originali- Original-Anleitungen- Instrucciones originales corpi estranei. 5) Durante la rasatura tenere il motore a massimo regime (fig. 1B, n. 10) e regolare la velocità del motore in base all’altezza dell’erba. 6) Mantenere pulite la griglia sopra al motore (fig. 4) e le alette di raffreddamento dell'assale idrostatico anteriore e posteriore. - Page 28 Climber 10/Original instructions- Istruzioni originali- Original-Anleitungen- Instrucciones originales CONTROLLO LAME E PIATTO Una lama non affilata strappa l’erba, conferendo un brutto aspetto al taglio: é necessario che l’affilatura sia sempre eseguita sui taglienti delle due lame. Per smontare una lama, afferrarla saldamente, utilizzando guanti da lavoro e svitare la vite centrale.
- Page 29 Climber 10/Original instructions- Istruzioni originali- Original-Anleitungen- Instrucciones originales DISPOSITIVO DI SBLOCCO DELLA TRAZIONE Il dispositivo di sblocco della trazione è posizionato dietro all'assale idrostatico (fig. 13). Se si verificasse un’avaria alla macchina, per poterla trainare o spostare a mano utilizzare la levetta posizionata sotto il paraurti posteriore.
- Page 30 Climber 10/Original instructions- Istruzioni originali- Original-Anleitungen- Instrucciones originales GUIDA ALLA IDENTIFICAZIONE DEGLI INCONVENIENTI INCONVENIENTE CAUSA RIMEDIO Con la chiave in pos. AVV. il cruscotto rimane spento La batteria non eroga corrente alcuna – Controllare i cavi di collegamento – Ricaricare la batteria –...
- Page 31 Climber 10/Original instructions- Istruzioni originali- Original-Anleitungen- Instrucciones originales Vibrazioni durante il funzionamento – Lame squilibrate – Equilibrare o sostituire le lame se danneggiate – Fissaggi allentati – Verificare e serrare le viti di fissaggio delle lame, del motore e del telaio Inserimento PTO irregolare –...
- Page 32 Climber 10/Original instructions- Istruzioni originali- Original-Anleitungen- Instrucciones originales RIMESSAGGIO E INATTIVITÀ PROLUNGATA Riporre la macchina in un ambiente asciutto, al riparo dalle intemperie e, possibilmente, ricoprirla con un telo. Se si prevede un prolungato periodo di inattività (superiore a 1 mese), provvedere a scollegare il cavo rosso della batteria e seguire le indicazioni contenute nel libretto di istruzioni del motore;...
- Page 33 DESCRIPTION GENERALE ET USAGE PREVU La machine Grillo Climber 10 AWD 22 – AWD 27 est un broyeur auto-porté, conçu pour la coupe de l'herbe aussi en pente.
- Page 34 Climber 10/ Traduction des instructions originales 23) Éviter les fuites de combustible. Si le réservoir a débordé, ne démarrer le moteur qu'après avoir nettoyé soigneusement les zones souillées d'essence et éviter de démarrer le broyeur tant que les vapeurs d'essence ne se sont pas dissipées.
-
Page 35: Identification Et Assistance
être téléchargée du site Grillo après avoir enregistré la machine même. En ce qui concerne le moteur, seulement les conditions prévues par le fabricant concerné sont valables. - Page 36 Climber 10/ Traduction des instructions originales FREIN : de stationnement sur les roues arrière par levier. SIEGE : suspendu et réglable avec roll-bar repliable. PLATEAU DE COUPE : à éjection latérale / arrière. SYSTEME DE COUPE : porte-lame rotatif avec couteaux escamotables.
-
Page 37: Mode D'emploi
– Régler l'amortisseur du siège utilisant le levier (fig. 1D – dans la version 10 AWD 27 seulement). DEMARRAGE DU MOTEUR CLIMBER 10 AWD 22 Pousser le levier de l’avancement à moitié de sa course. Si le moteur est froid enclencher le starter (fig. - Page 38 Climber 10/ Traduction des instructions originales d’avancement sur la position de stop. Le levier d'avancement peut être placé dans la position de stop même en pressant la pédale du frein (fig. 1, n. 4). – Le levier (fig. 1B, n. 12) sert également pour enclencher la marche arrière. Si on le déplace vers l’arrière, la machine recule, l’actionner doucement.
- Page 39 Climber 10/ Traduction des instructions originales – si le levier avancement n'est pas en position de «STOP» (fig. 1B, n. 12). REGLES UTILES POUR UN BON USAGE Ne jamais forcer le moteur. Ne pas laisser la machine sous la pluie.
- Page 40 23) soit d’un côté que de l’autre avec le plateau dans la position de coupe la plus haute et l'opérateur assis au poste de conduite. Contacter éventuellement un concessionnaire agrée Grillo pour effectuer ce réglage. Avec la version 10 AWD 27 est livrée une tôle (fig. 20) qui doit être fixée dans le plateau de coupe coté...
- Page 41 Climber 10/ Traduction des instructions originales trouver hors du gazon à couper. Ne pas enclencher la lame avec le moteur au maximum. La machine est équipé d'un embrayage électromagnétique qui fonctionne même comme frein de lame. La lame doit s’arrêter entre 5 secondes du déclenchement. S’il n’en était pas ainsi, enlever l'épaisseur monté...
- Page 42 Climber 10/ Traduction des instructions originales POINTS DE GRAISSAGE (toutes les 40 heures) IDENTIFICATION DES INCONVENIENTS INCONVENIENT CAUSE REMEDE Avec la clé sur la pos. «AVV.» (DEMARRAGE), le tableau de bord reste éteint. – La batterie ne distribue pas du courant –...
- Page 43 Climber 10/ Traduction des instructions originales – Contrôler le câblage de la commande ouverture carburateur. – Contrôler (et éventuellement remplacer) le filtre essence. – Contrôler que l’orifice de purge sur le bouchon du réservoir ne soit pas obstrué. – Le groupe allumage est insuffisant –...
- Page 44 Climber 10/ Traduction des instructions originales IMPORTANT! – Éviter d’inverser la polarité de la batterie. – Ne pas faire fonctionner la débroussailleuse sans la batterie (fig. 30) car elle est munie d’un régulateur de charge. – Veiller à ne pas provoquer des courts-circuits qui pourraient endommager le boîtier électronique et le régulateur de charge.
- Page 45 Handbuch sorgfältig auf. Es ist ein wichtiger Bestandteil der Maschinenausstattung. ALLGEMEINE BESCHREIBUNG UND VORGESEHENER GEBRAUCH Der Grillo CLIMBER 10 AWD 22 – AWD 27 ist ein Aufsitz-Wiesemäher, der für das Mähen von Gras auch an Hanglage entwickelt wurde. ACHTUNG! Lesen Sie vor dem Anlassen des Motors die folgenden Hinweise...
- Page 46 Climber 10/ Übersetzung der Original-Anleitungen Bevor die Maschine in einem geschlossenen Raum gestellt wird, muss der Motor abgekühlt sein. Den Mäher auf keinen Fall benutzen, wenn Sie müde sind und unter Alkoholeinfluss stehen. Keinen Treibstoff verschütten, und nach dem Tanken vor dem Anlassen des Motors alle Treibstoffreste sorgfältig entfernen.
-
Page 47: Identifikation Der Maschine Und Kundendienst
Für die Ersatzteile des Motors die Hinweise im Motor-Handbuch beachten. GARANTIE Es gelten die gesetzlichen Garantiebedingungen. Der Händler muss eine Kopie der Garantie-Karte der Maschine dem Kunden aushändigen. Die Kopie kann von der Grillo Webseite heruntergeladen werden. Für den Motor gelten die vom jeweiligen Hersteller vorgesehenen Garantiebedingungen. - Page 48 ABMESSUNGEN: Länge 2060 mm – Breite 1030 mm – Höhe 1185 mm. ACHSSTAND: 1420 mm TECHNISCHE DATEN CLIMBER 10 AWD 27 MOTOR: BRIGGS & STRATTON, 8270 SERIES, OHV, 22PS, 724 cm³ , 2-Zylinder Benzinmotor mit Vertikalwelle und integriertem CYCLONIC Luftfilter ausgestattet.
-
Page 49: Inbetriebnahme Der Maschine
– Der Sitzdämpfer durch das Hebel einstellen (Abb. 1D – für 10 AWD 27 ausschließlich). ANLASSEN DES MOTORS CLIMBER 10 AWD 22 Den Gashebel auf die Hälfte drücken. Die Starthilfe einschalten, ob der Motor kalt ist (Abb. 1B, Nr. 9). - Page 50 Climber 10/ Übersetzung der Original-Anleitungen BEGINN DER ARBEIT – Die Schnitthöhe mit Hilfe des Hebels (Abb. 1C, Nr. 8) einstellen, den Motor auf halbe Motordrehzahl aufdrehen (Abb. 1B, Nr. 10), die Zapfwelle außerhalb der zu bearbeitenden Fläche einkuppeln, indem man den Schalter auf dem Armaturenbrett benutzt (Abb.1, Nr. 6) und die maximalen Motorendrehzahl vor Beginn der Arbeit zurückbringen.
-
Page 51: Wartung Und Schmierung
Climber 10/ Übersetzung der Original-Anleitungen EINSATZ DER SICHERHEITSVORRICHTUNGEN Der Motor wird automatisch abgestellt, wenn der Fahrer bei nicht eingelegter Parkierbremse absteigt Der Motor kann nicht eingeschaltet werden, wenn: – Das Messer eingeschaltet ist. – Niemand auf dem Fahrersitz sitzt und die Parkierbremse nicht eingelegt ist. - Page 52 (Abb. 22 – Abb. 23) mit auf der Maschine sitzendem Fahrer und Mähwerk. Kann das Mähwerk nicht plan gestellt werden, ist der Kundendienst zu verständigen. Mit der Climber 10 AWD 27 wird ein Leitblech ausgeliefert (Abb. 20) , das unterhalb des Mähdecks auf der rechten Seite zu befestigen ist.
- Page 53 5 Sekunden stehen bleiben mit dem Motor auf max. Drehzahl. Andernfalls muss der Abstandsstück unter dem Plättchen von der Messerbremse entfernt werden (Abb. 28). ACHTUNG: Diese Einstellung muss von einer Grillo- Fachwerkstatt vorgenommen werden. Die Maschine darf auf keinen Fall benutzt werden, wenn das Messer nicht innerhalb von 5 Sekunden nach Abschalten des Motors auf voller Drehzahl zum Stillstand kommt.
- Page 54 Climber 10/ Übersetzung der Original-Anleitungen ZUSAMMENFASSENDE WARTUNGSTABELLE OPERATION ALLE 8 NACH DEN ALLE 50 ALLE 100 ALLE 200 STUNDEN ERSTEN 20 STUNDEN STUNDEN STUNDEN STUNDEN Motoröl den Stand ● überprüfen wechseln ● ● überprüfen ● Luftfilter wechseln ٭ Zündkerze überprüfen/ ●...
- Page 55 Climber 10/ Übersetzung der Original-Anleitungen LISTE DER HÄUFIGSTEN STÖRUNGEN UND DEREN BEHEBUNG STÖRUNG URSACHE ABHILFE Mit dem Zündschlüssel in Pos. AVV (ANLASSEN) schaltet sich das Armaturenbrett nicht ein. - Die Batterie liefert keinen Strom - Verbindungskabel kontrollieren - Batterie aufladen - Sicherung auswechseln Das Armaturenbrett schaltet sich ein, aber obwohl der Zündschlüssel in der Pos.
- Page 56 Ihrem Grill-Servicecenter in Verbindung. Versuchen Sie niemals, komplizierte Reparaturen selber durchzuführen, wenn Sie nicht über die dafür erforderlichen technischen Kenntnisse und Ausrüstungen verfügen. Beim Climber 10 AWD 27 neben der Schmelzsicherung der elektrischen Anlage befindet sich immer hinter dem Sitz eine weitere Schmelzsicherung zu 10A, die den Stecker zu 12V und den Zigarettenzünder schützt (Abb.
- Page 57 Climber 10/ Übersetzung der Original-Anleitungen NACH DER ARBEIT Nach Arbeitsende das Messer auskuppeln und vor dem Wegfahren das Mähdeck ins höhere Schnittposition stellen. Zum Anhalten den Fahrthebel auf STOPP legen, den Gashebel auf Minimum stellen und den Motor durch Drehen des Schlüssels auf der Position STOPP (Abb. 1, Nr. 1) abstellen.
- Page 58 AWD 22 – AWD 27 Estimado cliente, le agradecemos por la confianza y la preferencia que ha mostrado por nuestro GRILLO CLIMBER 10 y confiamos que el uso de su nueva máquina responda plenamente a sus exigencias. Para un empleo óptimo y un perfecto mantenimiento, le rogamos lea atentamente las indicaciones de este manual y...
- Page 59 Climber 10/ Traduccion instrucciones originales 20. Prestar atención cuando se trabaje en proximidad de una carretera. 21. Dejar enfriar el motor antes de guardar la máquina en ambientes cerrados. 22. Sólo utilice la desbrozadora descansado. No se deberá trabajar con el equipo después de tomar alcohol.
-
Page 60: Características Técnicas
Climber 10/ Traduccion instrucciones originales IDENTIFICACIÒN Y ASISTENCIA IDENTIFICACIÒN La desbrozadora CLIMBER 10 está dotada de una placa de identificación con el número de bastidor de la máquina, situada debajo del tablero de control. SERVICIO ASISTENCIA Este manual ofrece las indicaciones para el uso de la cortadora de césped y para un buen mantenimiento básico, posible de ser efectuado por el usuario. - Page 61 PESO: 345 kg DIMENSIONES: largo: 2.060 mm – Ancho 1.030 mm - Alto 1.185 mm - Distancia entre ejes 1.420 mm. CARACTERÍSTICAS TÉCNICAS CLIMBER 10 AWD 27 MOTOR: - B&S 8270 series OHV 22HP, 724 cm³, de dos cilíndros, gasolina, de eje vertical con filtro de aire CYCLONIC.
- Page 62 Atención: almacenar el carburante dentro de recipientes de metal o homologados para dicha finalidad. PUESTA EN MARCHA DEL MOTOR DEL CLIMBER 10 AWD 22 Empujar la palanca del acelerador hasta mitad de su recorrido. Si el motor está frío, activar el Starter (fig.1B, n.9).
- Page 63 Climber 10/ Traduccion instrucciones originales INICIO DEL TRABAJO Seleccionar la altura de corte mediante la palanca (fig. 1C, n. 8), acelerar el motor hasta la mitad de su regimen (fig. 1B, n. 10) y embragar la PTO (toma de fuerza) fuera del área por cortar (fig. 1, n. 6).
-
Page 64: Mantenimiento Y Lubricación
Climber 10/ Traduccion instrucciones originales INTERVENCIÓN DE LOS DISPOSITIVOS DE SEGURIDAD Recordar siempre que el motor se para automáticamente cada vez que el operador se levanta del asiento con el freno de estacionamento desactivado. Además, el motor no se pone en marcha si: ... - Page 65 Climber 10/ Traduccion instrucciones originales dentro del depósito tiene que superar la mitad. Arrancar el motor y empujar la palanca del avance (fig. 1B, n.12) hacia adelante y hacia atrás por 5 minutos. Durante esta operación, colocar la palanca posterior (fig. 13) 3 o 4 veces en posición de punto muerto. Apagar el motor. Volver a aflojar la válvula de purga encima del eje posterior hasta la salida del aceite y efectuando de esta manera la purga de la instalación hidráulica (fig.
- Page 66 Climber 10/ Traduccion instrucciones originales Además sera necesario desmontar la rueda posterior derecha y su guardabarros. Desenganchar el resorte anti-vibraciones enganchado al embrague (fig. 26). Luego, desenganchar el resorte del tensor de correa de la transmisión hidrostática (fig. 27). De esta manera, será posible quitar la correa.
- Page 67 Climber 10/ Traduccion instrucciones originales PUNTOS DE LUBRICACION CON GRASA (cada 40 horas) GUÍA A LA IDENTIFICACIÓN DE LOS INCONVENIENTES INCONVENIENTE CAUSA SOLUCIÓN Con la llave en posición “AVV” (MARCHA) el salpicadero queda apagado La batería no suministra alguna corriente –...
- Page 68 Climber 10/ Traduccion instrucciones originales – Insuficiencia en el equipo de encendido – Controlar la fijación de los capuchones de las bujías. – Controlar que los electrodos estén limpios y a una distancia correcta. Reducción del rendimiento del motor durante el corte –...
- Page 69 Climber 10/ Traduccion instrucciones originales SI LA MÁQUINA NO MANTIENE EL PUNTO MUERTO Llevar la palanca de avance en posición de punto muerto y ajustar el tirante colocado a mano derecha debajo del asiento, aflojandolo o apretandolo, hasta cuando las ruedas no se paran (fig. 32). Esta operación se debe efectuar siempre con las ruedas levantadas del suelo.
- Page 70 Fig. 1 1. Starting key and engine switch off 1. Chiave di avviamento e arresto motore 2. Hour meter 2. Contaore 3. Engine oil warning light 3. Spia olio motore 4. Front brake pedal (for emergency only) 4. Pedale freno anteriore (solo emergenza) 5.
- Page 71 10 AWD 22 STOP Fig. 1A Fig. 1B Fig. 1C Fig.1D Fig. 2 Fig. 1E...
- Page 72 Fig. 3 Fig. 4 10 AWD 22 Fig. 6 Fig. 5 – Fig. 5A Fig. 7 Fig. 8...
- Page 73 Fig. 9 Fig. 10 OIL LEVEL LIVELLO OLIO Fig. 11 Fig. 12...
- Page 74 Fig. 13 Fig.14 Fig. 15 Fig. 16 Fig. 17 Fig.18...
- Page 75 Fig. 20 Fig. 19 Fig. 22 Fig. 21 Fig. 23 Fig. 24...
- Page 76 Fig. 25 Fig. 26 Fig. 27 Fig. 28 Fig. 29 Fig. 30...
- Page 77 Fig. 31 Fig. 32 Fig. 33...
- Page 78 Grillo Spa Via Cervese, 1701 – 47521 CESENA (FC) – ITALY CORTAHIERBA Machine model / Maccina tipo / Machine type / Maschine Typ / Máquina tipo: CLIMBER 10 AWD 22 – CLIMBER 10 AWD 27 Serial n° / Numero / Numéro / Nummer / Número: Engine / Motore / Moteur / Motor / Motor: BRIGGS&STRATTON INTEK 7220 PROFESSIONAL SERIES –...
- Page 80 47521 CESENA (ITALY) – Via Cervese 1701 Tel: +39 0547 633111 Fax: +39 0547 632011 Website: www.grillospa.it E-mail: grillo@grillospa.it GRILLO DEUTSCHLAND GmbH Pilsener Strasse, 9 - D-86199 Augsburg Tel: + 49 082126879910 Faxnr.: + 49 01733132860 Webseite: www.grillodeutschland.de E-Mail: grillo@grillodeutschland.de...
Need help?
Do you have a question about the CLIMBER 10 and is the answer not in the manual?
Questions and answers