Advertisement
Quick Links
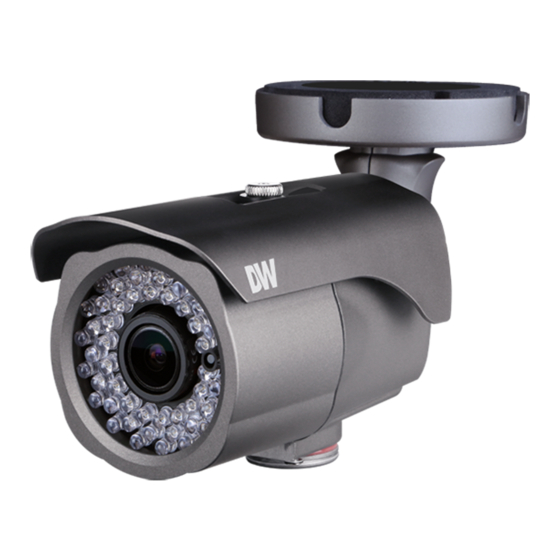
Advertisement

Related Manuals for DW DWC-MB421TIR


Summary of Contents for DW DWC-MB421TIR
- Page 1 User’s Manual...
- Page 5 Cables Camera Screw & Plastic Anchor-4pcs Torx Wrench Test Monitor Cable Template Sheet Quick Manual...
- Page 6 Sunshield Lens Pan/Tilt Stopper Screw Camera Control Board Mounting Bracket Camera Control Board Cap Power Supply Alarm In/Out Cables: - Red : ALARM_OUT+ - Black : ALARM_OUT- - Yellow : GND - White : ALARM_IN+ Audio In/Out RJ45 Port...
- Page 7 To pass cables through the wall/ceiling, drill holes on the wall/ceiling. Connect the network cable, power cable respectively. See the section ‘Installation - Cabling’ for details. Fix the camera on the wall/ceiling by screw provided. Loosen the Pan/Tilt stoper screw a litte before fixing the camera. By using the video test cable, check the screen during Reset installation.
- Page 8 Alarm In Alarm Out Audio In Audio Out Please, check the voltage and current capacity of rated power carefully. Rated Power Consumption AF Working Max 7.5W IEEE 802.3af DC 12V ON : 4.2W / OFF : 2.5W Connect the ‘Audio In’ plug of the camera to the microphone directly or ‘Line Out’...
- Page 10 Micro Not Included...
- Page 12 If you use a static IP address assigned by your ISP If you have a dynamic address provided by your ISP admin.
- Page 18 If you use Case B, C If you use Case A, D...
- Page 22 Does not use the Smart Bitrate Control.
- Page 23 Extension Option B-Frame On(BP) / B-Frame On(BBP) Using B-Frames yields better quality for the same data rate, or lower data rate for the same quality. SVC-T On Scalable video coding is a type of video encoding algorithm that can be applied to streaming be transmitted over low bandwidth networks effectively.
- Page 26 Select the Audio Codec. Volume Select the Audio Volume from 0 to 10. Sample Rate Select the Audio Sample Rate.
- Page 28 Click 'Cancel' to return to the previous setting. Click 'Default' to settings to the factory defaults.
- Page 29 Automatic exposure(AE) automatically sets the aperture or Slow shutter Level lets you adjust the amount of light striking shutter speed, based on the external lighting conditions the sensor, determin when the video sensor sends out its for the batch of data for processing. The smaller number AE metering mode refers to the way in which Click 'Cancel' to return to the previous setting.
- Page 30 set to A rate at which ensitivity will be reduced in the dark light condition but better color reproduction performance obtained. ensitivity will be enhanced in the dark light condition. Click 'Cancel' to return to the previous setting. Click 'Default' to settings to the factory defaults.
- Page 31 Select the WDR level depending on the difference in brightness between the darkest and lightest part of an image. Click ‘Save’ to Click 'Cancel' to return to the previous setting. Click 'Default' to settings to the factory defaults.
- Page 32 The R/G/B gain can be set only when the White Balance Mode is set to Manual. Select White Balance depending on the lighting conditions. Click ‘Save’ to Click 'Cancel' to return to the previous setting. Click 'Default' to settings to the factory defaults.
- Page 33 Click ‘Save’ to Click 'Cancel' to return to the previous setting. Click 'Default' to settings to the factory defaults.
- Page 34 Click ‘Save’ to Click 'Cancel' to return to the previous setting. Click 'Default' to settings to the factory defaults.
- Page 36 Define the Secondary DNS server IP address. Define the IP address. The address is consisted of four numbers separated by dots and the range of each number is from 0 to 255. between 1025 to 60000. Define the Subnet Mask. Format is same as the IP address. The RTSP port between 1025 to 60000.
- Page 37 It displays the unique id or address. Click ‘Apply’...
- Page 38 Allows access without ONVIF authentication. Allows access with WS-User Token of ONVIF authentication. Allows access with WS- User Token and Digest of ONVIF authentication. function can be enable or disable.
- Page 39 UPNP function can be enable or disable. Define the friendly name.
- Page 40 To use public DDNS service, select a site DynDNS www.dyndns.com No-IP www.no-ip.com Click ‘Apply’...
- Page 41 Password to access the FTP Server. Click ‘Apply’ FTP Server IP Address. Define a path in FTP server to store video . For the path name, English Alphabets, numbers and special characters ( / ~ !@ $ ^ ( ) _ - { } [ ] ; , ) can be used. the FTP Server Port User ID to access he FTP Server.
- Page 42 the Password to access SMTP Server. e-mail address Select ecurity mode rom Plain or SSL / TLS. the e-mail address of E-Mail Receiver. the SMTP Server Address. the Port used Plain or SSL / TLS security mode. the title camera The title of the Email is limited to 40 characters including spaces.
- Page 43 Click ‘Add’ to add custom action rules. Click ‘Modify' to modify selected item from the action rules list. Click 'Delete' to delete selected item from the action rules list.
- Page 44 name Select Click ‘Save’ to...
- Page 45 Image Transfer due to event is configured by setting Image transfer rate and Pre / Post alarm duration. Descriptions Define Number of image transferred per second. Define duration of image transfer before an event. Define duration of image transfer after an event. Click ‘Apply’...
-
Page 46: Relay Output
Relay Output Select the Relay output. The number of relay outputs depends on the camera model. Mode Select the monostable / bistable for relay mode. Idle State Select whether the contact is normally opened or is closed. Duration Relay out is operated during the setting time. If bistable mode is selected, this funtion is activation. - Page 47 custom Event Rule Event Rules list. Click ‘Add’ to add custom event rules. Click ‘Modify' to modify selected item from the event rules list. Click 'Delete' to delete selected item from the event rules list.
- Page 48 name Select event Click ‘Save’...
- Page 49 the sensitivity of motion detection hows Motion event status. . If it will detect Event Alert Icon( ) appears if ‘Motion Detection’ is activated. very small motion Set the motion detected area. Click ‘Save’ You can set up to four areas.
-
Page 50: Input Device Setup
Input Device Setup Select input device type from OFF / N.O. / N.C. Operation Ignore this Input sensor. The contact is normally open and closed when activated. The contact is normally closed and open when activated. - Page 51 Select the channel you want to record. Click ‘Save’ Display information recording settings. Click ‘Modify’ to modify selected item in the recording list.
- Page 52 Select the recording file type Select the storage type. mode is duration of recording before an event duration of even Click ‘Save’...
- Page 53 date / time, event, sort or storage format Click the 'Refresh' button to refresh the records list. Click 'Filter' to view the filtered recorded video. Click 'Play' to view the selected item in list of recorded video. Click 'Remove' to delete the selected item recorded video Click 'Download' to download the selected item.
- Page 54 Play the recorded video. Display information the recorded video Click 'Replay' to view the recorded video again. Click 'Back' to return to the previous menu.
- Page 56 Total capacity of SD card and emove the SD card from the device. displayed. Delete the all contents stored in SD card. Select the period for Auto delet The image data stored before period will be Click ‘Apply’ deleted automatically. SD card, new will start to overwrite e oldest data SD card,...
- Page 57 IP Address Filter IP filter function can be enable or disable. IP Filter Type Select the recording IP filter type. Click ‘Apply’ to make above setting effective. Filter IP Address Display the filterd IP address. IP Address Define the IP address you want to apply the IP filter. Click ‘Add’...
- Page 59 Do not turn off the power during the It shows the current Firmware Version. Firmware update. he system can unstable. the system will reboot automatically. Select the Firmwar file your computer by clicking [Select file] button. start update. Progress...
- Page 60 Password to access to the FTP Server. Server Define a path in FTP server to store video. For the path name, the FTP Server Port. English Alphabets, numbers and special characters ( / ~ ! @ $ ^ ( ) _ - { } [ ] ; , ) can be used. Click ‘Save’...
- Page 61 camera time server Date will be updated automatically every hour. Prior to setting below ‘New Camera Date & Time’, set correct Click ‘Apply’ to Shows the current date and time setting in the Camera. Set the date time using th currently connected Set the date time...
- Page 62 Set the Start time and end time the DST. Click ‘Apply’ to...
- Page 63 List all user accounts for Modify the information of user account. For admin account, only Password can be modified. Register a new user Delete selected user account. Admin account cannot be deleted. Enter a new user ID except Admin. Enter the user Password. Enter the user Password again for verification.
- Page 64 Select a date, sort or type of log to filter the log. Click the 'Refresh' button to Click 'Filter' to view the filtered log.
- Page 65 Reset to the factory default eturn setup to the factory default Reset all Settings to the factory defaults. xcept etwork related settings. Reset only Click ‘Apply’ to...
- Page 69 Internet Explorer Chrome...
- Page 70 Unit: Inch (mm) * Dimensions based on the position of the sun shield cover 3.8” (96.7 mm) 3.8” (96.7 mm) 9.8” (248.9 mm) ~ 8.8” (225.3 mm)* 3.26” (83 mm) 8.87” (225.3 mm)
Need help?
Do you have a question about the DWC-MB421TIR and is the answer not in the manual?
Questions and answers