Table of Contents
Advertisement
CERAMIC TOWER HEATER
INSTRUCTION MANUAL
CATALOG NUMBER
BHTC301B
Thank you for choosing BLACK+DECKER!
PLEASE READ BEFORE RETURNING THIS PRODUCT FOR
ANY REASON.
If you have a question or experience a problem with your BLACK+DECKER
purchase, go to www.blackanddecker.com/instantanswers
If you can't find the answer or do not have access to the Internet, call
844-299-0879 from 10:30 a.m. to 6:30 p.m. EST Mon. - Fri. to speak with an
agent. Please have the catalog number available when you call.
SAVE THIS MANUAL FOR FUTURE REFERENCE.
Advertisement
Table of Contents

Subscribe to Our Youtube Channel
Related Manuals for Black & Decker BHTC301B


Summary of Contents for Black & Decker BHTC301B
- Page 1 CERAMIC TOWER HEATER INSTRUCTION MANUAL CATALOG NUMBER BHTC301B Thank you for choosing BLACK+DECKER! PLEASE READ BEFORE RETURNING THIS PRODUCT FOR ANY REASON. If you have a question or experience a problem with your BLACK+DECKER purchase, go to www.blackanddecker.com/instantanswers If you can’t find the answer or do not have access to the Internet, call 844-299-0879 from 10:30 a.m.
-
Page 2: Table Of Contents
CONTENTS SAFETY INFORMATION Important Safety Instructions ............................3-5 Electrical Requirements ................................4 Battery Information ................................5, 9 SET UP & USE Parts & Features ..................................6 Control Panel ....................................7-8 Remote ......................................8-9 Operating Instructions ..............................10-12 Care & Cleaning ..................................13 TROUBLESHOOTING & WARRANTY Troubleshooting..................................14 Limited Warranty ..................................15 SPECIFICATIONS Voltage: 120V, 60Hz... -
Page 3: Safety Information
SAFETY INFORMATION DANGER WARNING CAUTION DANGER - Immediate hazards WARNING - Hazards or unsafe CAUTION - Hazards or unsafe which WILL result in severe practices which COULD result in practices which COULD result in personal injury or death severe personal injury or death minor personal injury IMPORTANT SAFETY INSTRUCTIONS WARNING... -
Page 4: Save These Instructions
SAFETY INFORMATION 12. A heater has hot and arcing or sparking parts inside. Do not use it in the areas where gasoline, paint, or flammable liquids are used or stored. 13. Use this heater only as described in this manual. Any other use not recommended by the manufacturer may cause fire, electric shock, or injury to persons. -
Page 5: Battery Information
SAFETY INFORMATION OVERHEAT SAFETY FEATURE This heater is equipped with a overheat safety feature. When the heater’s internal components reach a certain temperature that could cause overheating and possible fire, the heater will automatically shut off. If this should occur, please contact our Customer Satisfaction Center at 844-299-0879. -
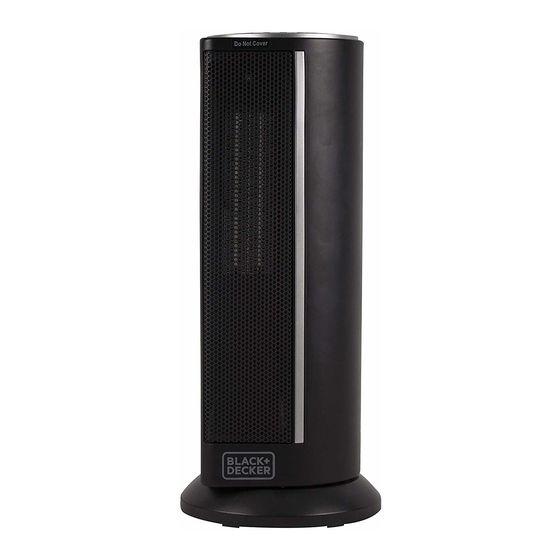
Page 6: Parts & Features
SAFETY INFORMATION PARTS & FEATURES Front Housing Airflow Grill Oscillating Base Remote Control (CR2025 Lithium Battery Included) Carry Grip Air Intake Grill Back Housing Page 6... -
Page 7: Control Panel
SET UP & USE CONTROL PANEL 1. Fahrenheit indicator light: Will be lit when temperature displayed is in Fahrenheit. 2. Celsius indicator light: Will be lit when temperature displayed is in Celsius. 3. Power indicator light: Indicates that the heater is receiving power from outlet. Will flash when unit is powered “ON”... -
Page 8: Remote Control
SET UP & USE CONTROL PANEL 10. ON/OFF button: Powers the display on and off. 11. Swing button: Opening and closing of swing/oscillating function. 12. Temp up button: To increase desired temperature. 13. Temp down button: To decrease desired temperature. 14. -
Page 9: Remote
SET UP & USE TO ACTIVATE BATTERY Remote Control Battery Cover PULL TAB TO REPLACE BATTERY Battery Remote Control Battery Cover PULL PUSH NOTE: Your remote control comes with a CR2025 type lithium battery already installed. To operate your remote control, however, you must activate the battery by removing the plastic tab that is sticking out of the battery compartment door. -
Page 10: Operating Instructions
SET UP & USE OPERATING INSTRUCTIONS Place the heater on a firm, level surface and plug the unit directly into a 120 V AC electrical outlet. NOTE: Only operate heater in upright position with caster wheels attached. 1. Powering Your Unit and Selecting the Desired Mode Turn the heater on by pressing the ON/OFF button on the control panel or by pressing the POWER button on the supplied remote control. - Page 11 SET UP & USE Push “MODE” for 3 seconds to go between ˚C and ˚F The Fahrenheit indicator LED will light when the temperature is displayed in Fahrenheit. The Celsius LED will light when the temperature is displayed in Celsius. 3.
- Page 12 SET UP & USE 4. Setting the POWER-ON TIMER Function NOTE: The Power-ON Timer Function will allow for the heater to power ON after a certain set time, and can only be set while the heater’s display is in the “OFF”...
-
Page 13: Care & Cleaning
CARE & CLEANING MAINTENANCE 1. Turn power off either from control panel or remote control. 2. Unplug the unit and let it cool completely. 3. To keep the heater clean, the outer shell may be cleaned with a soft, damp cloth. You may use a mild detergent if necessary. -
Page 14: Troubleshooting & Warranty
TROUBLESHOOTING & WARRANTY BEFORE YOU CALL FOR SERVICE IF THE HEATER/FAN FAILS TO OPERATE: A) Check to make sure that the heater/fan is plugged in securely. If it is not, remove the plug from the outlet, wait 10 seconds and plug it in again securely. B) Check for a blown circuit fuse or a tripped main circuit breaker. -
Page 15: Limited Warranty
TROUBLESHOOTING & WARRANTY LIMITED WARRANTY Any repair, replacement, or warranty service, REPAIR OR REPLACEMENT AS PROVIDED UNDER THIS WARRANTY IS THE EXCLUSIVE REMEDY OF and all questions about this product should be THE CUSTOMER; W Appliance Co. SHALL NOT BE directed to W Appliance Co. - Page 16 BLACK & DECKER, BLACK+DECKER, the BLACK & DECKER and BLACK+DECKER logos and product names and the orange and black color scheme are trademarks of The Black & Decker Corporation, used under license. All rights reserved. Product in this box may differ slightly from that pictured. Does not affect function. Not all accessories shown in photography are included in this package.
Need help?
Do you have a question about the BHTC301B and is the answer not in the manual?
Questions and answers